
Manage your account
Introduction
Your GradeChum account carries the name and photo your students and fellow teachers see. Your photo shows in the navigation bar at the top of every page, and your name shows on classes you share with other teachers, so keep both correct and up to date.
Your account also holds how you log in: your email, your LMS connection, your phone number and, if you log in with an email, your password. Some of what GradeChum offers you also depends on your school.
In this guide, you will manage your account from My Account.
Steps
Note: You must have already created your GradeChum teacher account before proceeding. See Sign up and log in.
To manage your account in GradeChum, follow the instructions for each:
a. Change your name and profile photo
- After logging in, click your photo in the navigation bar, then click My Account.
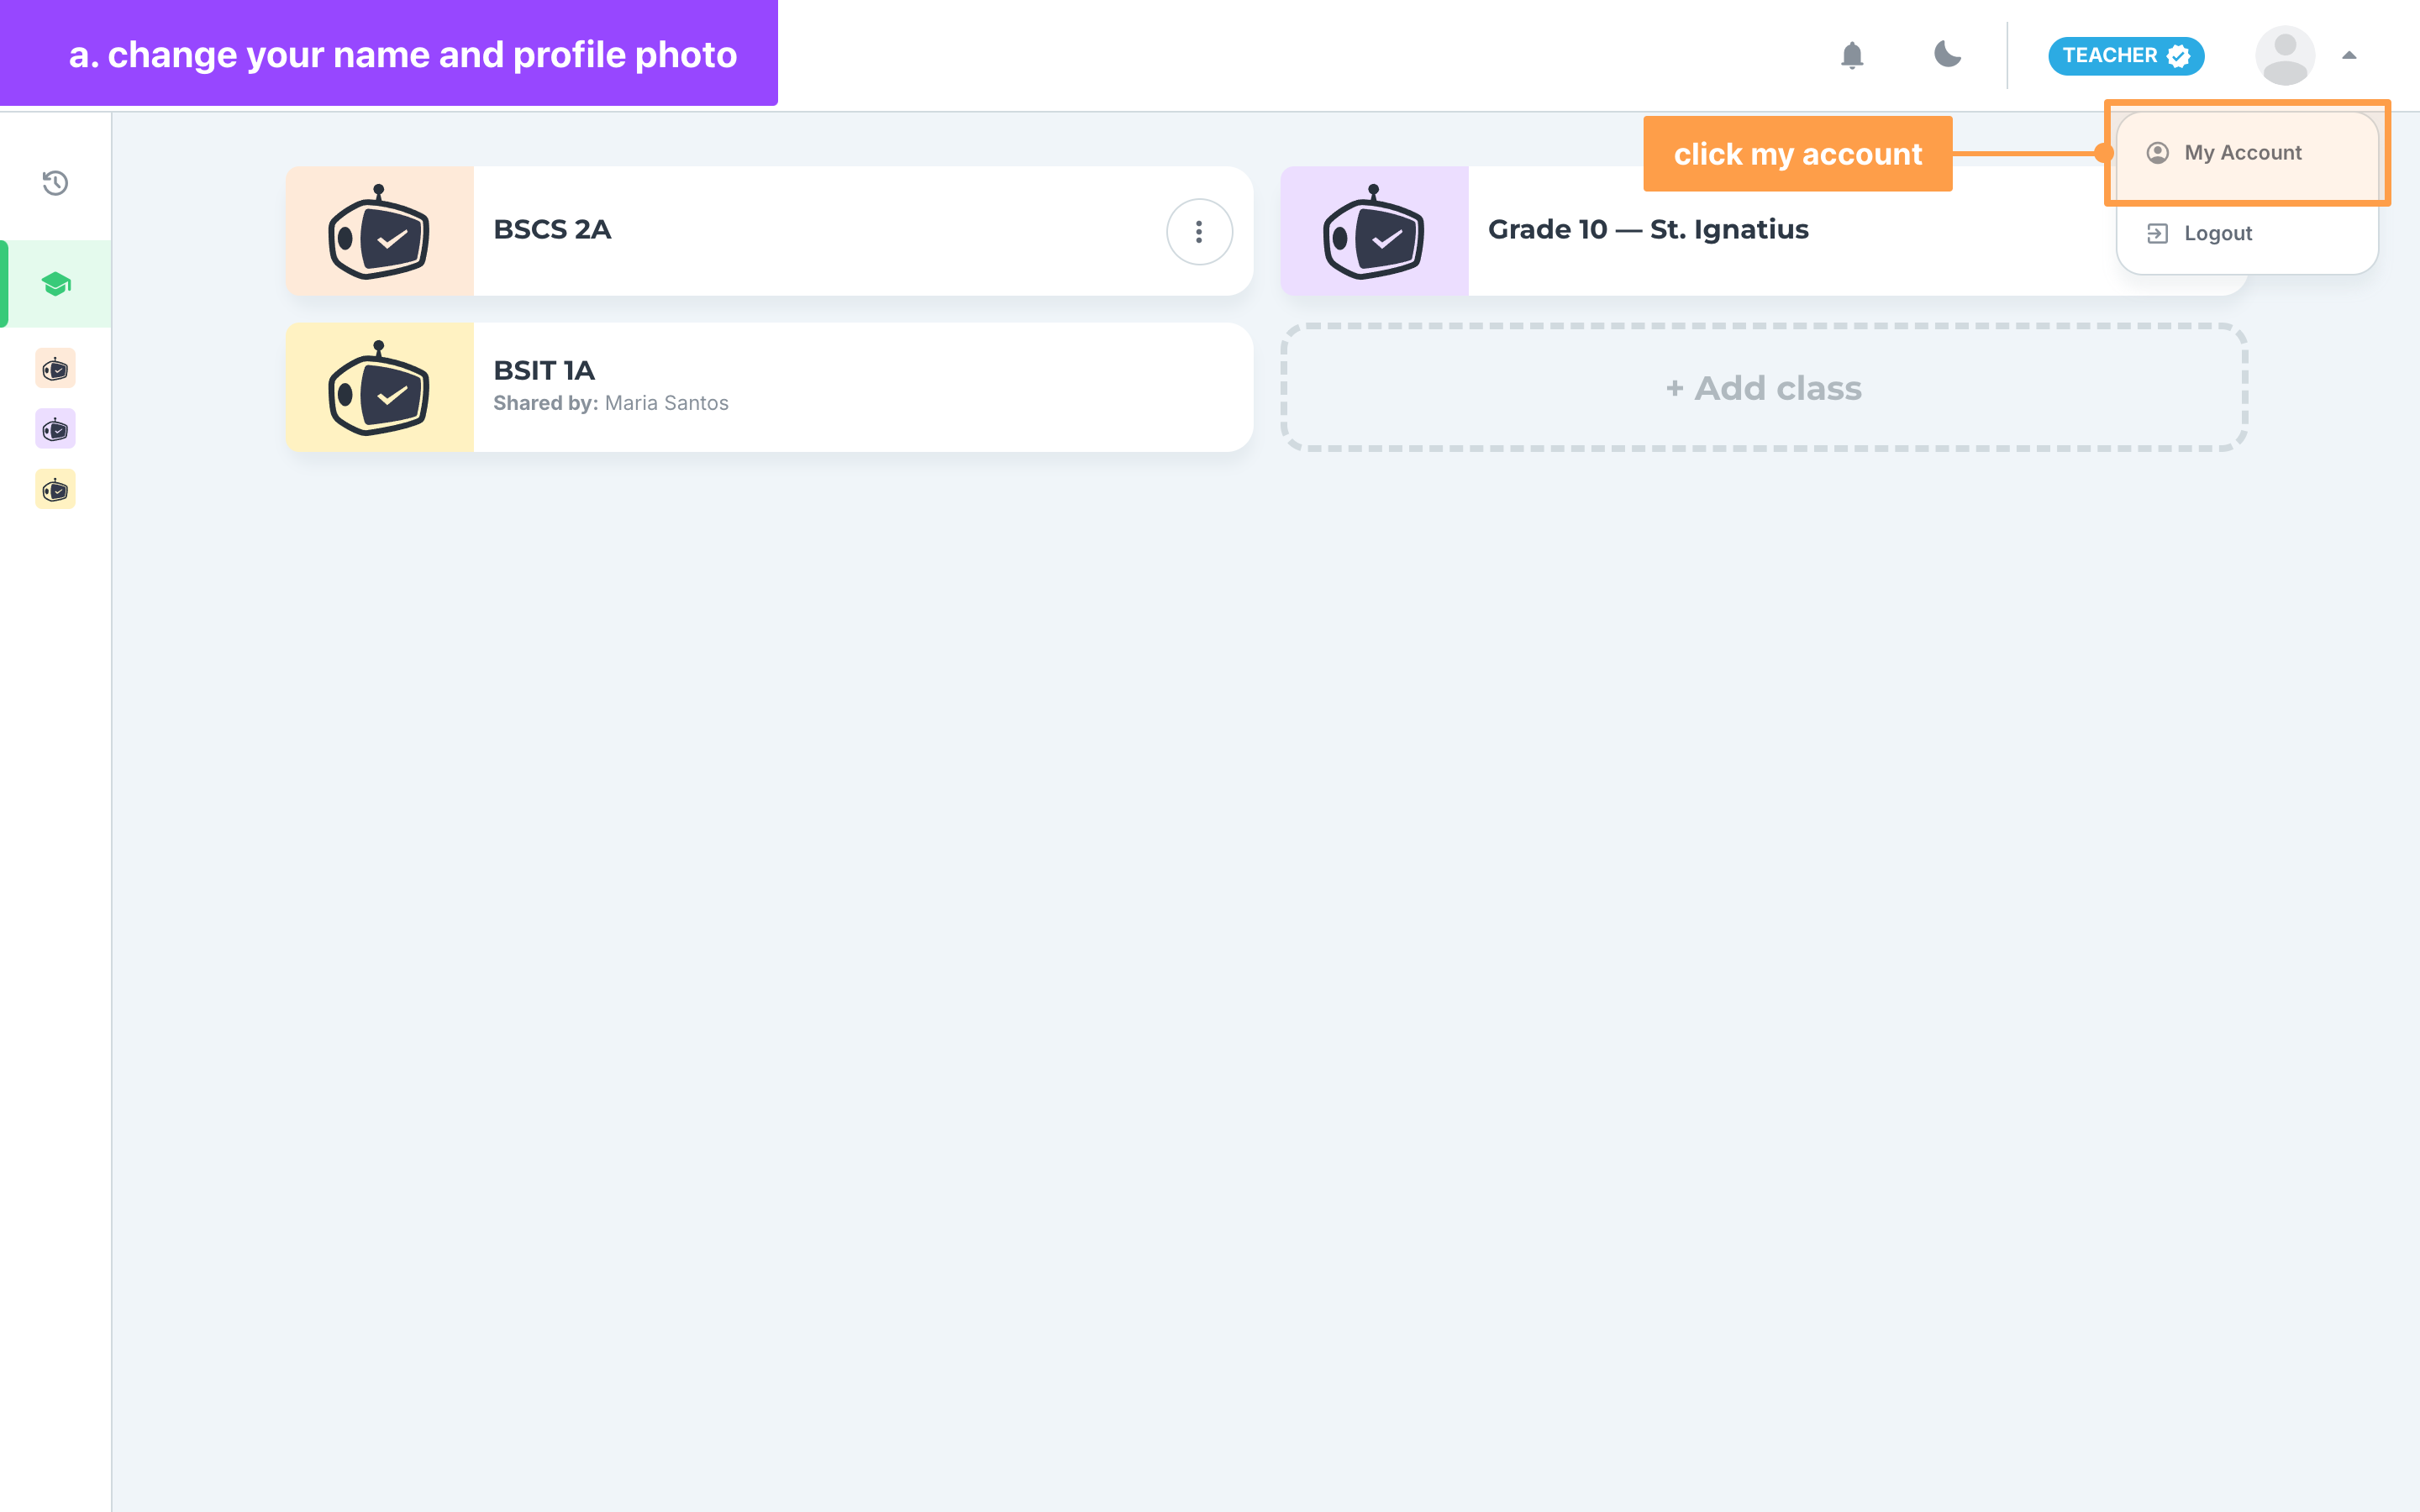
Note: On a phone, open the side menu and click your name at the bottom of it instead. The page then shows two tabs at the top, Personal and Account, in place of the Account Settings list.
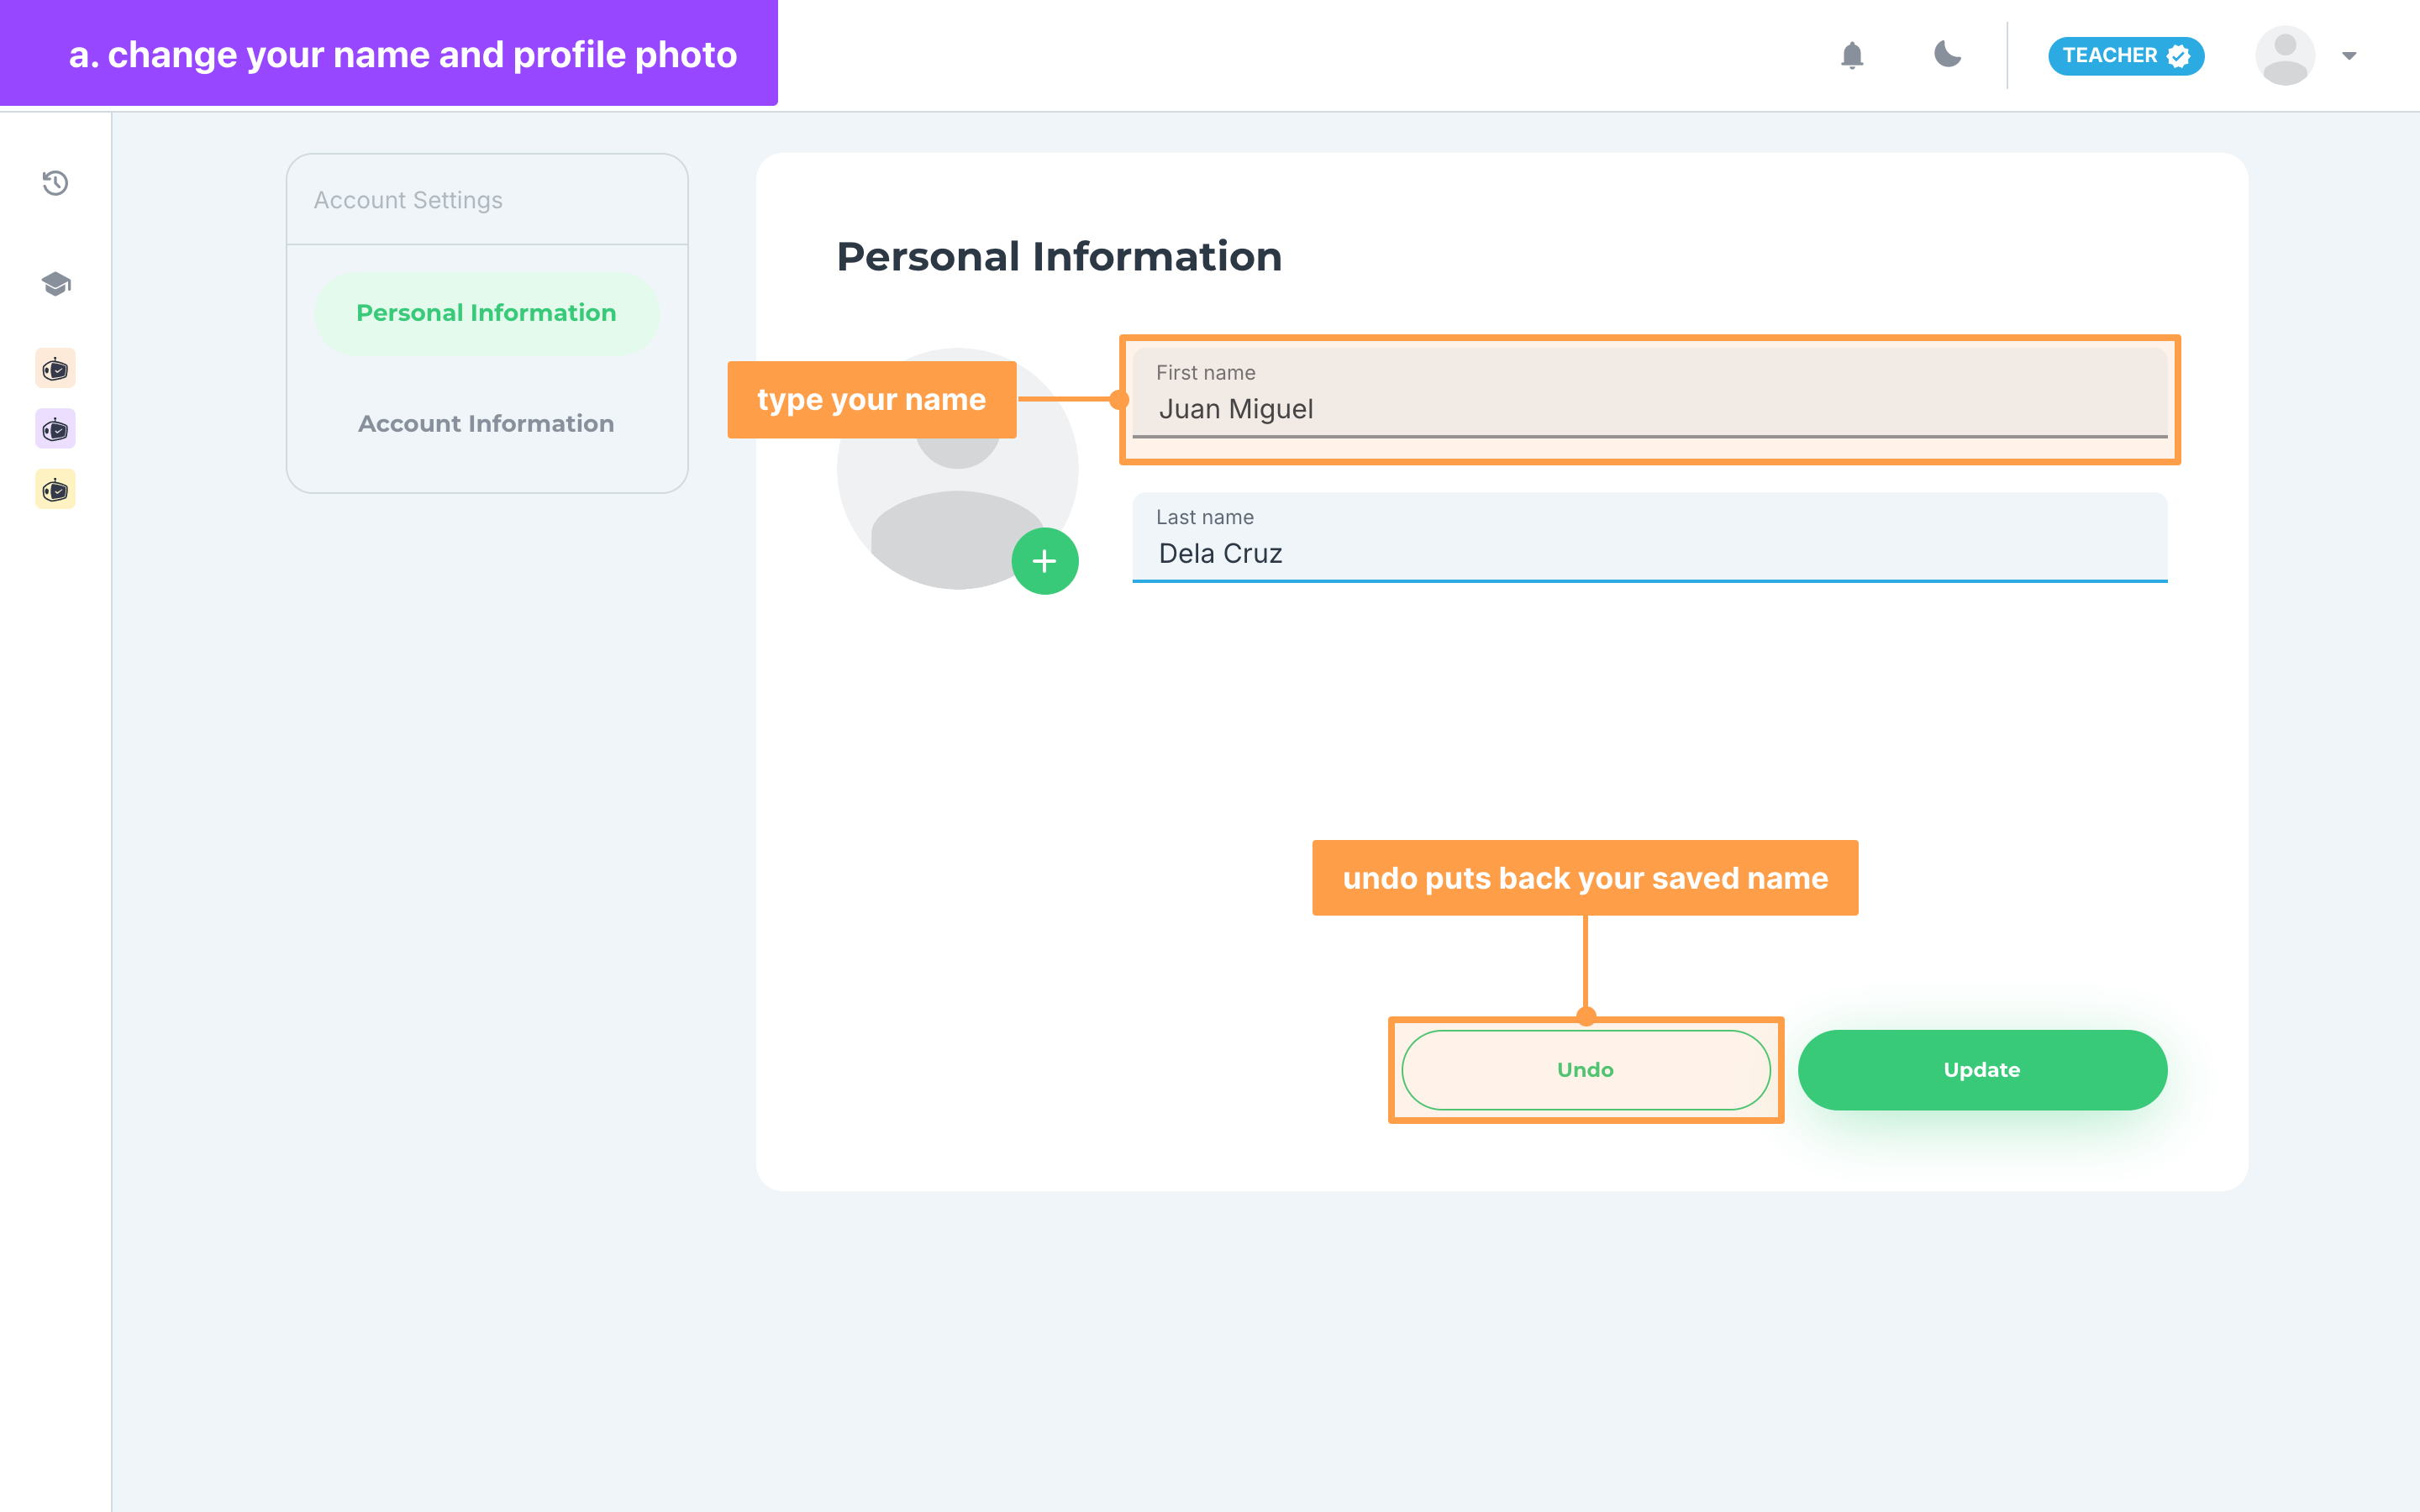
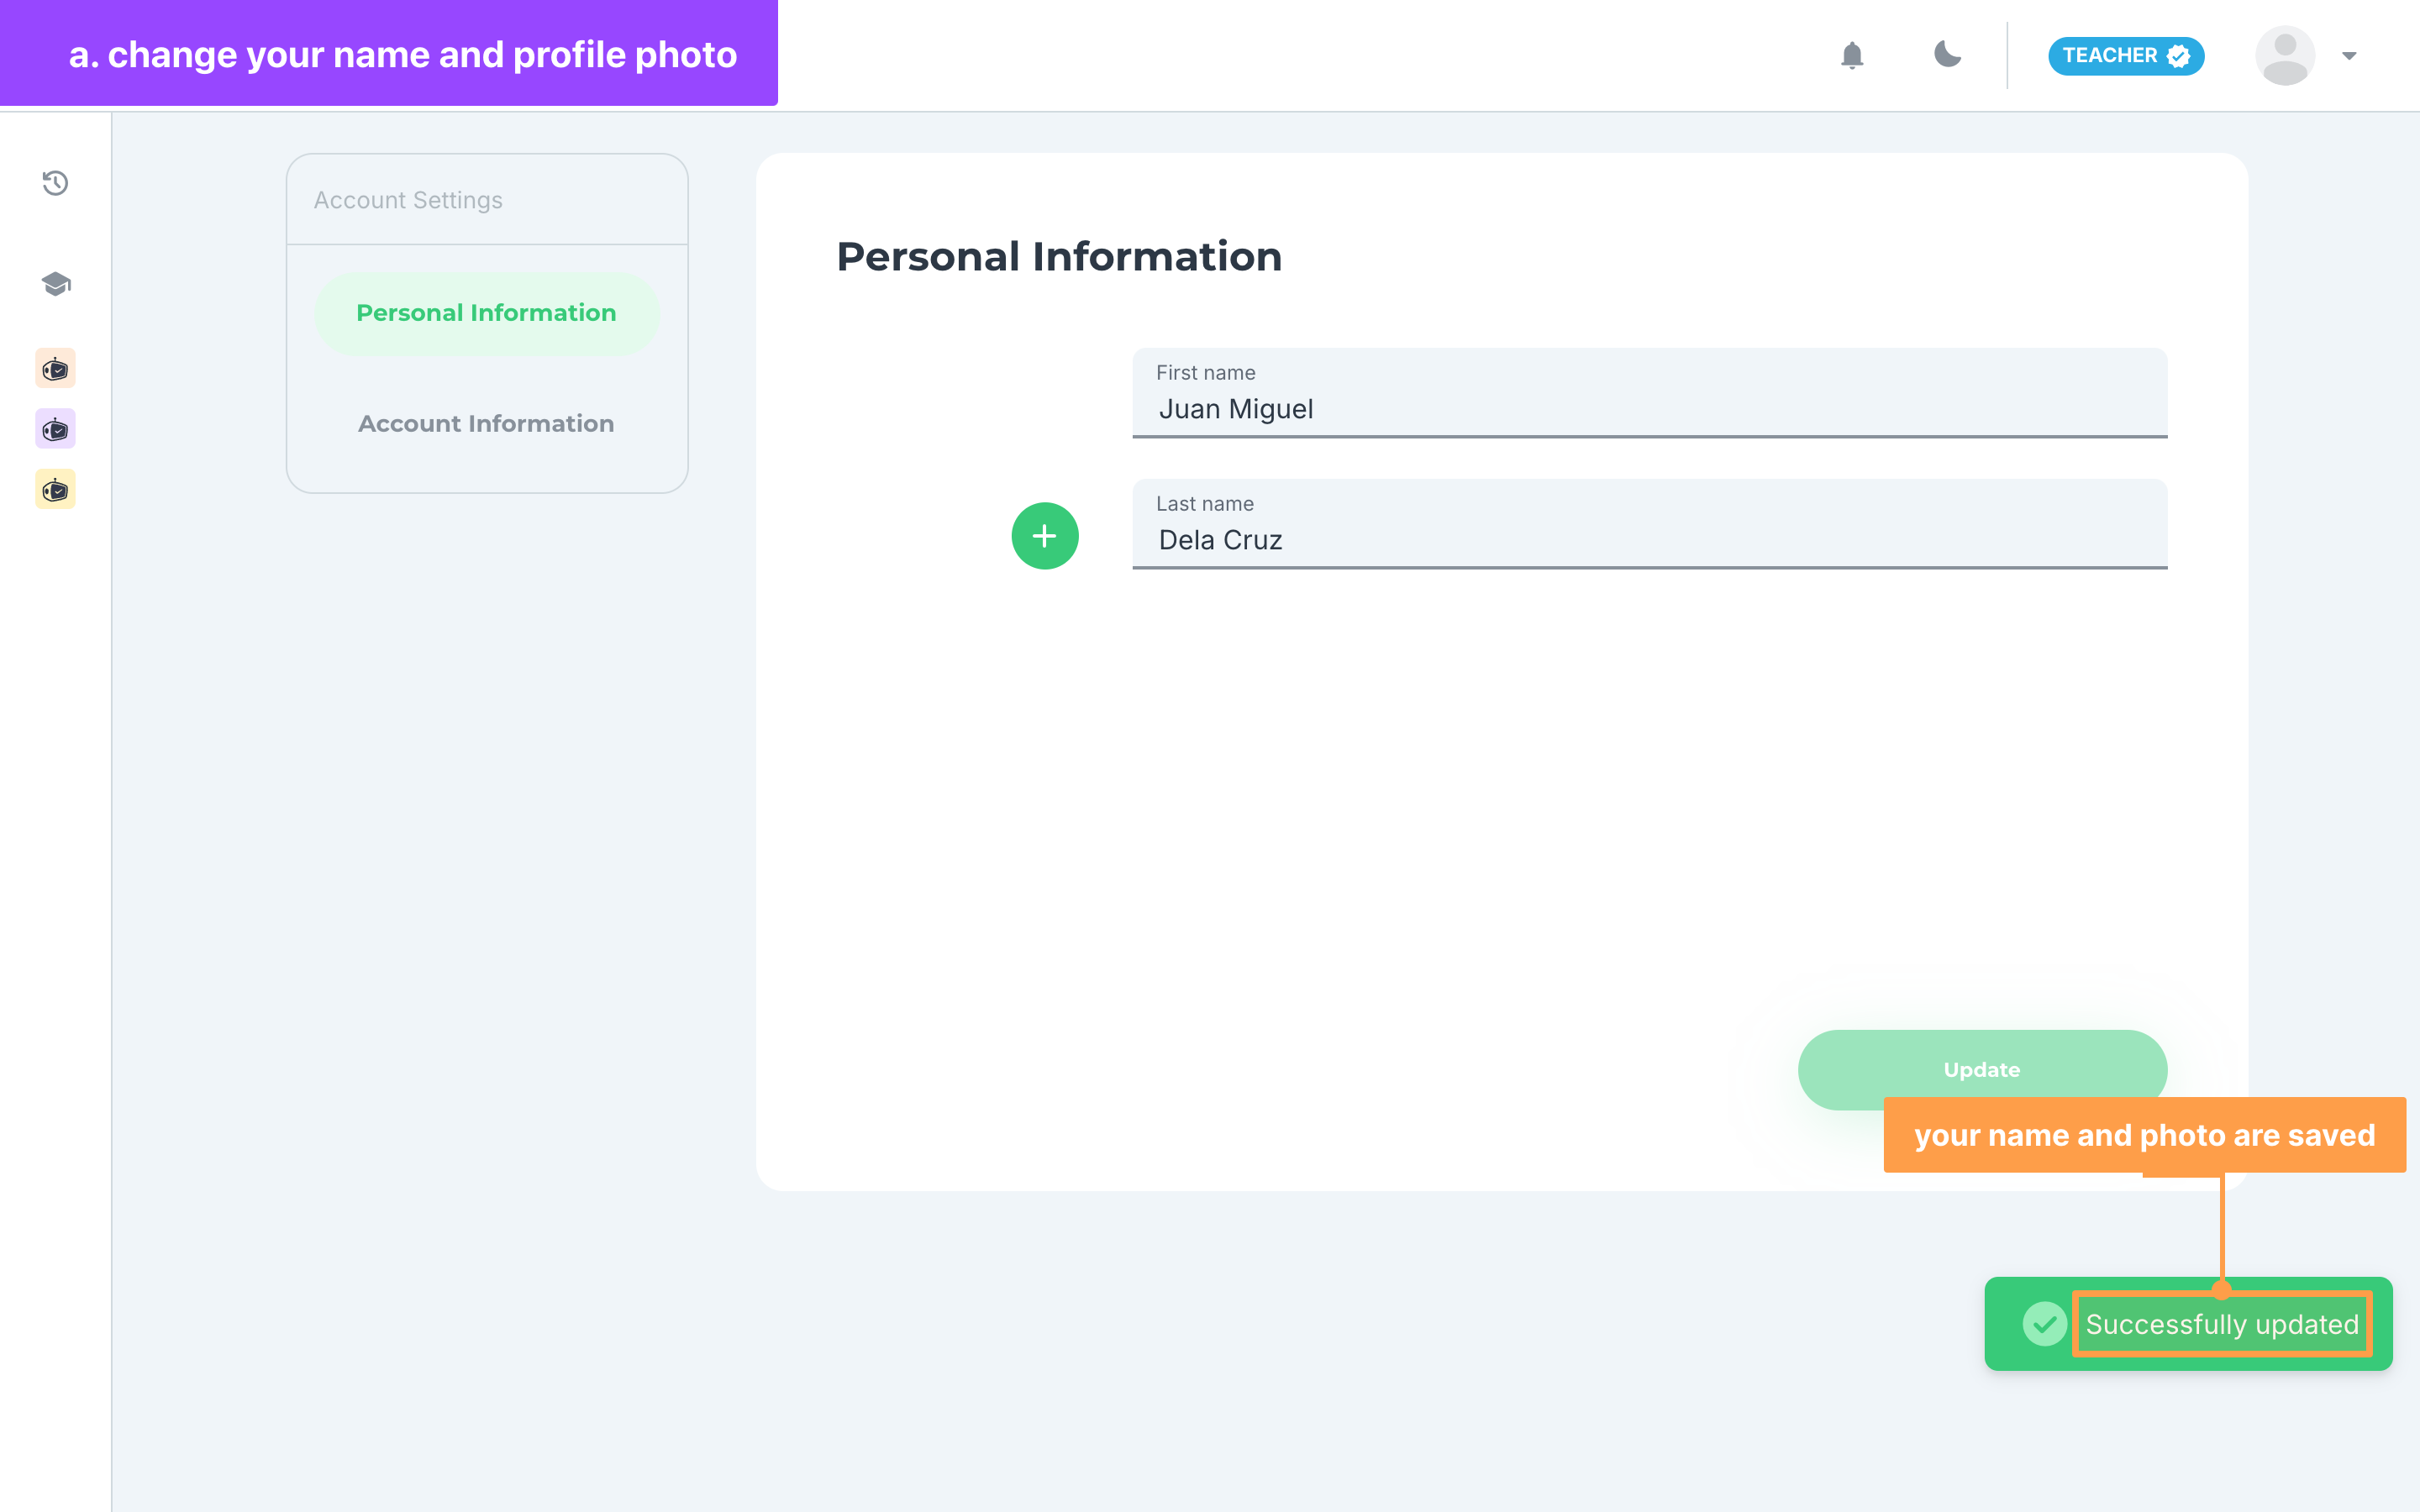
- My Account opens on Personal Information. Type your name in the First name and Last name fields. Undo appears as soon as you change something: click it to put back your saved name and photo.
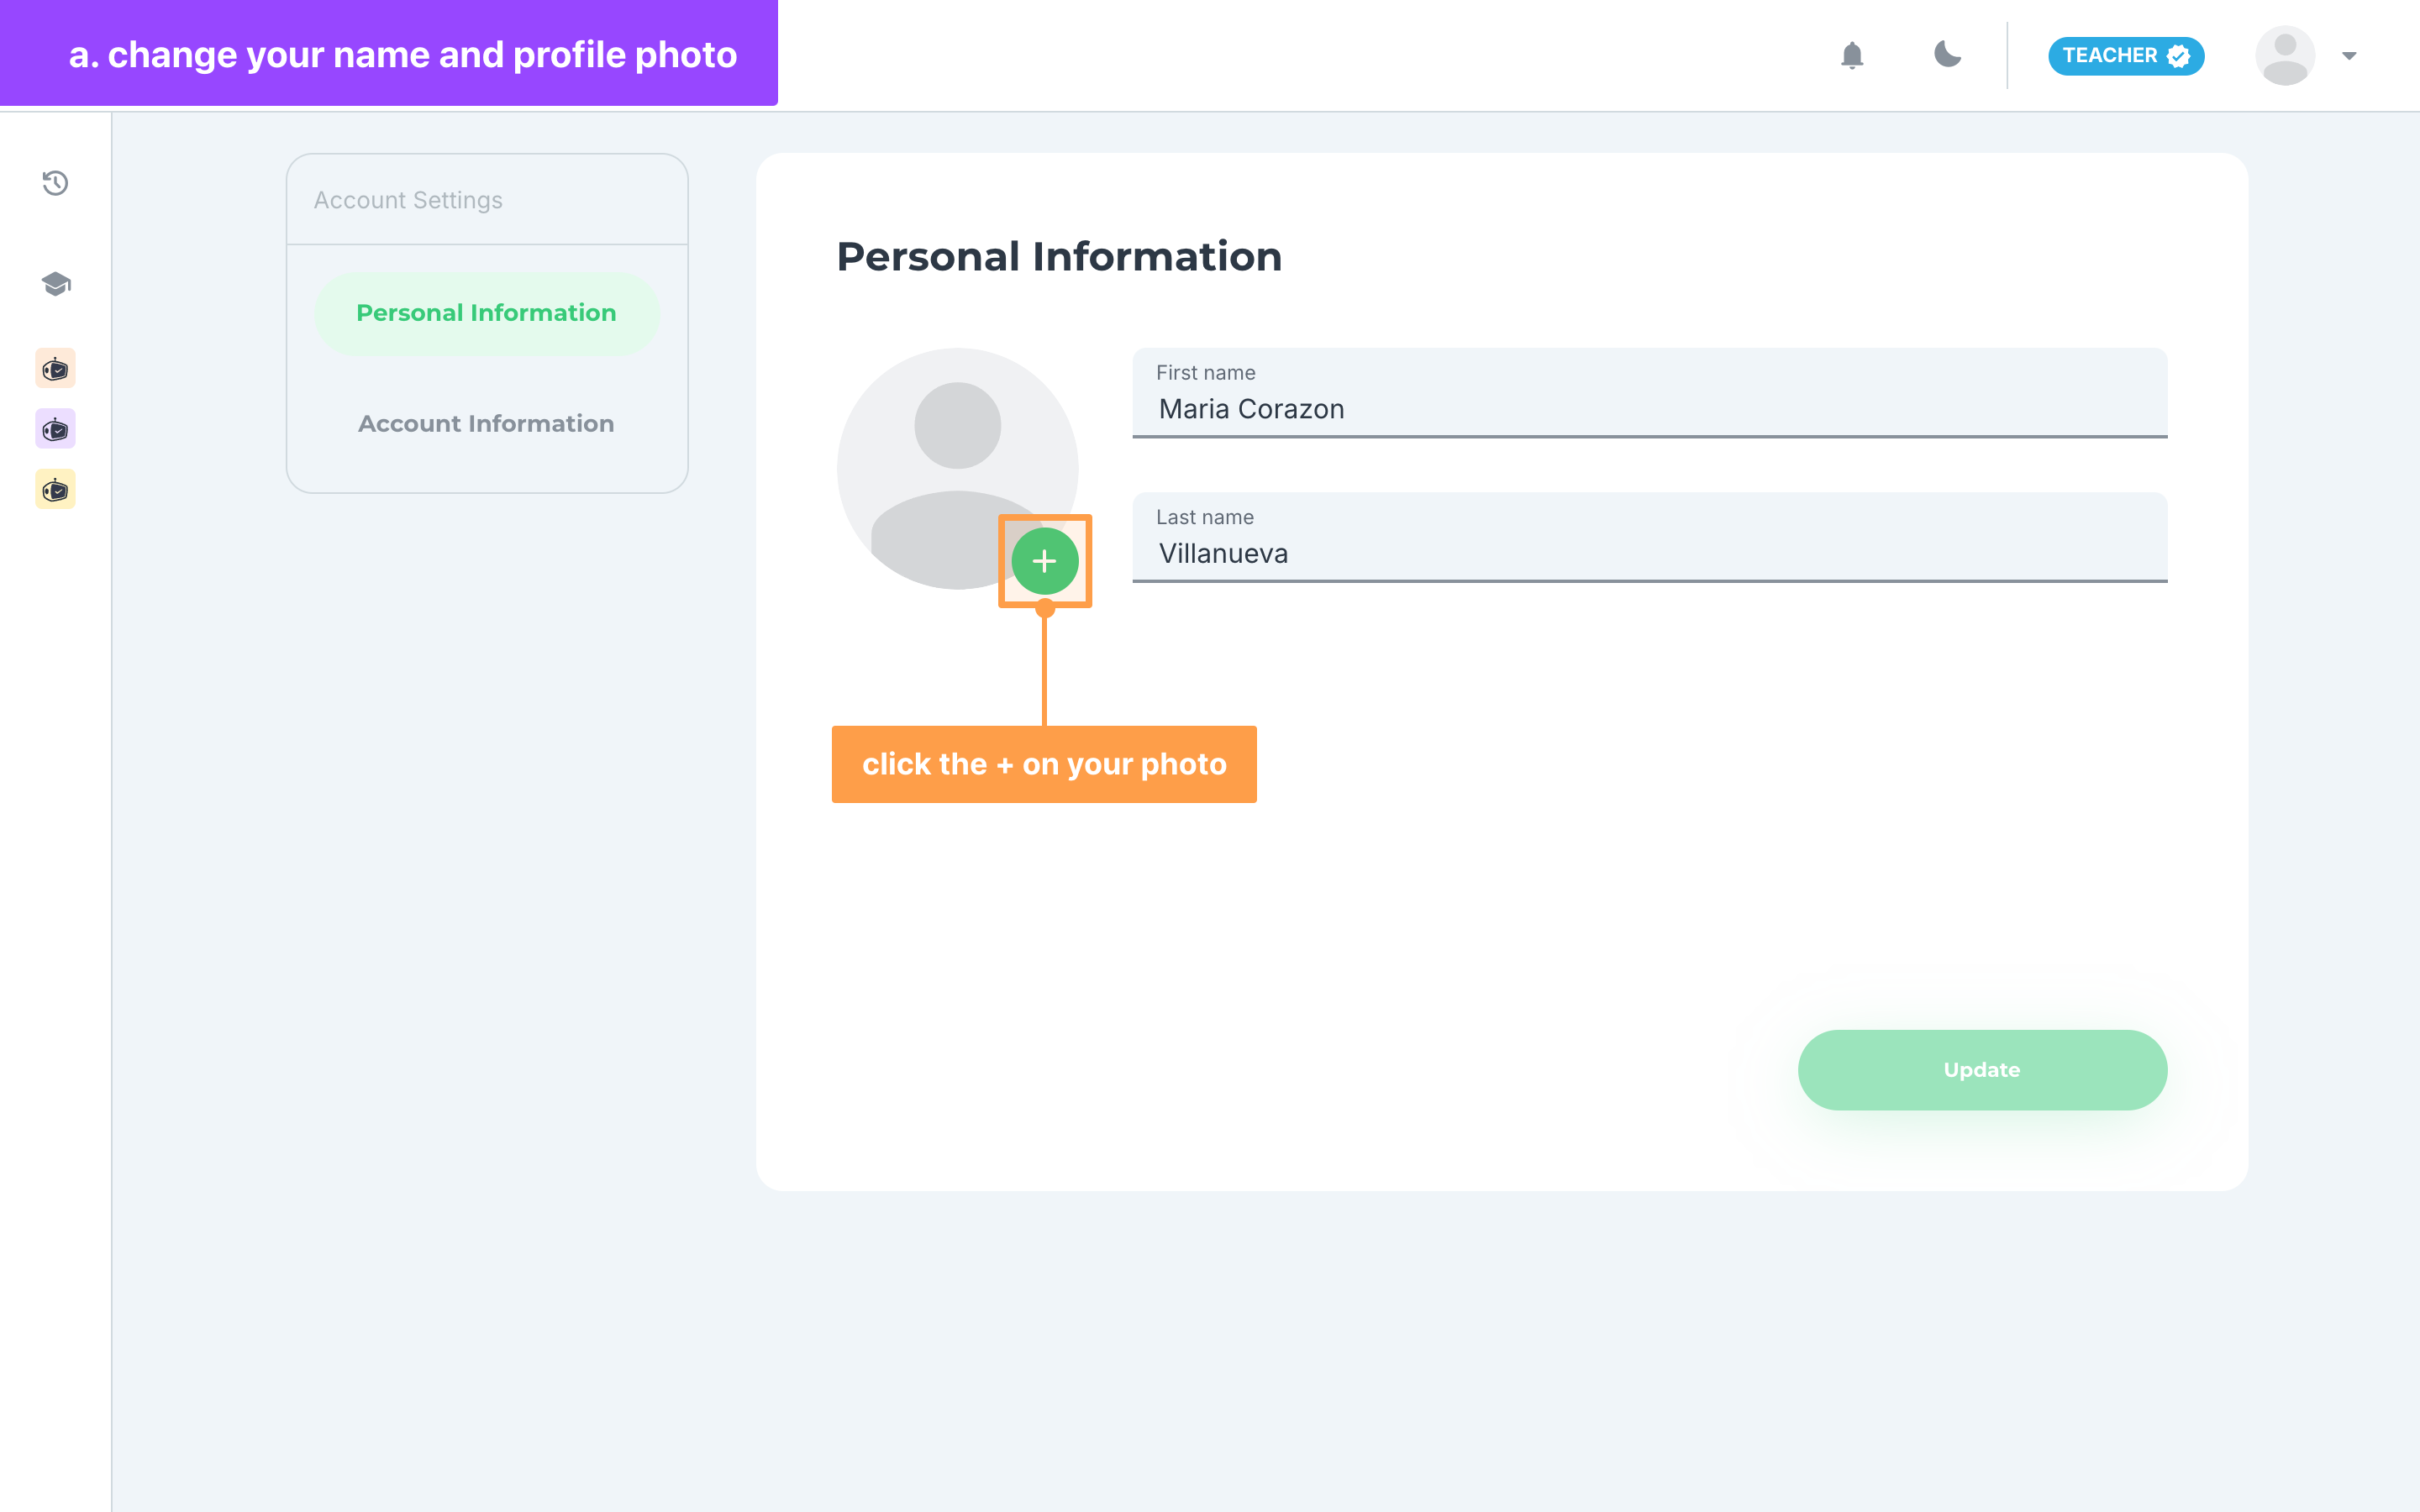
- To change your profile photo, click the round green + button on your photo. If you have no photo yet, a placeholder picture shows in its place.
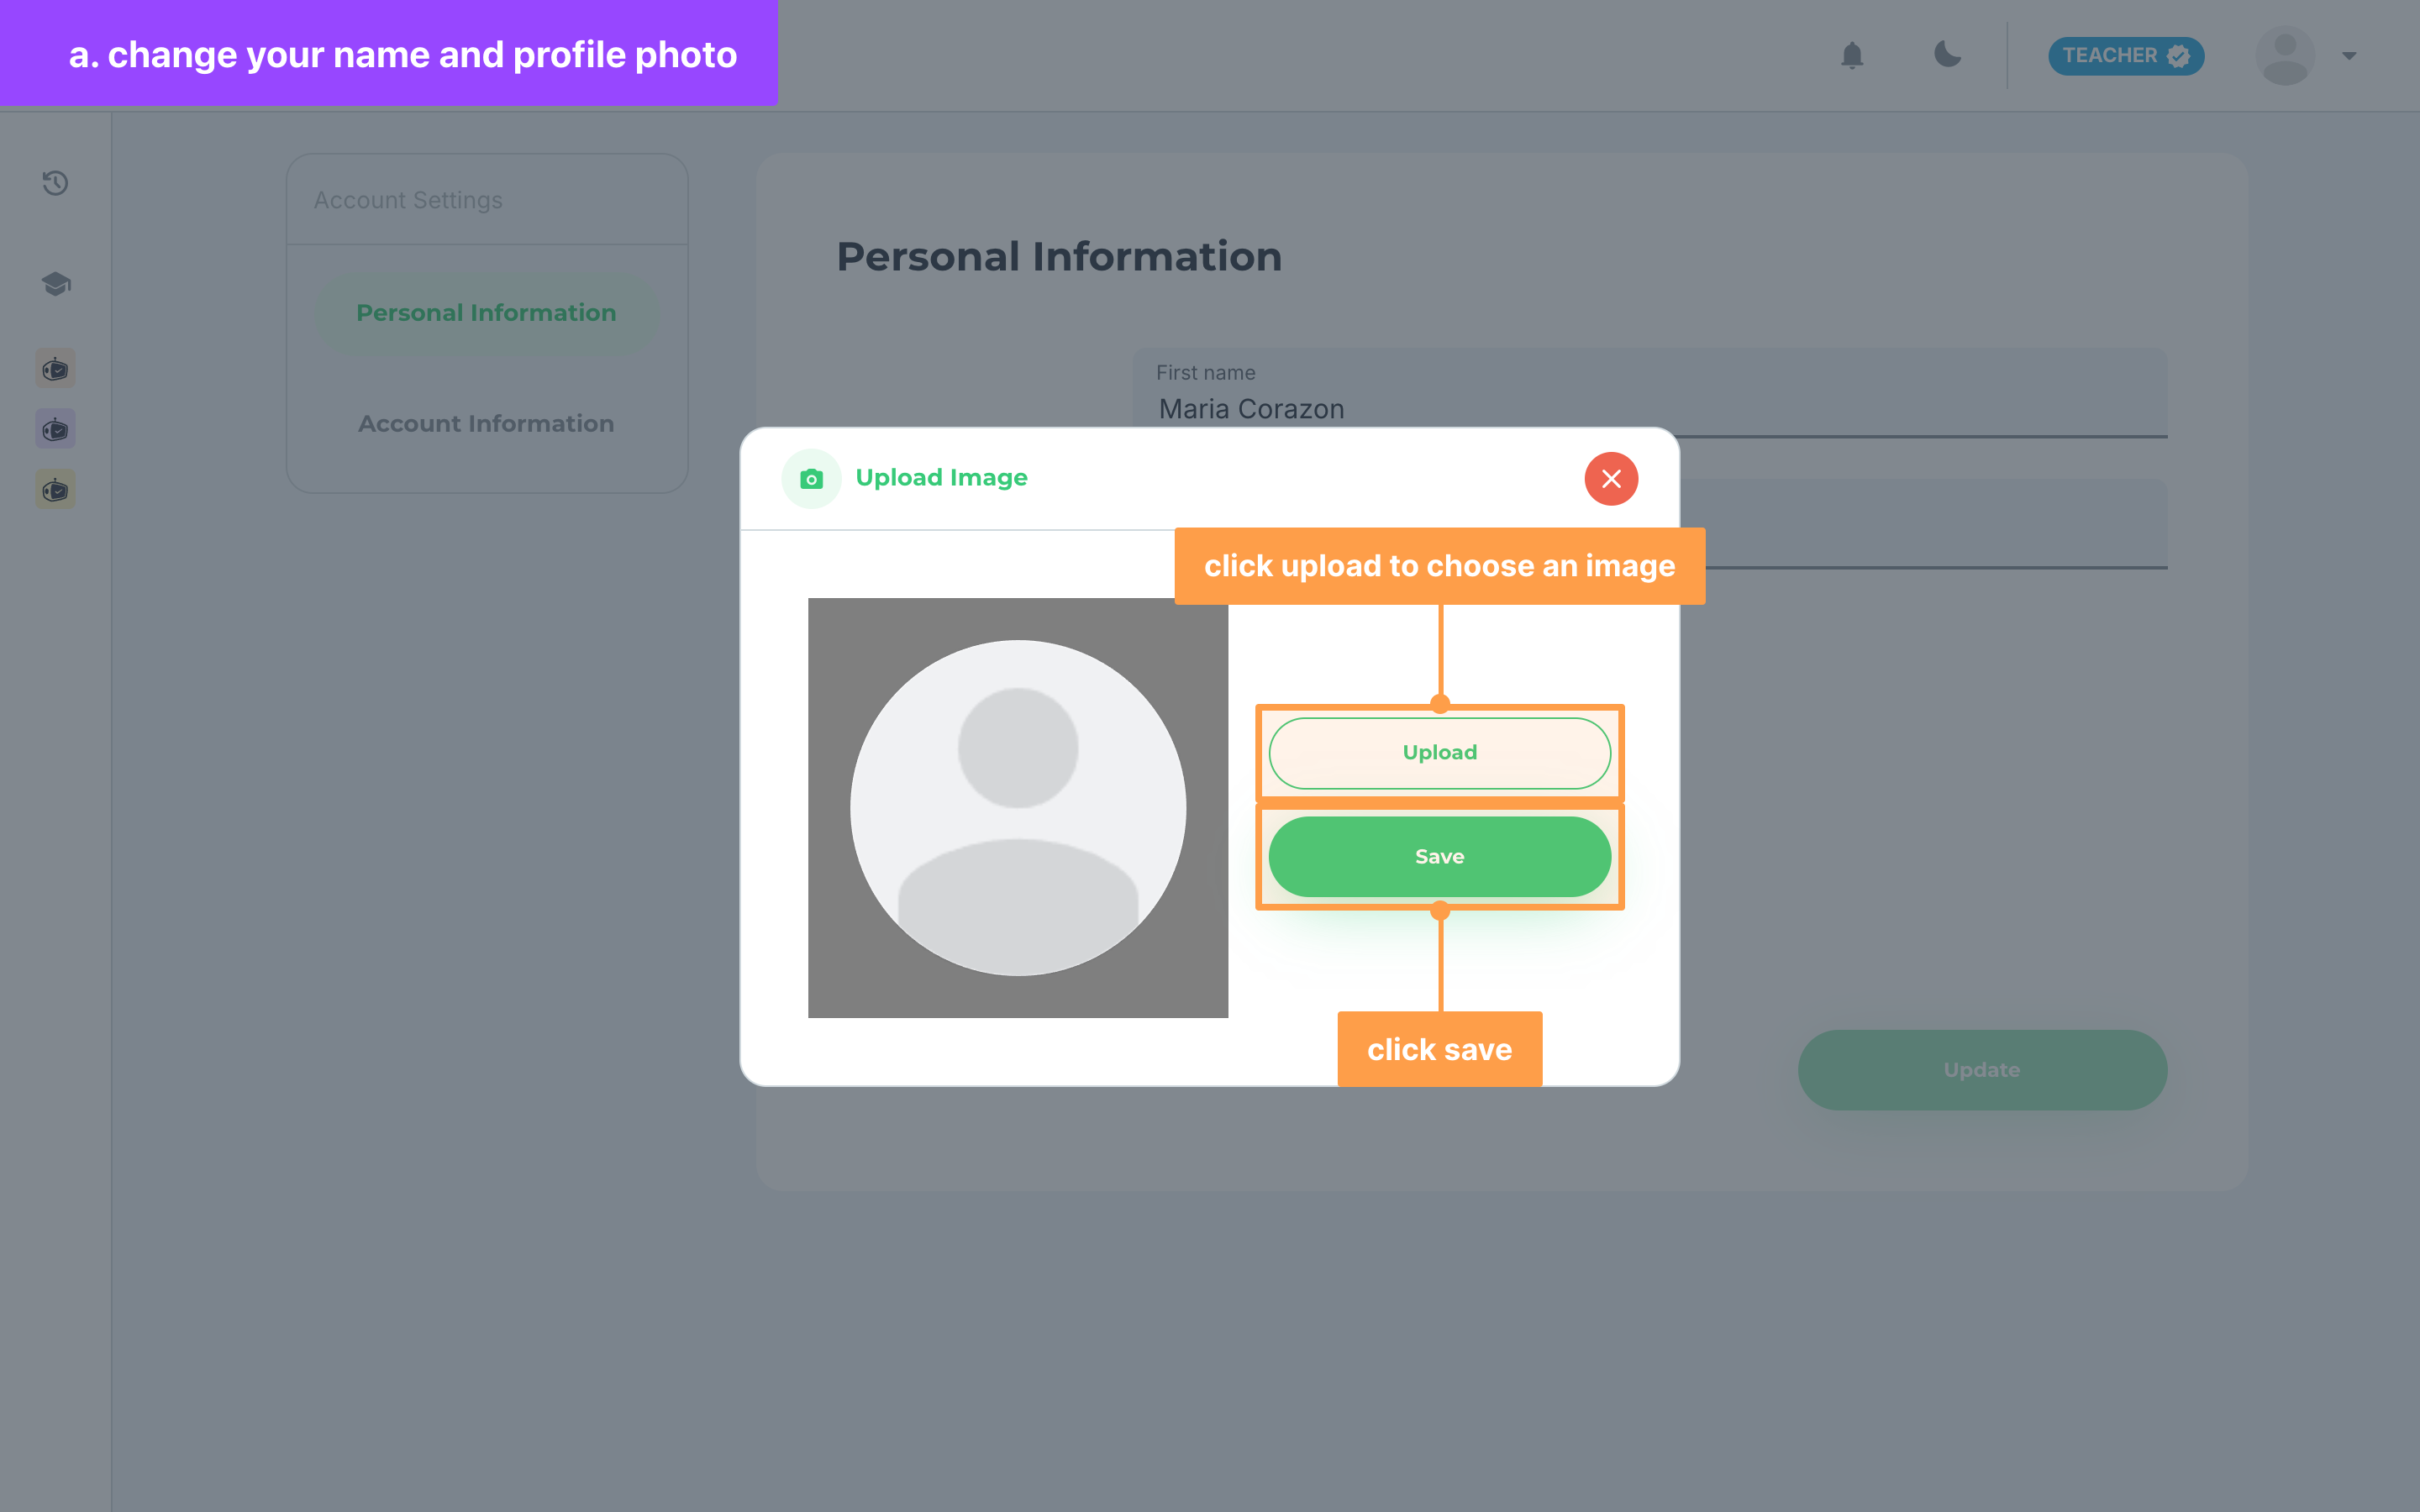
- In the Upload Image modal, click Upload and choose a PNG, JPEG, GIF, WebP or SVG image. Drag the image to position it in the round frame, then click Save. The photo is not stored yet: Save only puts it on the form.
- Finally, click Update. The button stays disabled until you change your name or photo, and reads Updating while it saves. Once a green "Successfully updated" message shows, your new name and photo are saved.
If your name is not accepted
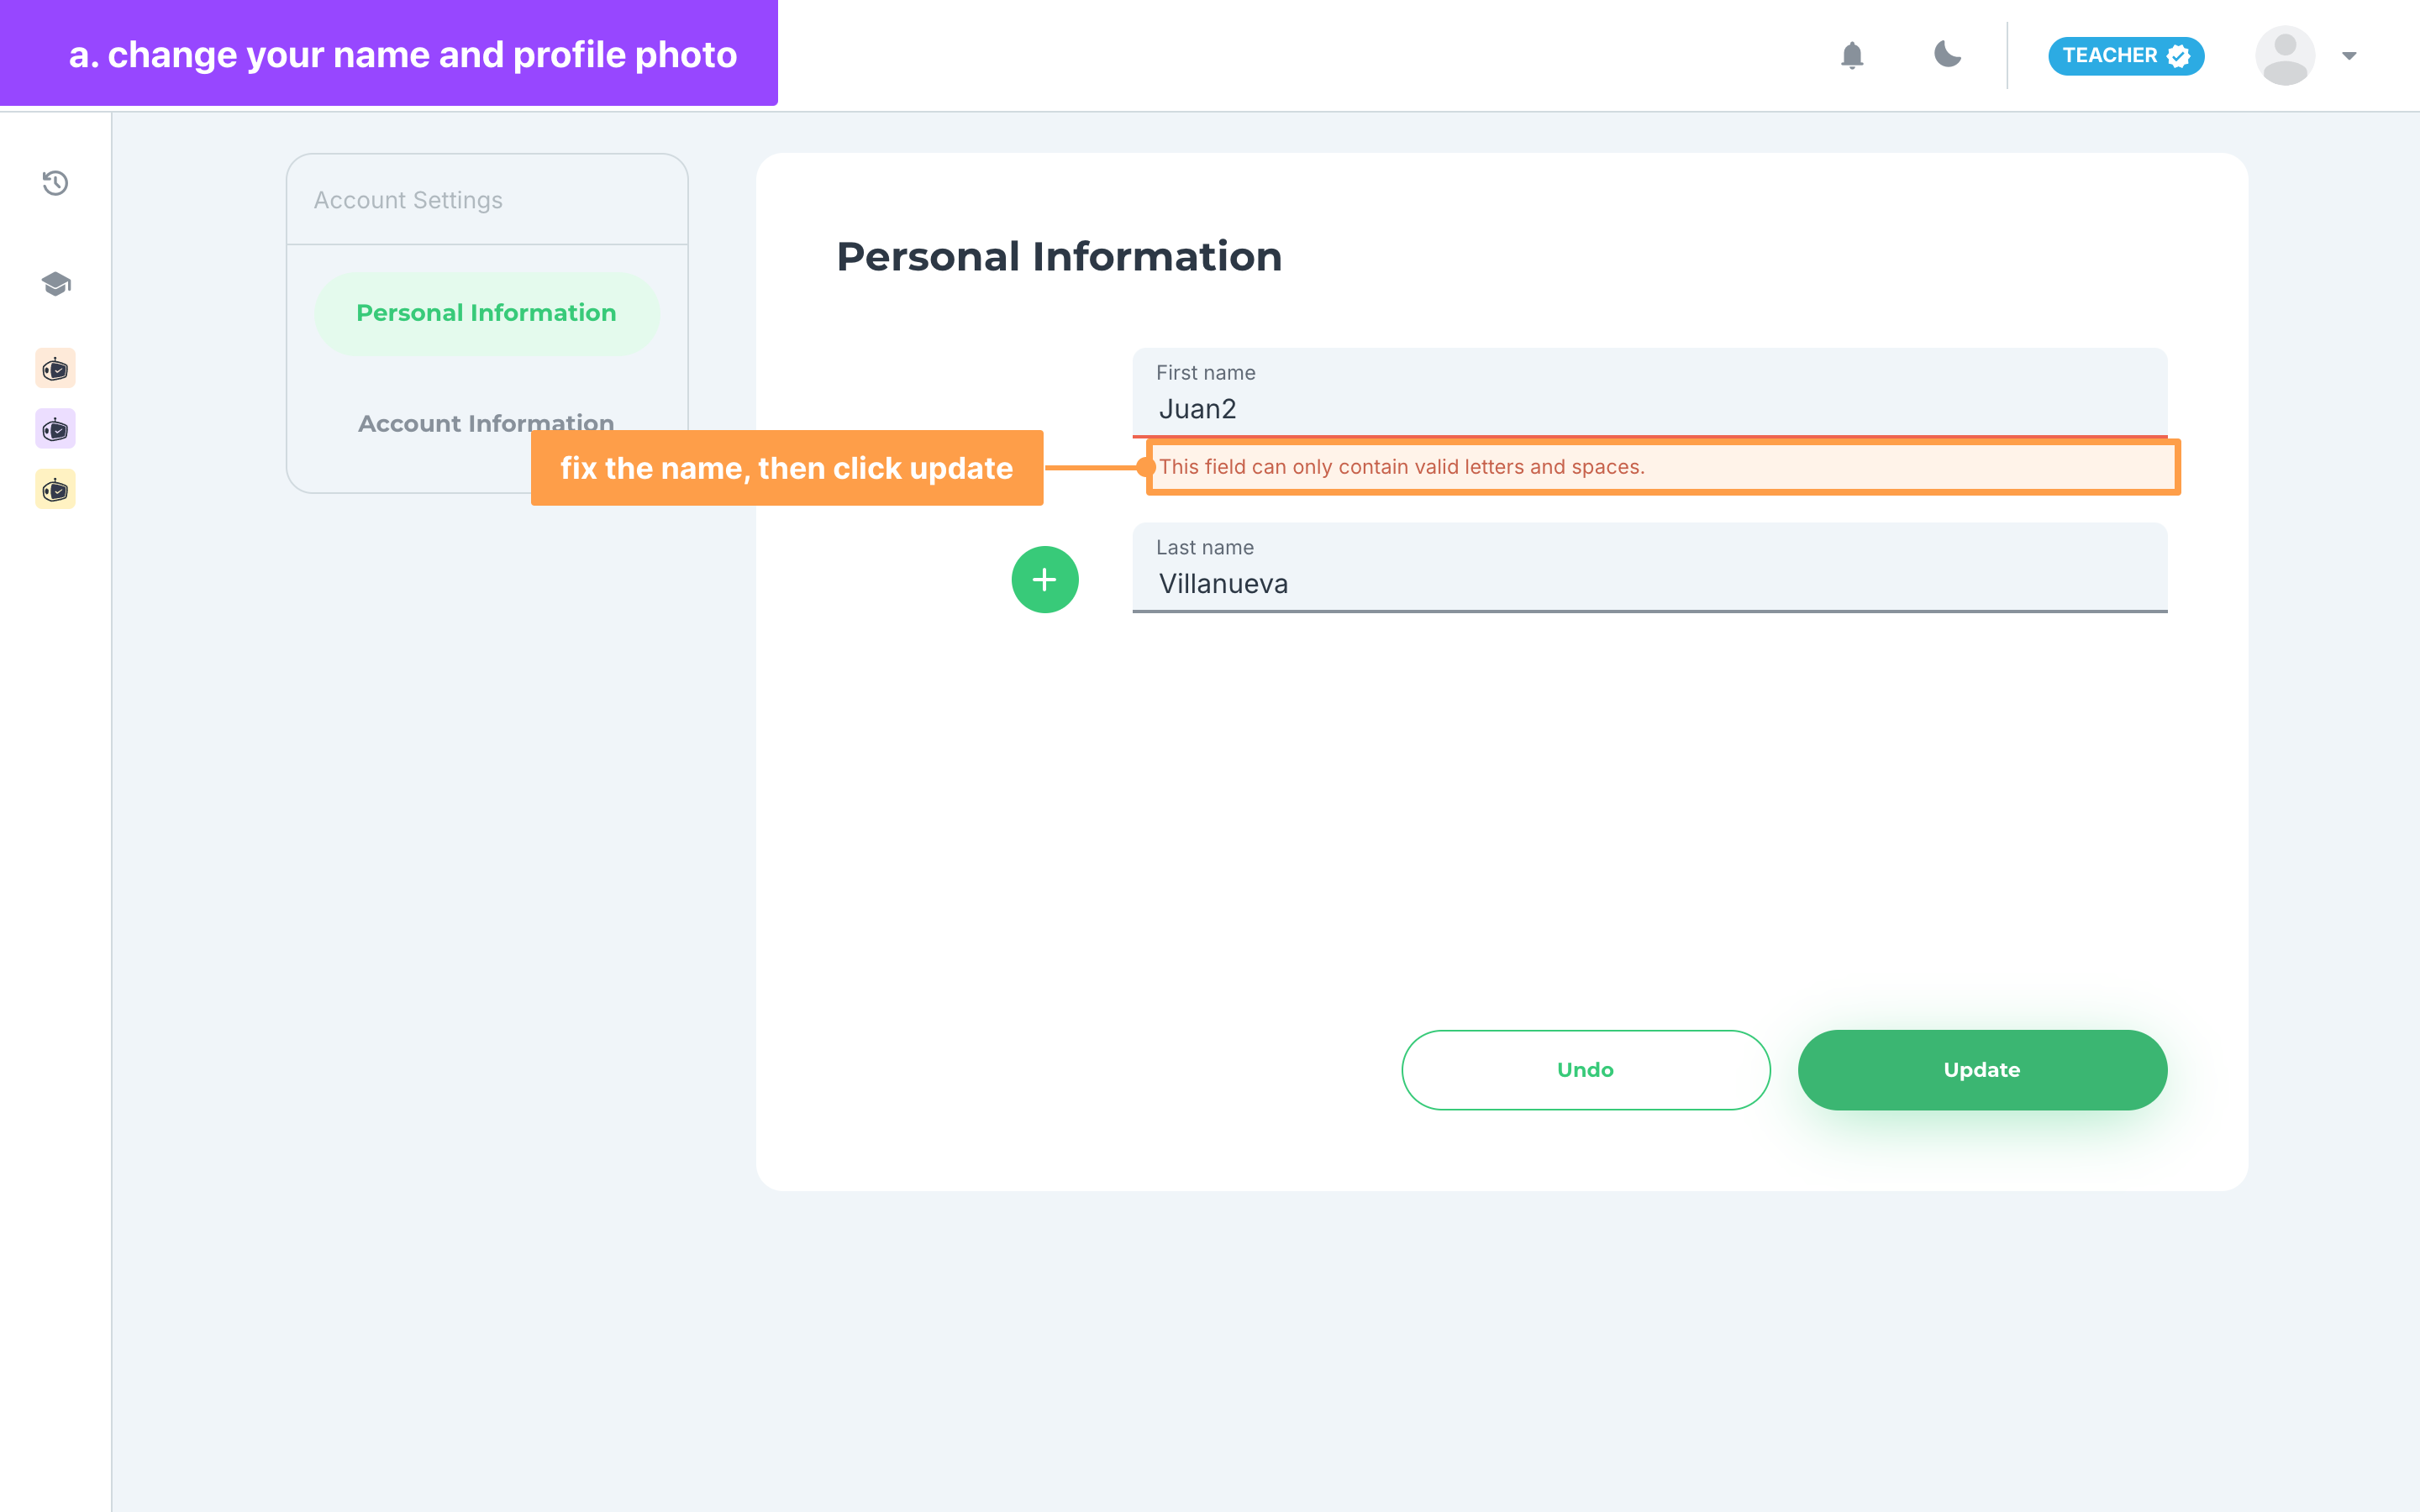
When you click Update, a message under the field tells you what to fix:
- "First name is required" or "Last name is required" means the field is empty.
- "This field can only contain valid letters and spaces." means the name has a number or a symbol in it. Letters, spaces, apostrophes and hyphens between letters are allowed.
- "This field cannot contain only spaces." means the field has spaces but no letters.
If a red "Something went wrong. Try again later." message shows instead, your change was not saved. Click Update again after a moment.
If your image is not accepted
Upload only takes image files. Any other file shows "Please upload a valid image file." Choose a PNG, JPEG, GIF, WebP or SVG image instead.
If you close the Upload Image modal without clicking Save, the image you picked is thrown away. You can replace your photo at any time, but there is no option to remove it.
b. Check your email, LMS and phone number
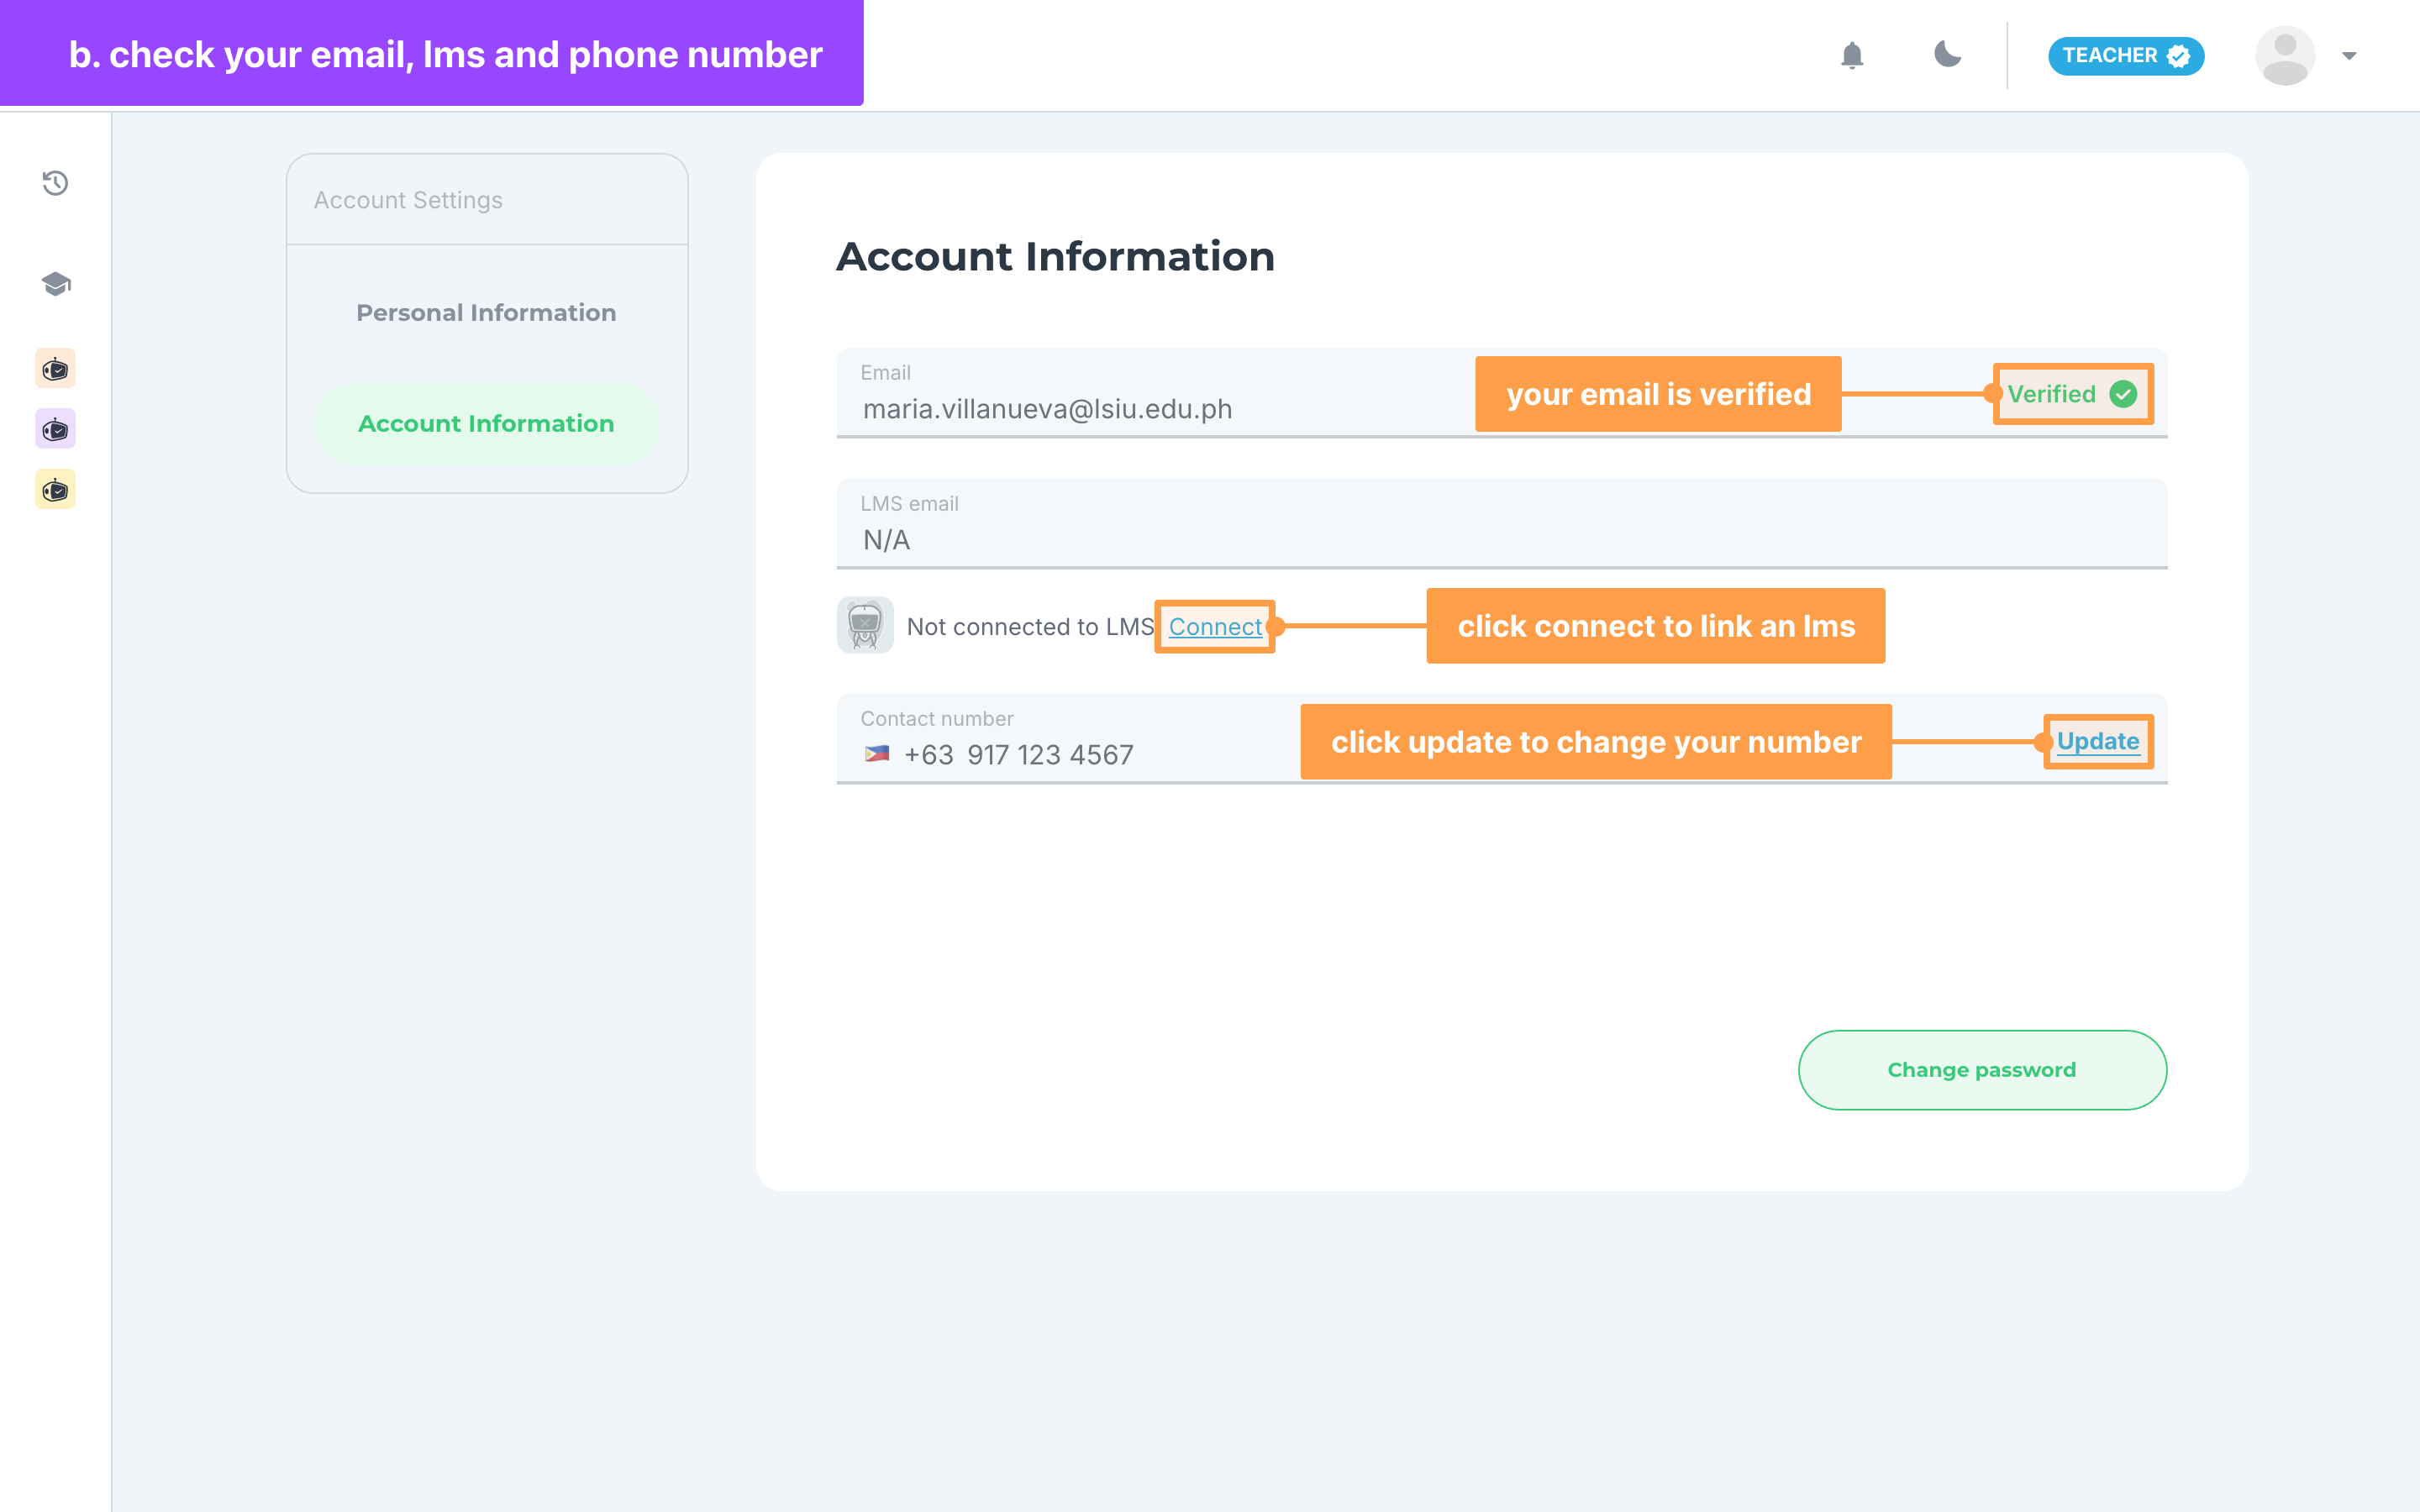
- In My Account, click Account Information. You cannot type in these fields, but each one shows its status and what you can do about it:
- Email: a green Verified mark means your email is confirmed. If you see Verify email instead, click it and follow Verify your email and phone number.
- LMS email: Connected to and your LMS's name when your account is linked to an LMS, or N/A and Not connected to LMS. when it is not. Click Connect to link it, as in Connect to LMS.
- Contact number: click Update to change your number and verify it with a code.
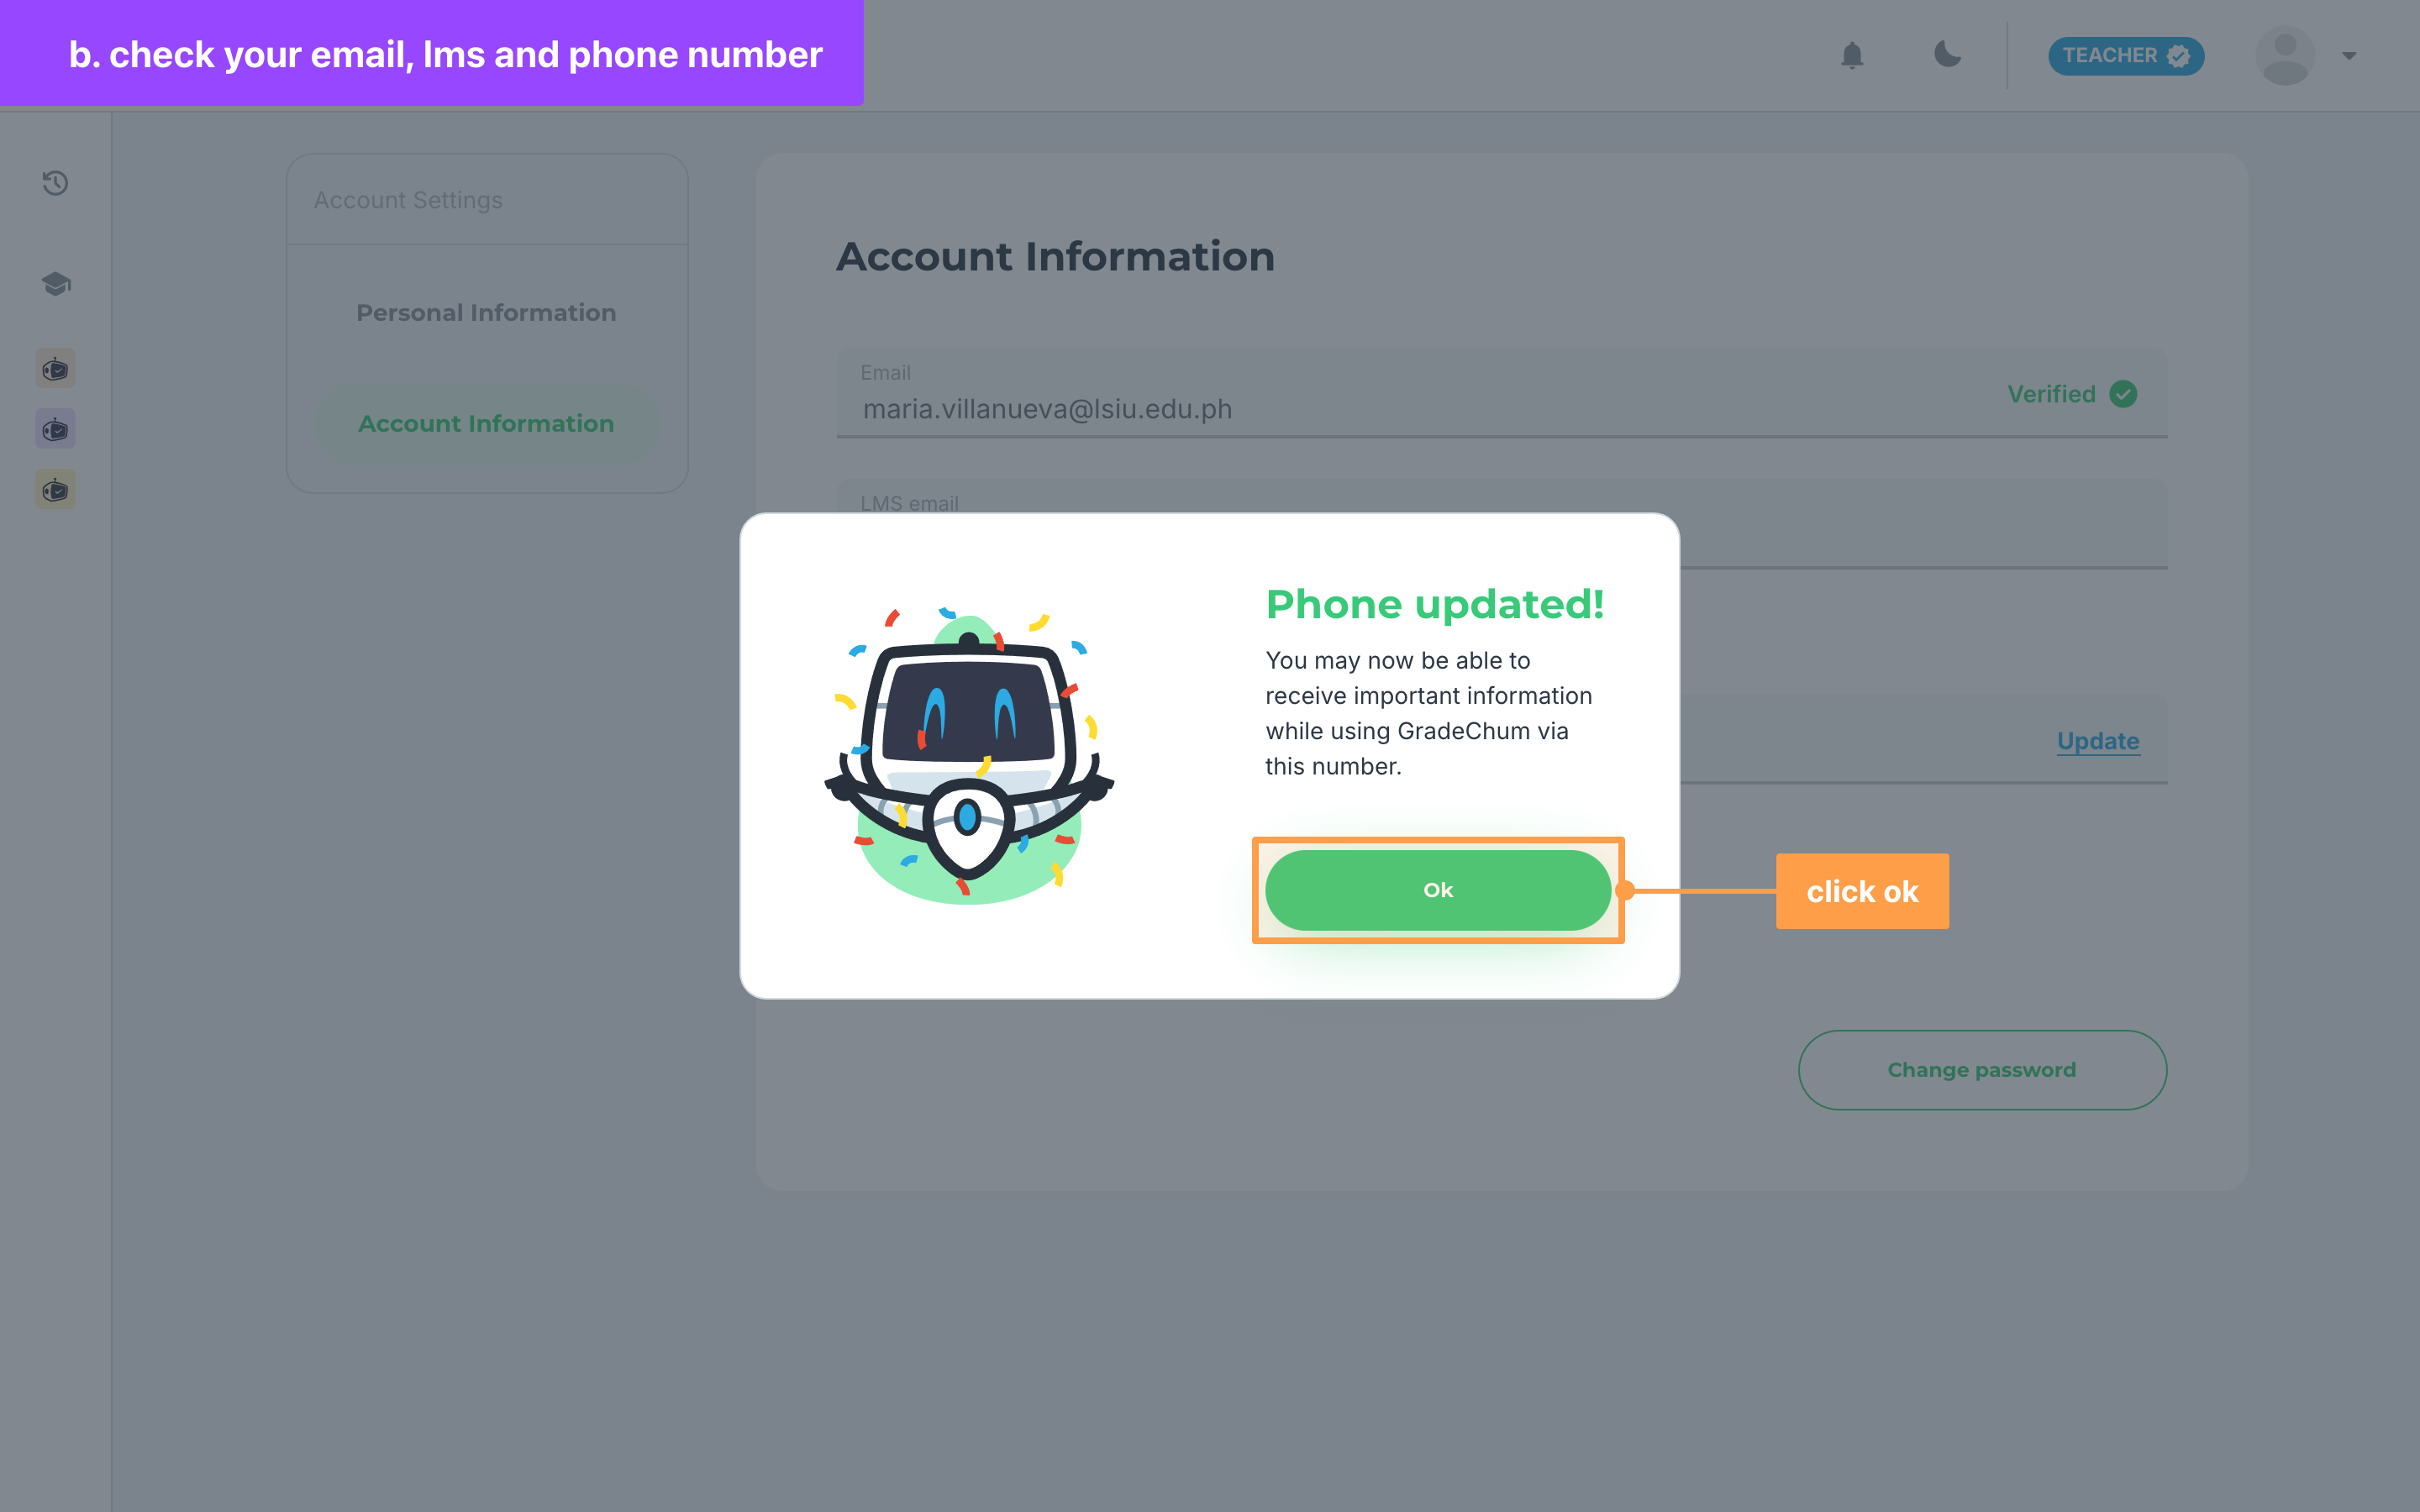
- Finally, once you verify a new phone number, you come back to Account Information and see Phone updated!. Click Ok. Without a school license, a verified phone number unlocks options such as exporting your class record. See Verify your email and phone number.
c. Change your password
Note: Change password only shows for accounts that log in with an email and password. If you log in with Google, Facebook or your school's LMS, your password is managed there, so change it in that account instead.
- In My Account, click Account Information, then click Change password at the bottom of the page.
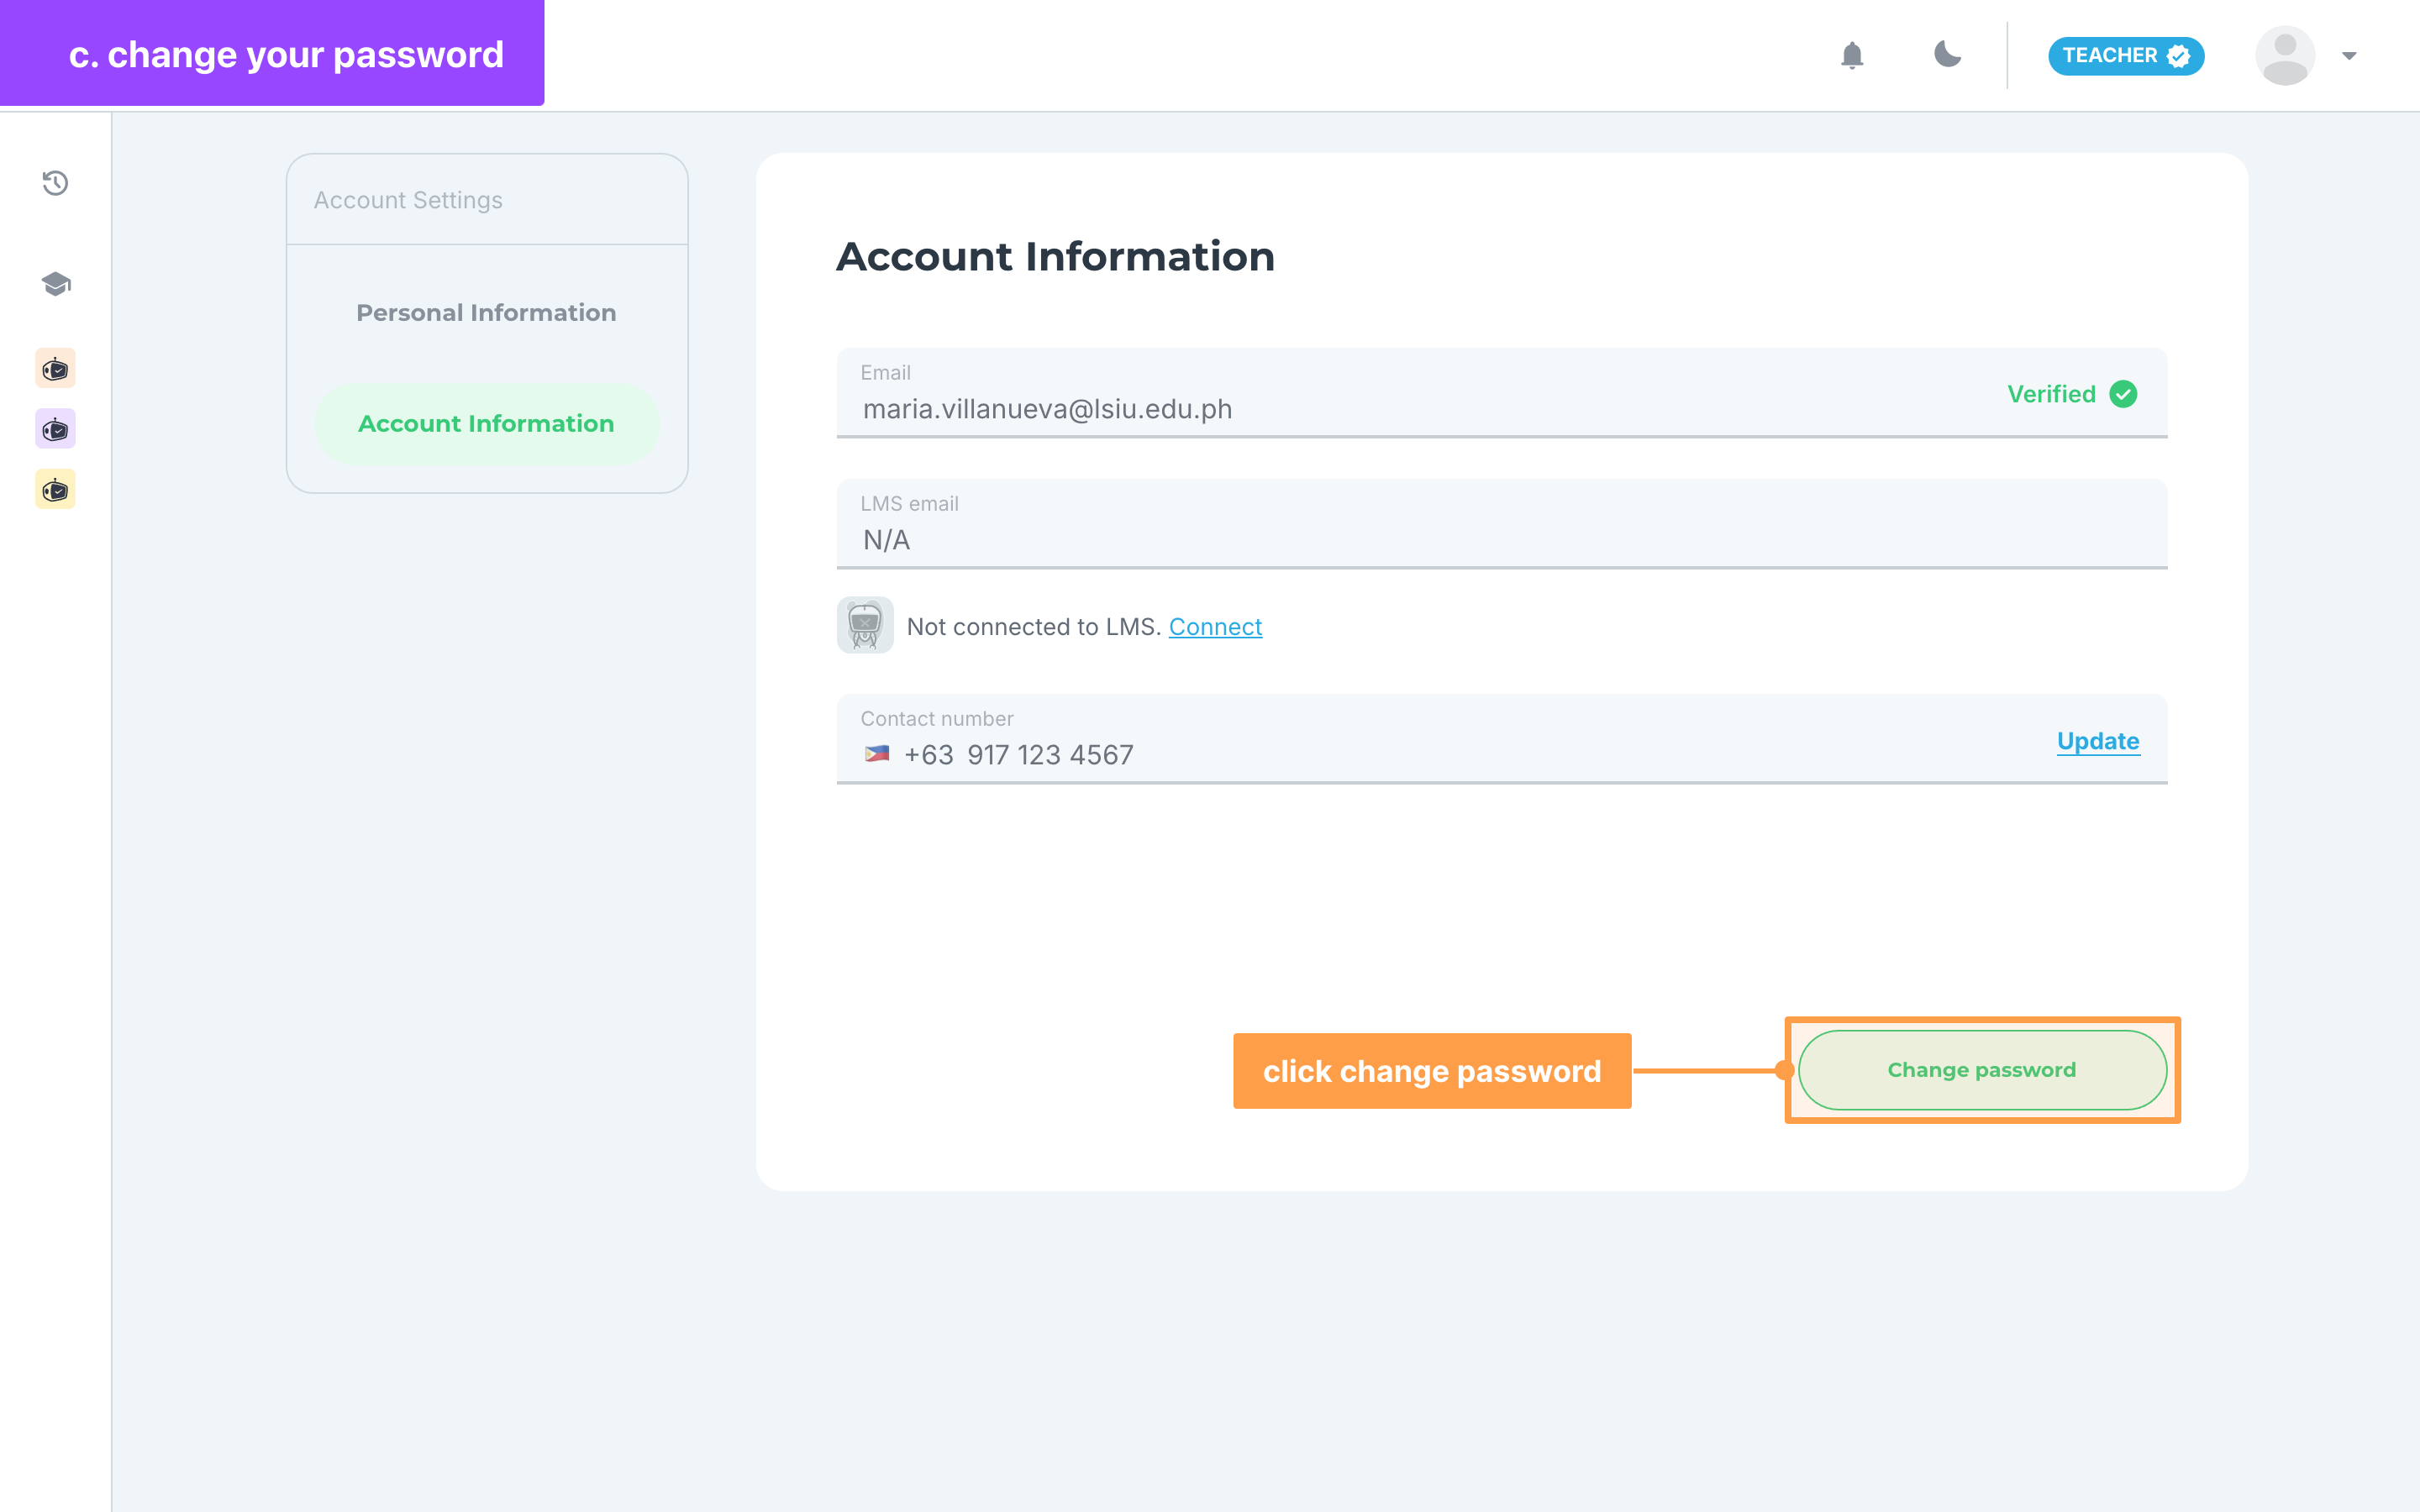
- In the Change Password modal, type the password you log in with now in Current password. Then type your new password in New password and again in Confirm new password.
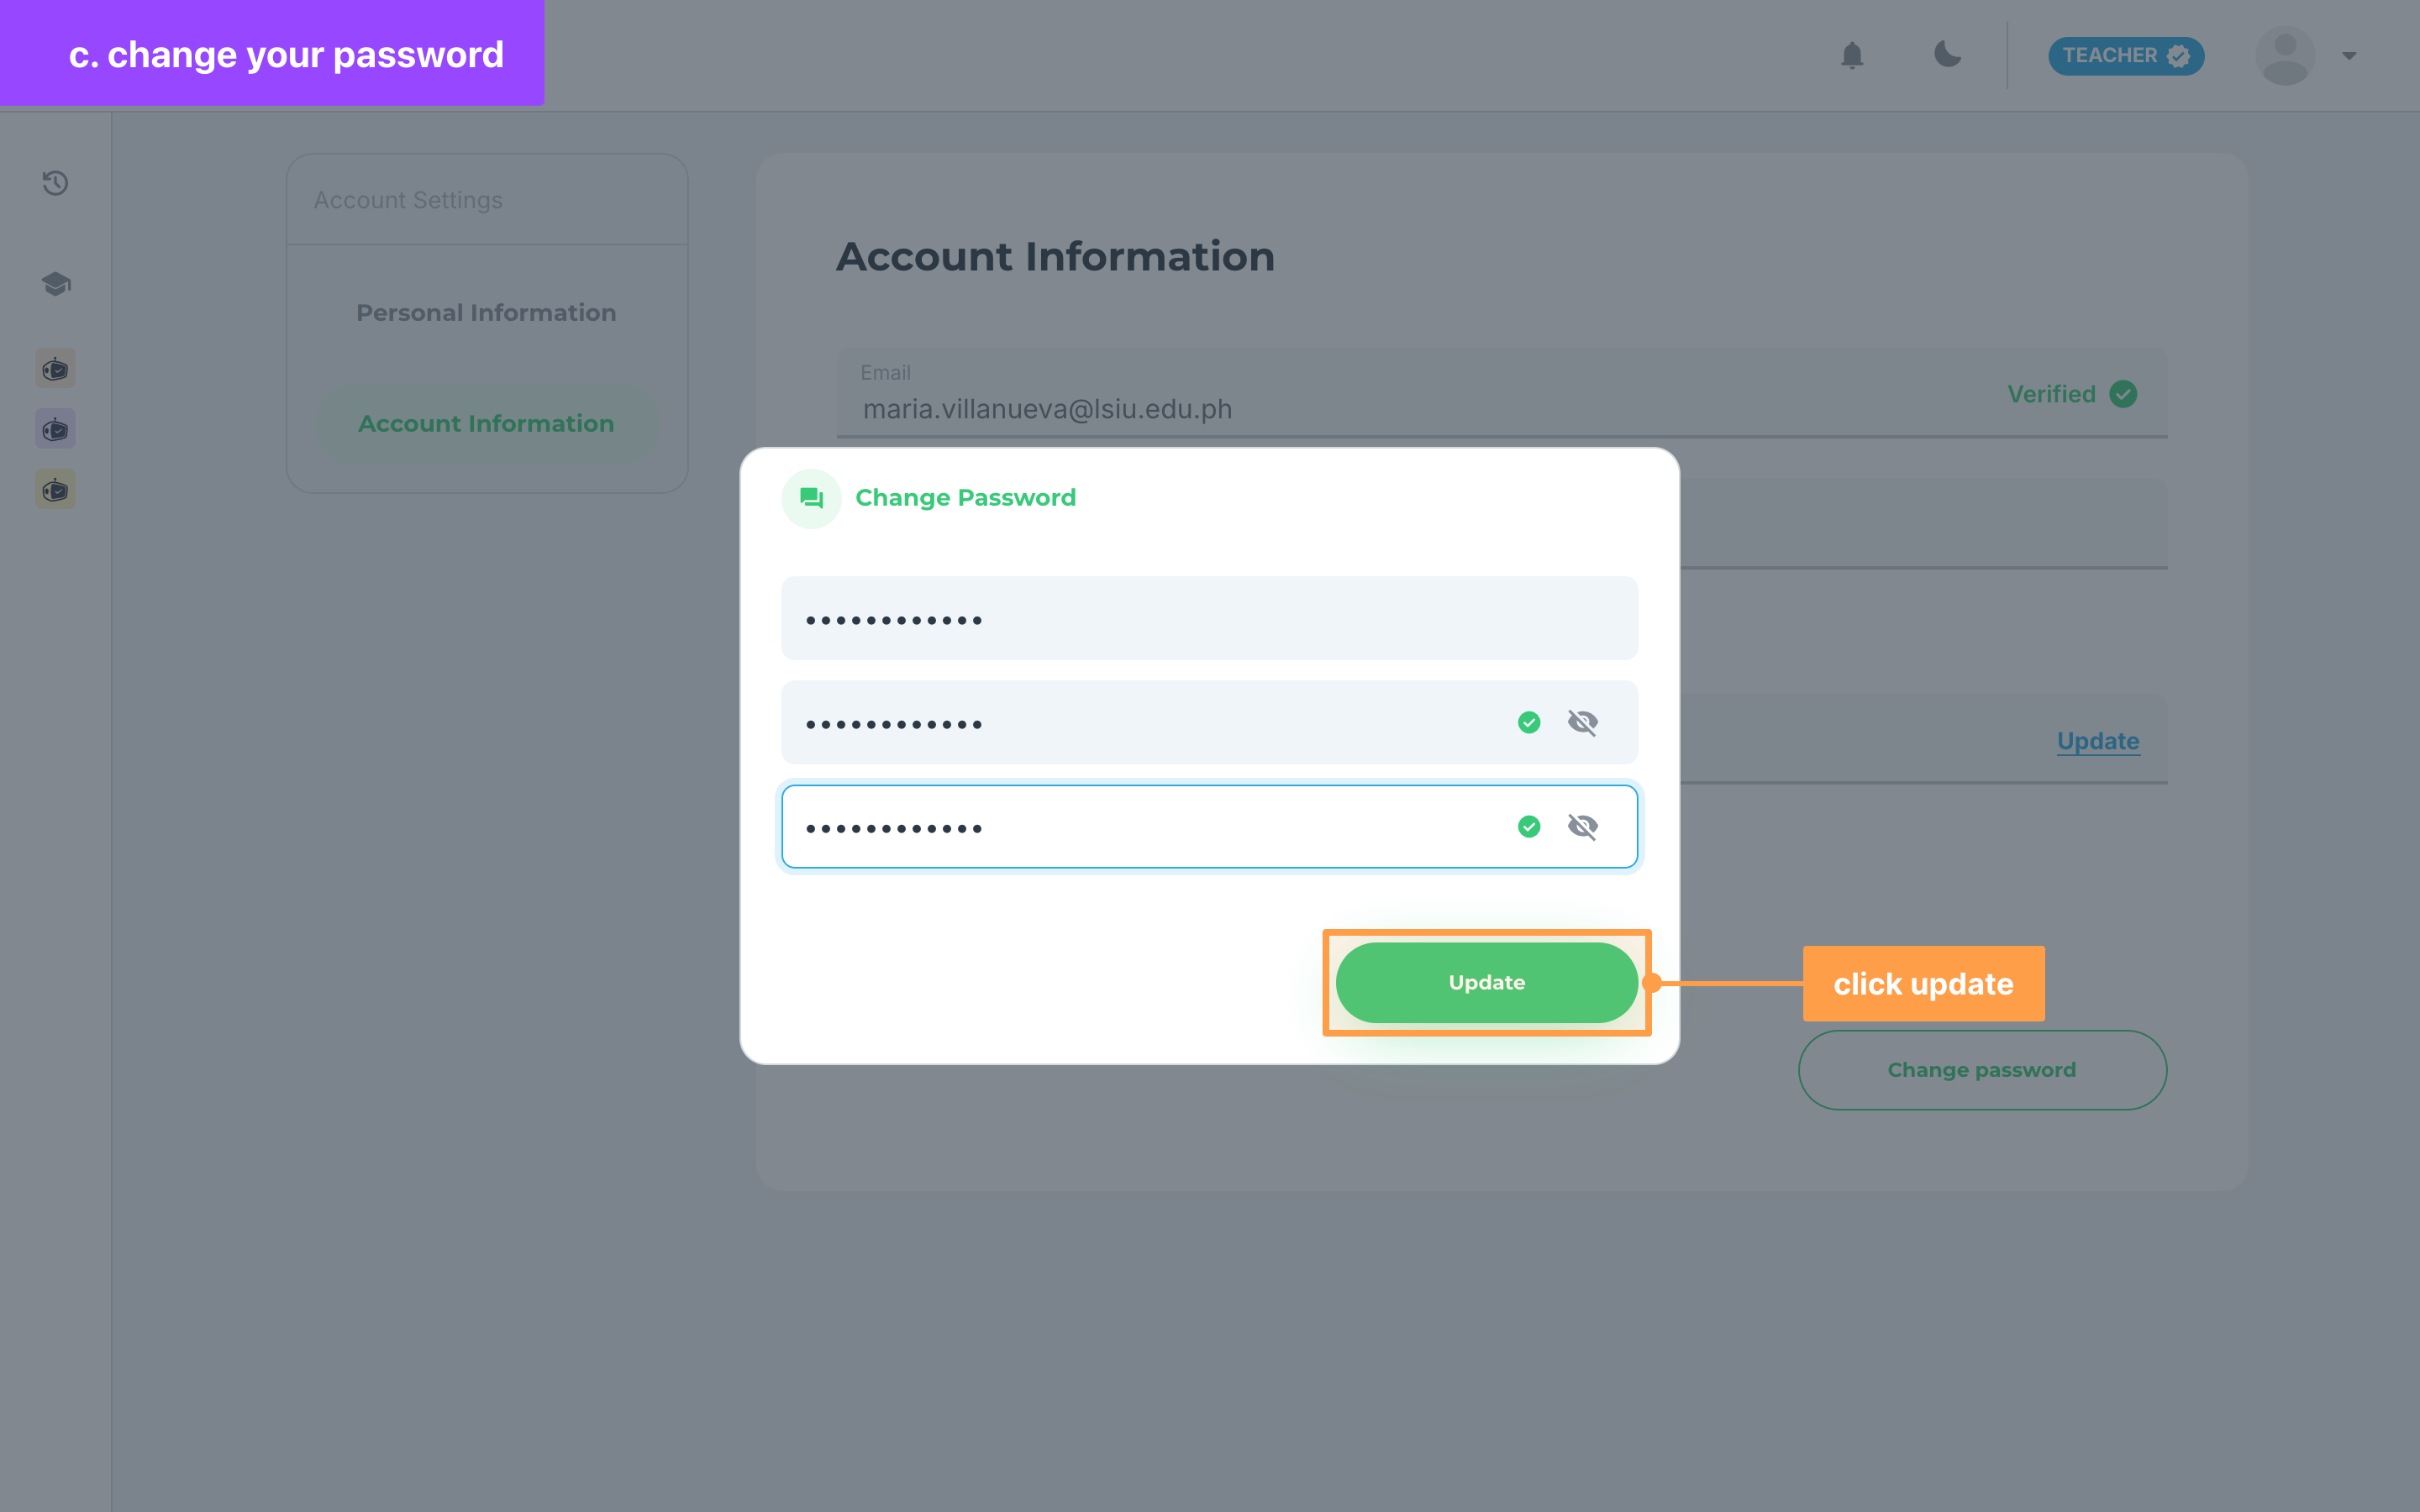
Your new password must be at least 8 characters long and at most 30, with at least 1 special character, 1 uppercase character, 1 lowercase character and 1 number. The icon in the New password field turns into a green check once every rule is met.
- Finally, click Update. The button stays disabled until the new password meets every rule and Confirm new password is filled in. Once the modal closes and a green "Password updated successfully" message shows, use your new password the next time you log in.
If your password is not accepted
A message under the field tells you what to fix:
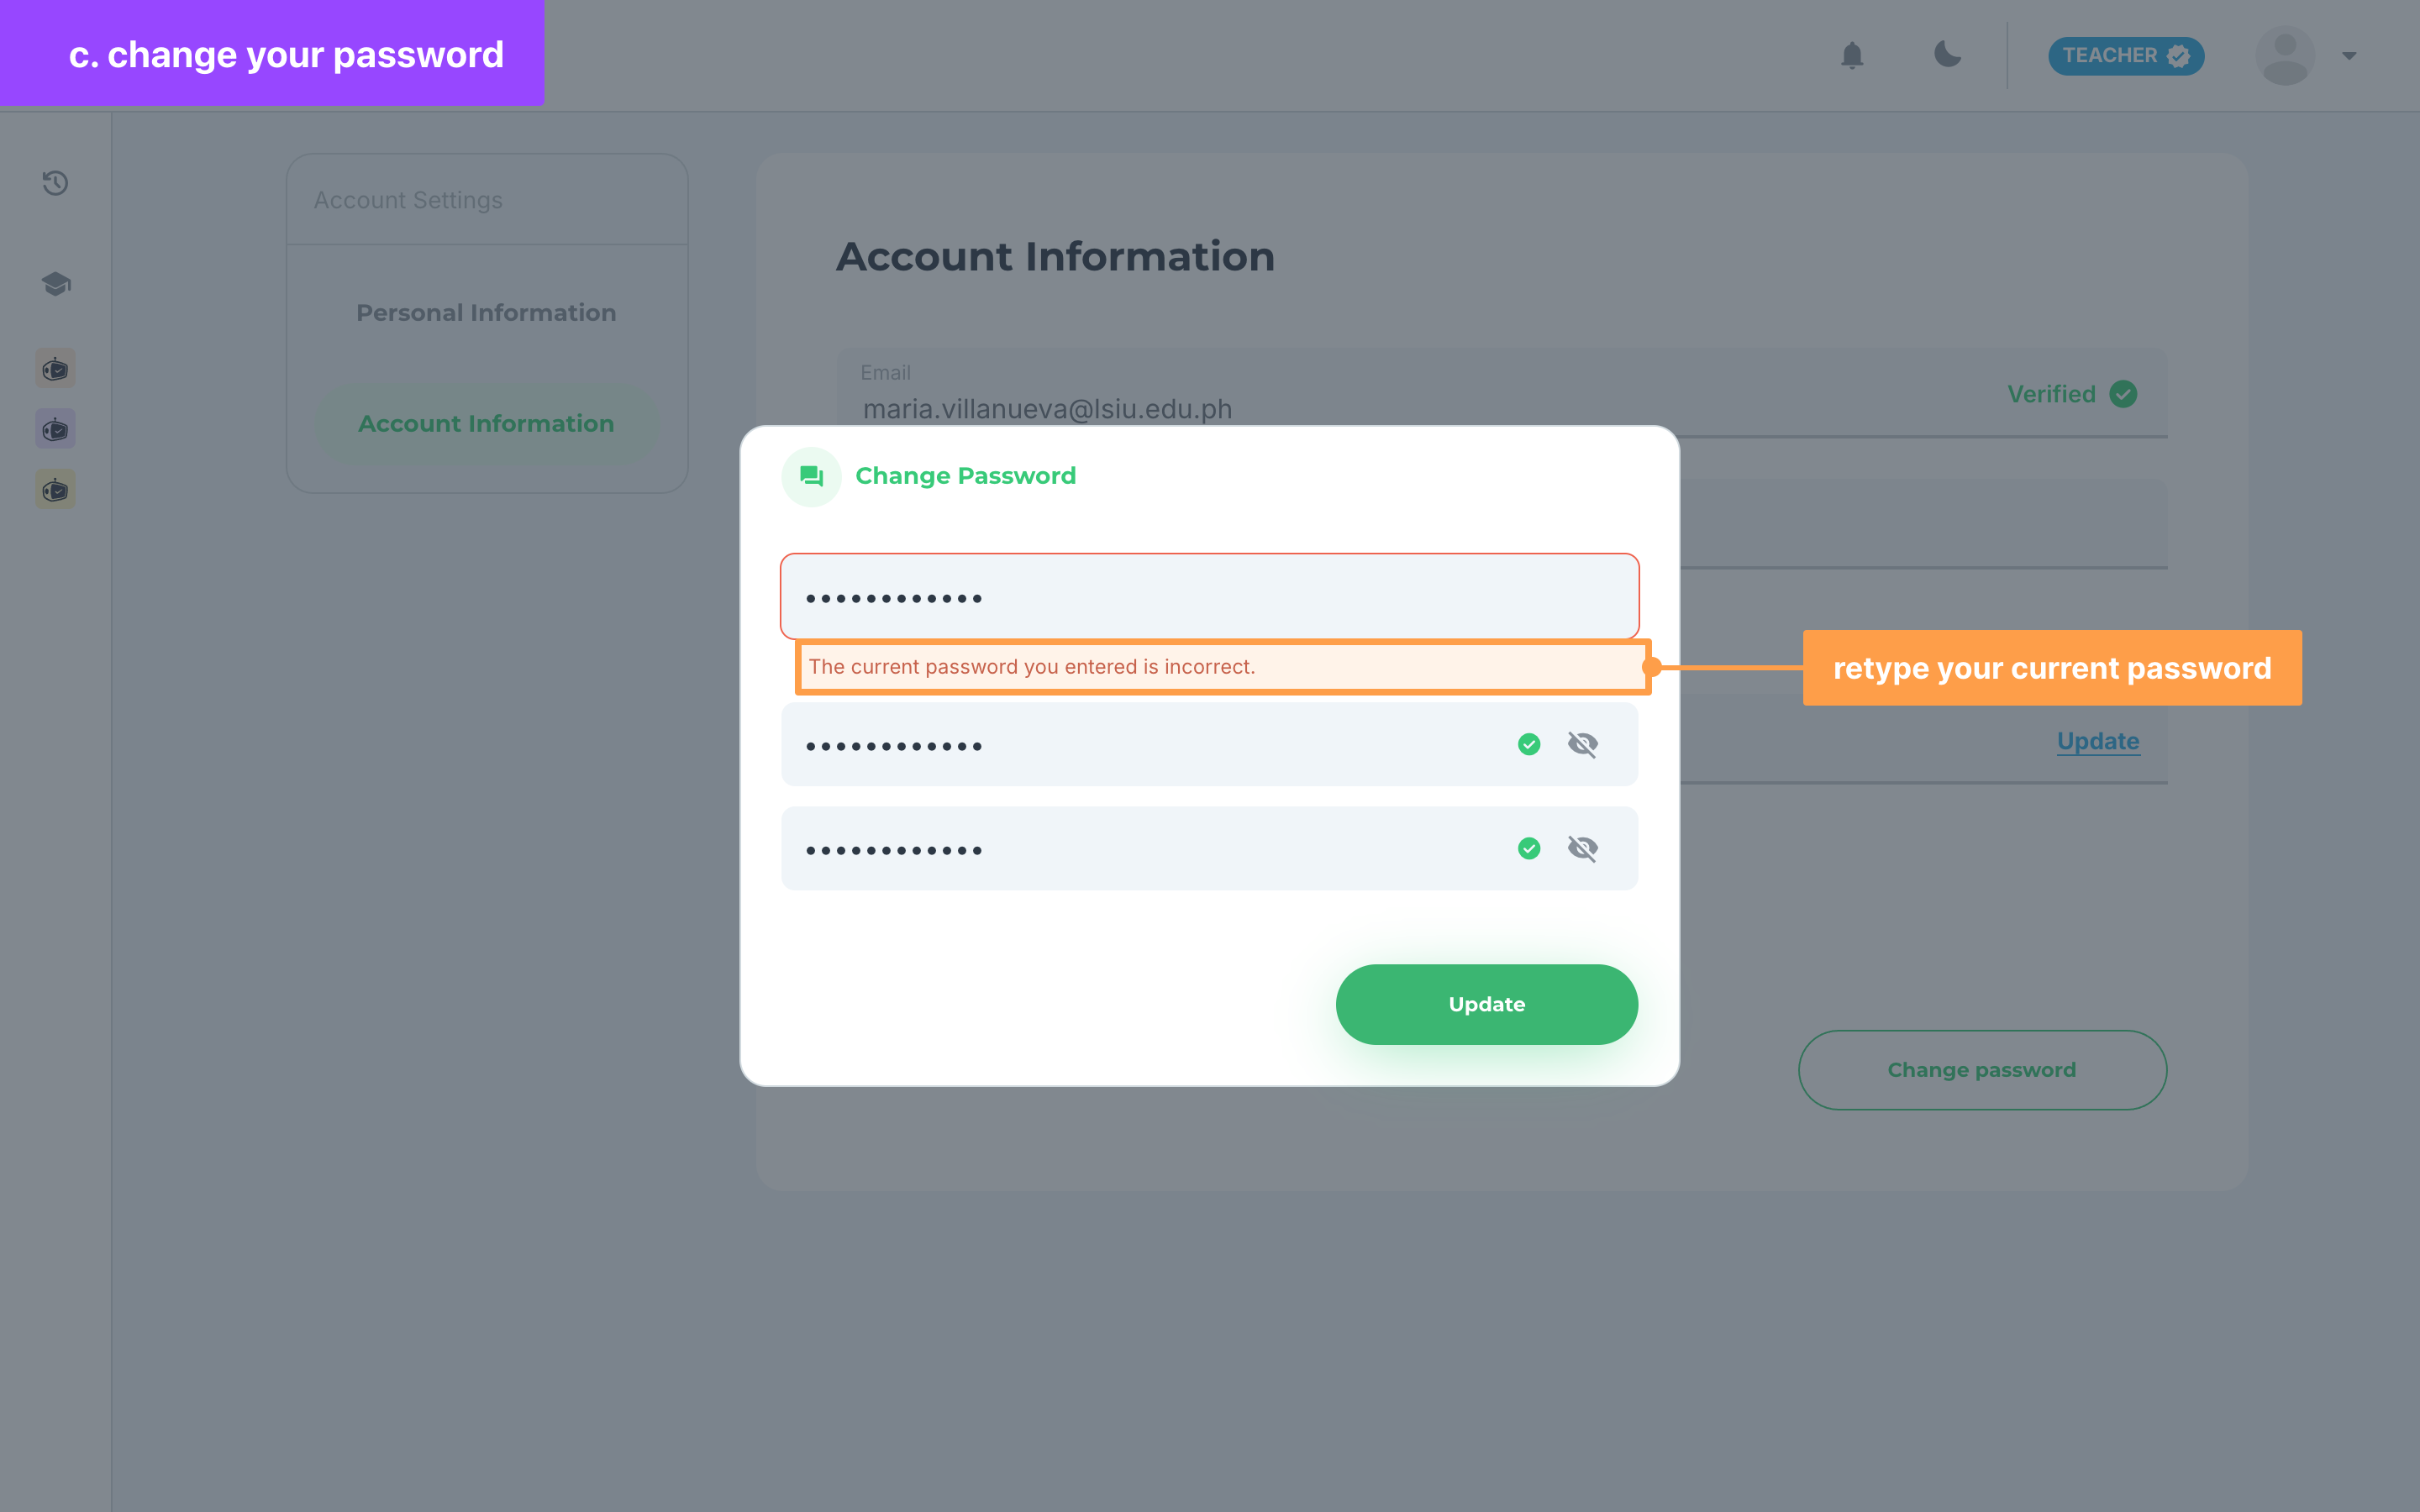
- "The current password you entered is incorrect." means Current password does not match the password you log in with now. Type it again. If you no longer know it, log out and click Forgot password? on the login page.
- "This must match with your new password." means Confirm new password is not the same as New password.
- "This must be less than or equal to 30 characters." means your new password is too long.
- "Current password is required.", "New password is required." and "Confirm new password is required." mean that field is empty.
The Verified Teacher badge
The tag beside your photo in the navigation bar says TEACHER. When GradeChum has verified your teacher account, a small badge shows next to it, and hovering over the badge shows Verified Teacher.
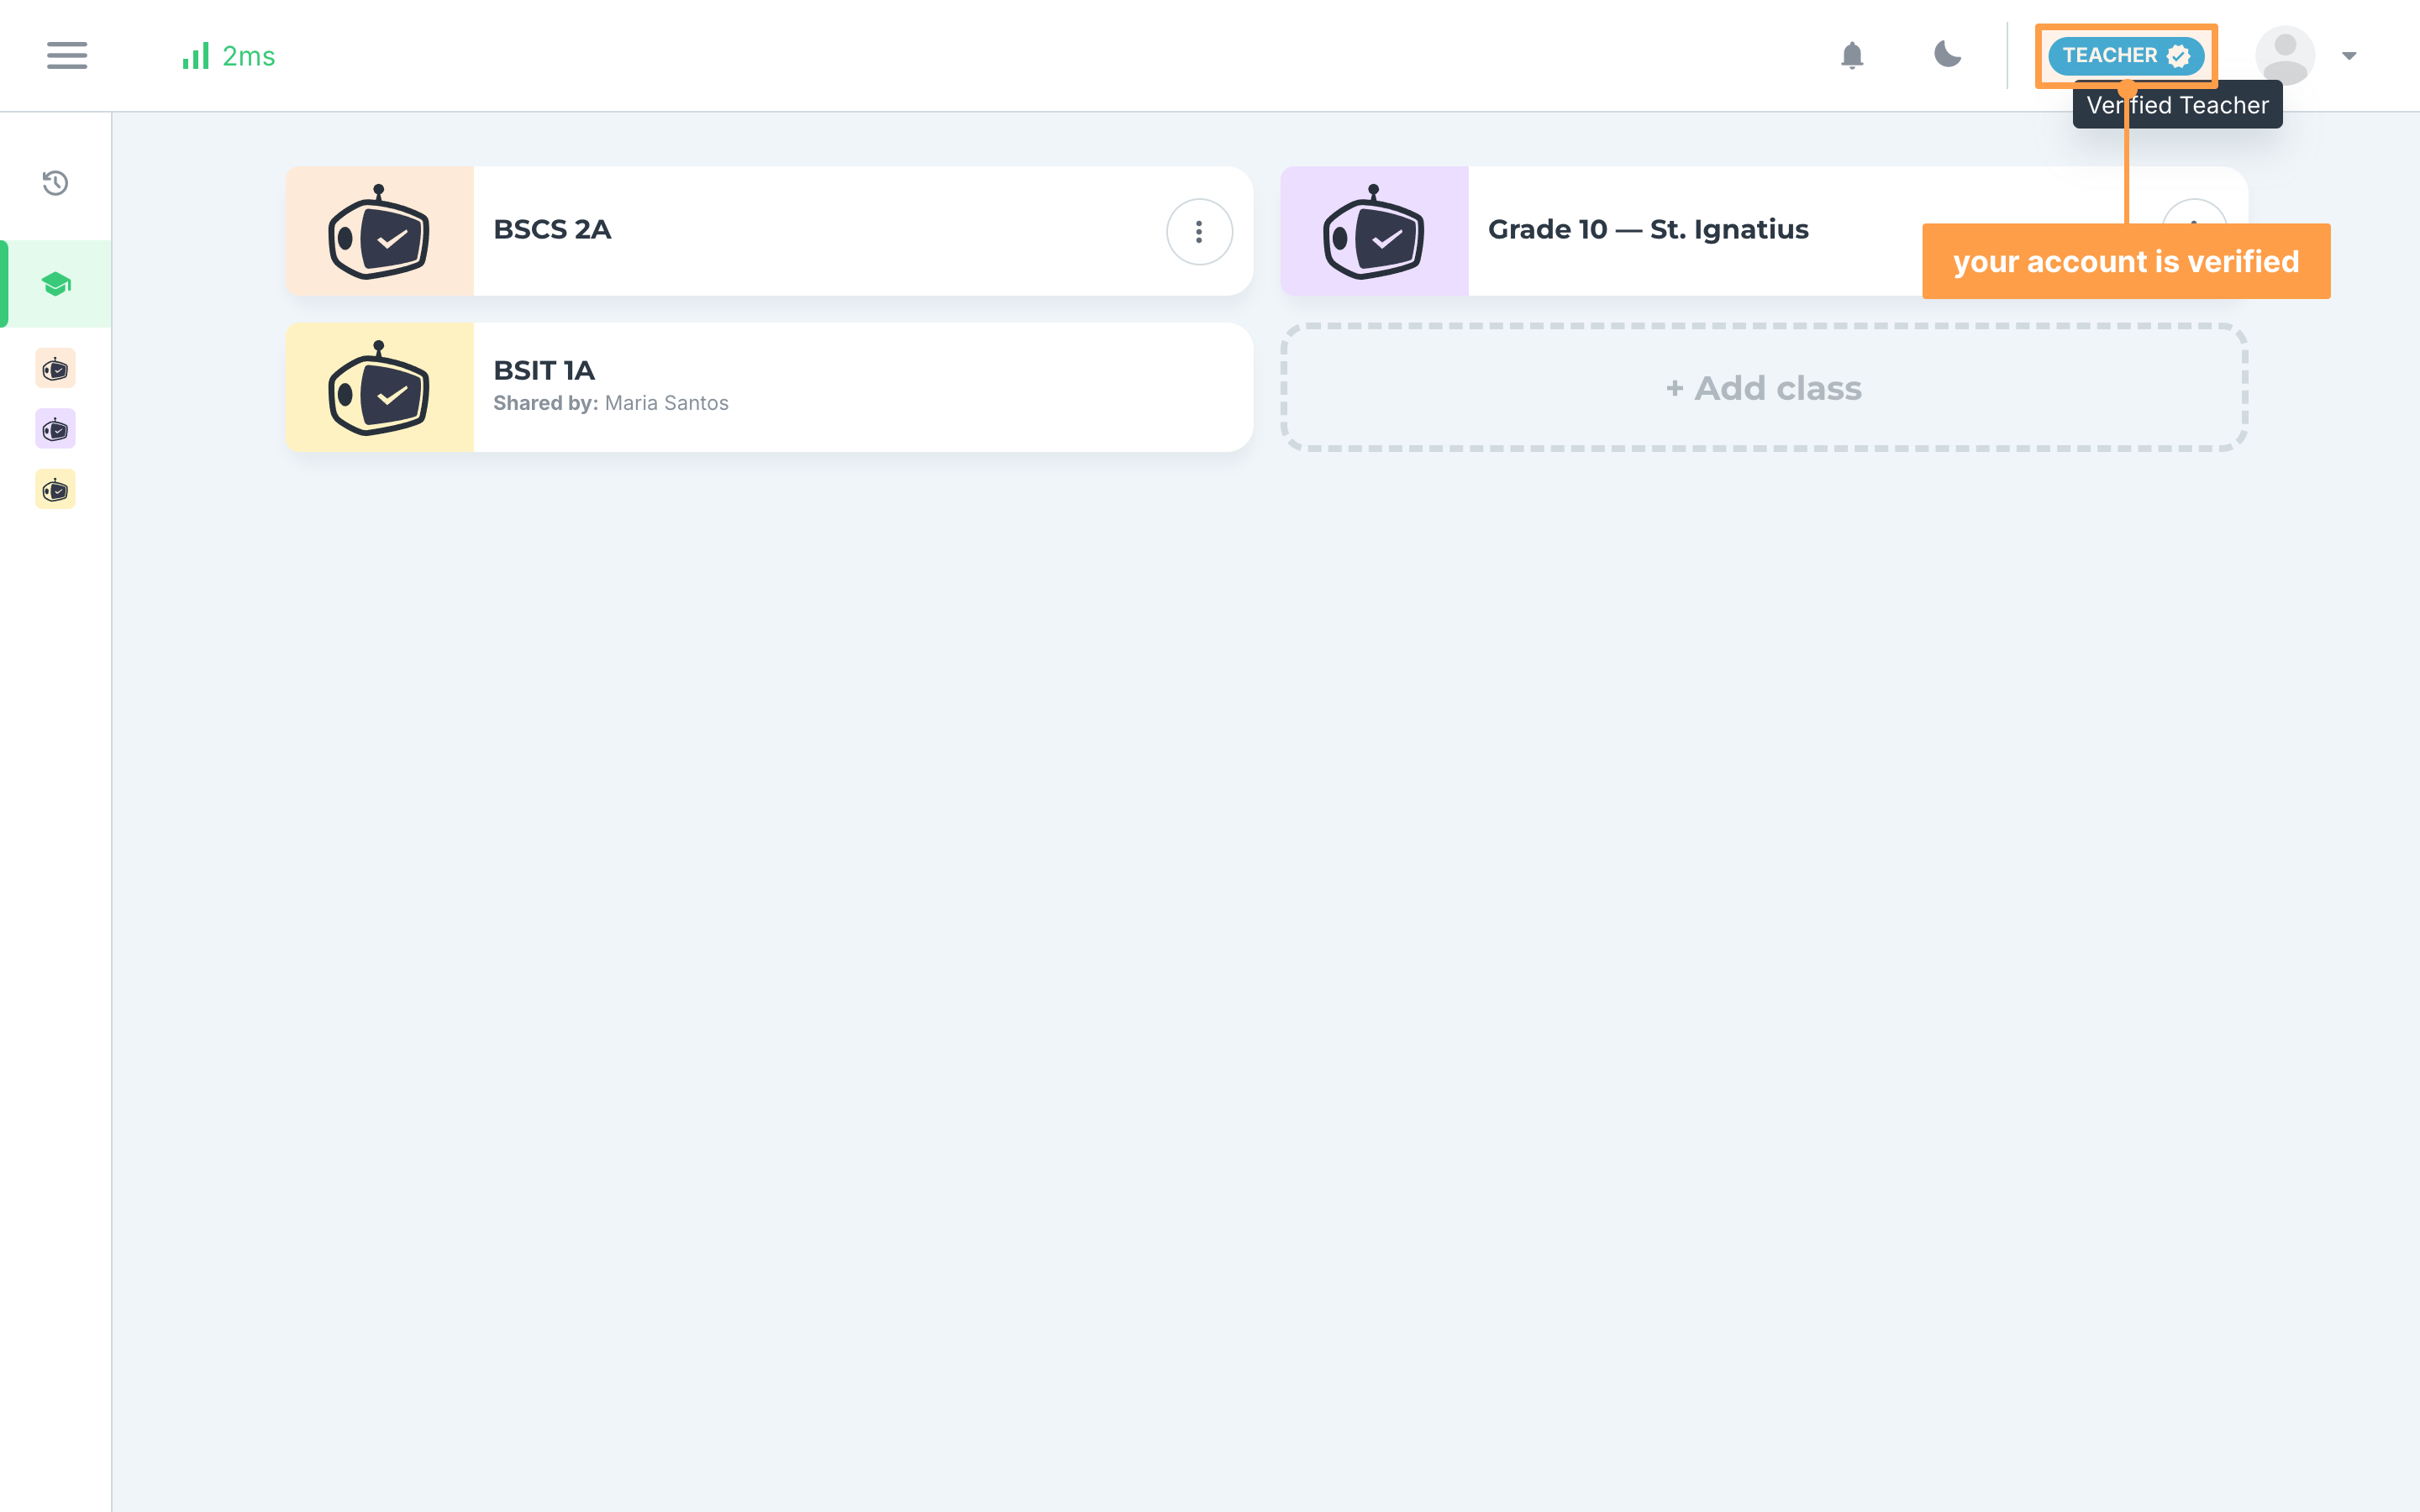
GradeChum verifies teacher accounts on its side, so there is nothing to click in the app to get the badge. Without it, you use GradeChum as usual. If you think your account should be verified, email us at info@gradechum.com. Once your account is verified, the badge appears within a few seconds, without reloading the page.
Note: The badge is not the same as verifying your phone number. A locked option that asks you to verify your phone number is unlocked from Contact number on Account Information, not by the badge.
What depends on your school
The school you chose when you signed up decides some of what GradeChum shows you. There is nothing to set: the options below turn on or off by themselves.
a. Government partner schools
Government partner schools use GradeChum with paper activities only, so GradeChum hides what they do not use:
- When you create an activity, there is no step to choose an activity type. Every activity is handwritten.
- Your class has no Class code card, and the Class Record has no Has Joined Class column.
- Results Sharing Options offers only QR result sheets, and opens every time you release the results of an activity.
- The Board exam display format is not offered for the shading items on the answer sheet.
b. Schools with a school license
With a school license, you can share a class with another teacher, and opening the results of your activities does not use activity credits. When you log in, GradeChum takes you to your school's own GradeChum address, with your school's logo in the navigation bar. On an iPhone, an iPad or Safari, you stay on the address you logged in on. See Share a class with another teacher and Sign up and log in.
c. Accounts without a school license
Without a school license, Share Class does not show on your classes, and after your first free check, opening the results of an activity uses activity credits. Some accounts that are not under a GradeChum partner school also have no step to choose an activity type when they create an activity. See Activity credits and school licenses.
And that's how you manage your account in GradeChum! Next, let's learn about getting around GradeChum.