
Linked classes
Introduction
If you teach the same subject to several classes, you often give each class the same quiz or exam. Instead of building the activity again in every class, you can create it once and have copies made for your other classes.
The copies stay linked, so a change you make to the activity applies to all of its classes. Each linked class still needs its own students before its results can show. In this section, let's explore how to create copies of an activity for your other classes.
Steps
Note: You must have already created the classes you want to link. See Create a class.
To put one activity in several classes, follow these steps:
- Go to one of your classes and start a new activity with Create activity > Create new or Reuse old activity, and fill in its steps as usual. See Create new or Reuse.
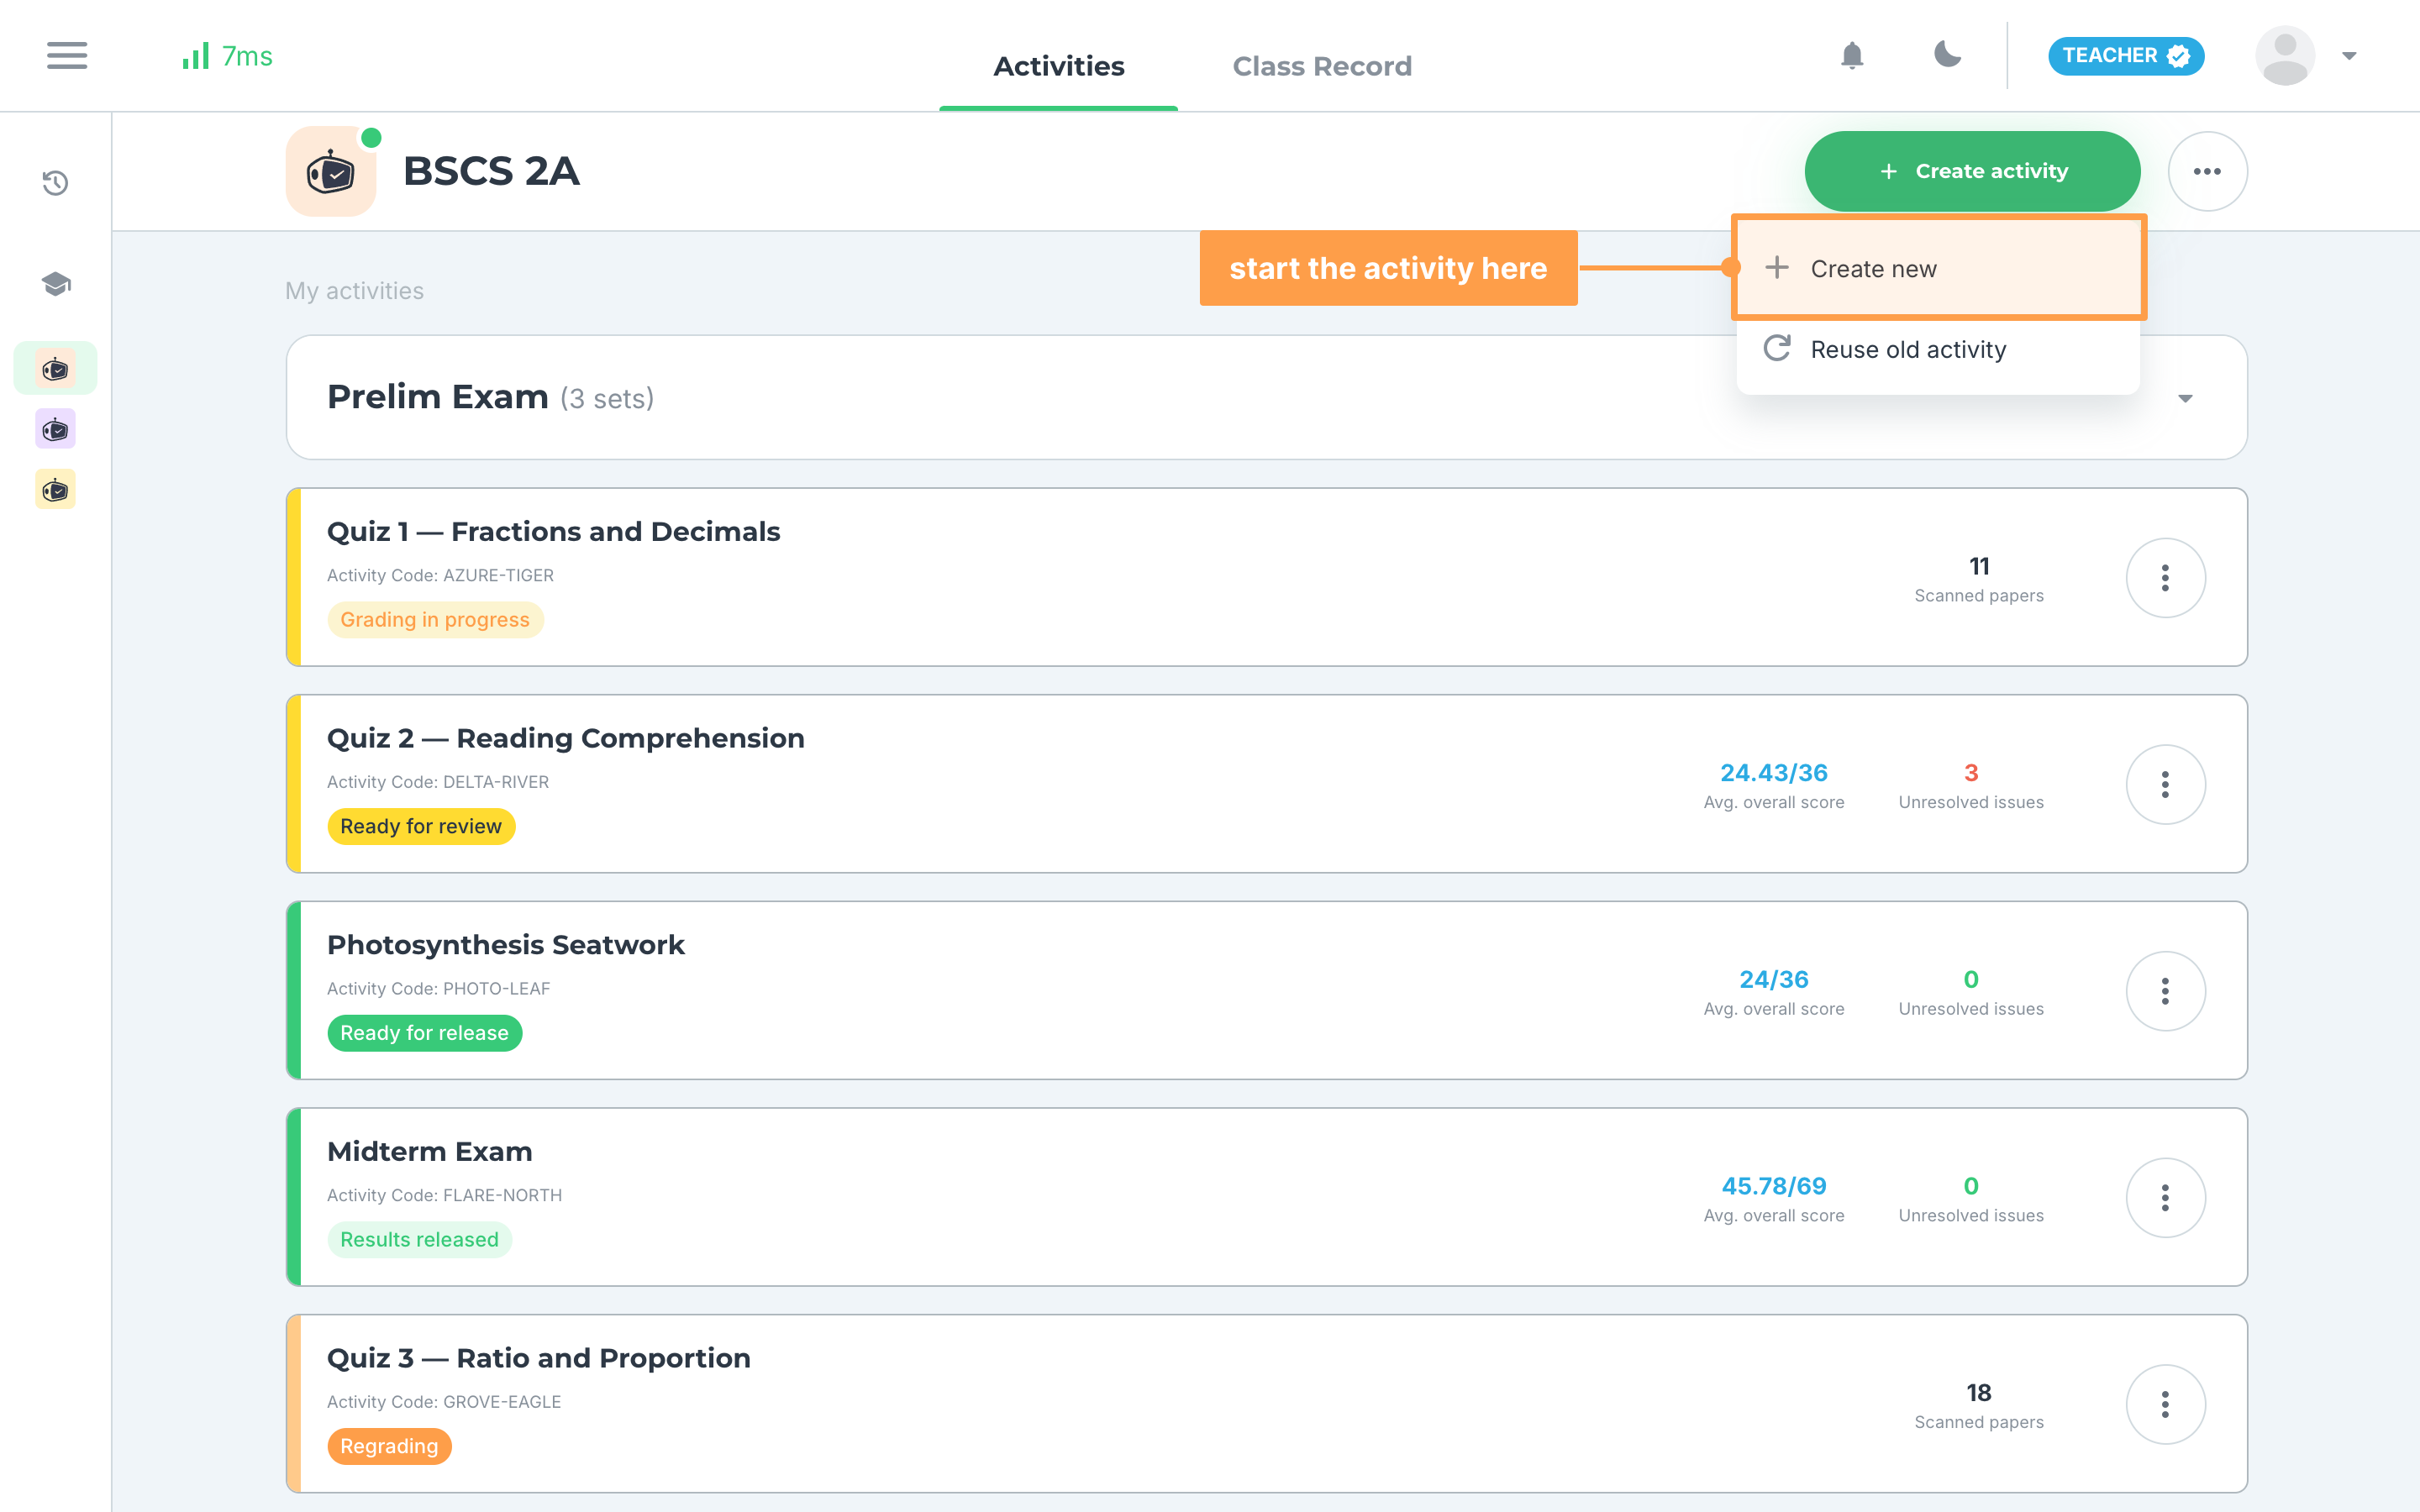
- Scroll to the bottom and click Optional step Create copies for other classes. to open it. For an activity on paper, the same activity and answer sheets are created for each class you select.
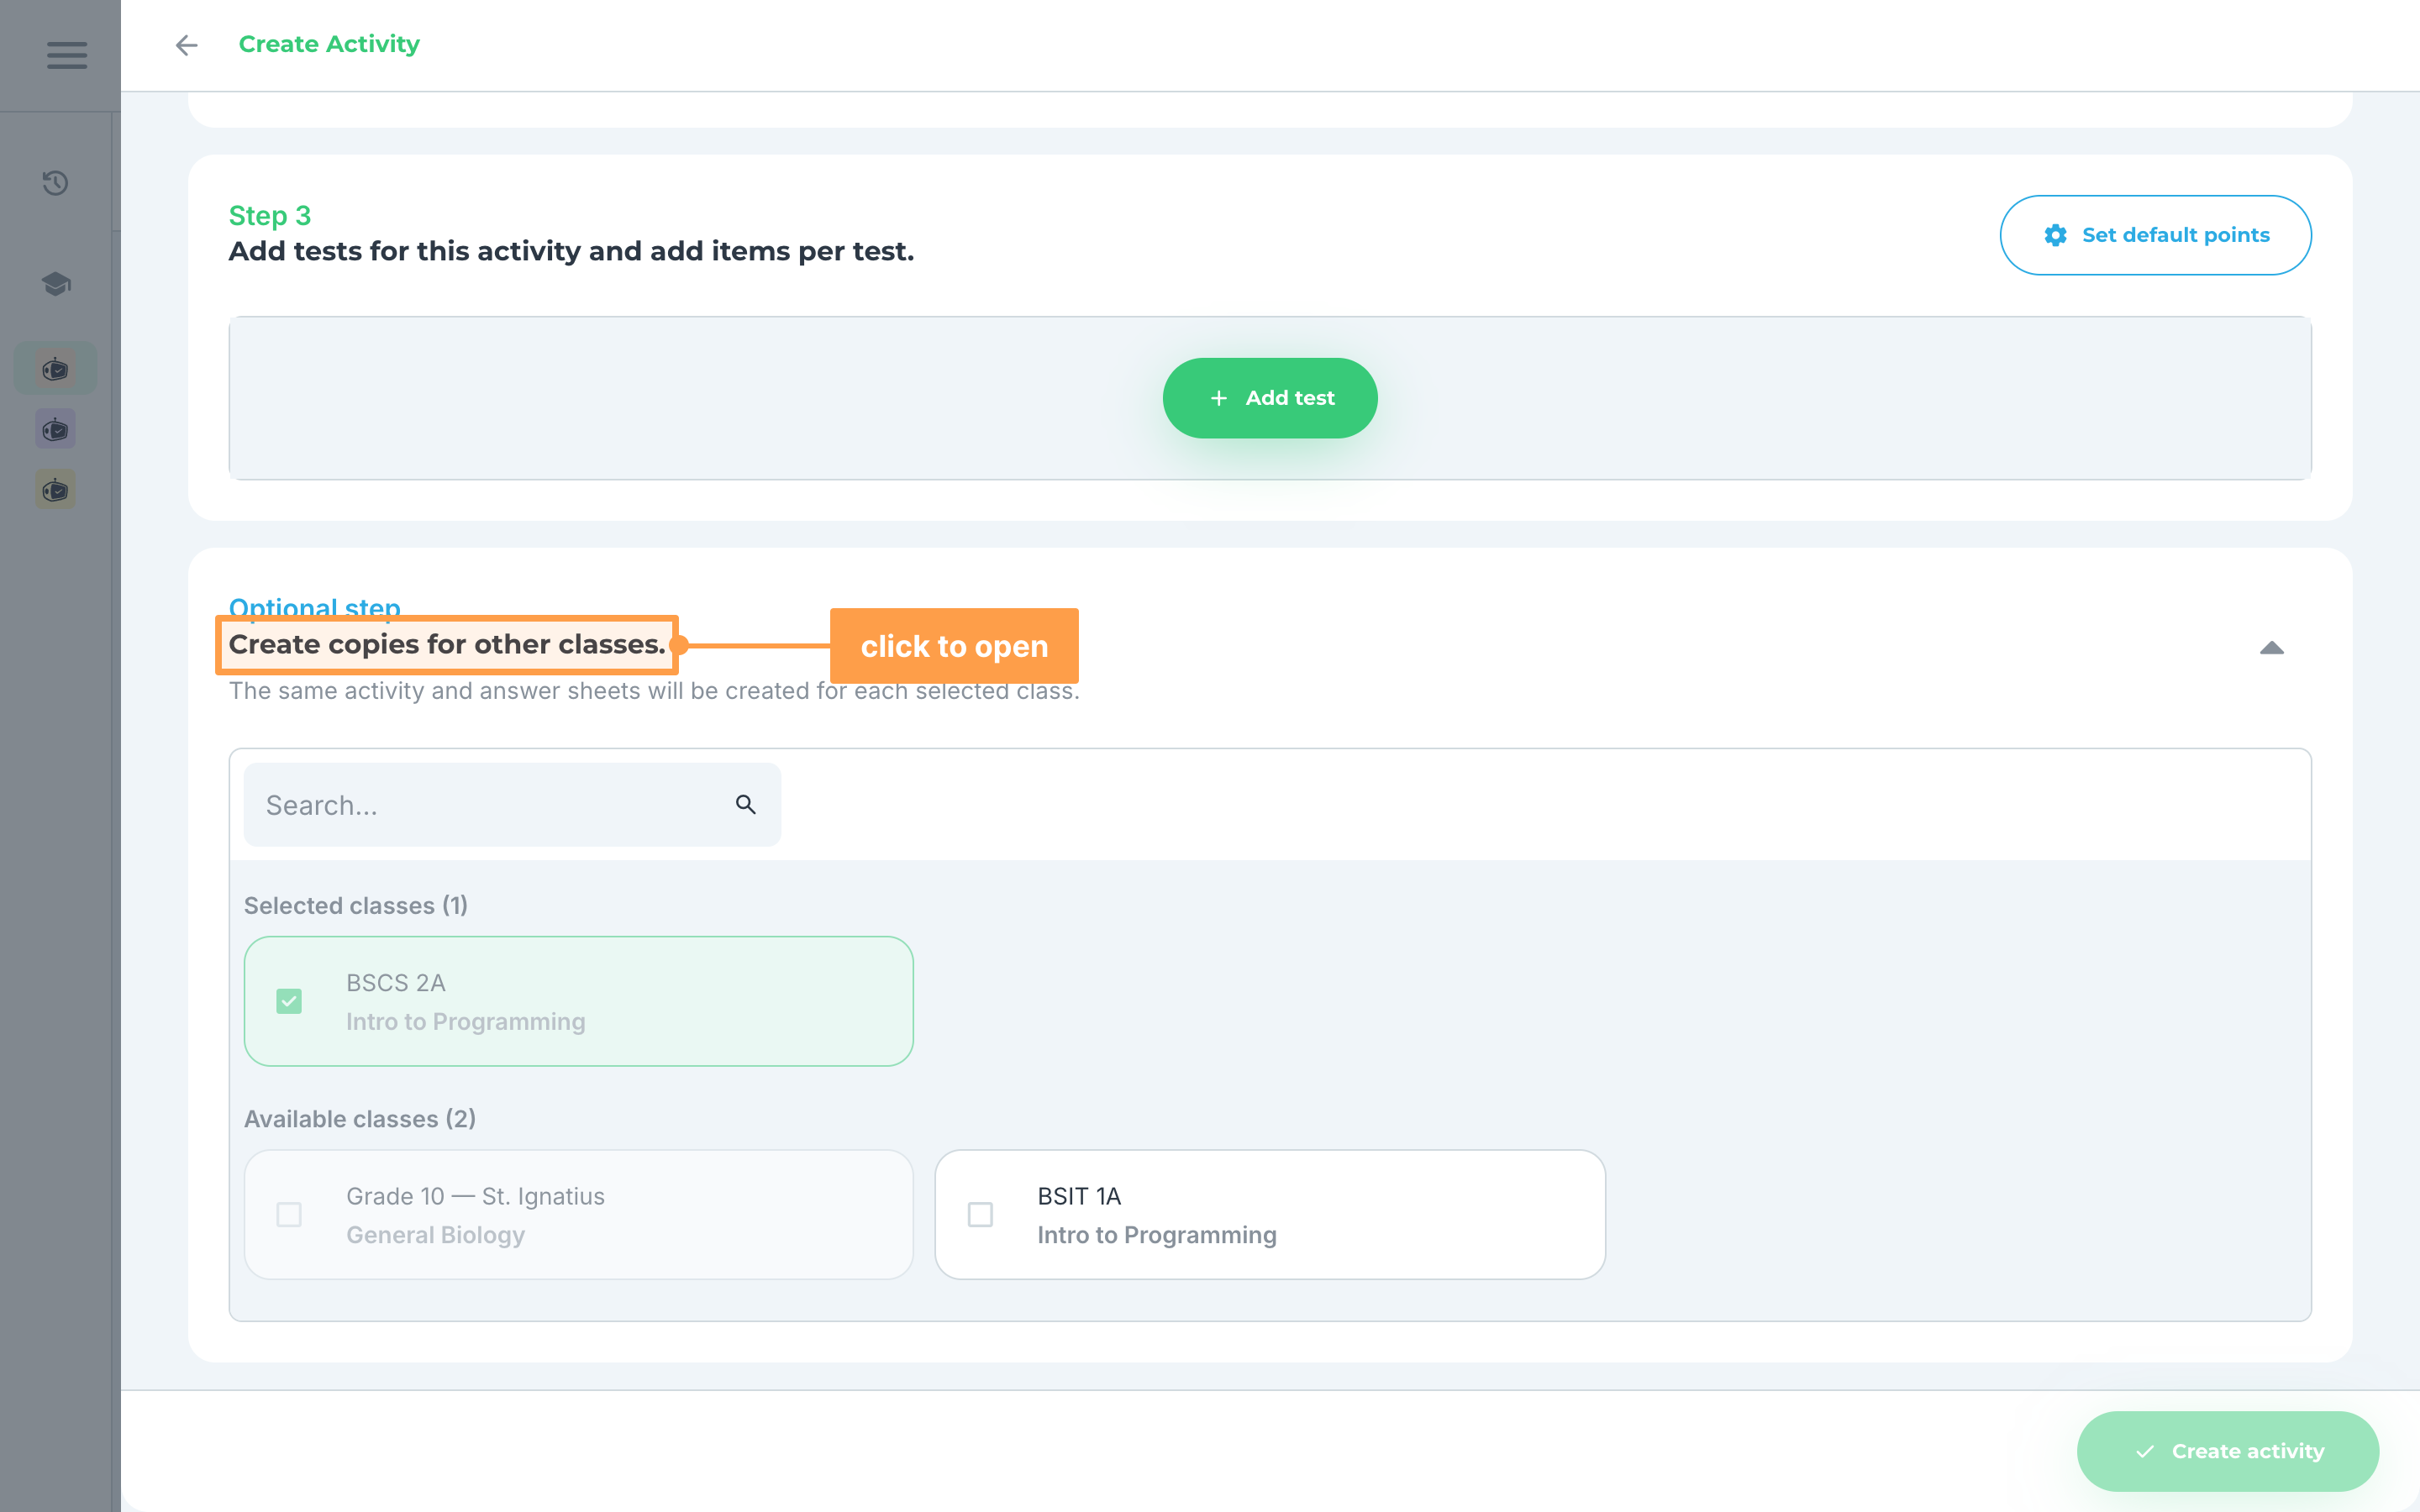
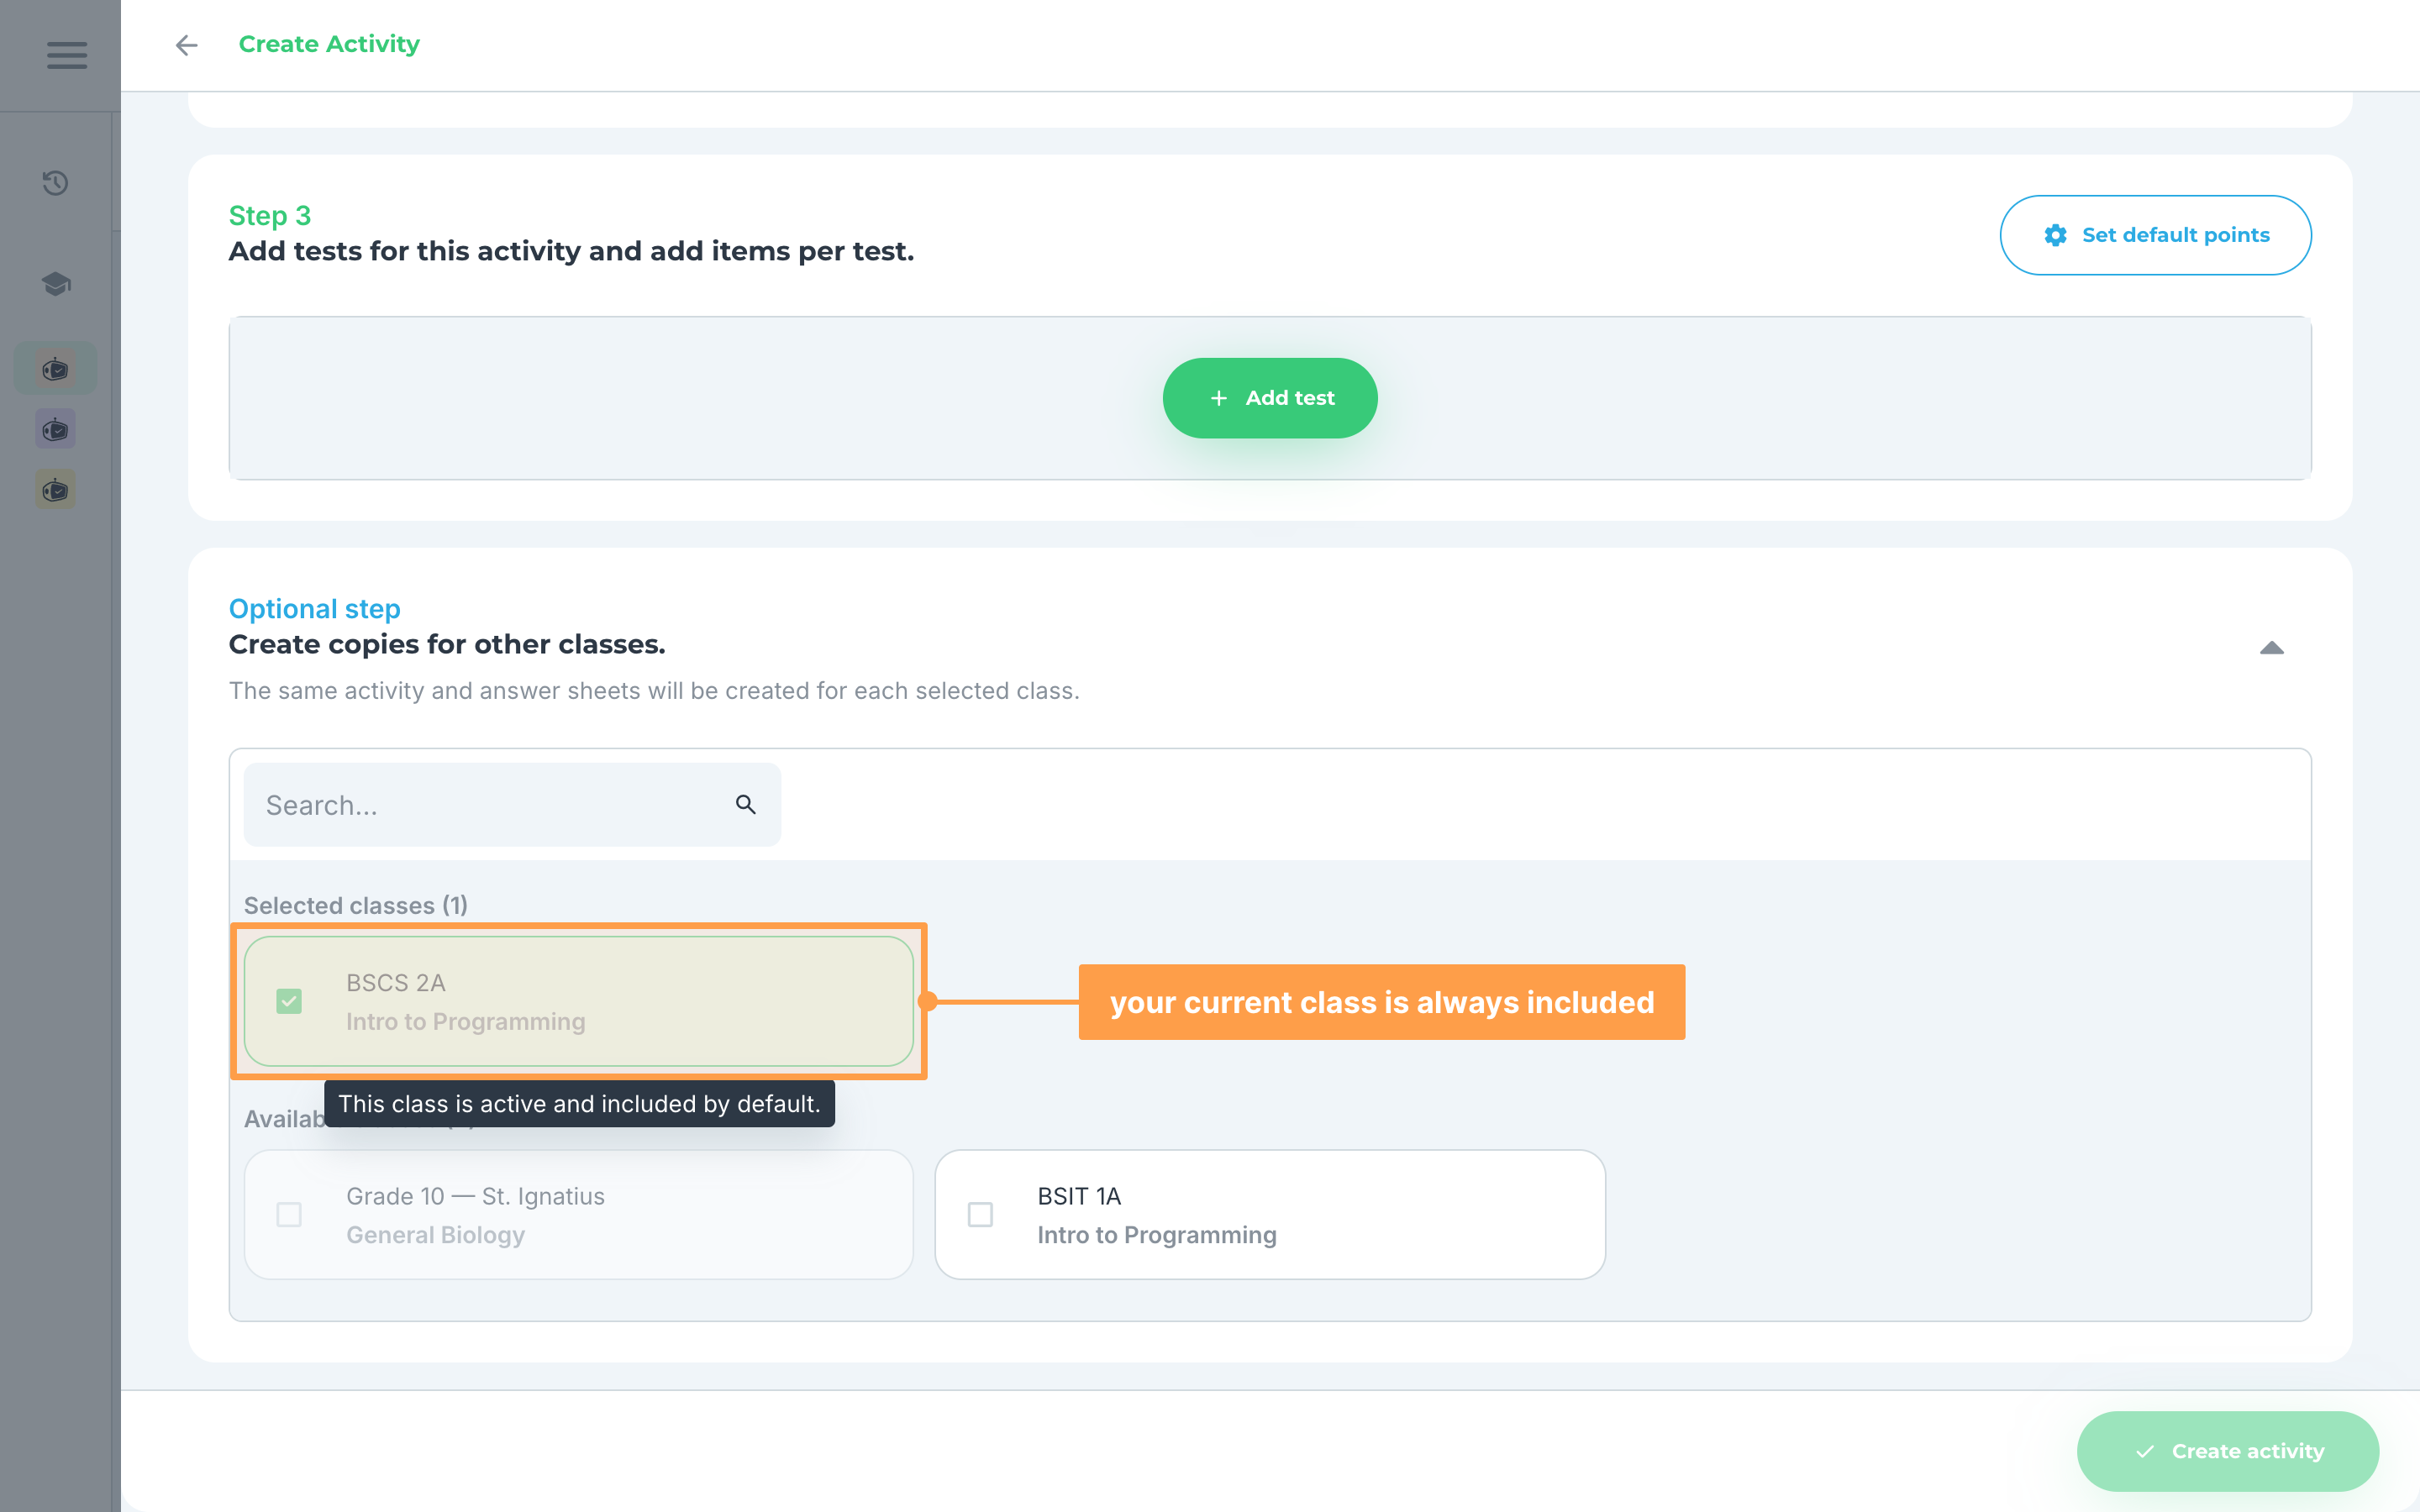
- Your current class is already under Selected classes (1) and cannot be unticked, because the activity is always in it. Hover it to see "This class is active and included by default."
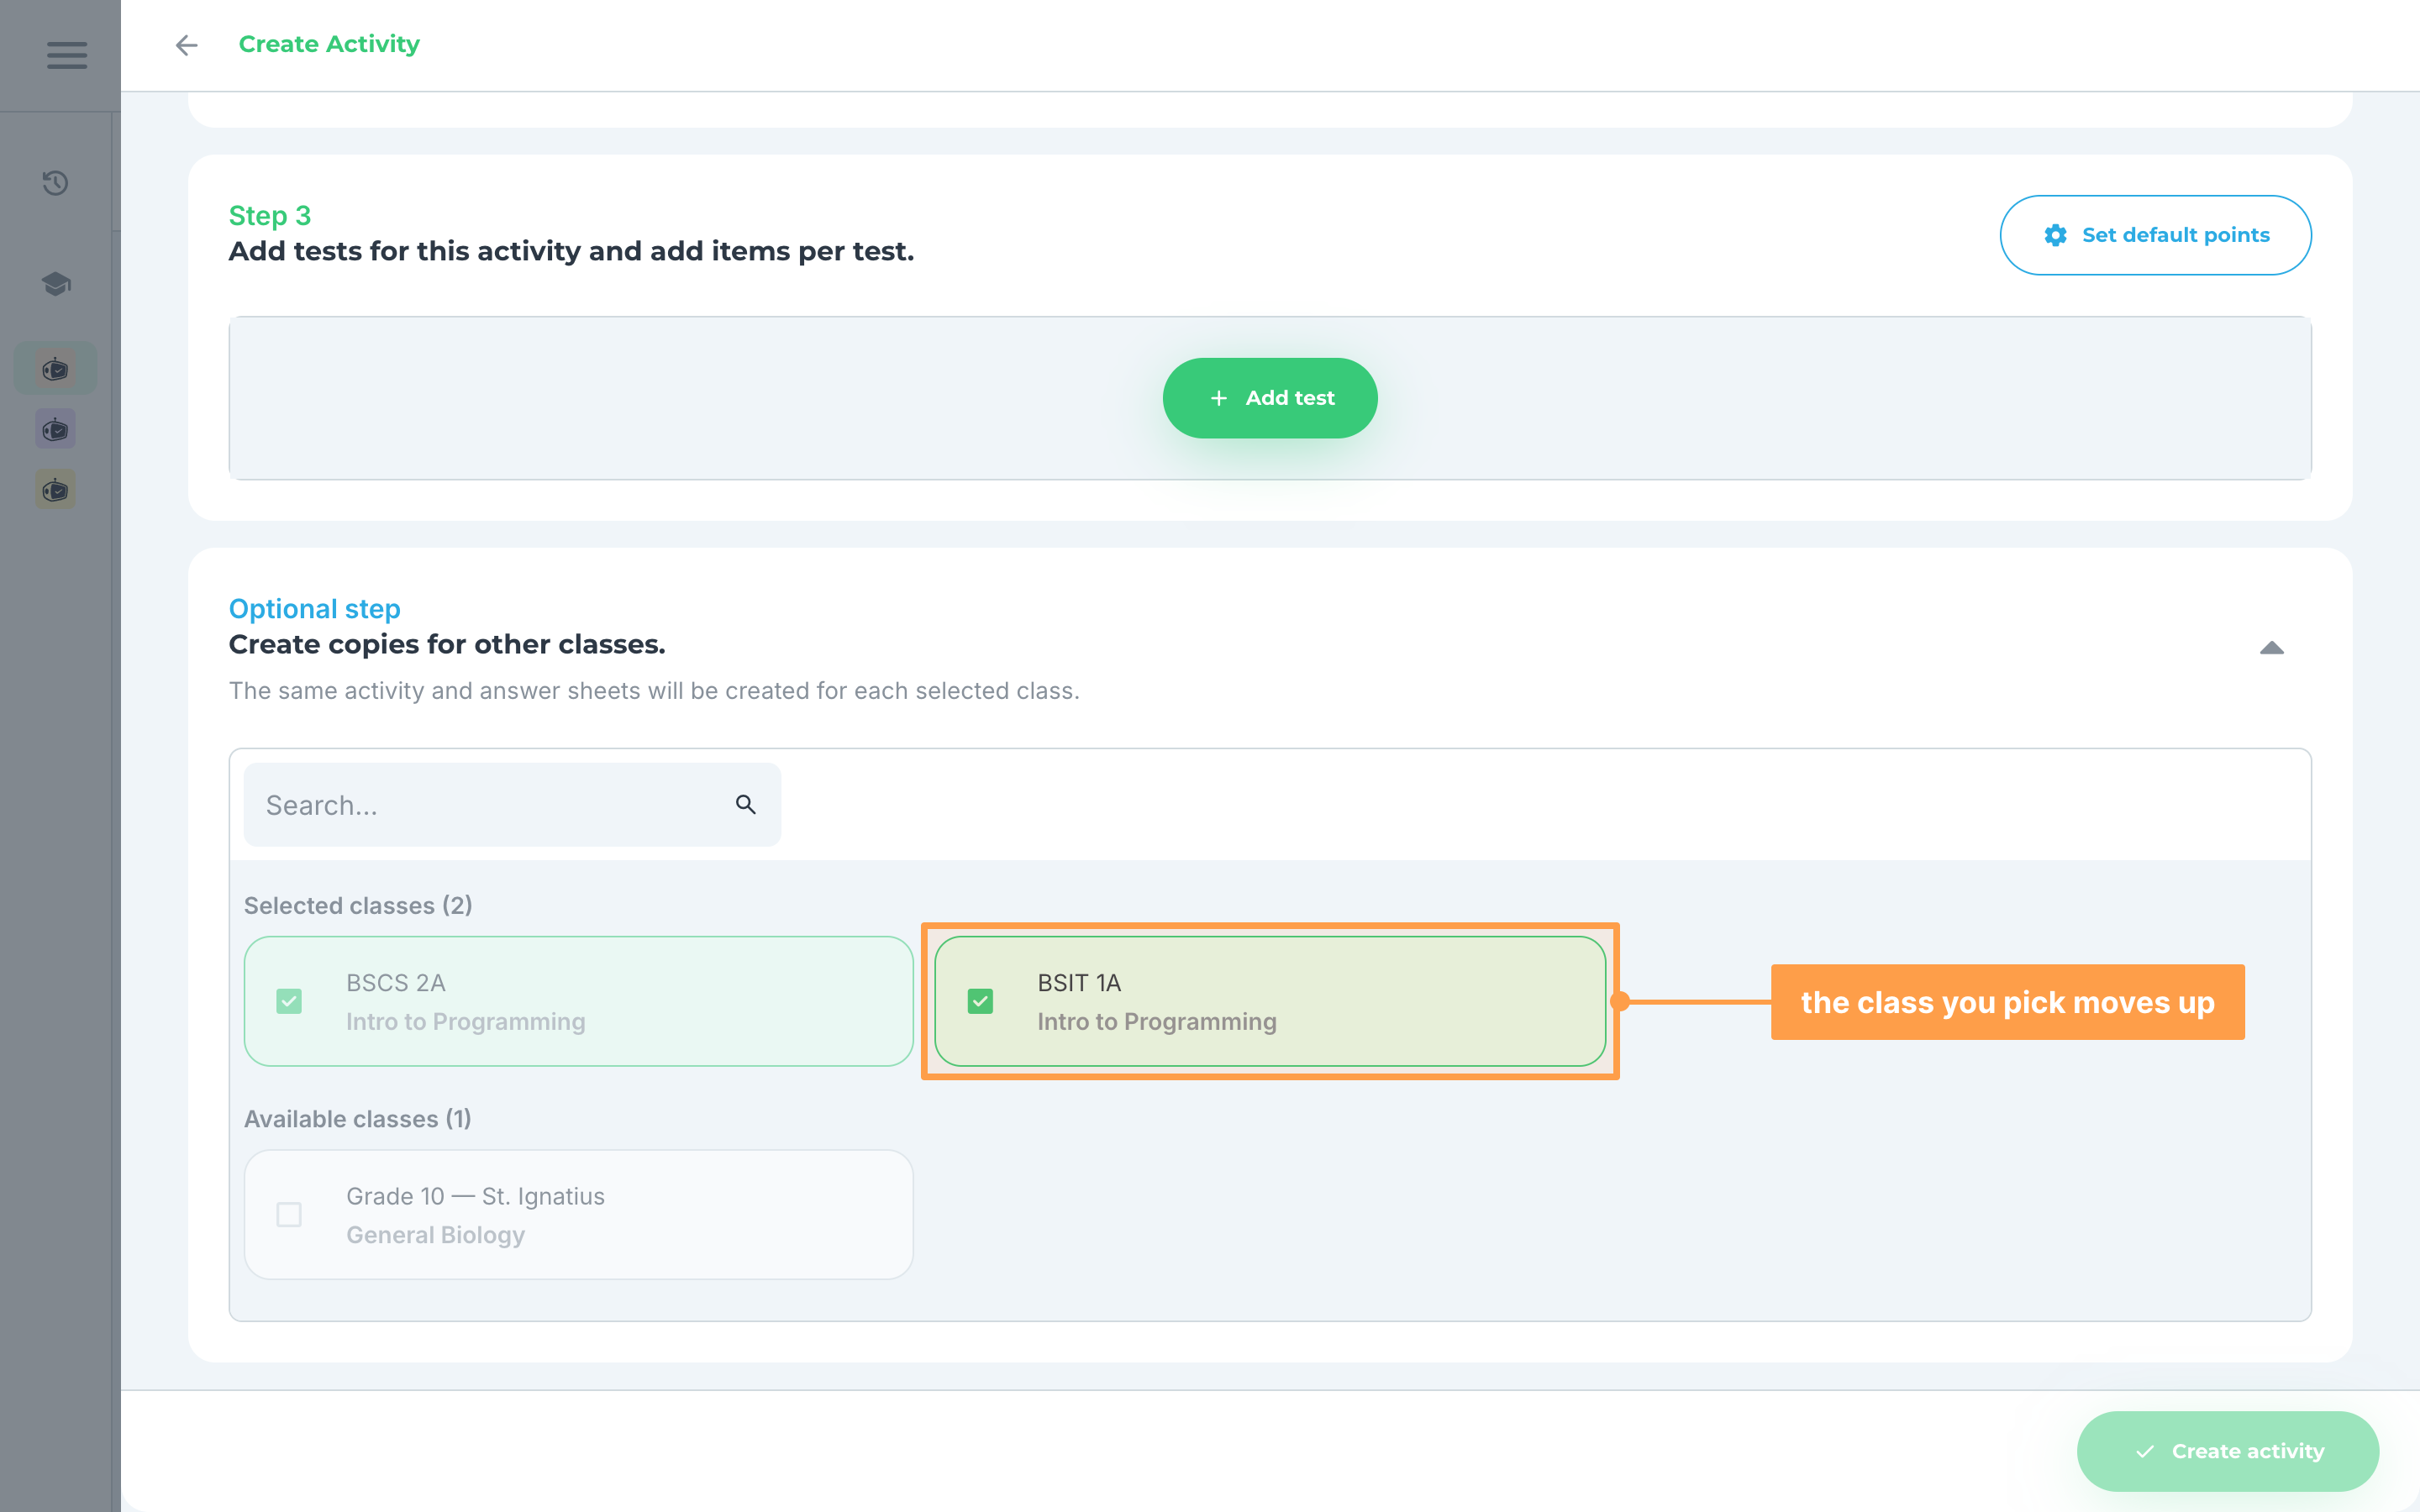
- Under Available classes, click each class you want to add. Each class shows its course name. Type in Search... to find a class, and scroll down to load more. The classes you pick move to Selected classes. Click a picked class again to remove it.
-
Click Create activity. If a class you picked has no course yet, Assign a course to this class? asks first, because linking gives that class this activity's course for good. Click Yes, link and assign to continue, or Go back to change your picks.
-
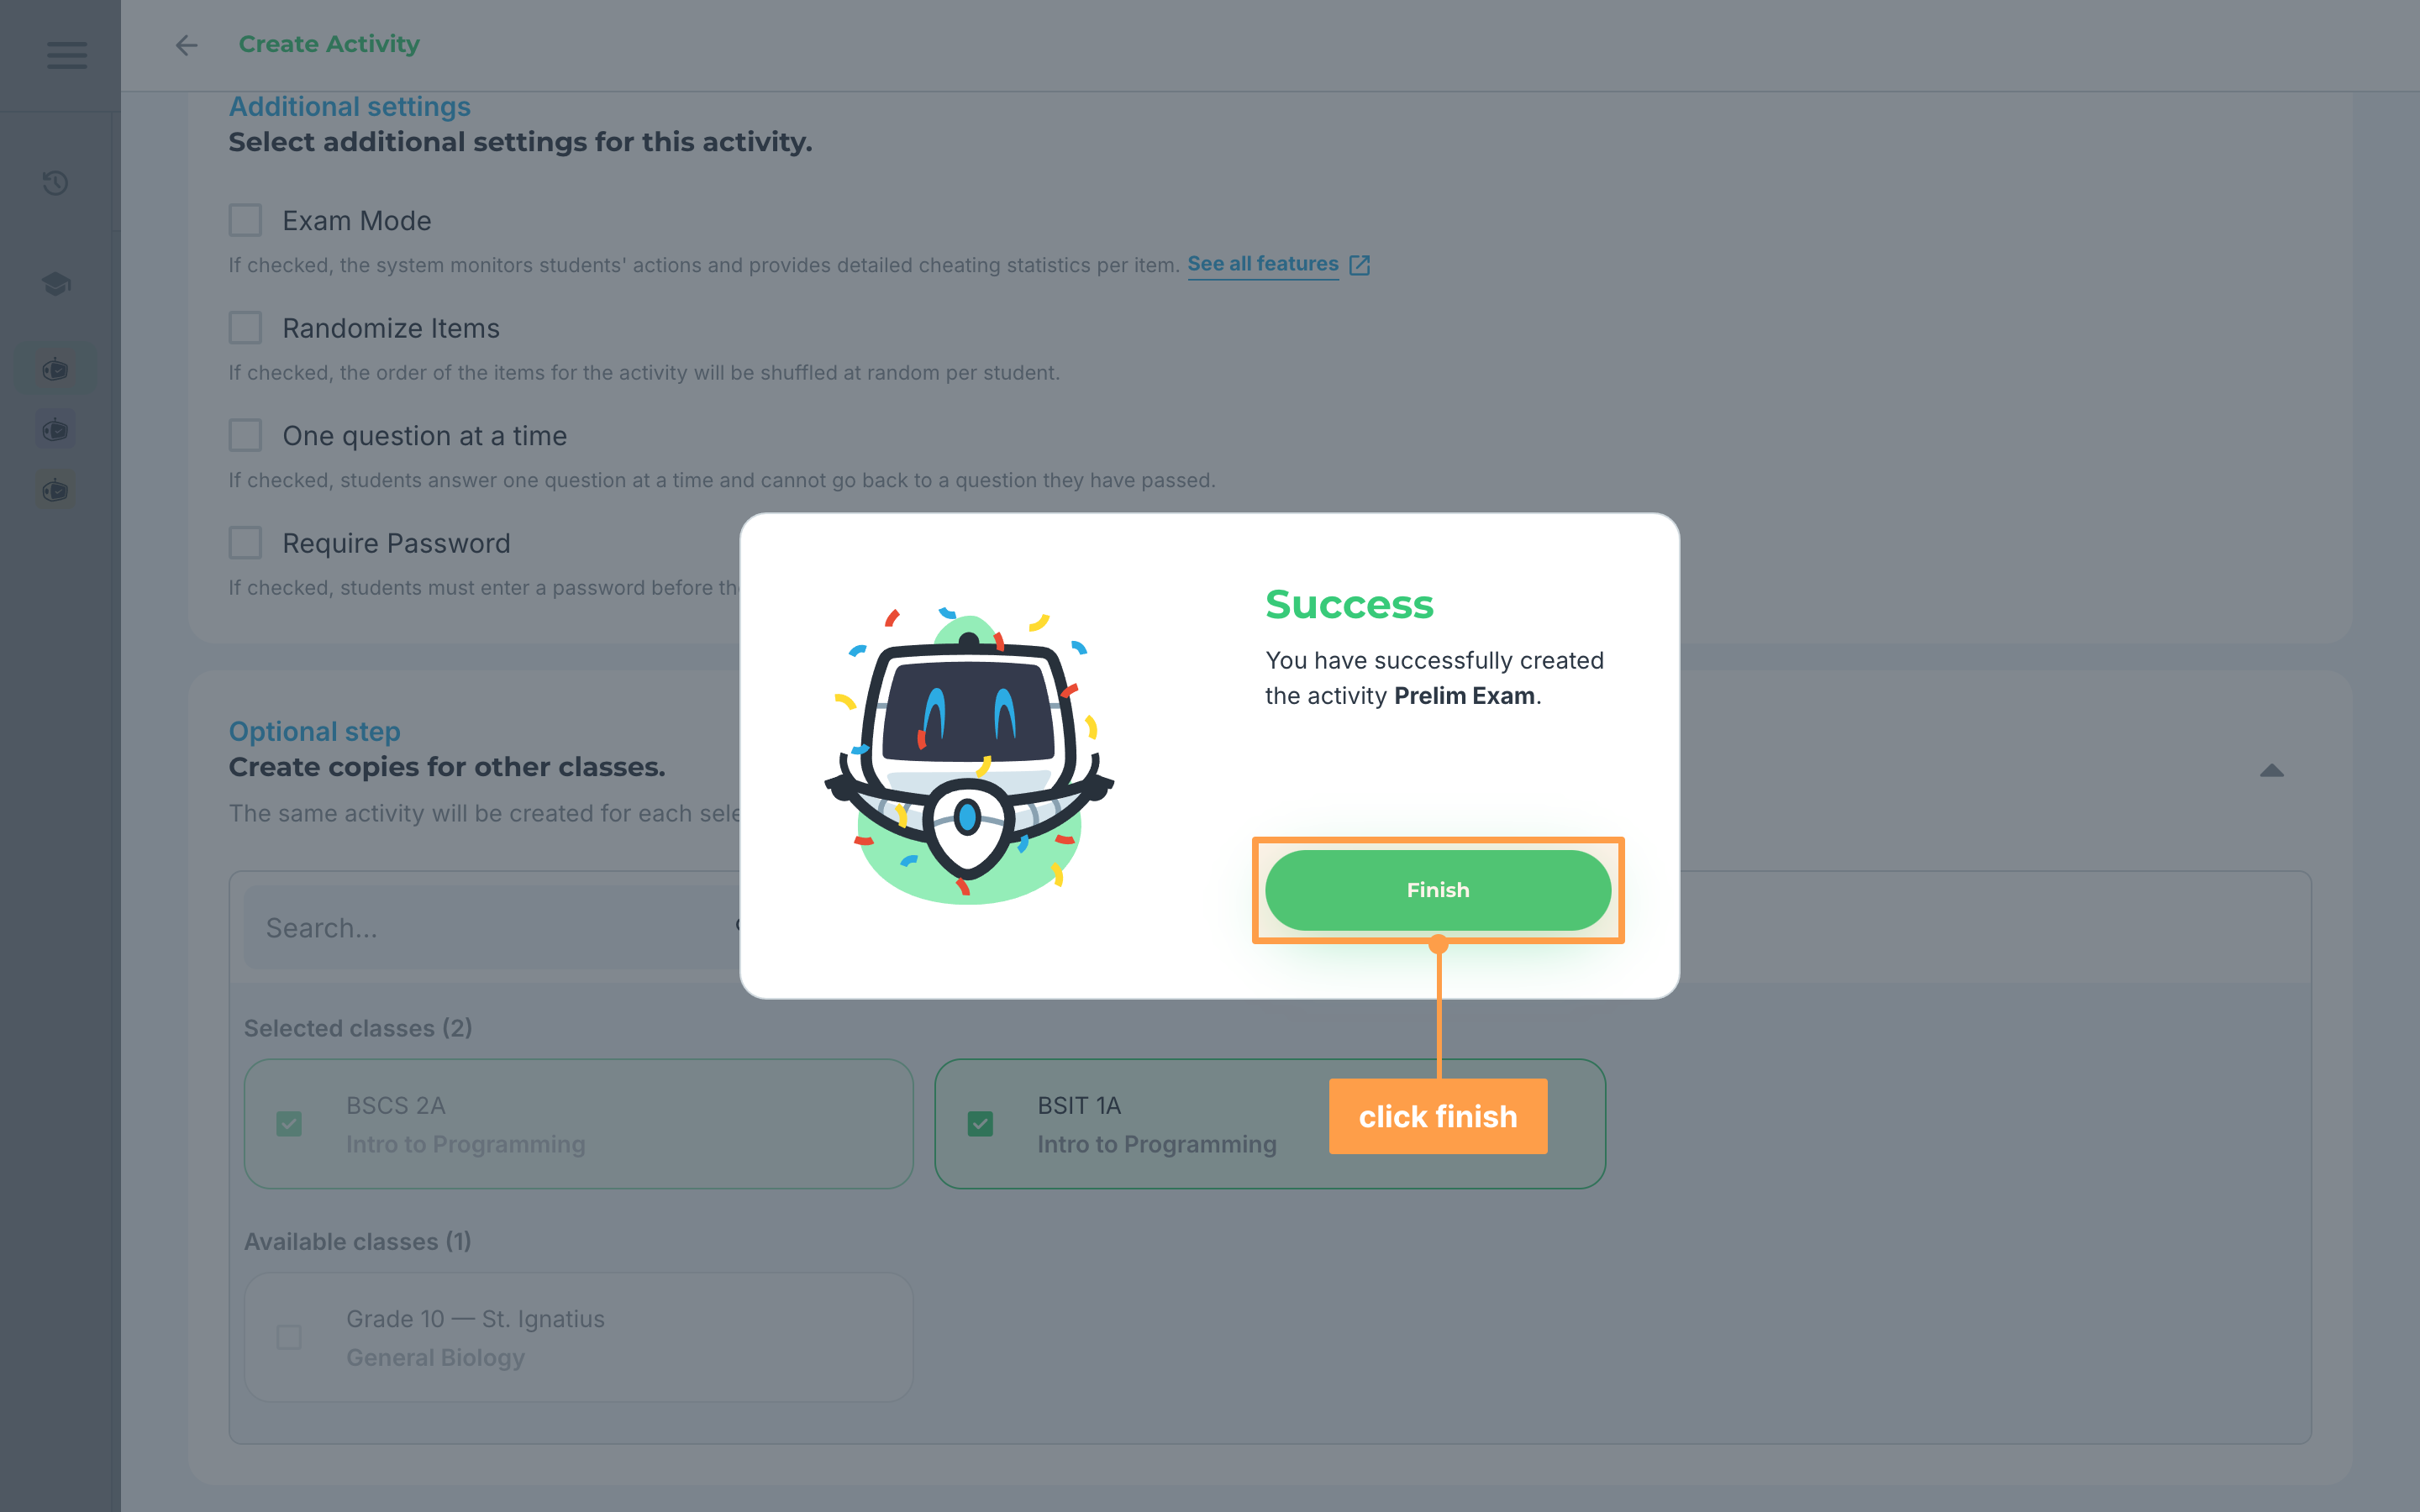
Finally, for an online or outside GradeChum activity, Success says "You have successfully created the activity" with its name, and you click Finish. An activity on paper ends on Activity successfully created! instead, which offers to generate shuffled sets. Either way, the activity now shows in every class you picked.
Note: You can also link classes later. Click Edit on the activity, and the step opens with the activity's classes already picked. Once the activity has results, the step is locked with "You cannot edit this step anymore."
Which classes you can link
- Only your active classes are offered. Mock board classes do not have this step and are never offered.
- An activity runs in classes that share one course. If your current class has a course, you see only classes with the same course or with no course.
- A class under a different course than a class you already picked cannot be clicked. Hover it to see "An activity can only run in classes that share one course."
- A class with no course can always be picked. Linking gives it the activity's course, and a class keeps its course for good.
- The step is locked with "You cannot link classes for this activity." in a class another teacher shared with you, and when you create or edit a set.
Linked activities on your Activities tab
An activity in more than one class shows a Linked to badge with the number of classes, on its card and at the top of View Activity. Hover the badge, or click it on a phone, to see "Changes apply to all linked classes." and the list under Linked Classes:.
When you assign scanned pages to students, the Associated Class column shows which class each answer sheet belongs to.
Linked classes setup
GradeChum matches scanned papers to the students in each class. So when a linked activity is in a class with no students yet, opening the activity shows Linked classes setup instead of its tabs, until every class has its class record.
Click a class that already has its students to see its Class record of table with each student's Full Name, and click Upload new class record to replace it. For more on class records, see Invite students to class.
To give each class its students, follow these steps:
-
Open the linked activity. The left side lists its classes and how many are done, for example 1/2 completed. An hourglass marks a class that is Pending, and a check marks one that is Imported.
-
Click a pending class. On a computer, the first pending class is picked for you. On a phone or tablet, the class opens in its own window.
-
Under Import your class record here for class, click Upload Excel/CSV and choose your class record, or drag and drop it onto the upload area. It can be a .csv, .xlsx or .xls file of up to 100 MB. If the file has several sheets, pick the one to import.
-
Wait while Processing class record shows. Once Class record processed! tells you how many students it found, click Confirm. The class is now Imported.
-
Finally, repeat steps 2-4 for every pending class. Once every linked class has students, the activity opens normally.
And that's how you link one activity to several classes in GradeChum! Next, let's give the activity to your students.