
Add new test
Introduction
In a typical activity, there are different types of questions that you can give to your students, which might be a simple multiple choice, or something like identification, enumeration, essay, problem solving and programming. In GradeChum, we call these questions as items.
In this segment, we will explore how to create an activity from scratch.
Steps
To create an activity from scratch, there are two ways to do it:
a. Single item option
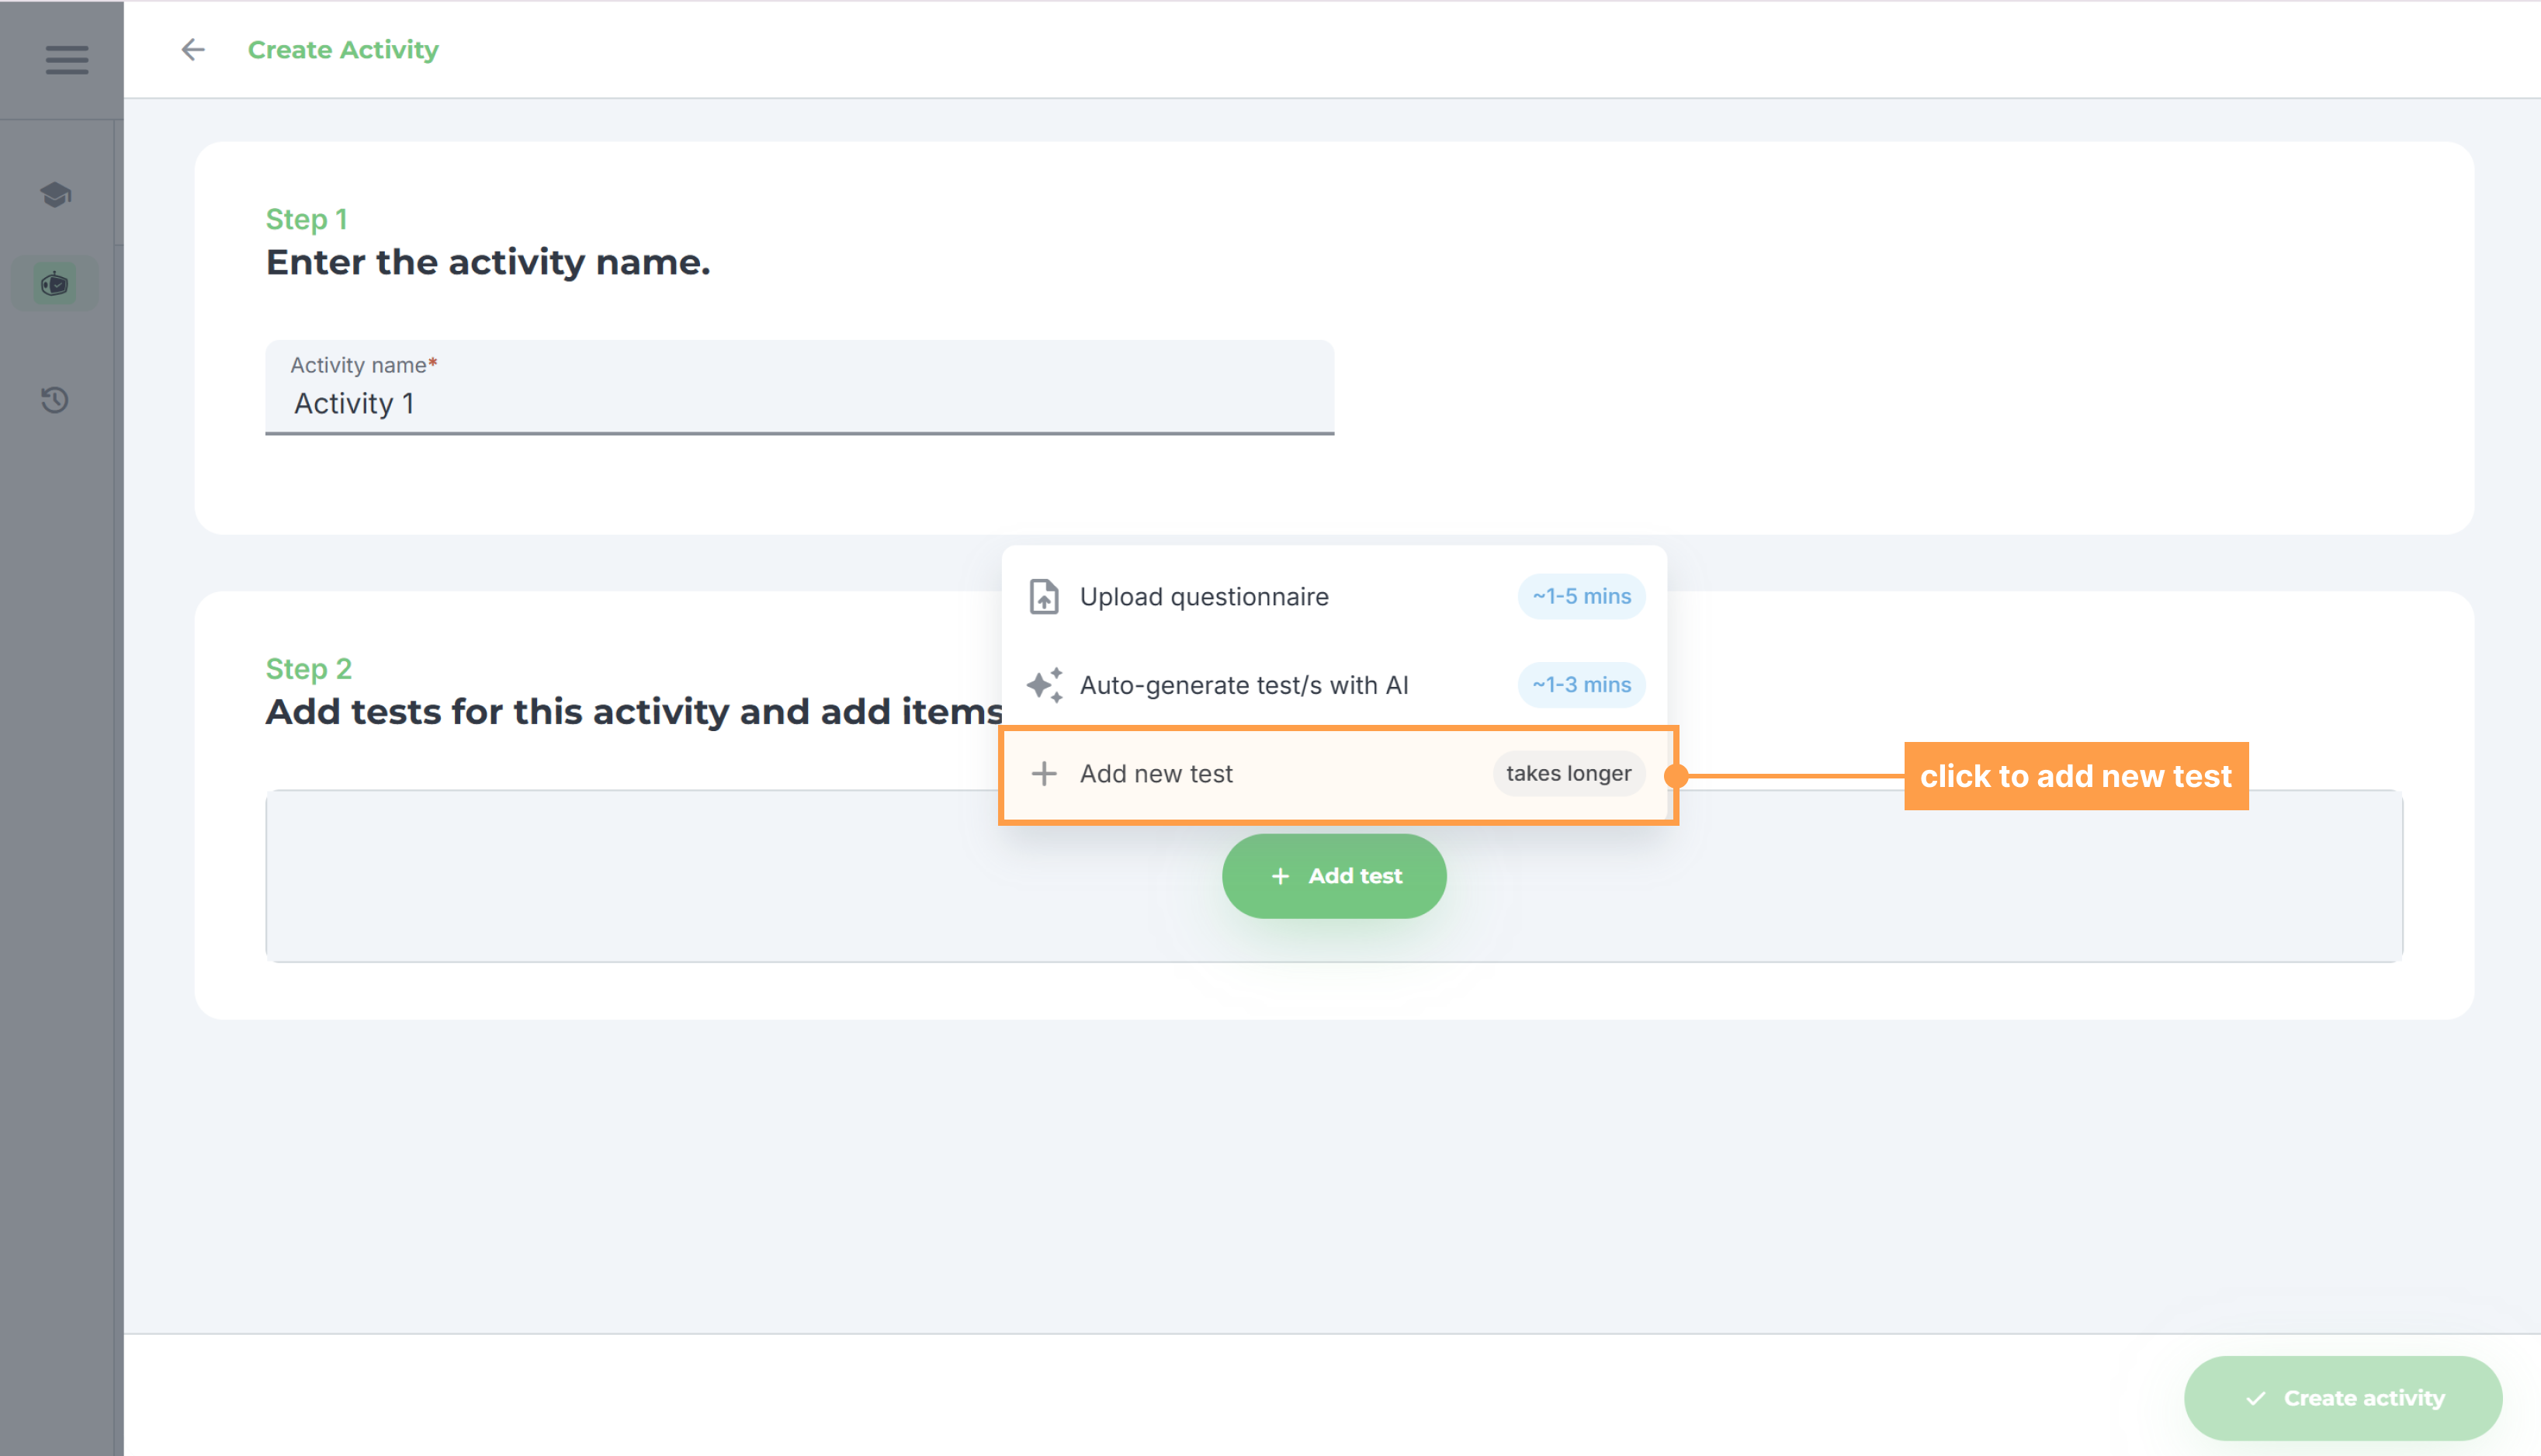
- Add a test by clicking the + Add test text button, then select "Add new test".
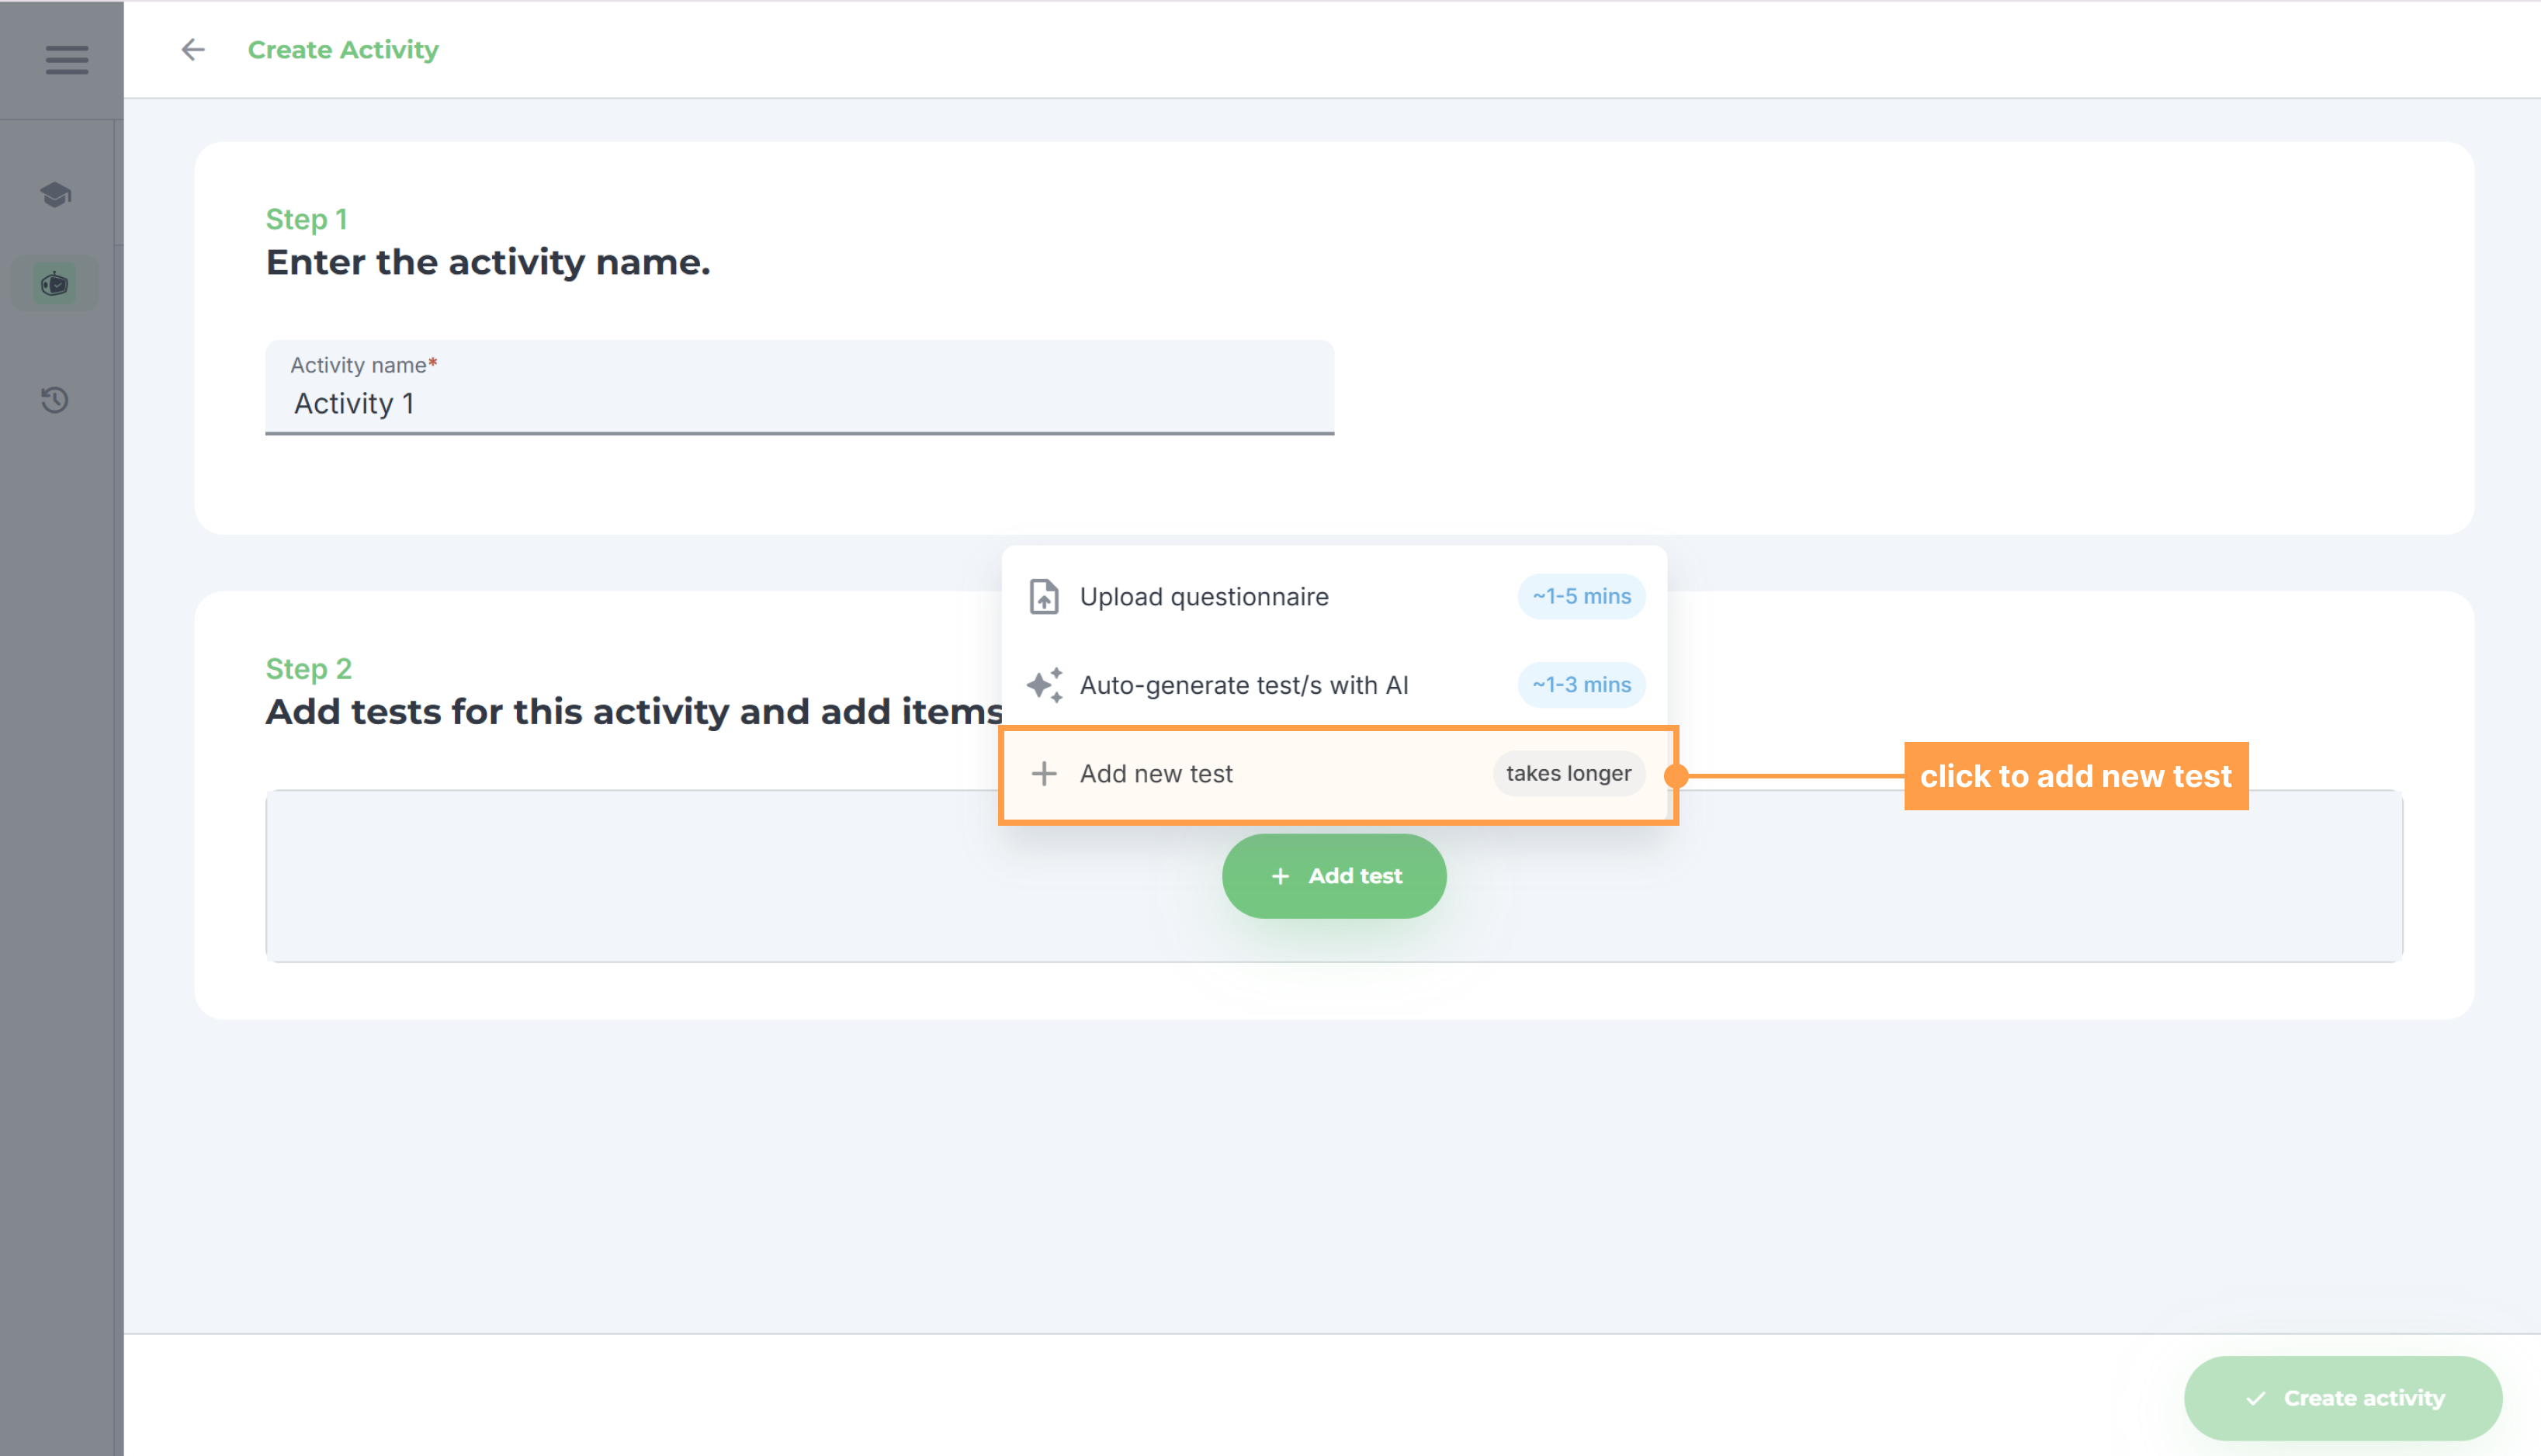
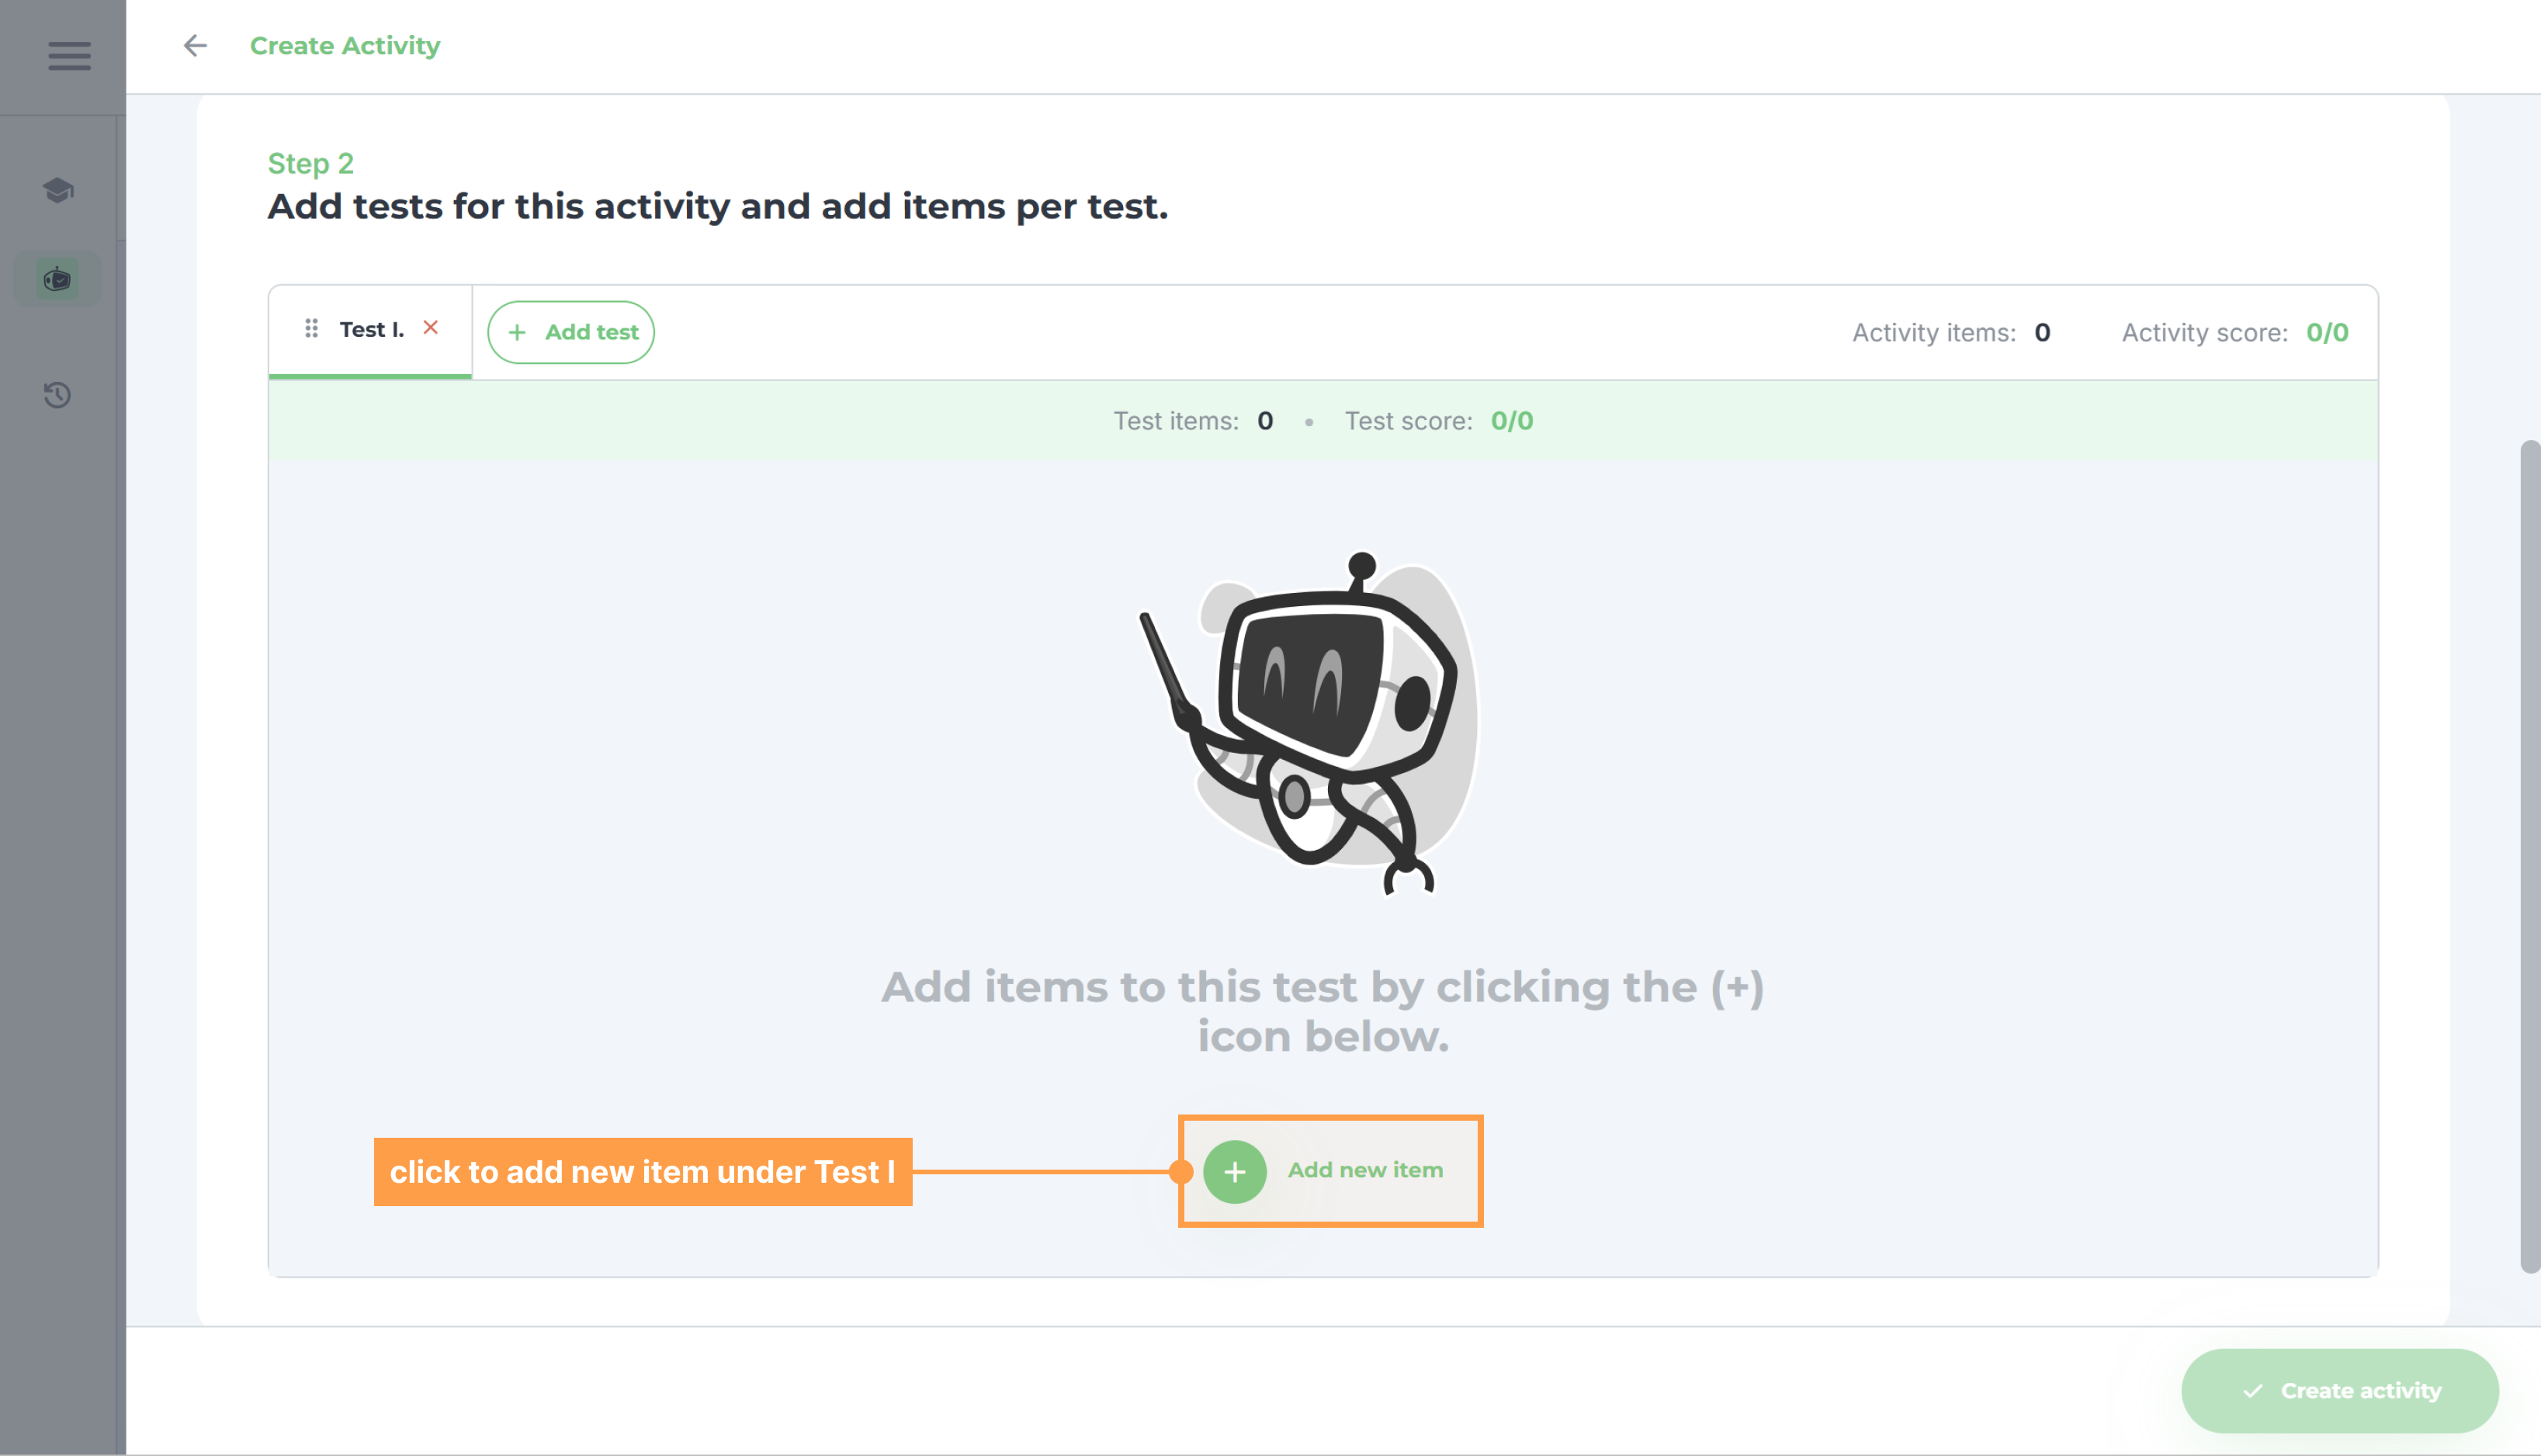
- Under Test I, click on the + Add new item text button to add an item.
Note: You can add as many test in your activity as you want by clicking on the + Add test text button beside Test I.
- Then, select an item type for your item. In GradeChum, we currently support 7 item types. Two of them (Code on paper and Visuals) are for handwritten activities only, so they do not appear if you chose Online in step 2:
a. Mutliple Choice
For items with Multiple Choice as the item type:
- Fill out the question for this item.
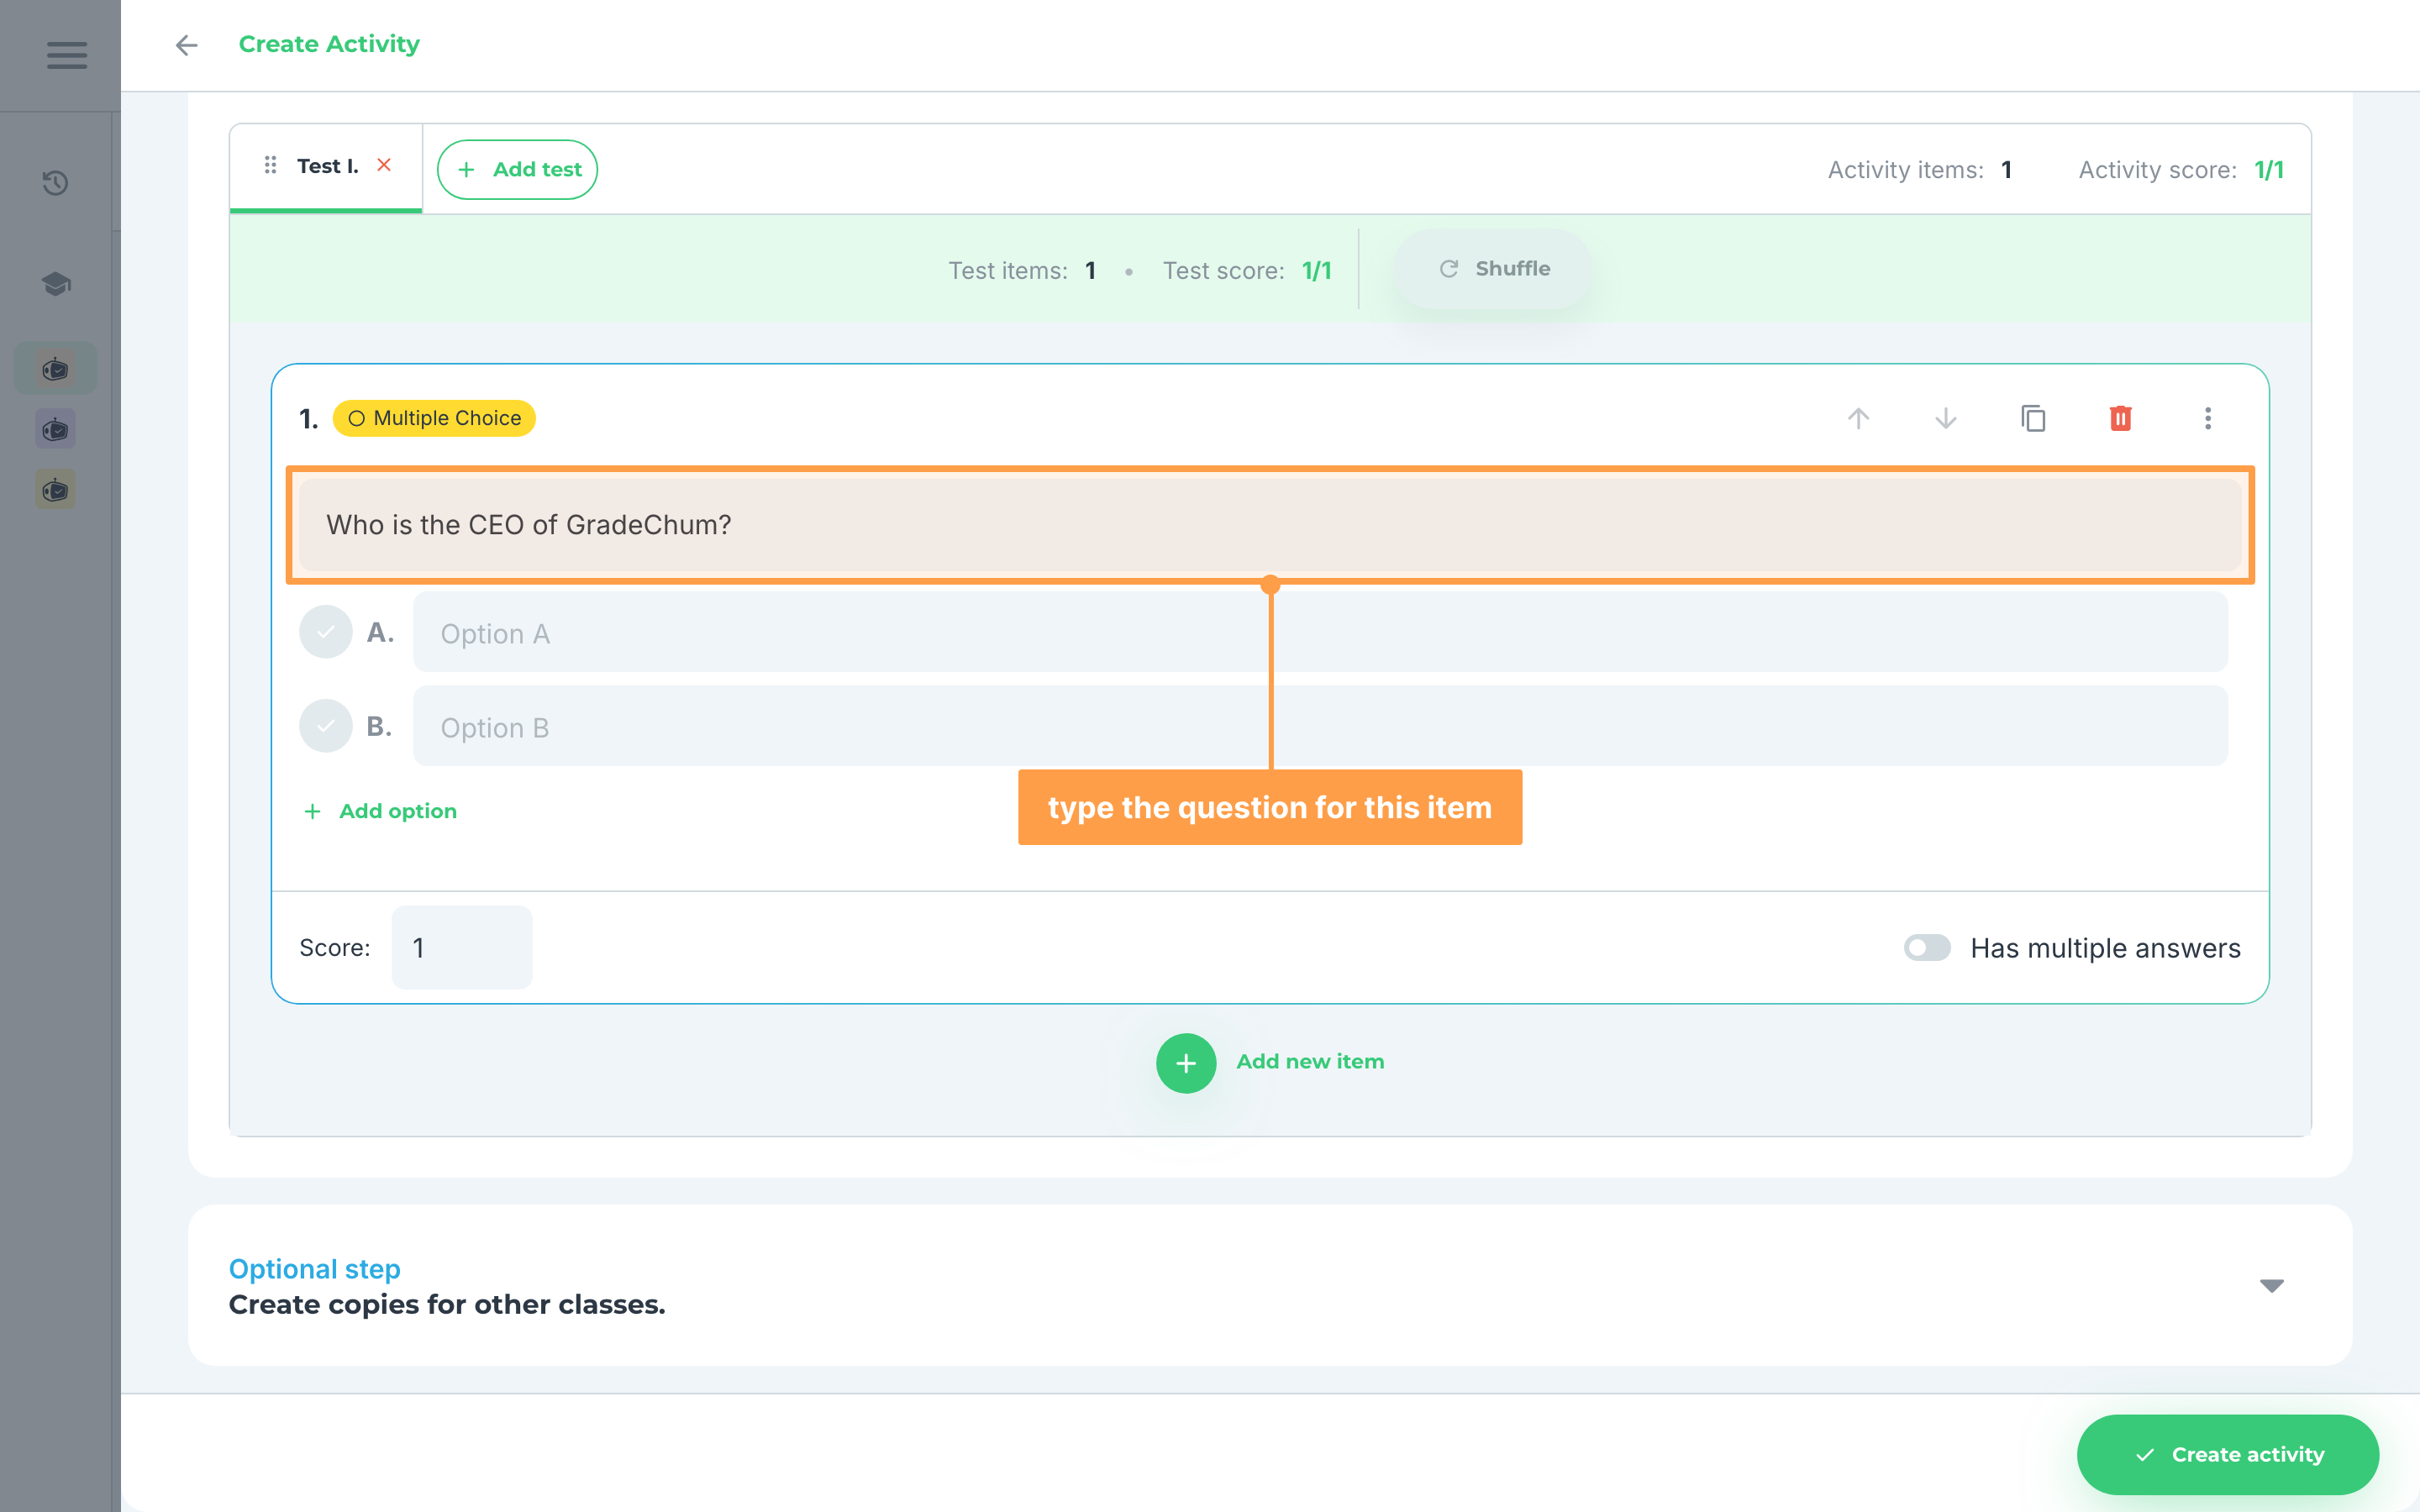
- Add options for this item by clicking the + Add option button. You can add up to 5 options (a-e) for a single item.
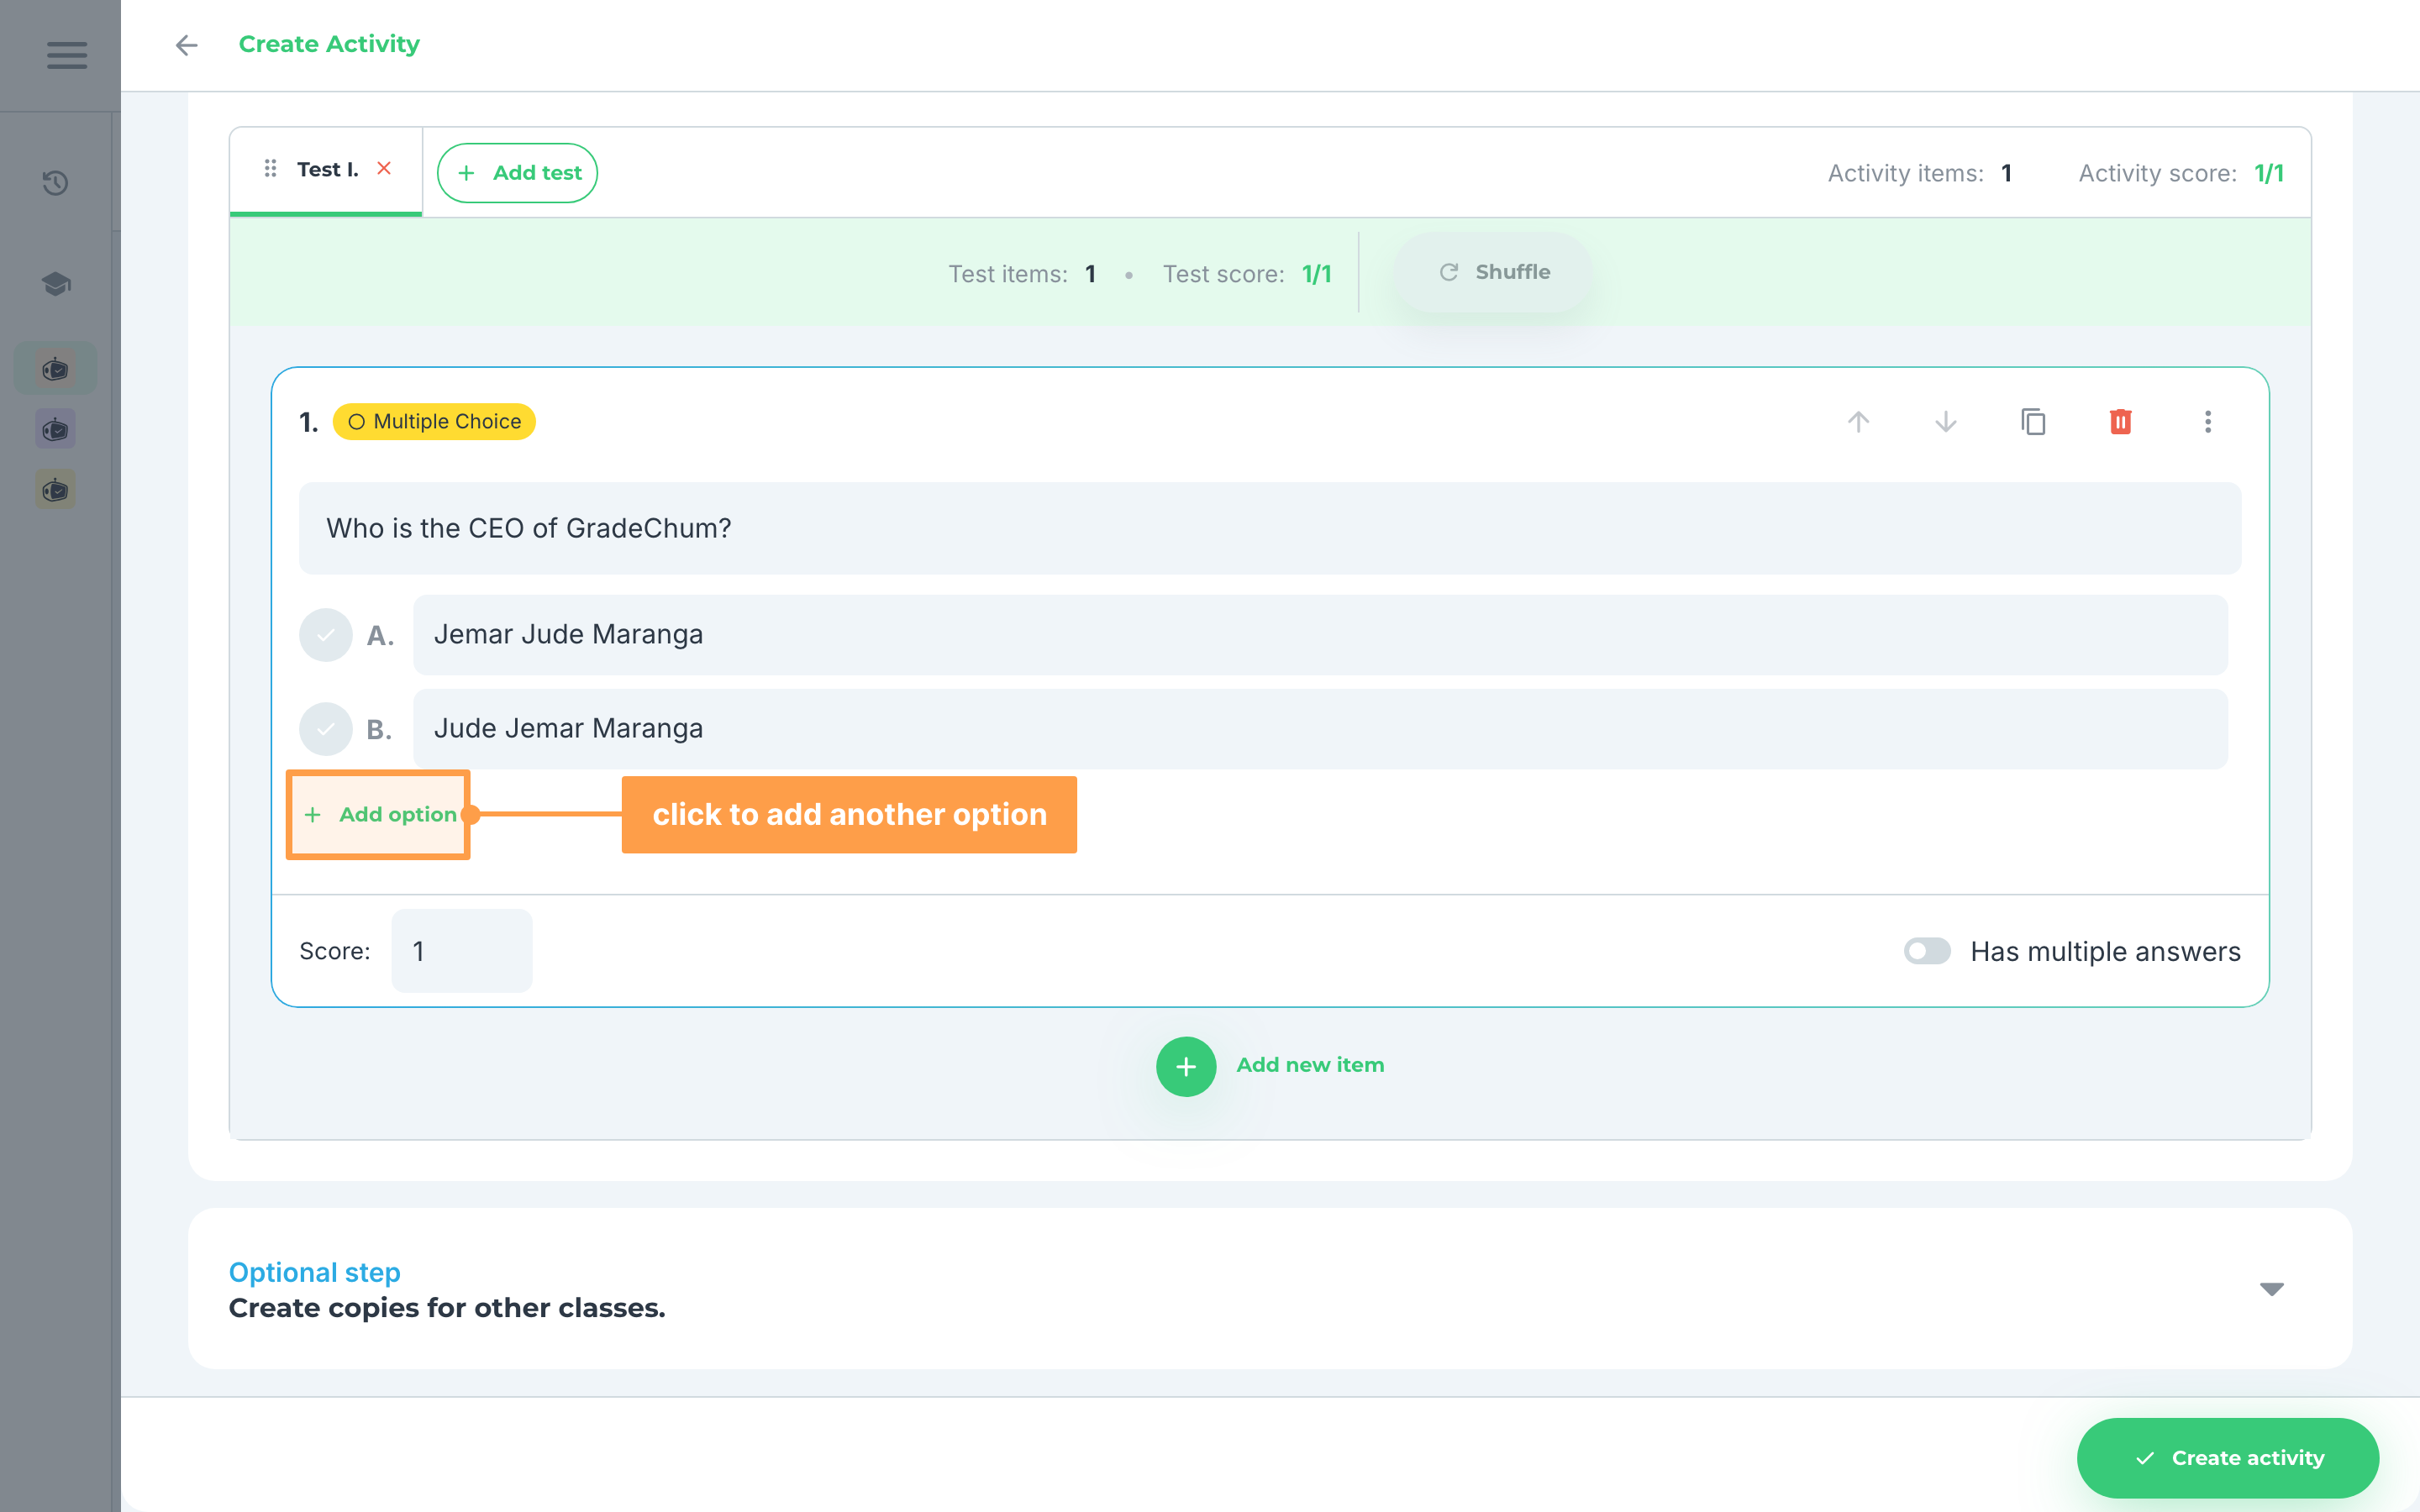
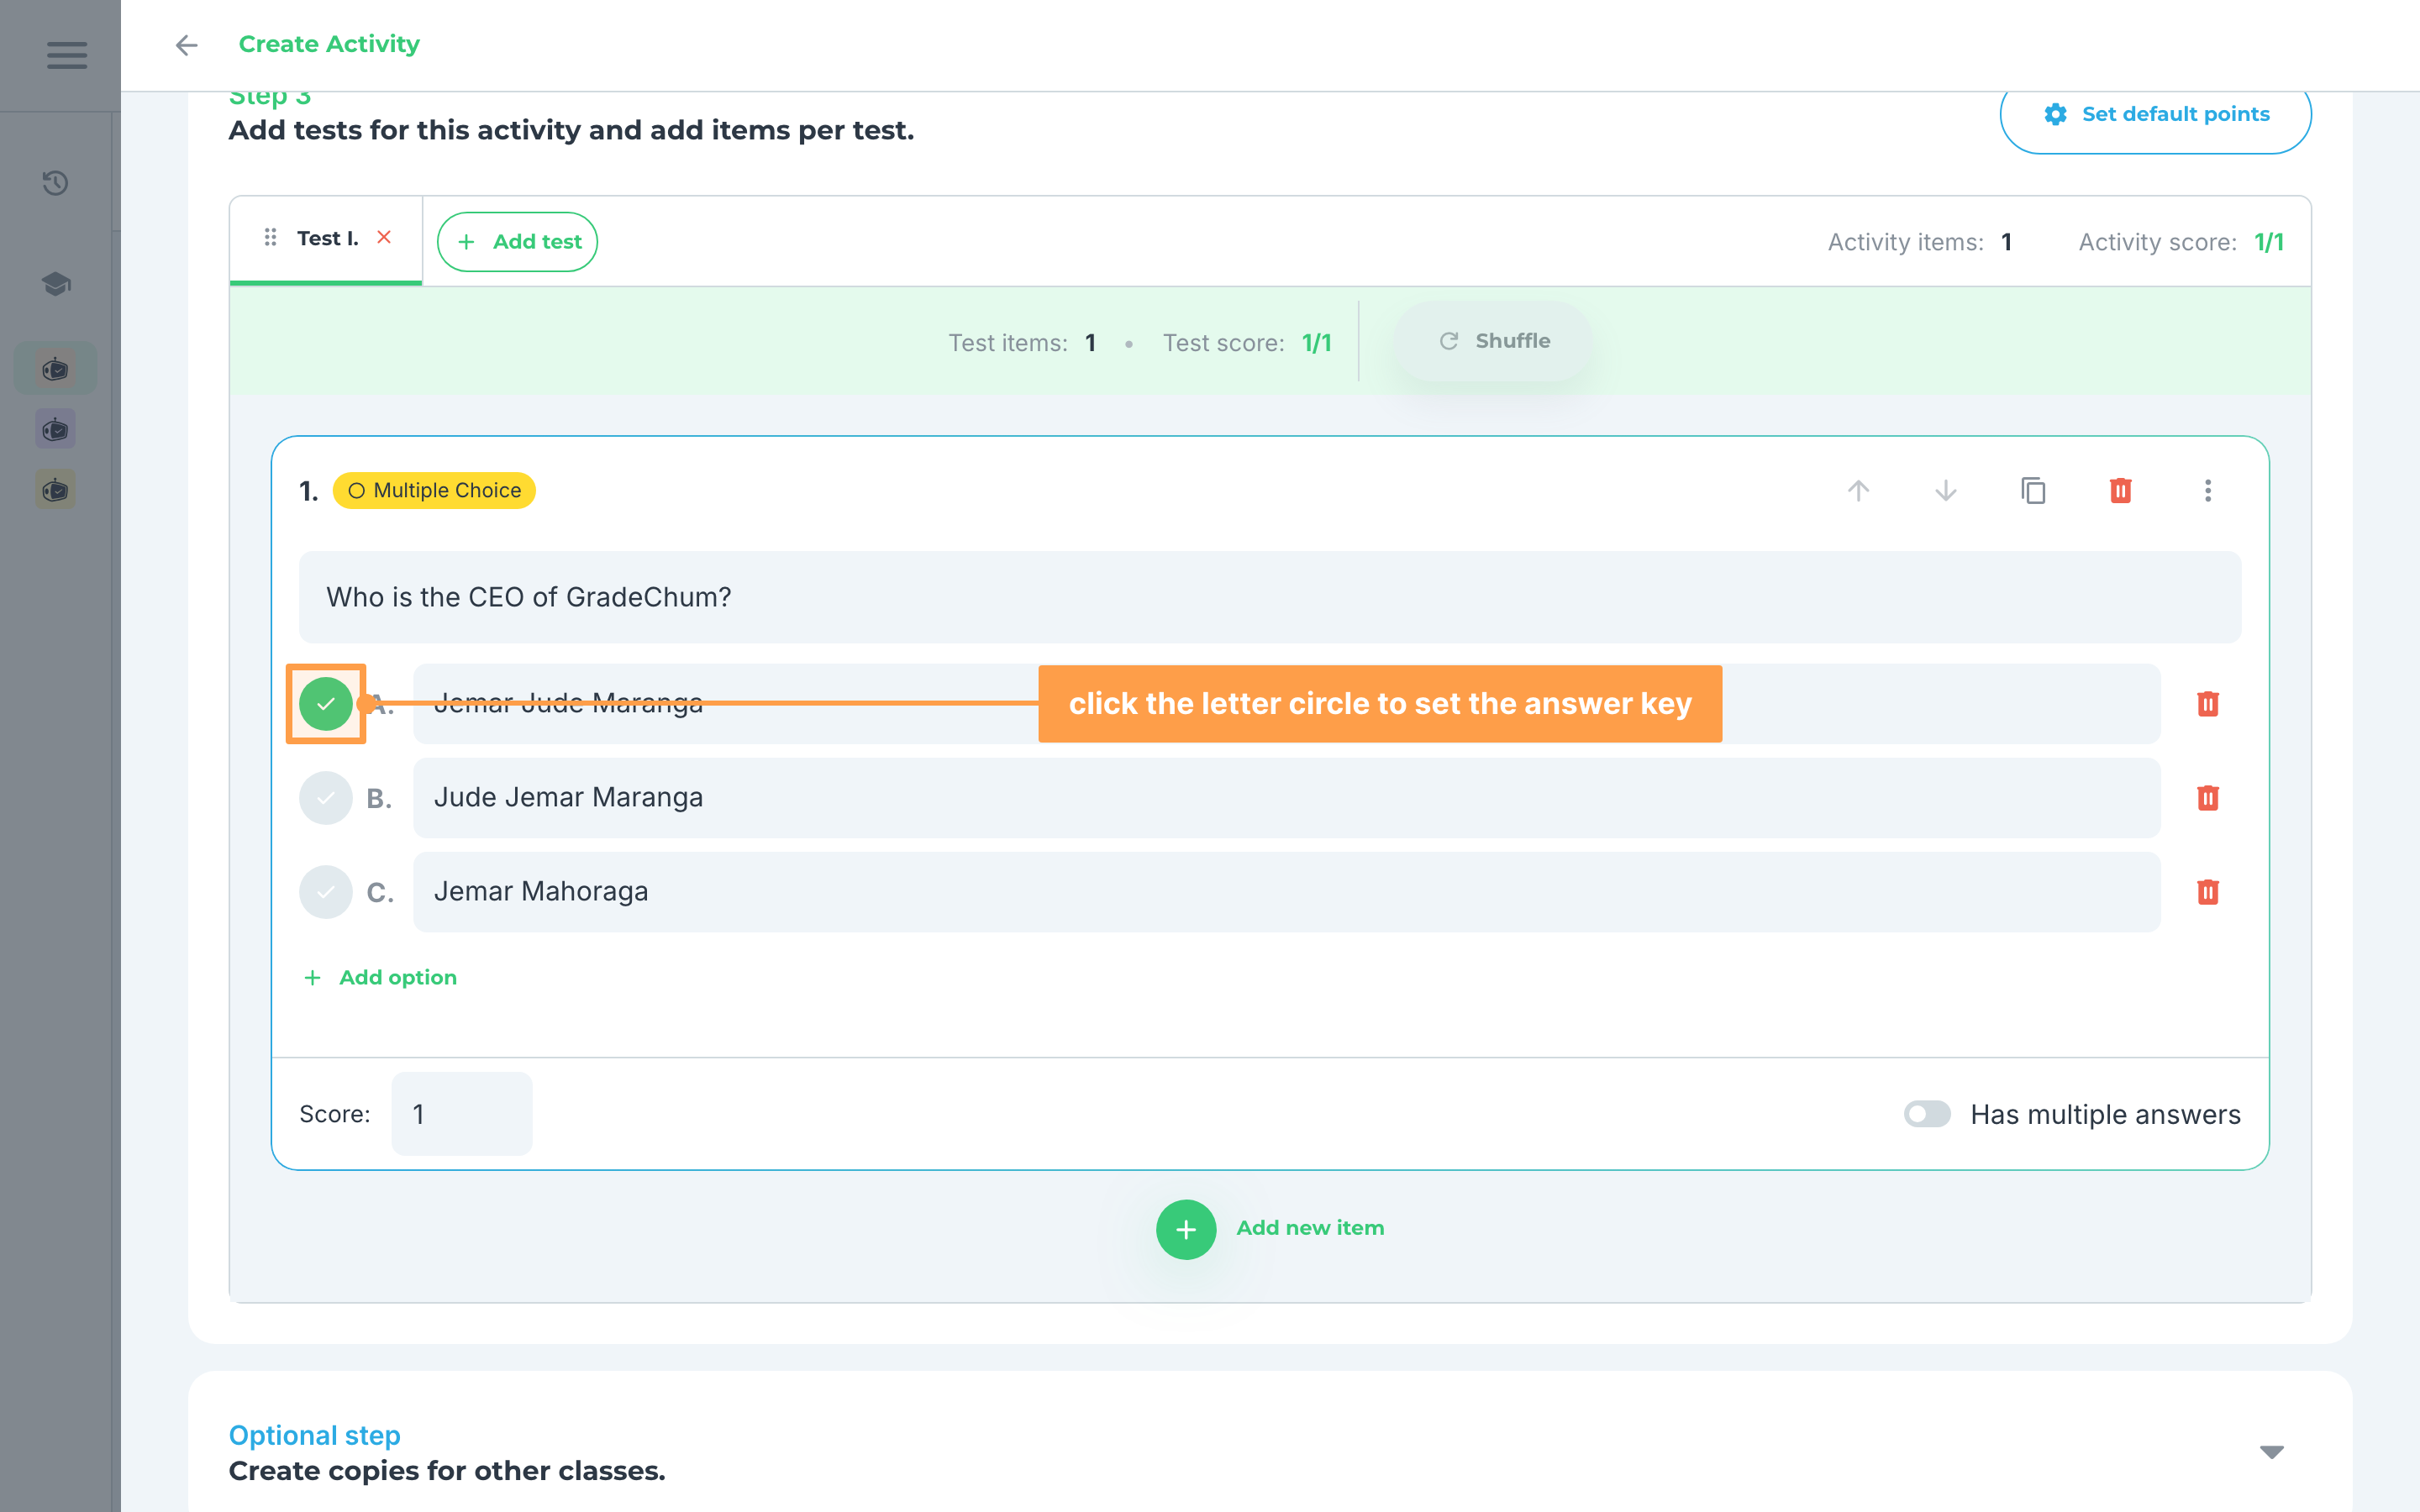
- Select the correct answer from your list of options by clicking on the round button to the left of the option letter. You will know that the option has been set when that button turns green.
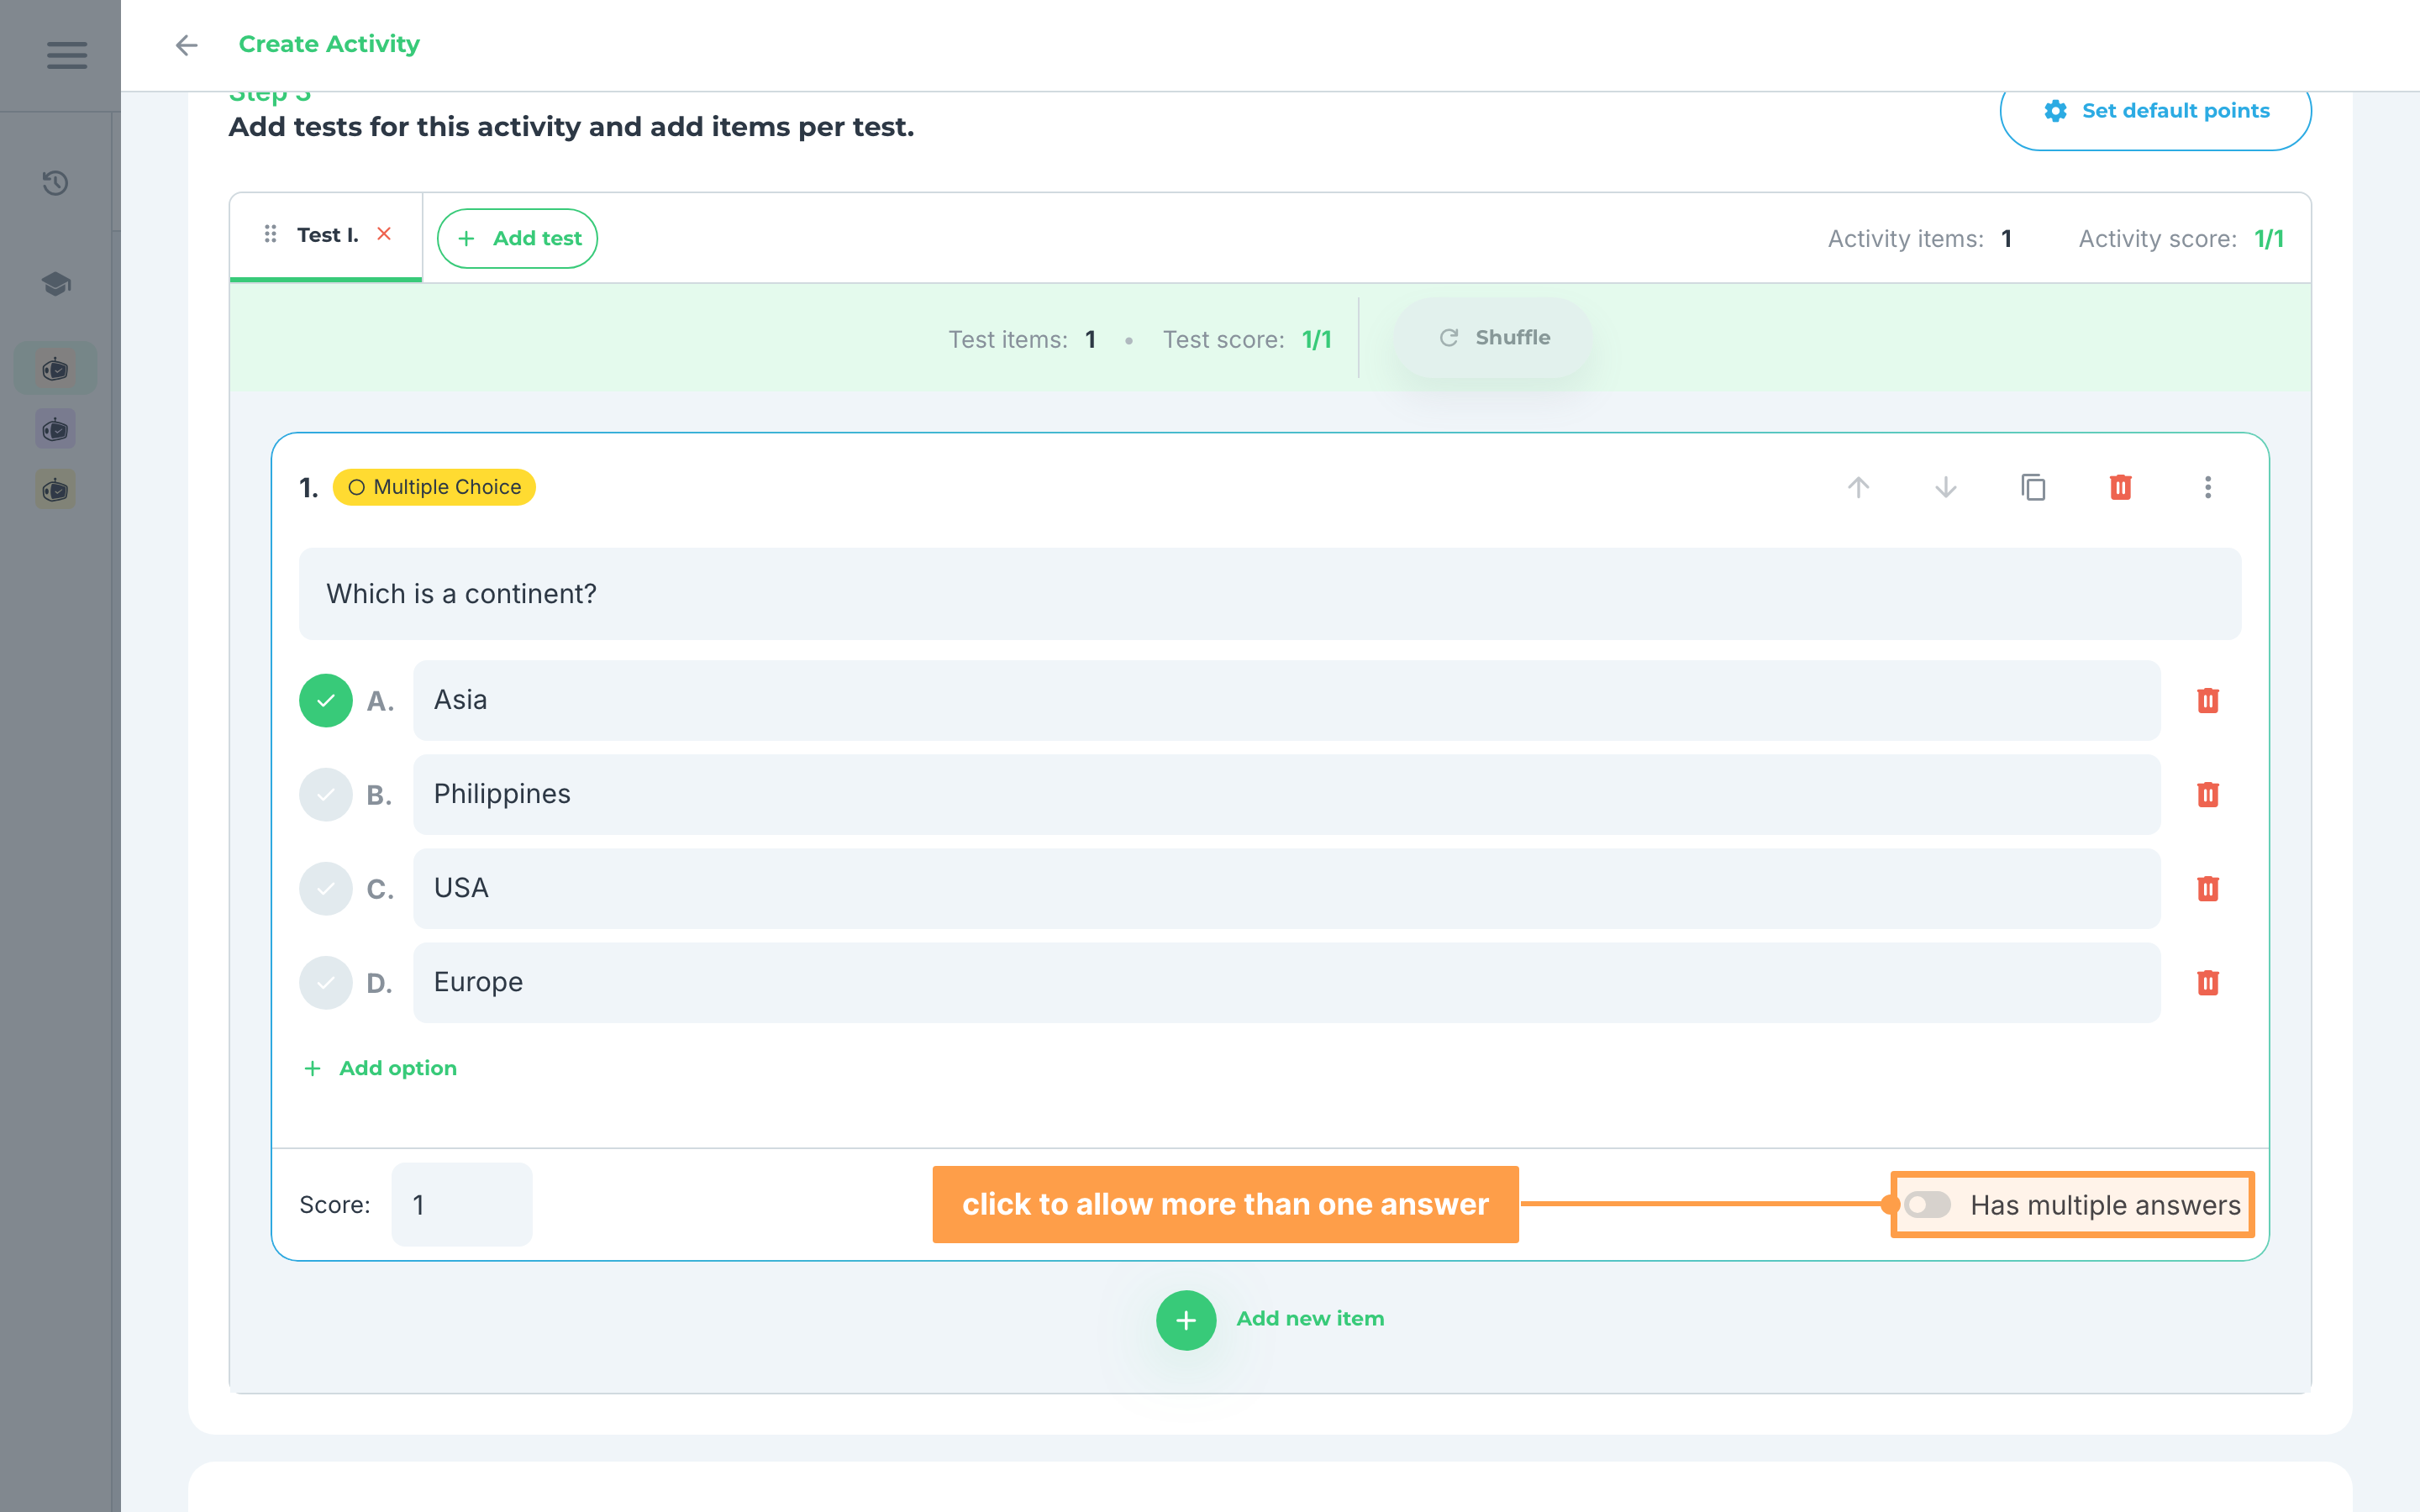
- If you have multiple answers in the Multiple Choice item, turn on the Has multiple answers switch at the bottom right of the item. The item's type badge changes to Multiple Answers.
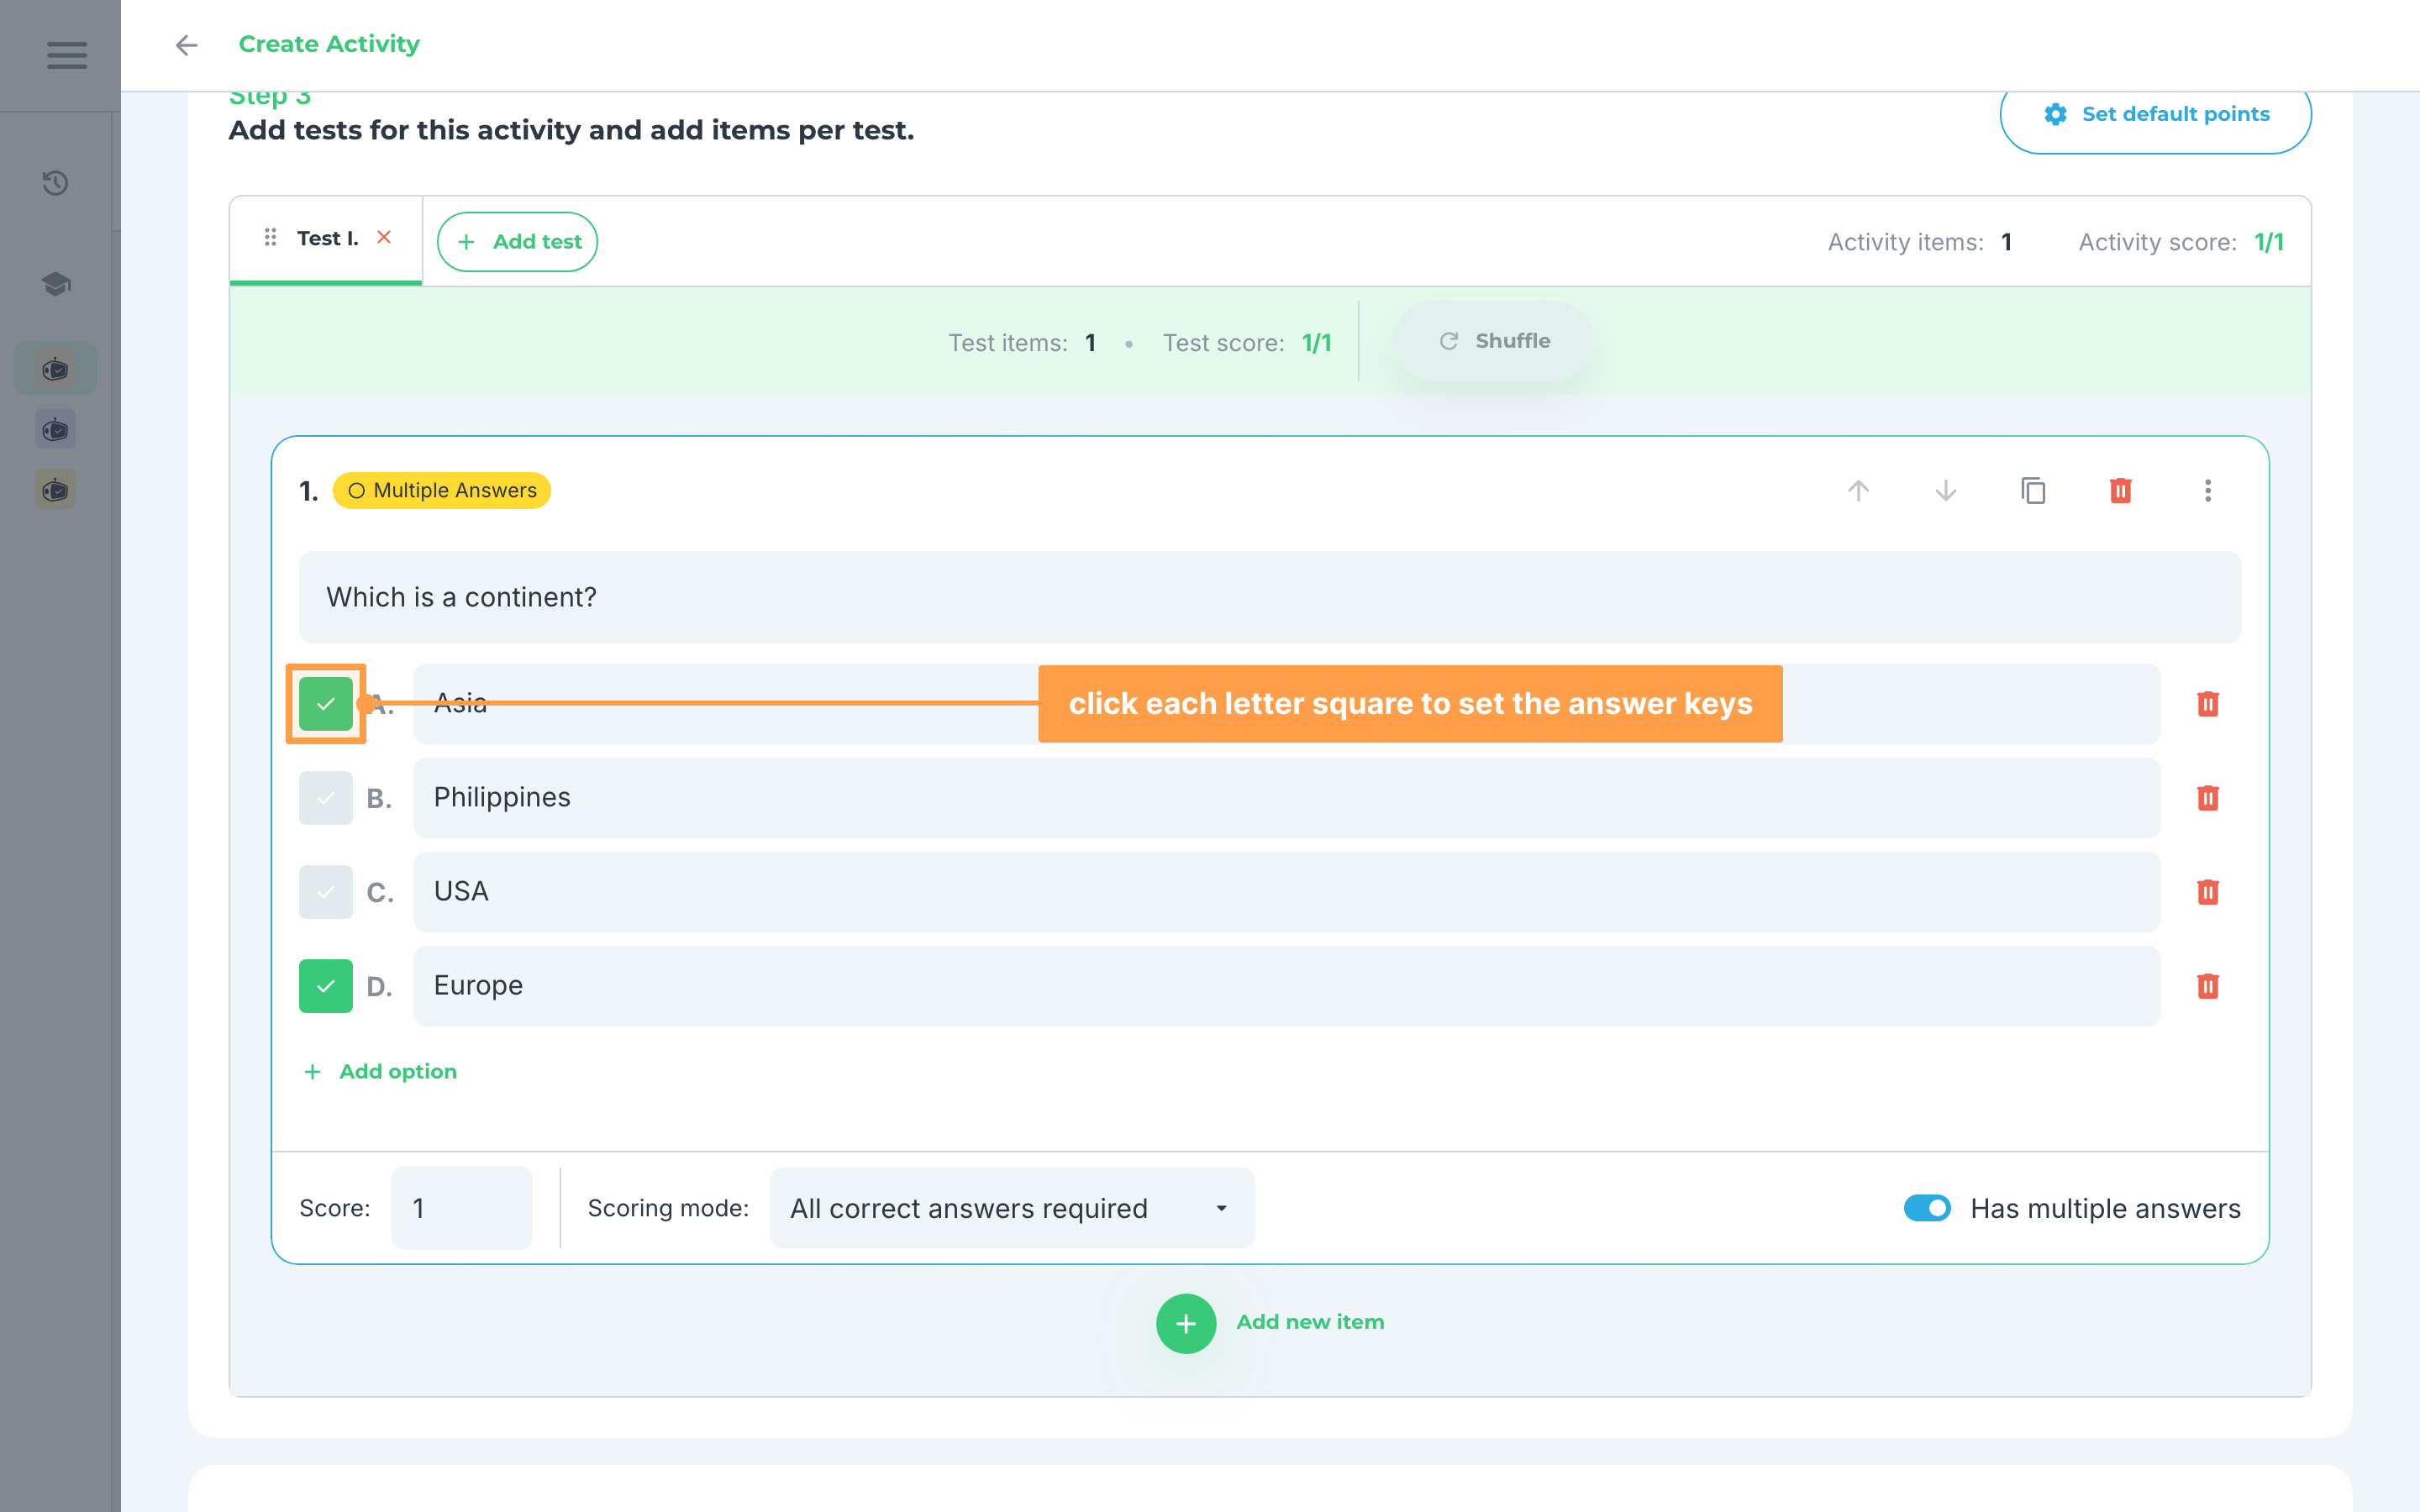
- Then, select the correct answers from your list of options by clicking on the square buttons to the left of the option letters. Those buttons turn green when the options are set.
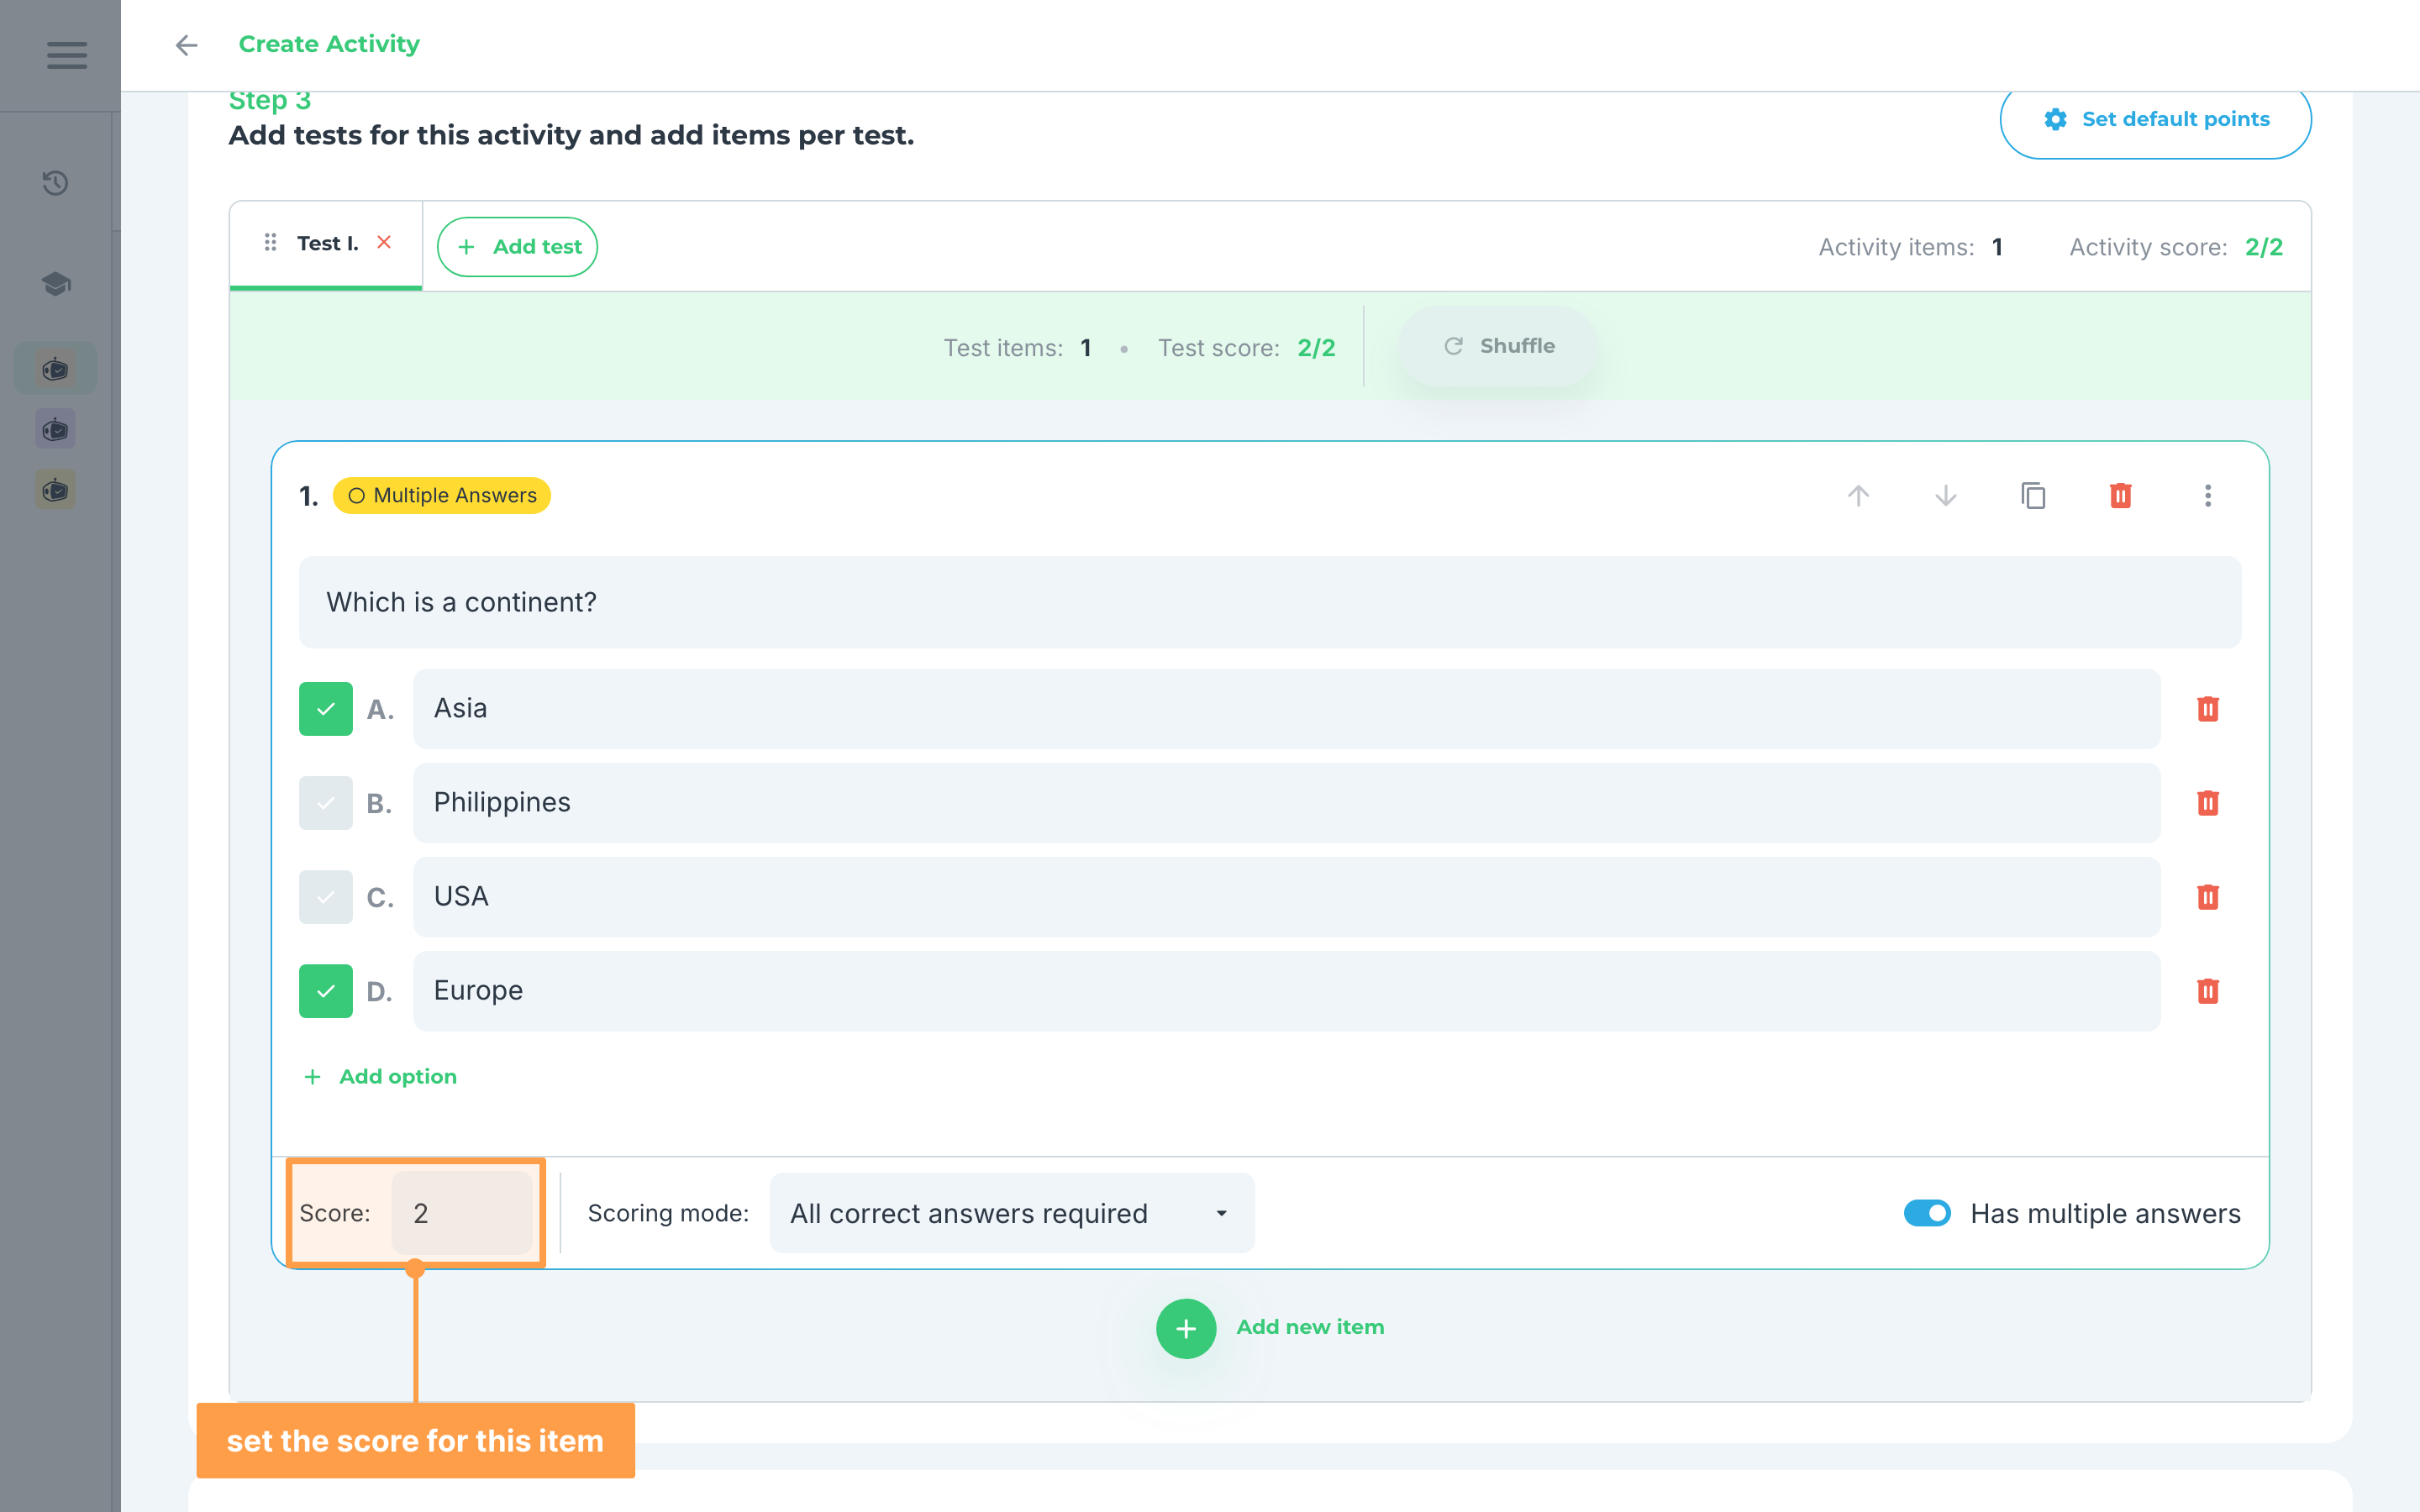
- Set the score on the bottom left. This should be a whole number and should be greater than 0. For an item with multiple answers, also check Scoring mode beside it: All correct answers required (the default) gives the points only for a fully correct answer, Any correct answers accepted gives them for any one correct option, and Partial credit shares the points out and lets you set a penalty per wrong answer.
b. Identification
For items with Identification as the item type:
- Fill out the question for this item.
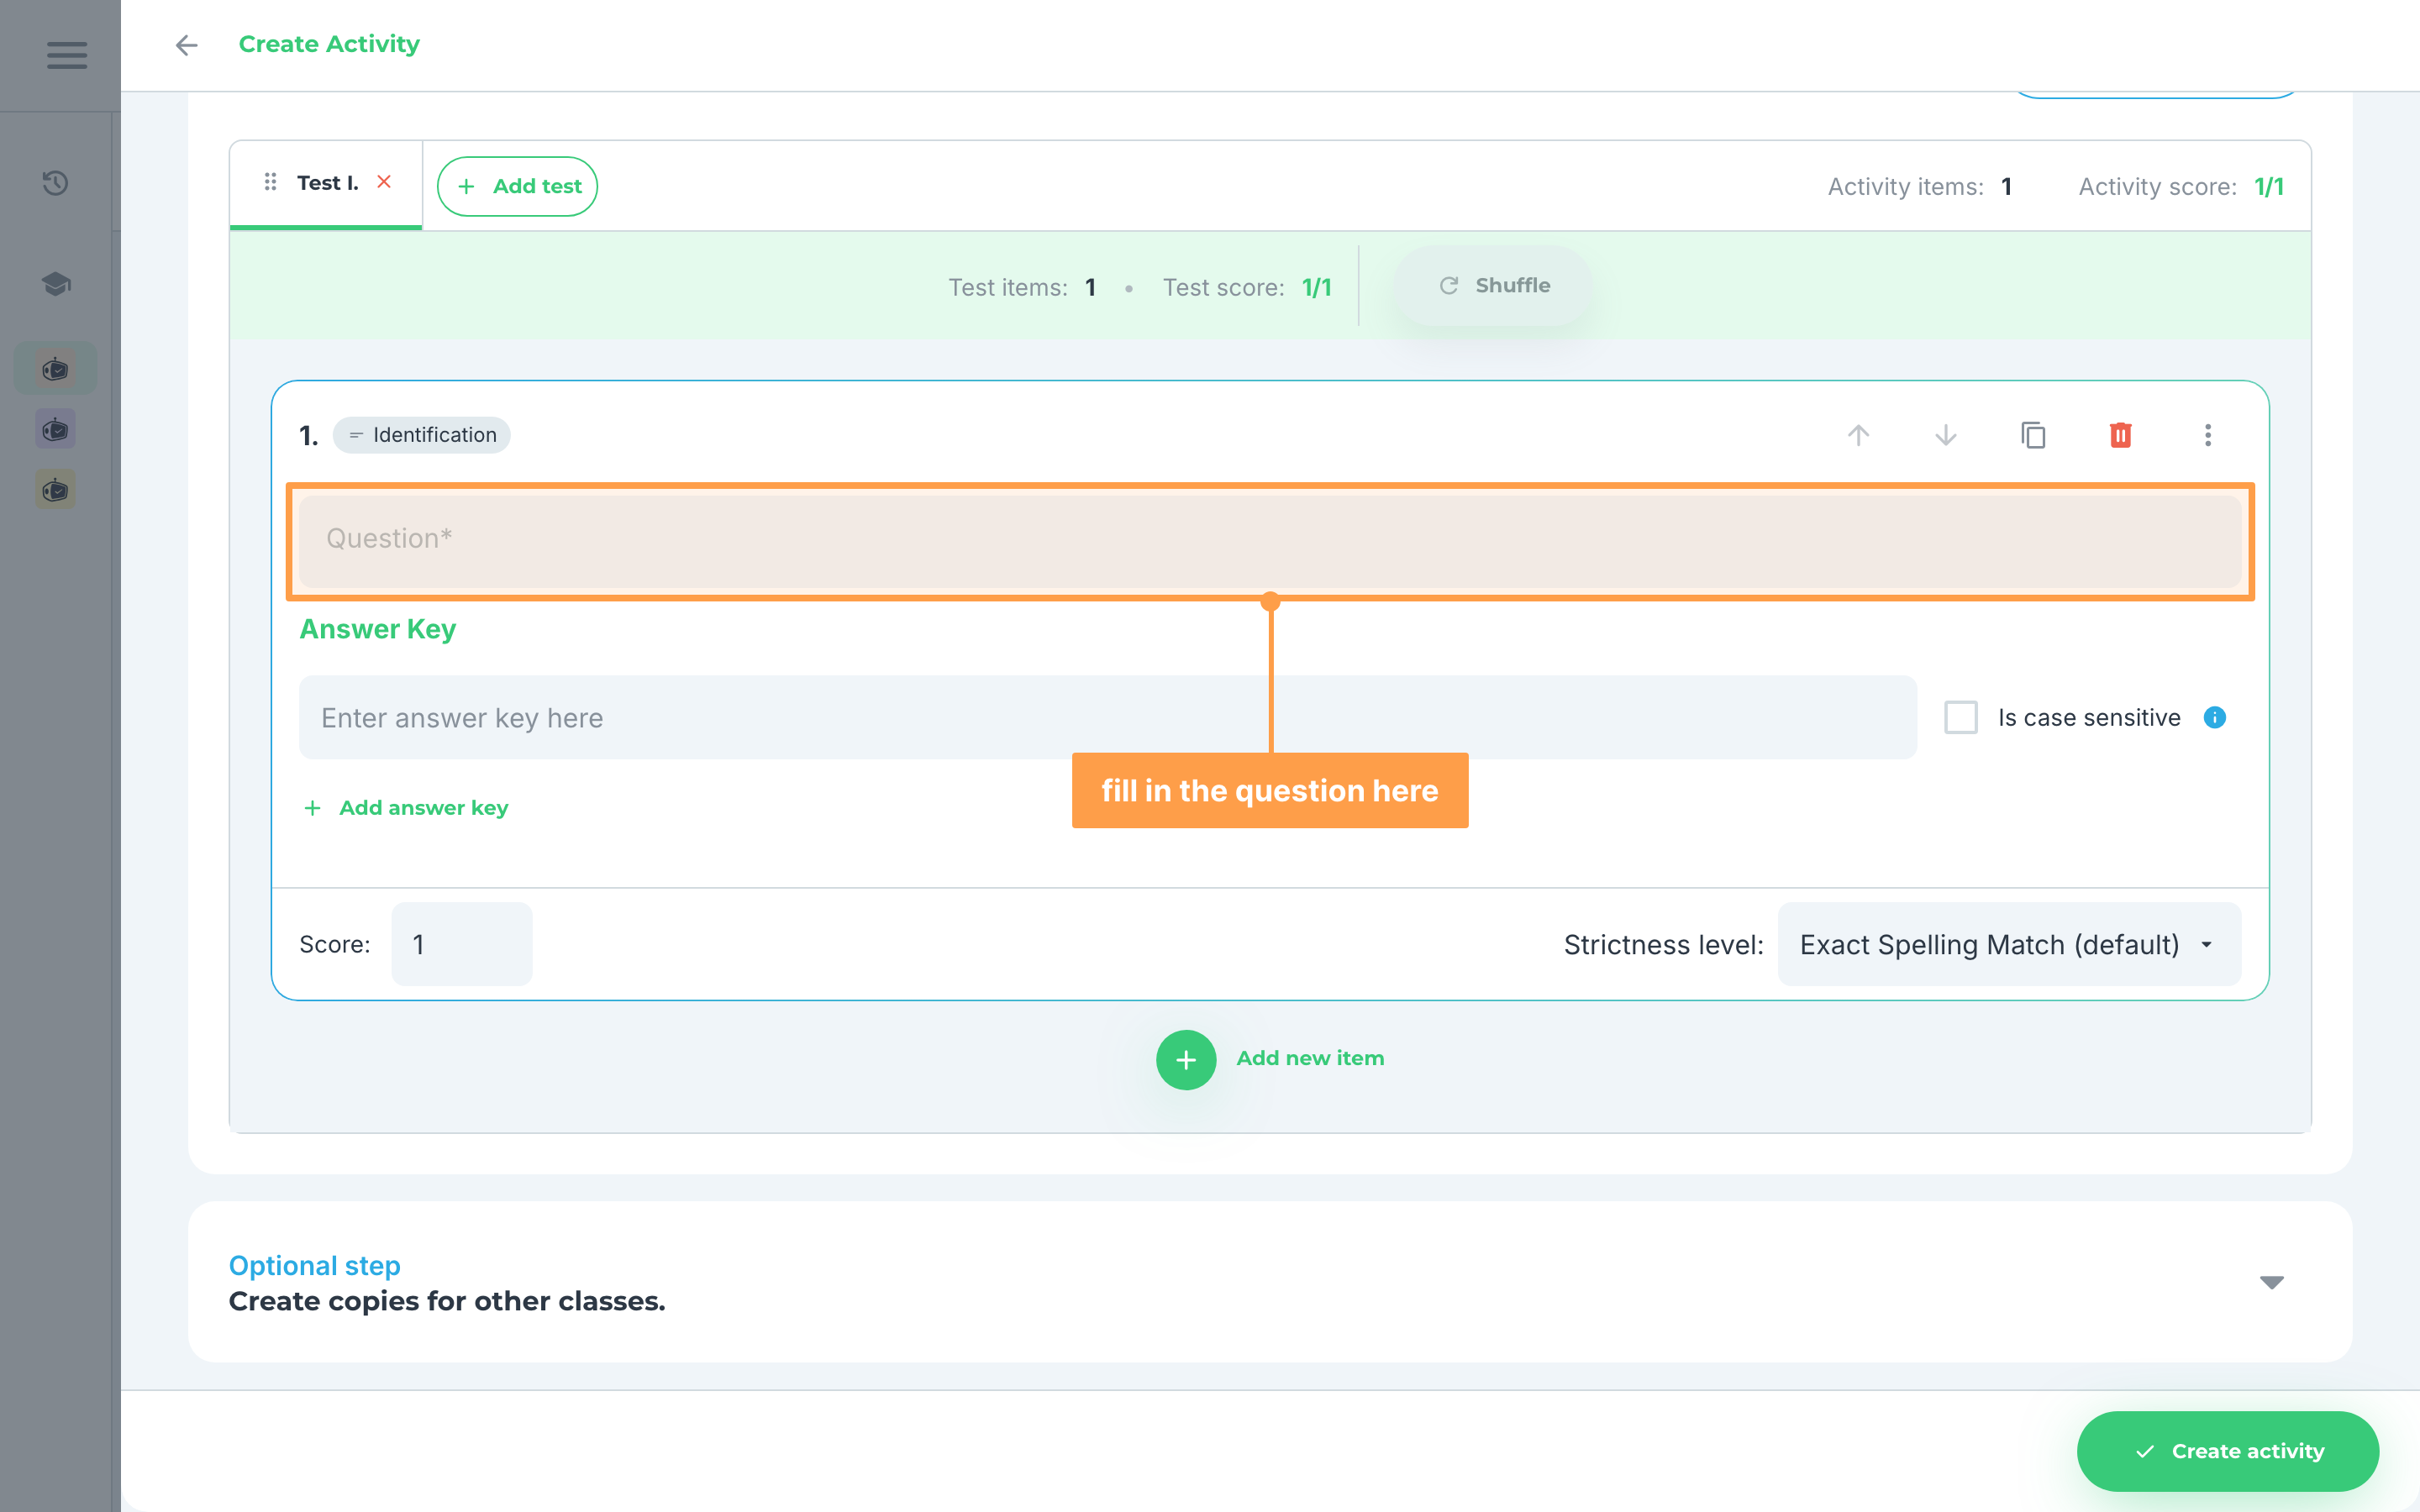
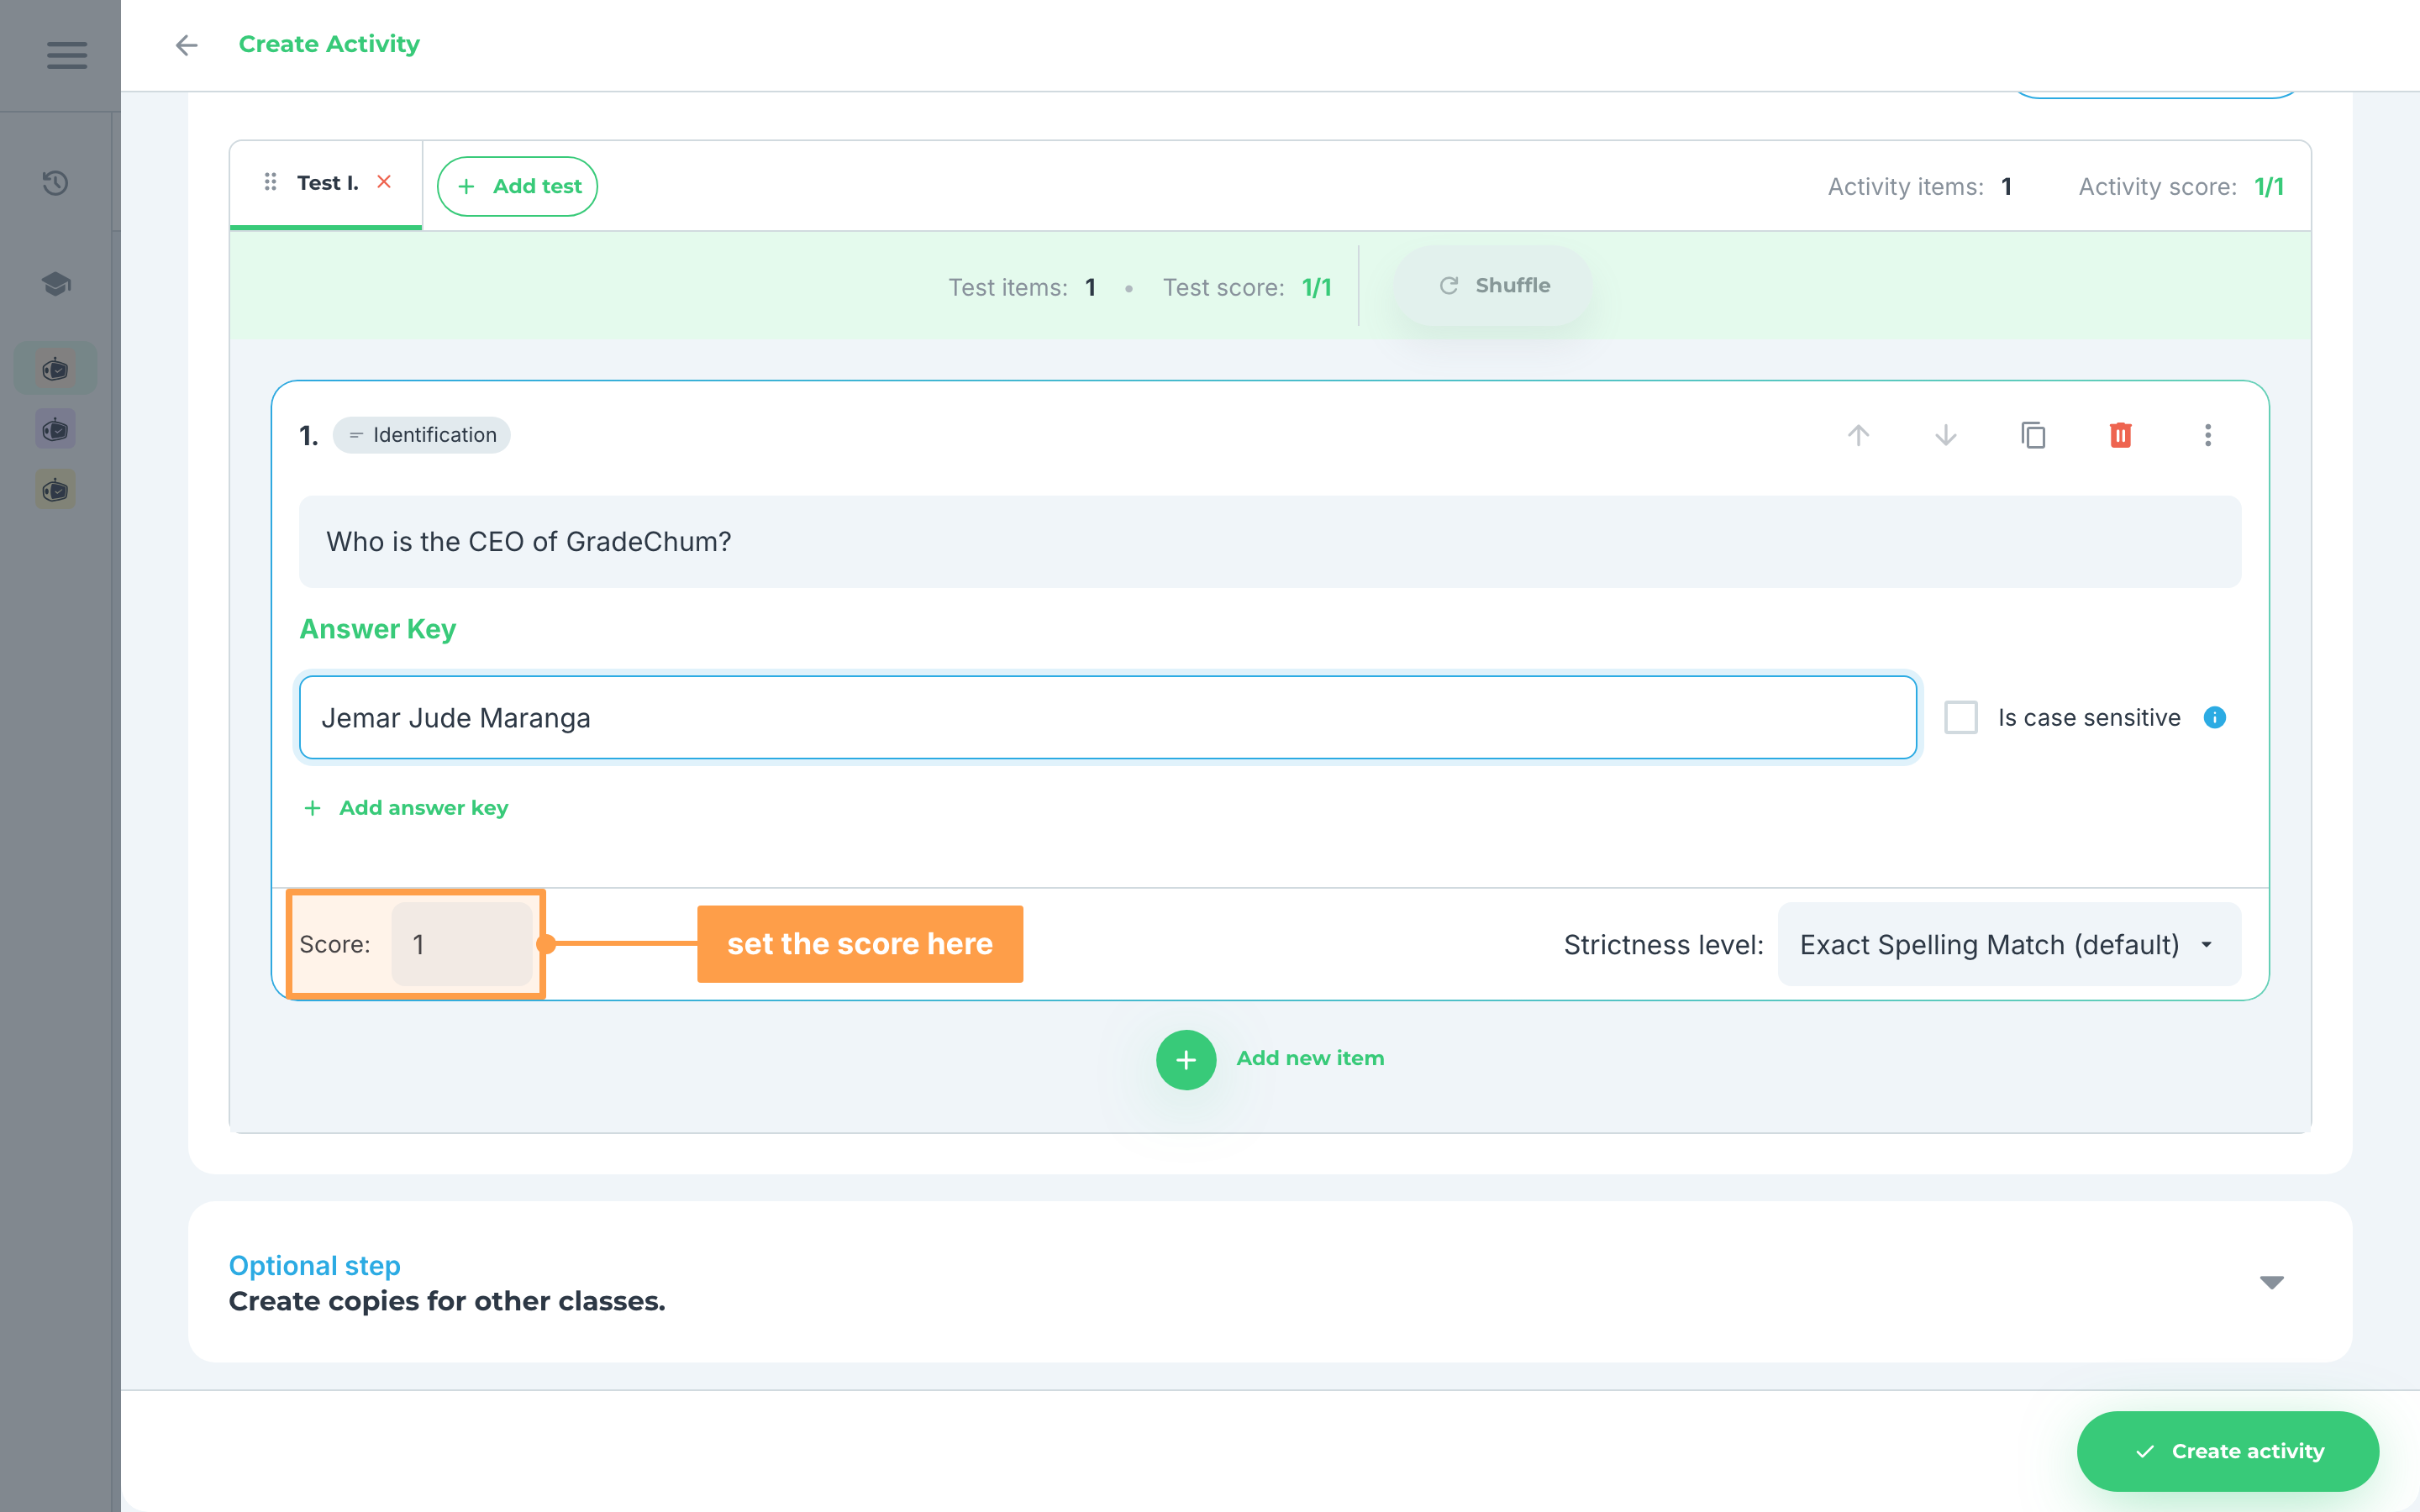
- Provide at least one (1) answer key for the item by typing it on the provided field. Tick Is case sensitive beside it if the answer only counts when the capitalisation matches.
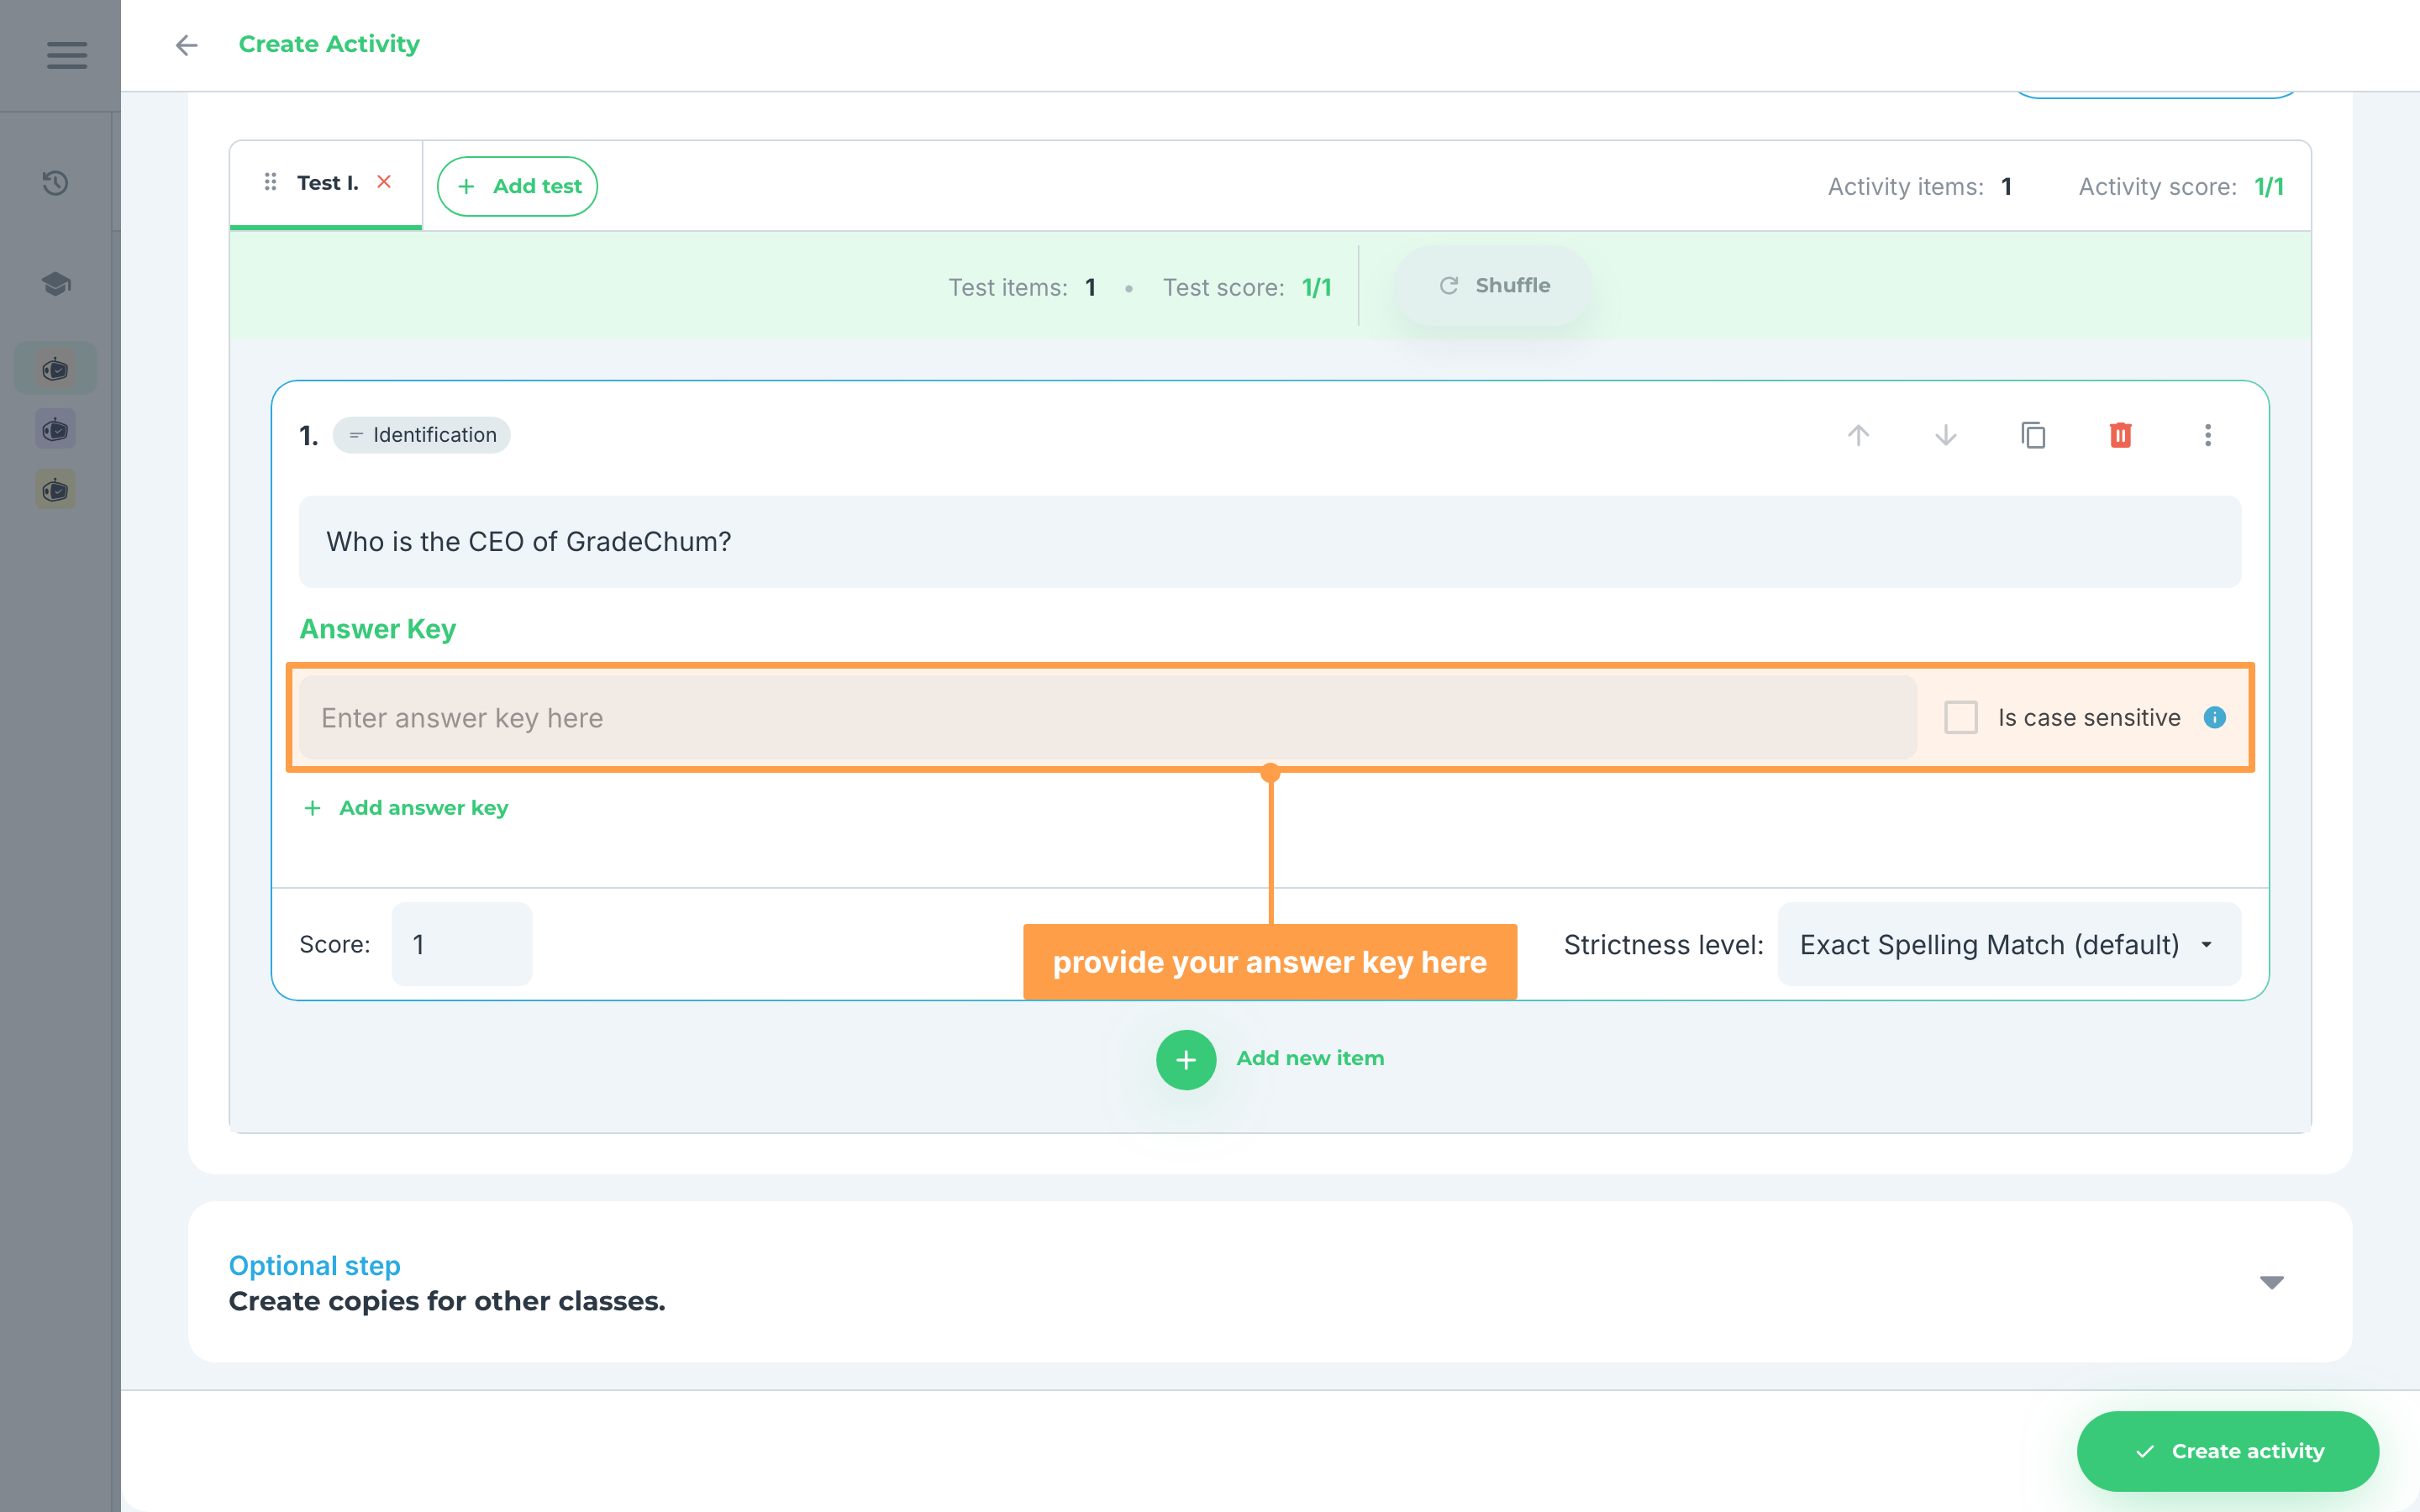
- If the item has two or more possible answers, you can add them by clicking the + Add answer key button under the last answer key.
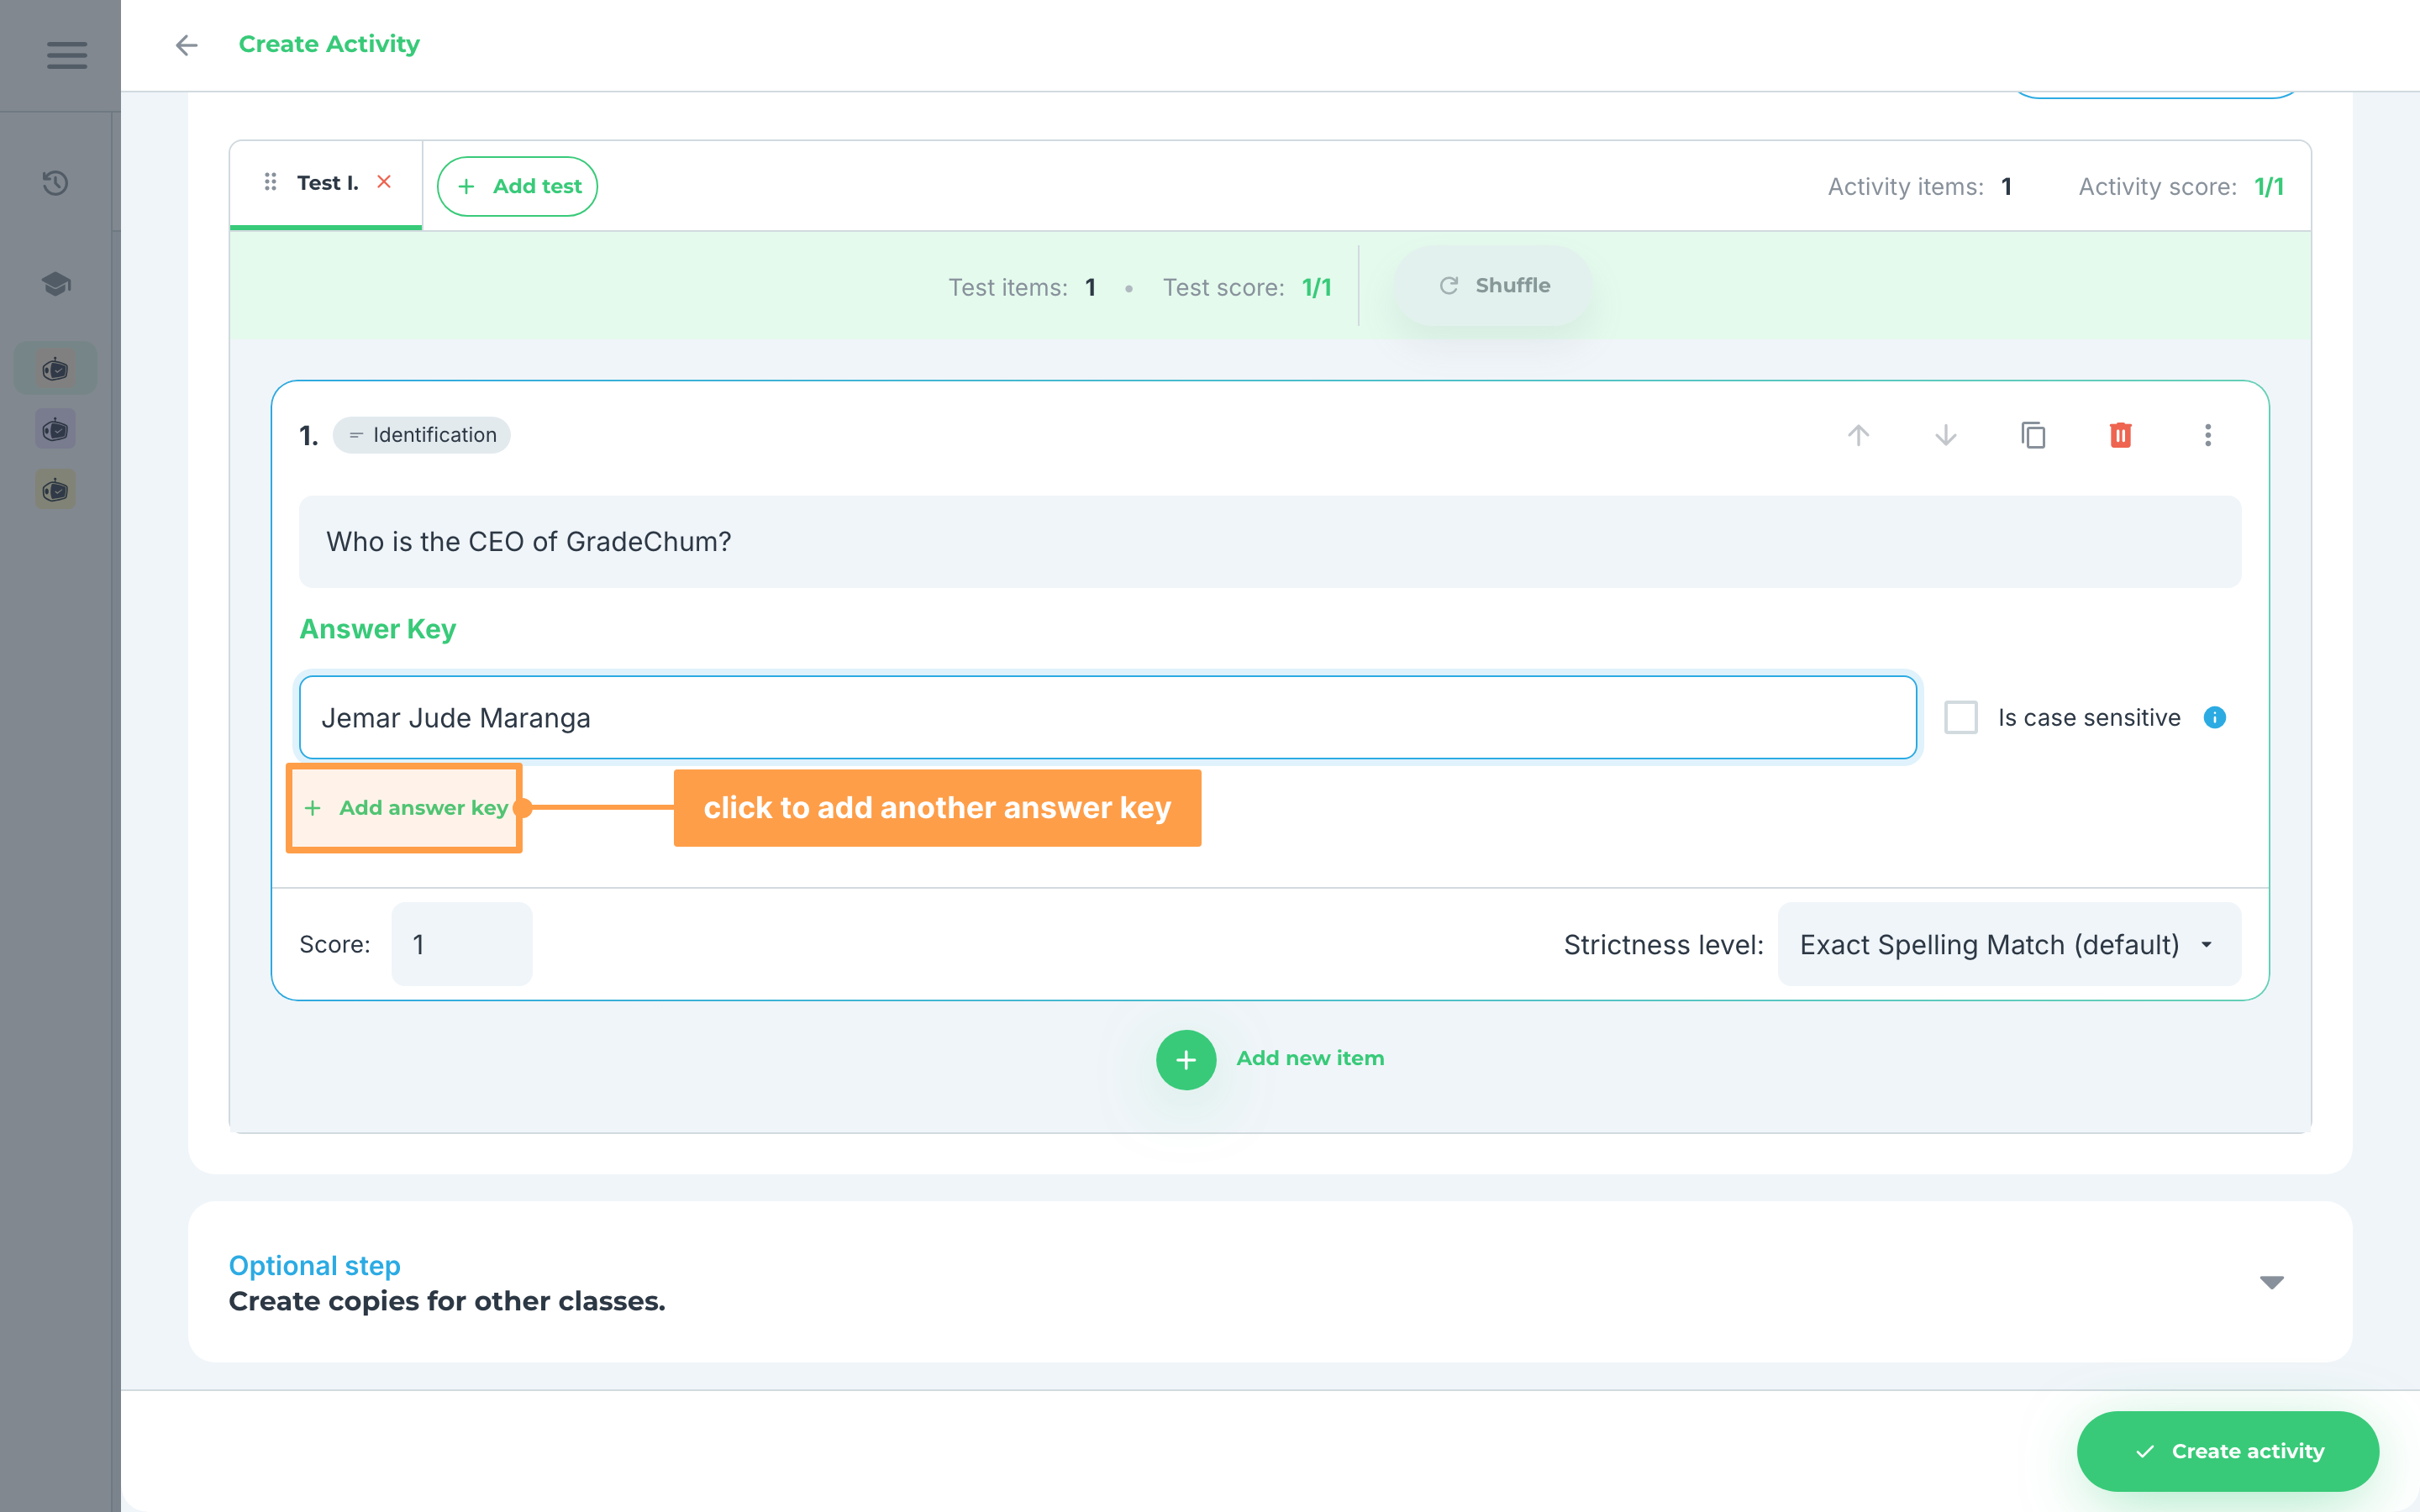
- Select a strictness level for this item. Strictness levels determine how strict our system will be in checking the students' answers. Identification items offer two: Flexible, which focuses on effort and partial understanding, and Exact Spelling Match, the default, which focuses on exact spelling of the answer key.
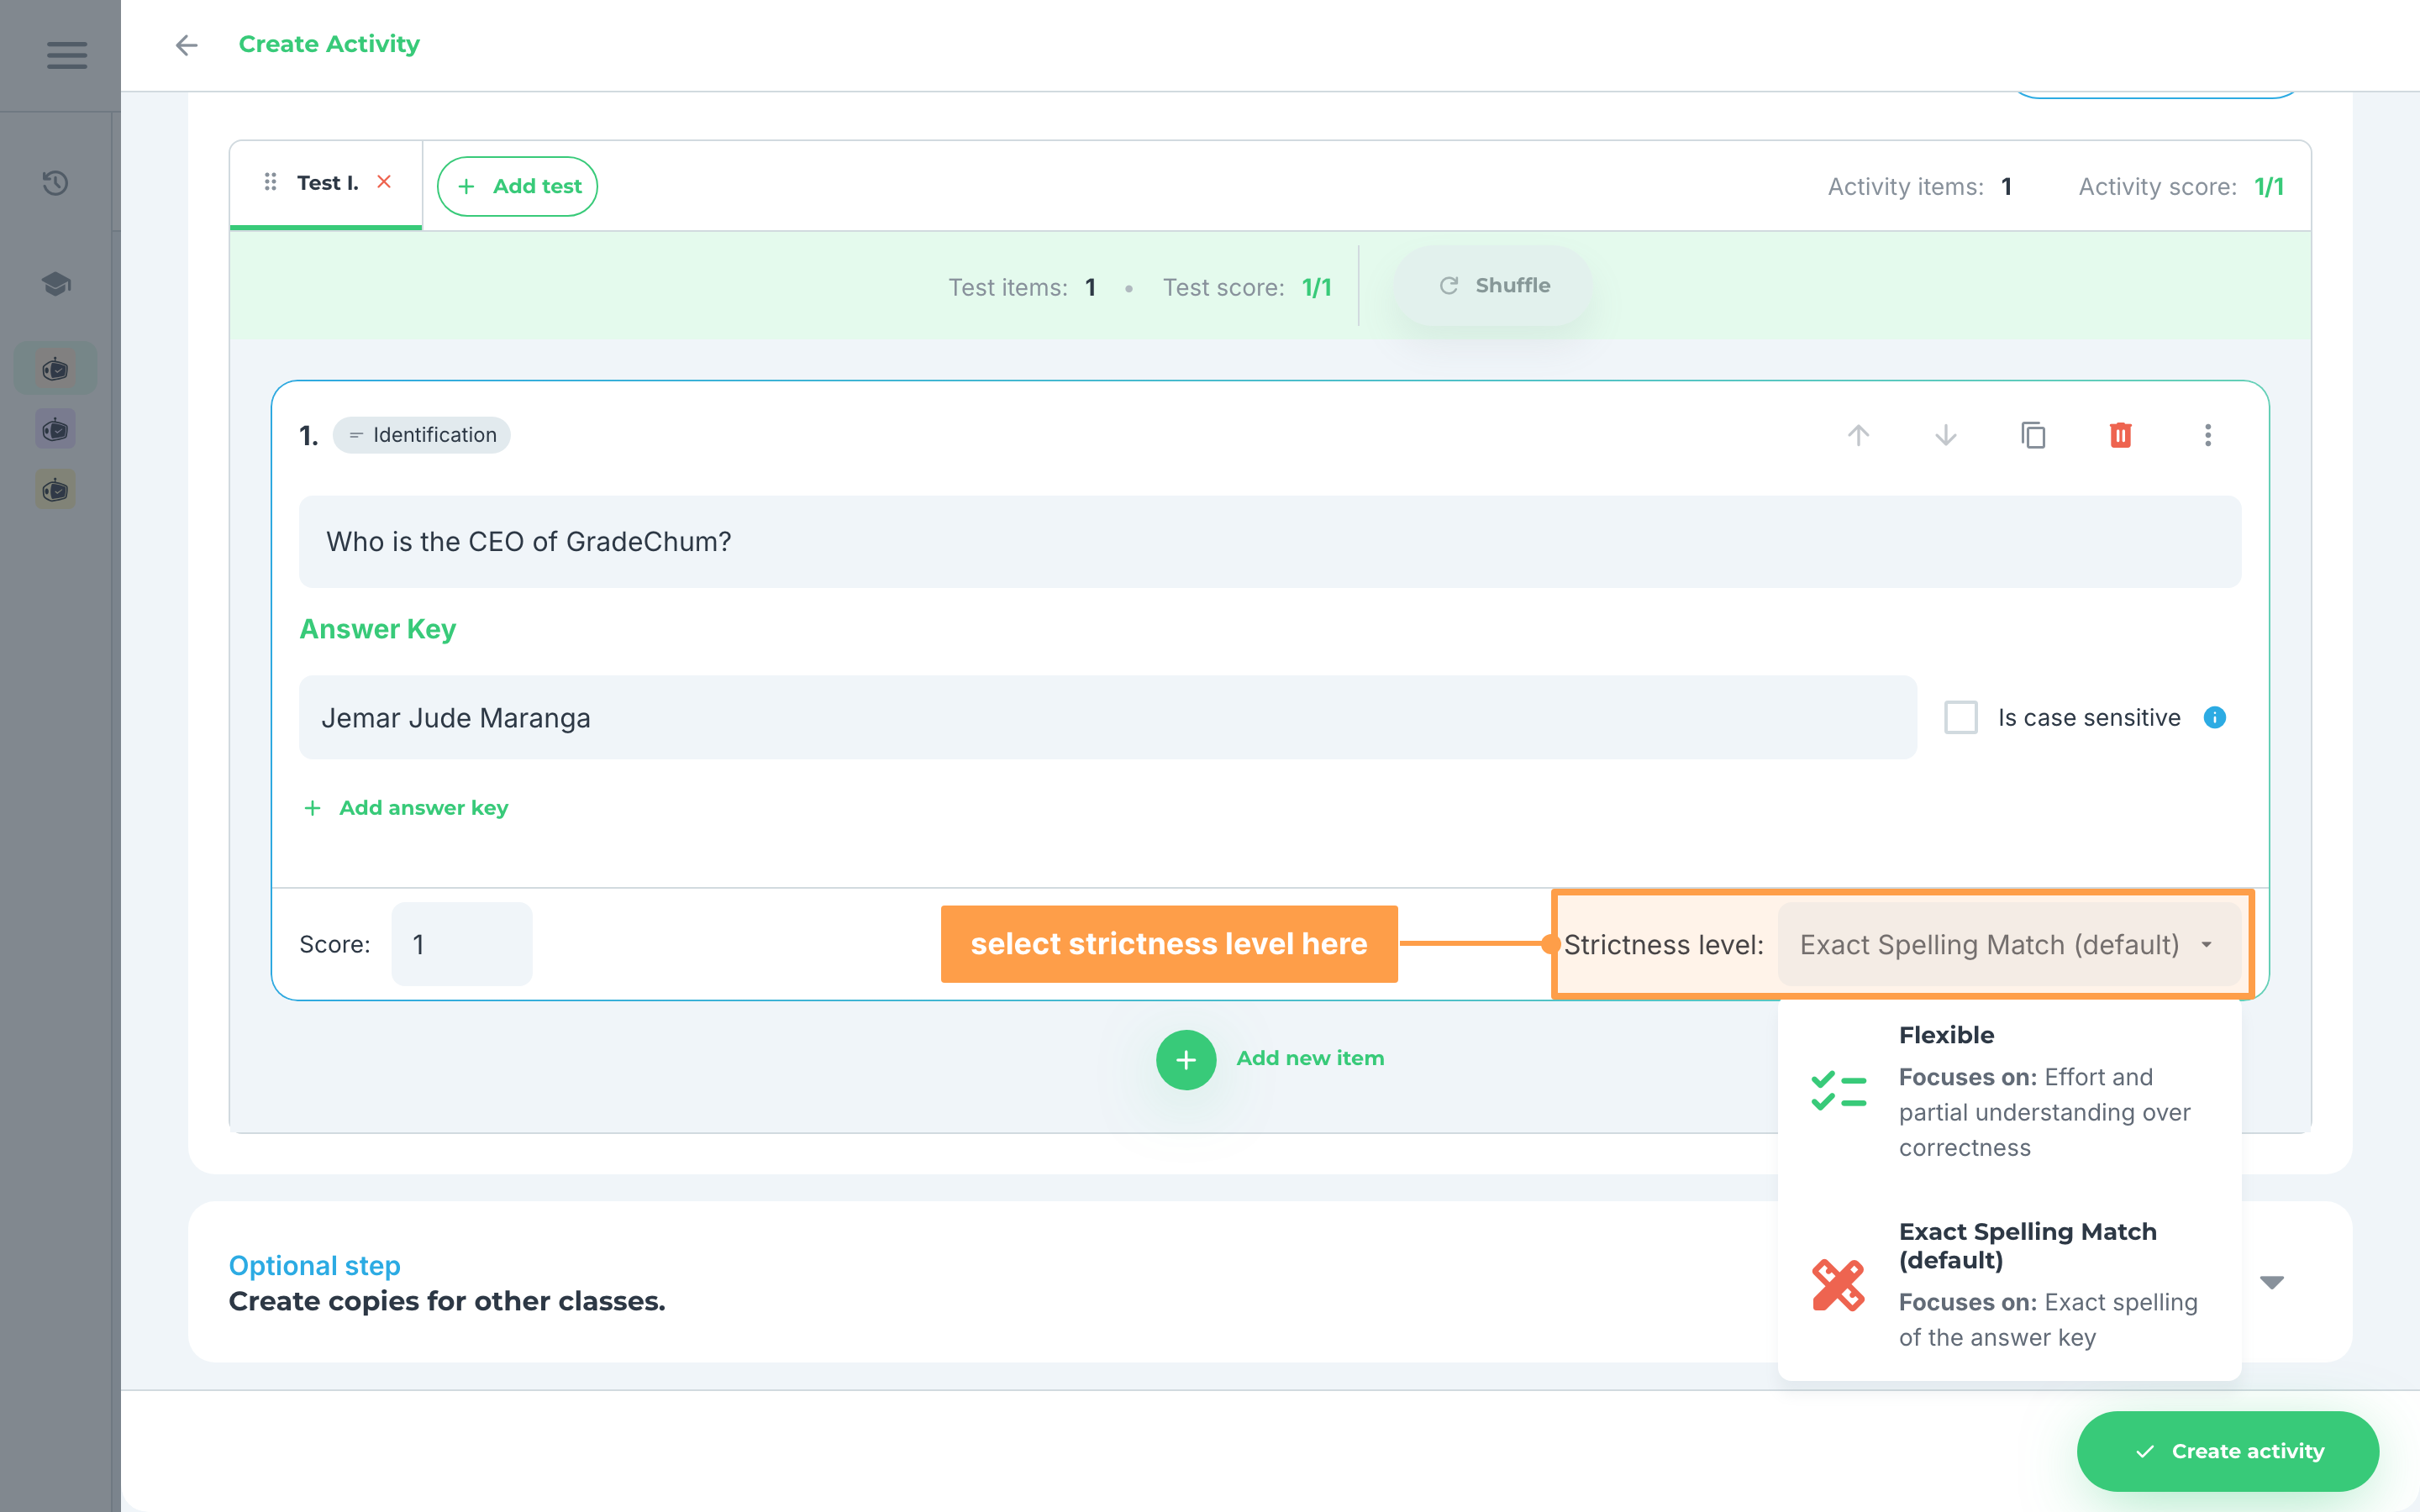
- Finally, set a score for this item. By default, this is set to 1 point.
c. Enumeration
For items with Enumeration as the item type:
- Fill out the question for this item.
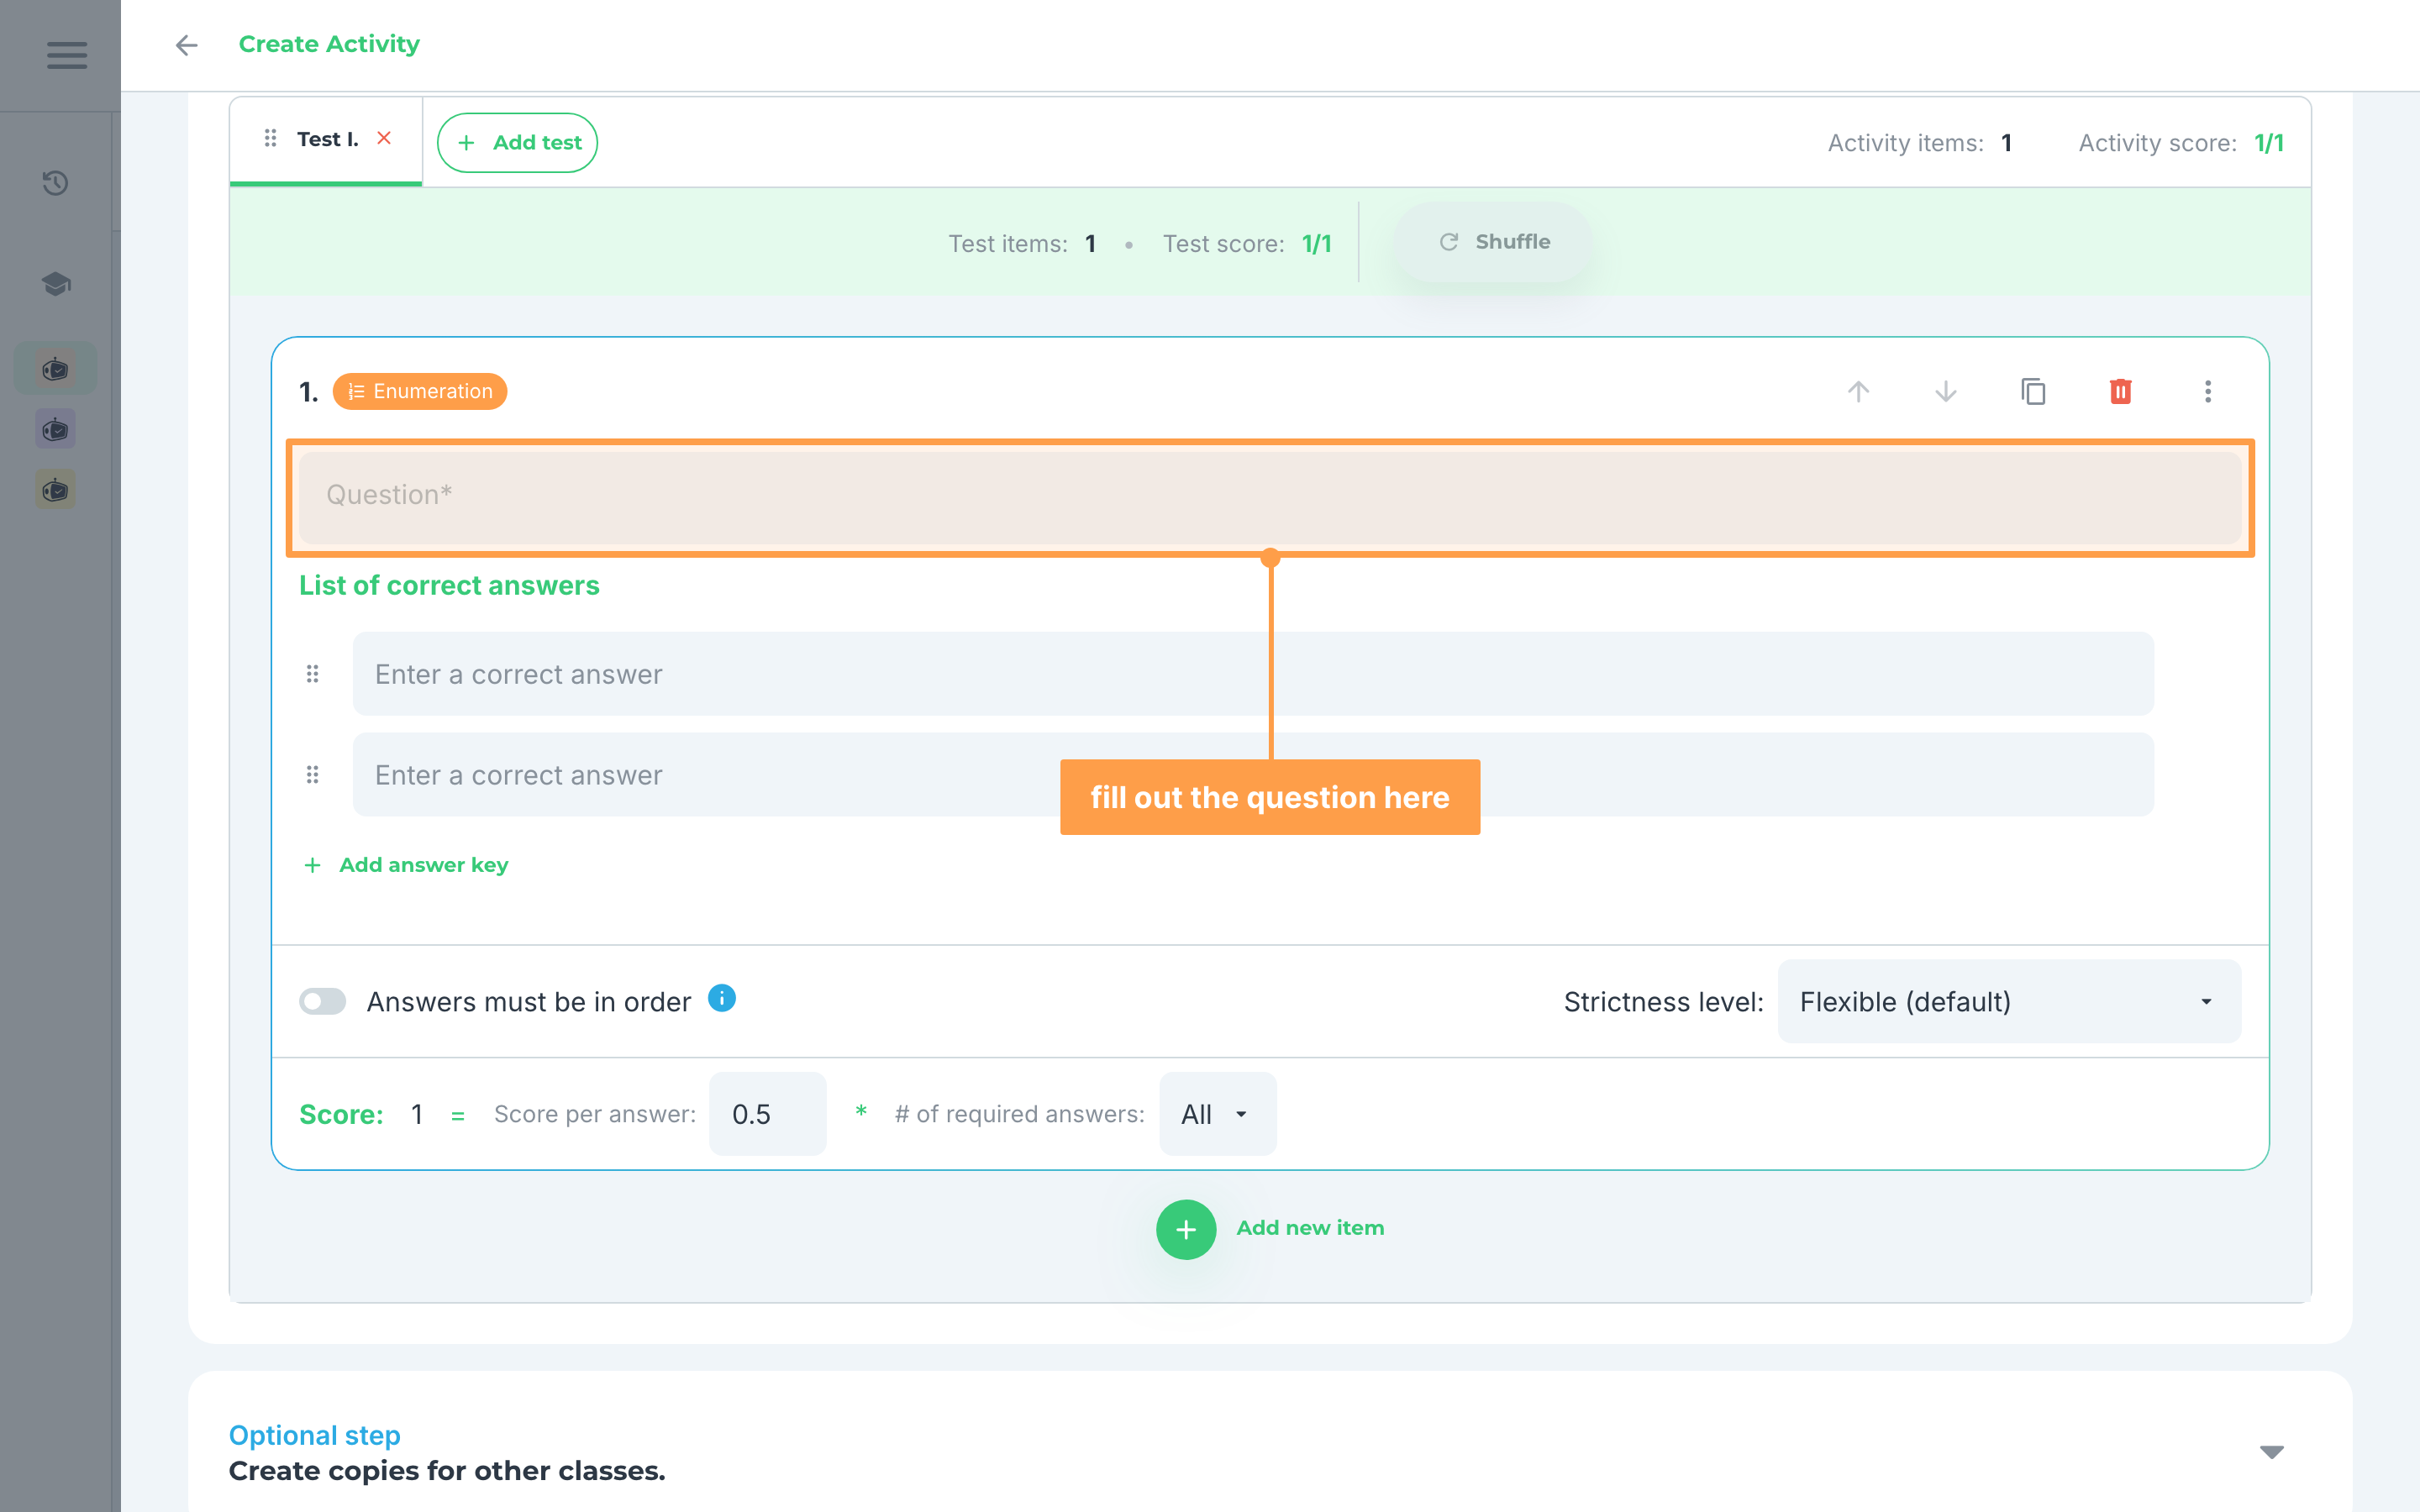
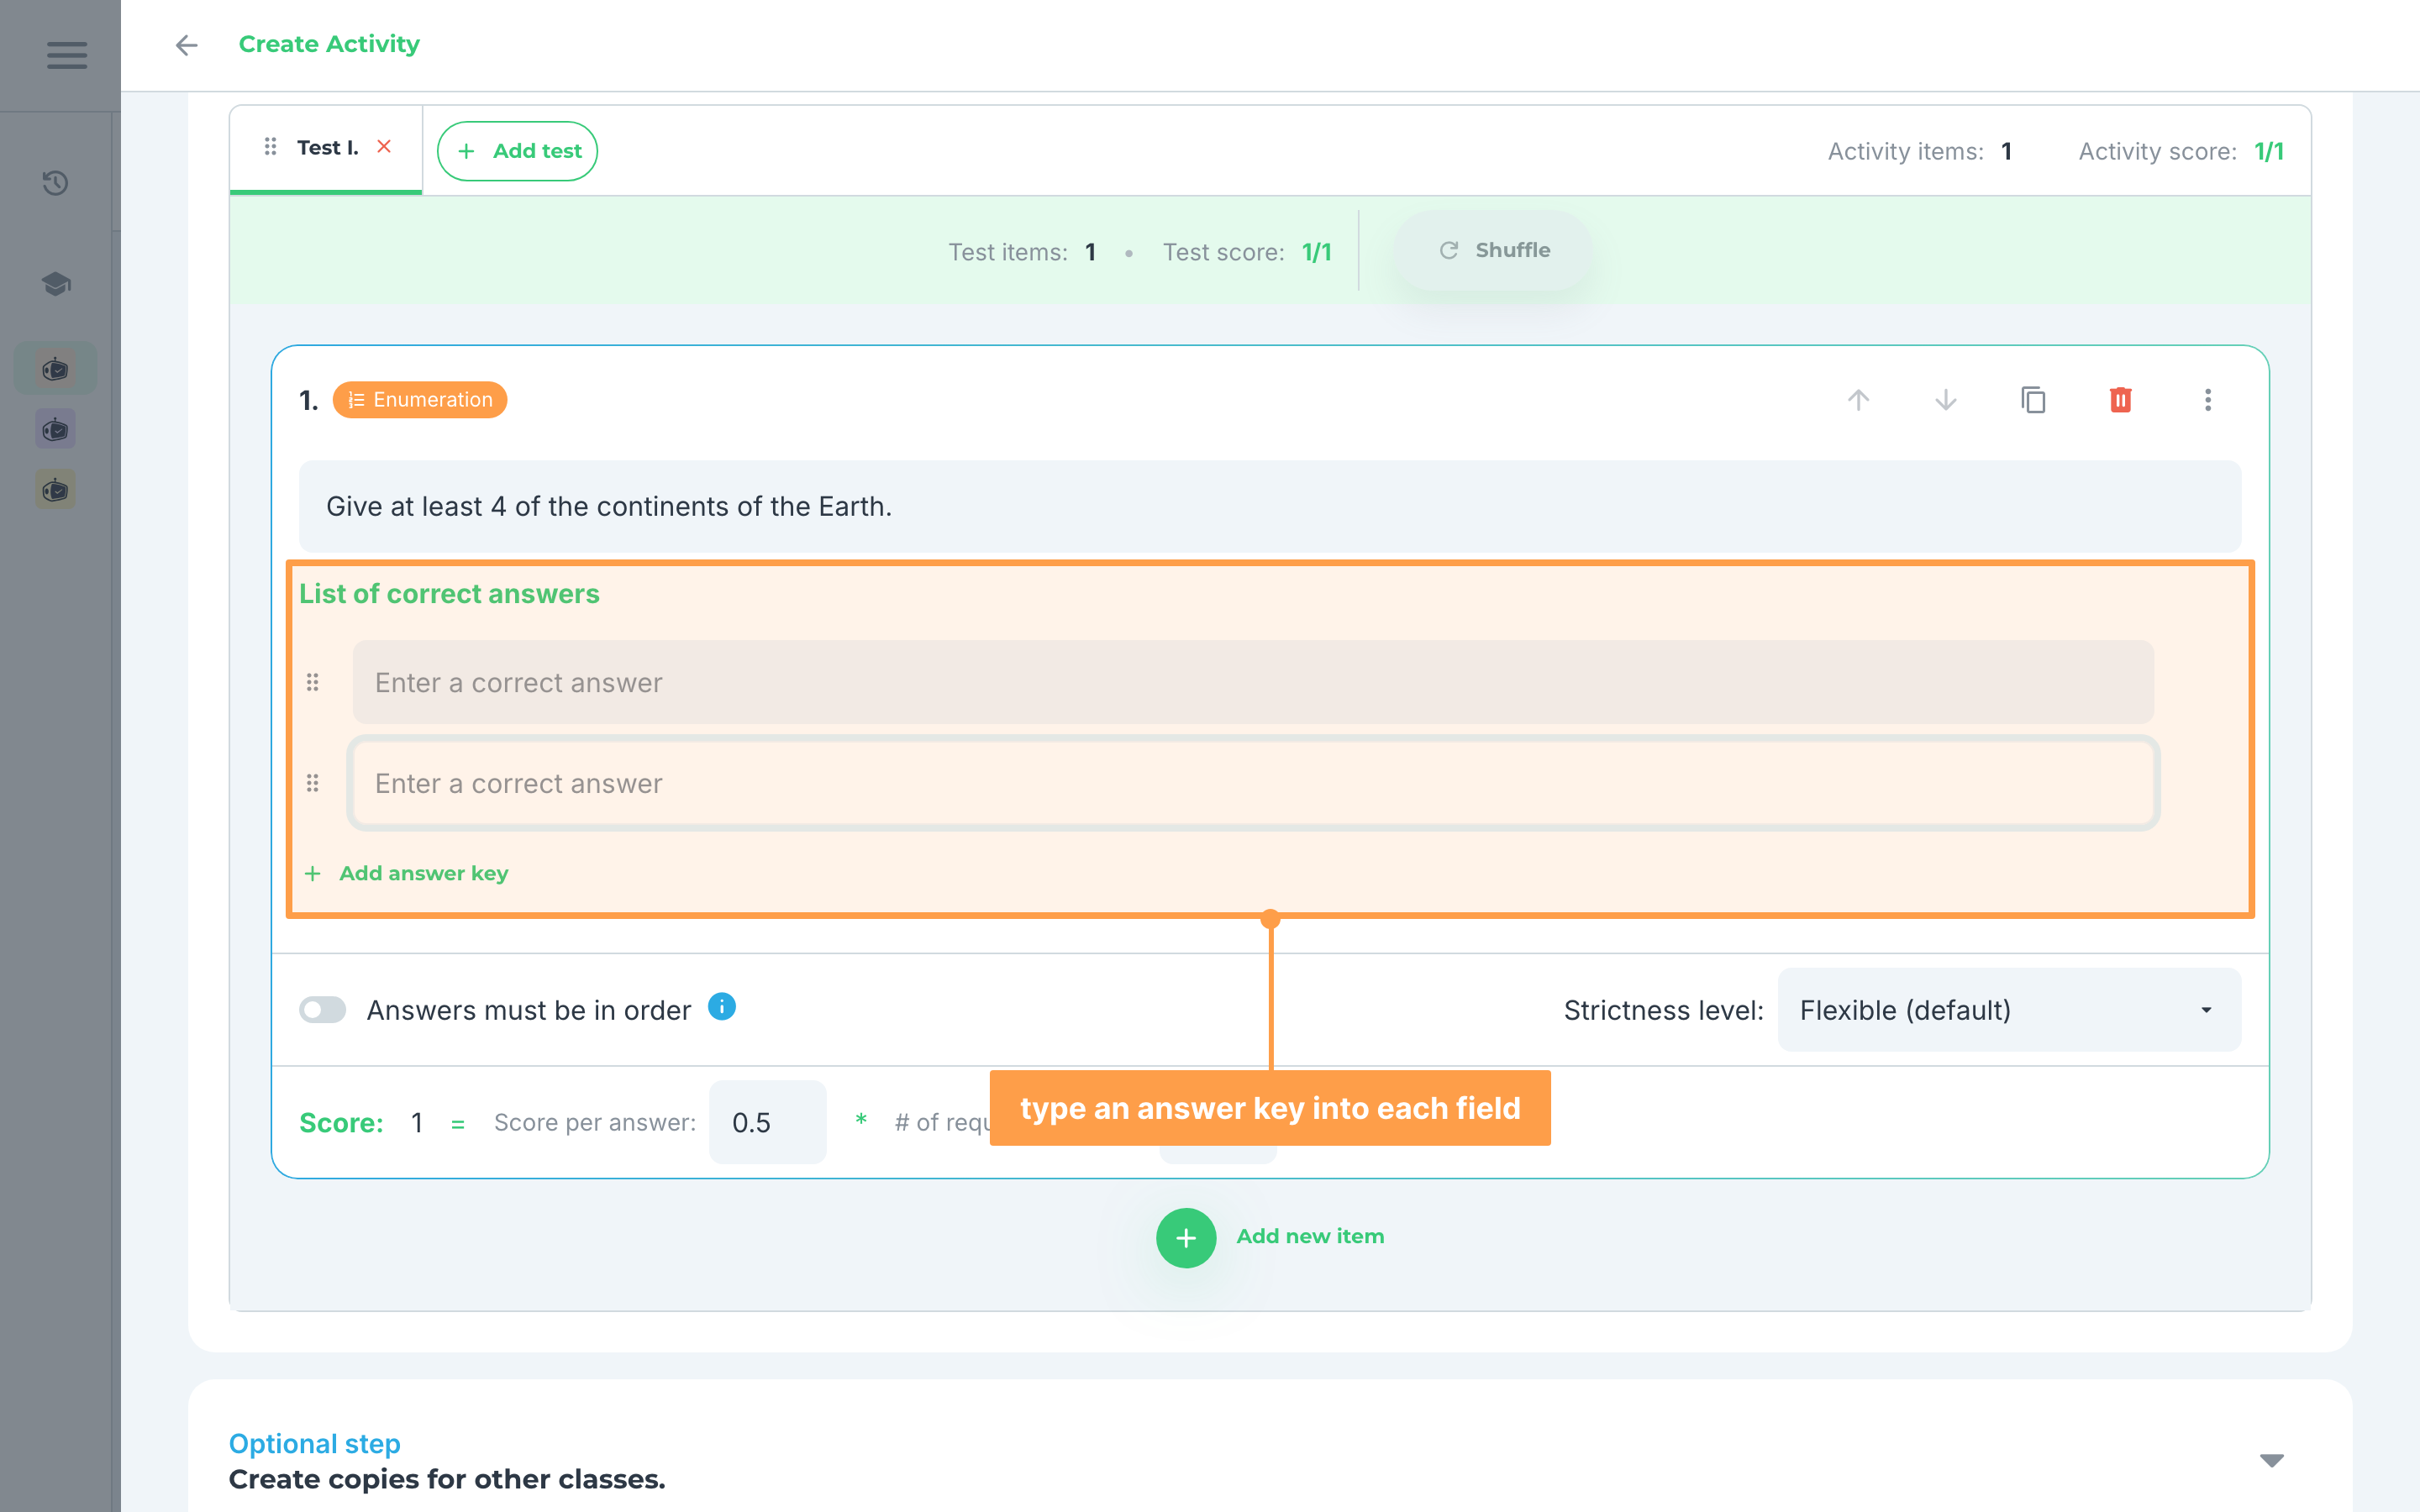
- Provide the answer keys for the item by typing them into the fields under List of correct answers. A new enumeration item starts with two, which is also the fewest it can have.
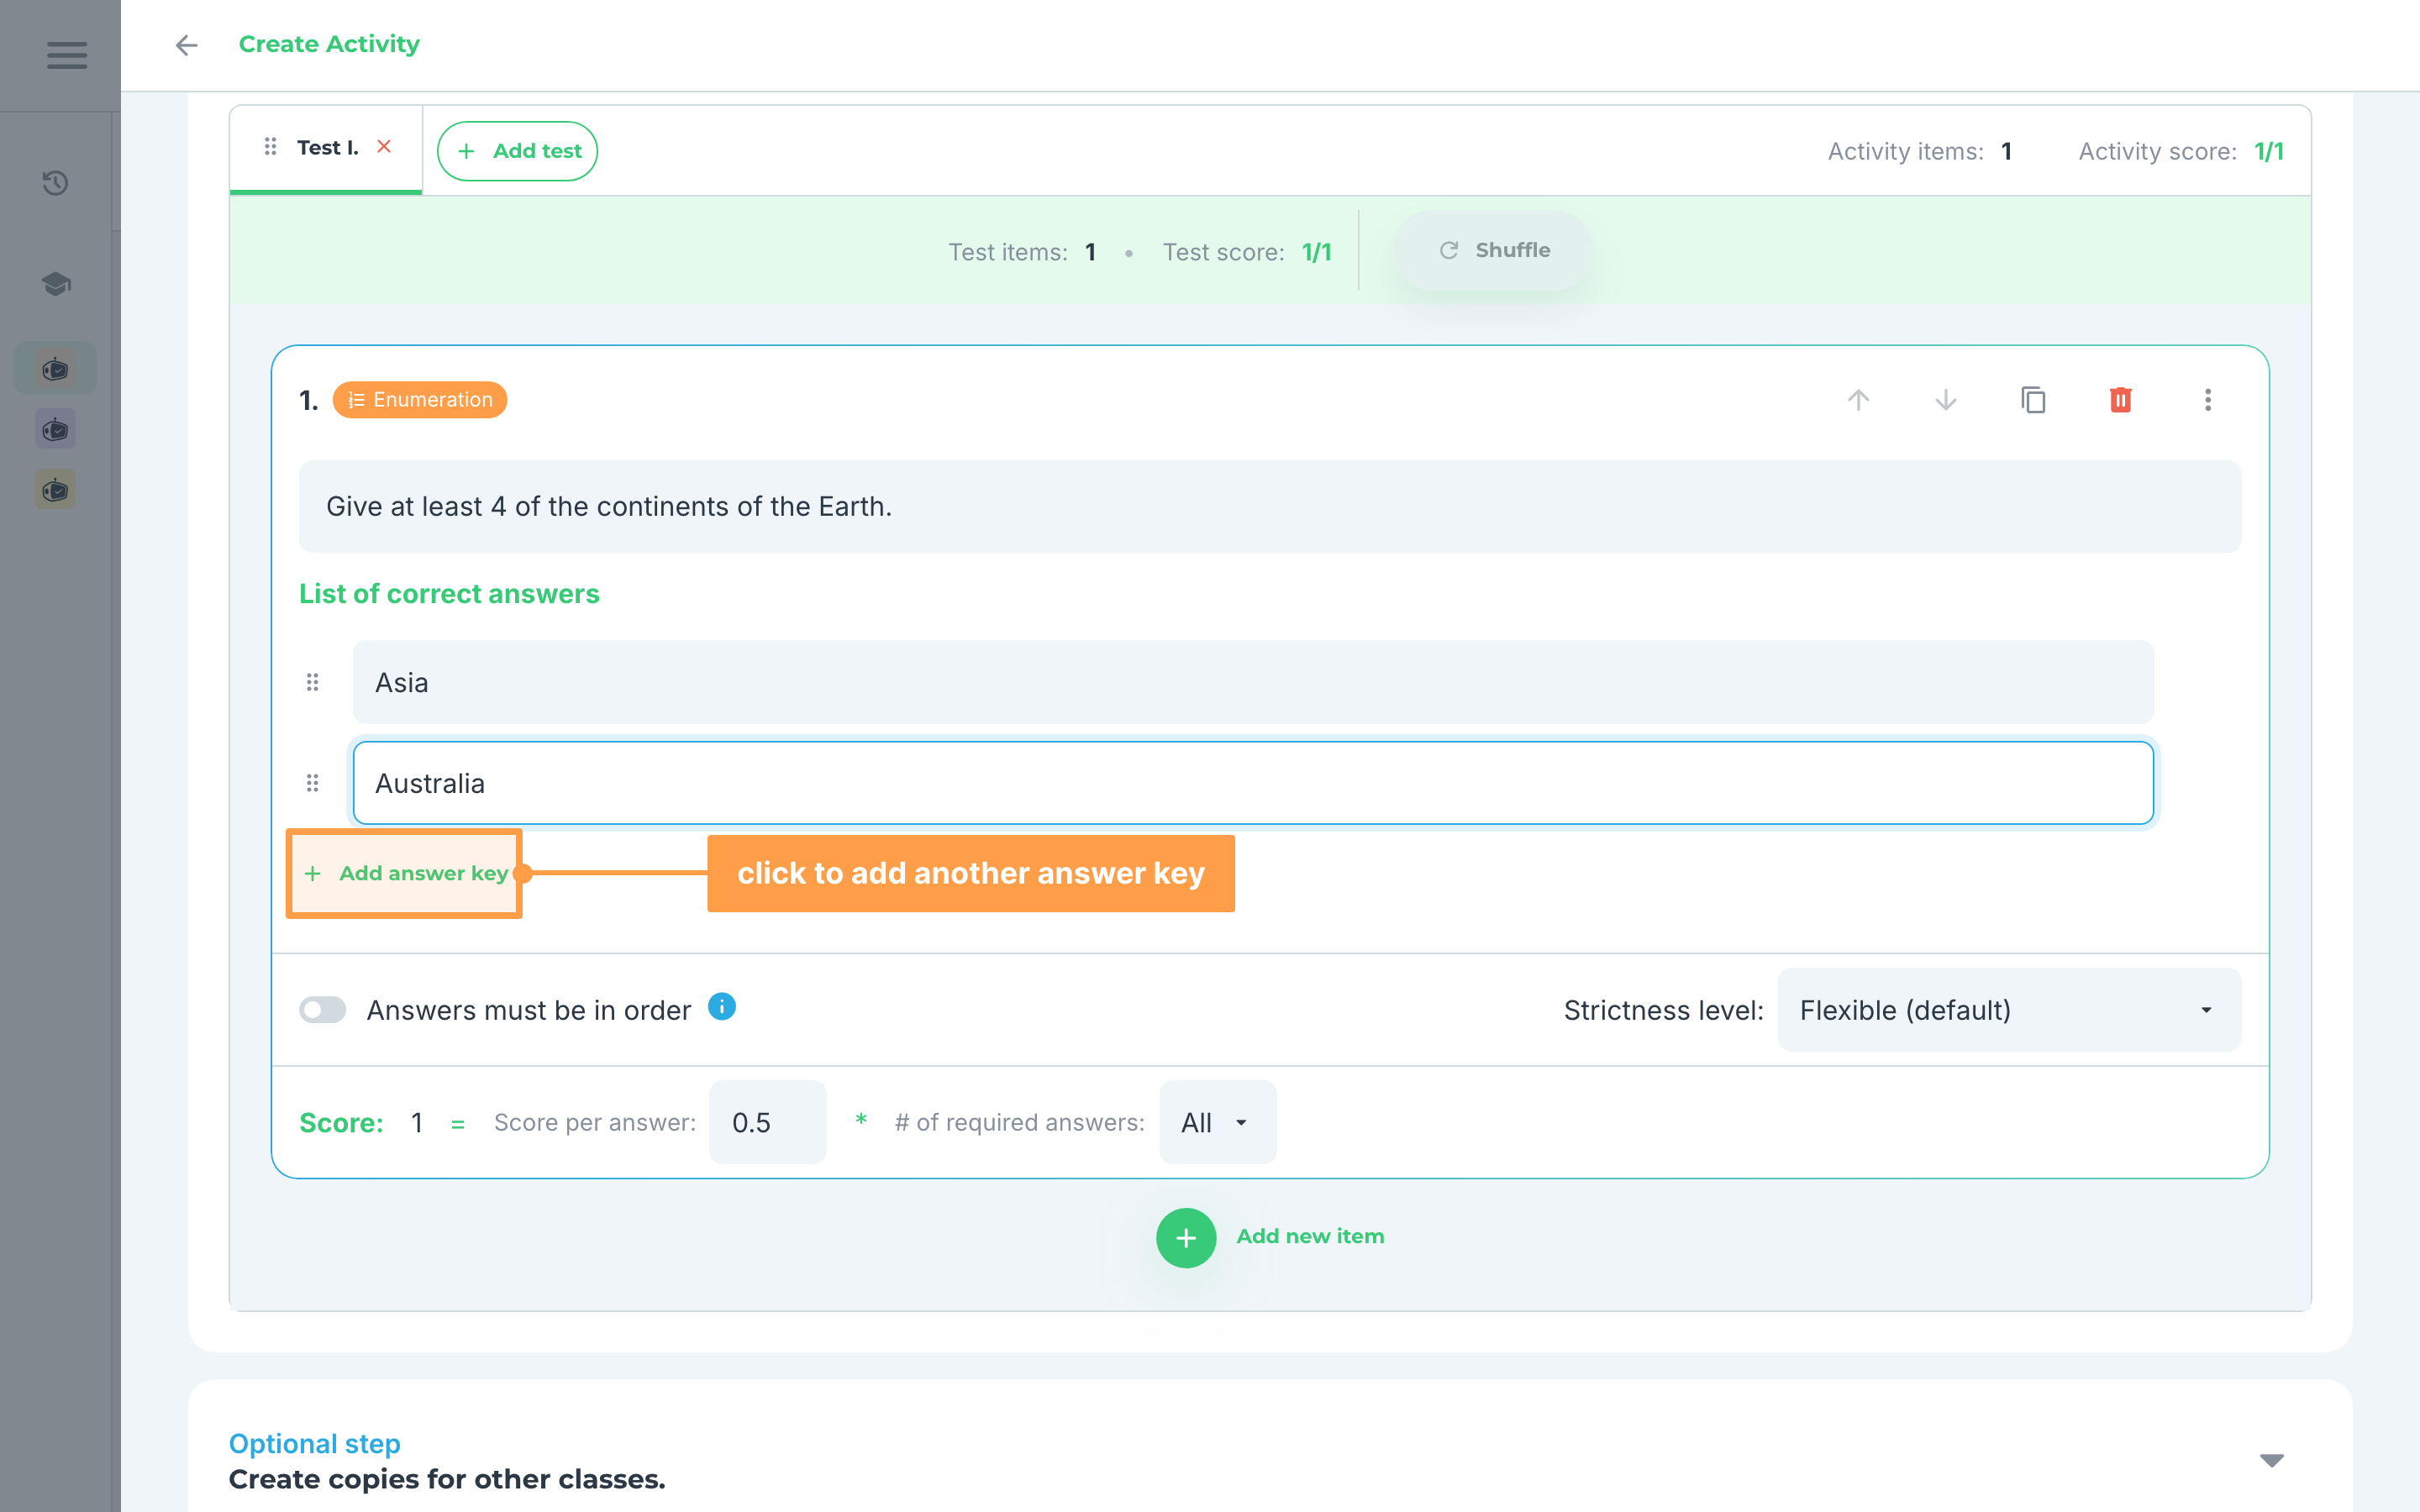
- To add an answer key, click the + Add answer key link directly below the last answer key.
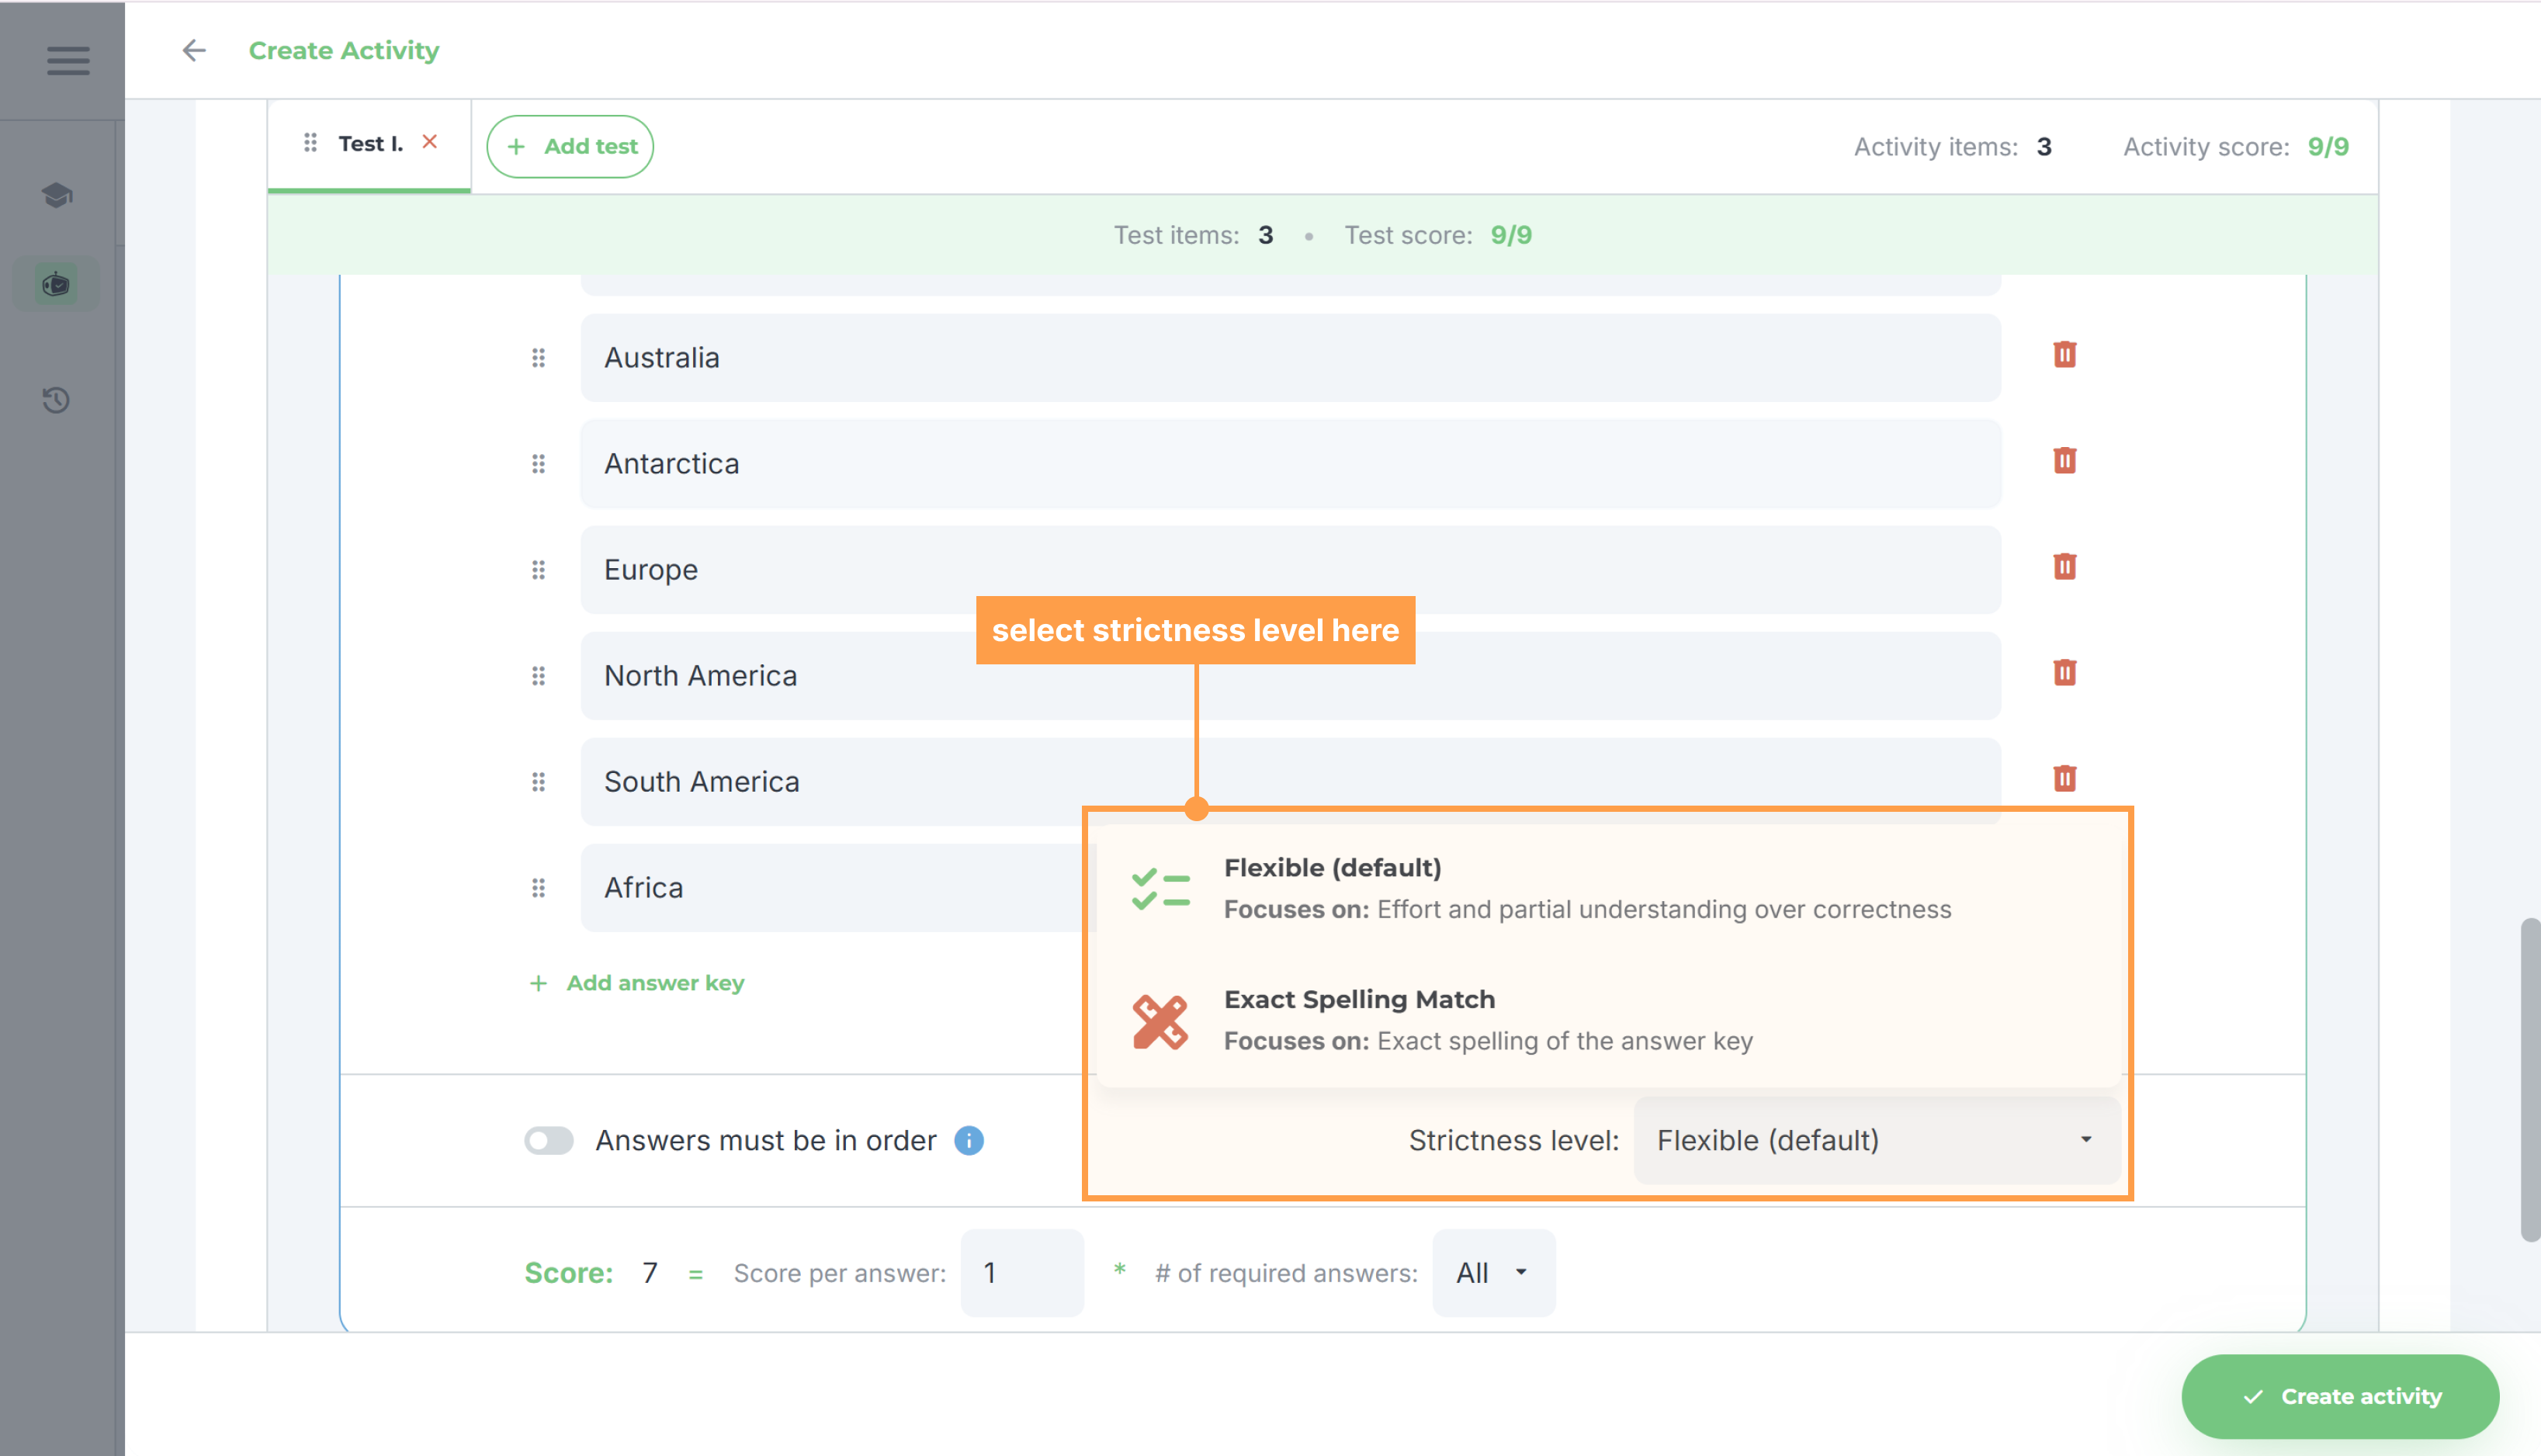
- Select a strictness level for this item. Strictness levels determine how strict our system will be in checking the students' answers. If you pick Exact Spelling Match, an Is case sensitive checkbox appears beside each answer key. In the same row, turn on Answers must be in order if your students have to give the answers in the order you listed them.
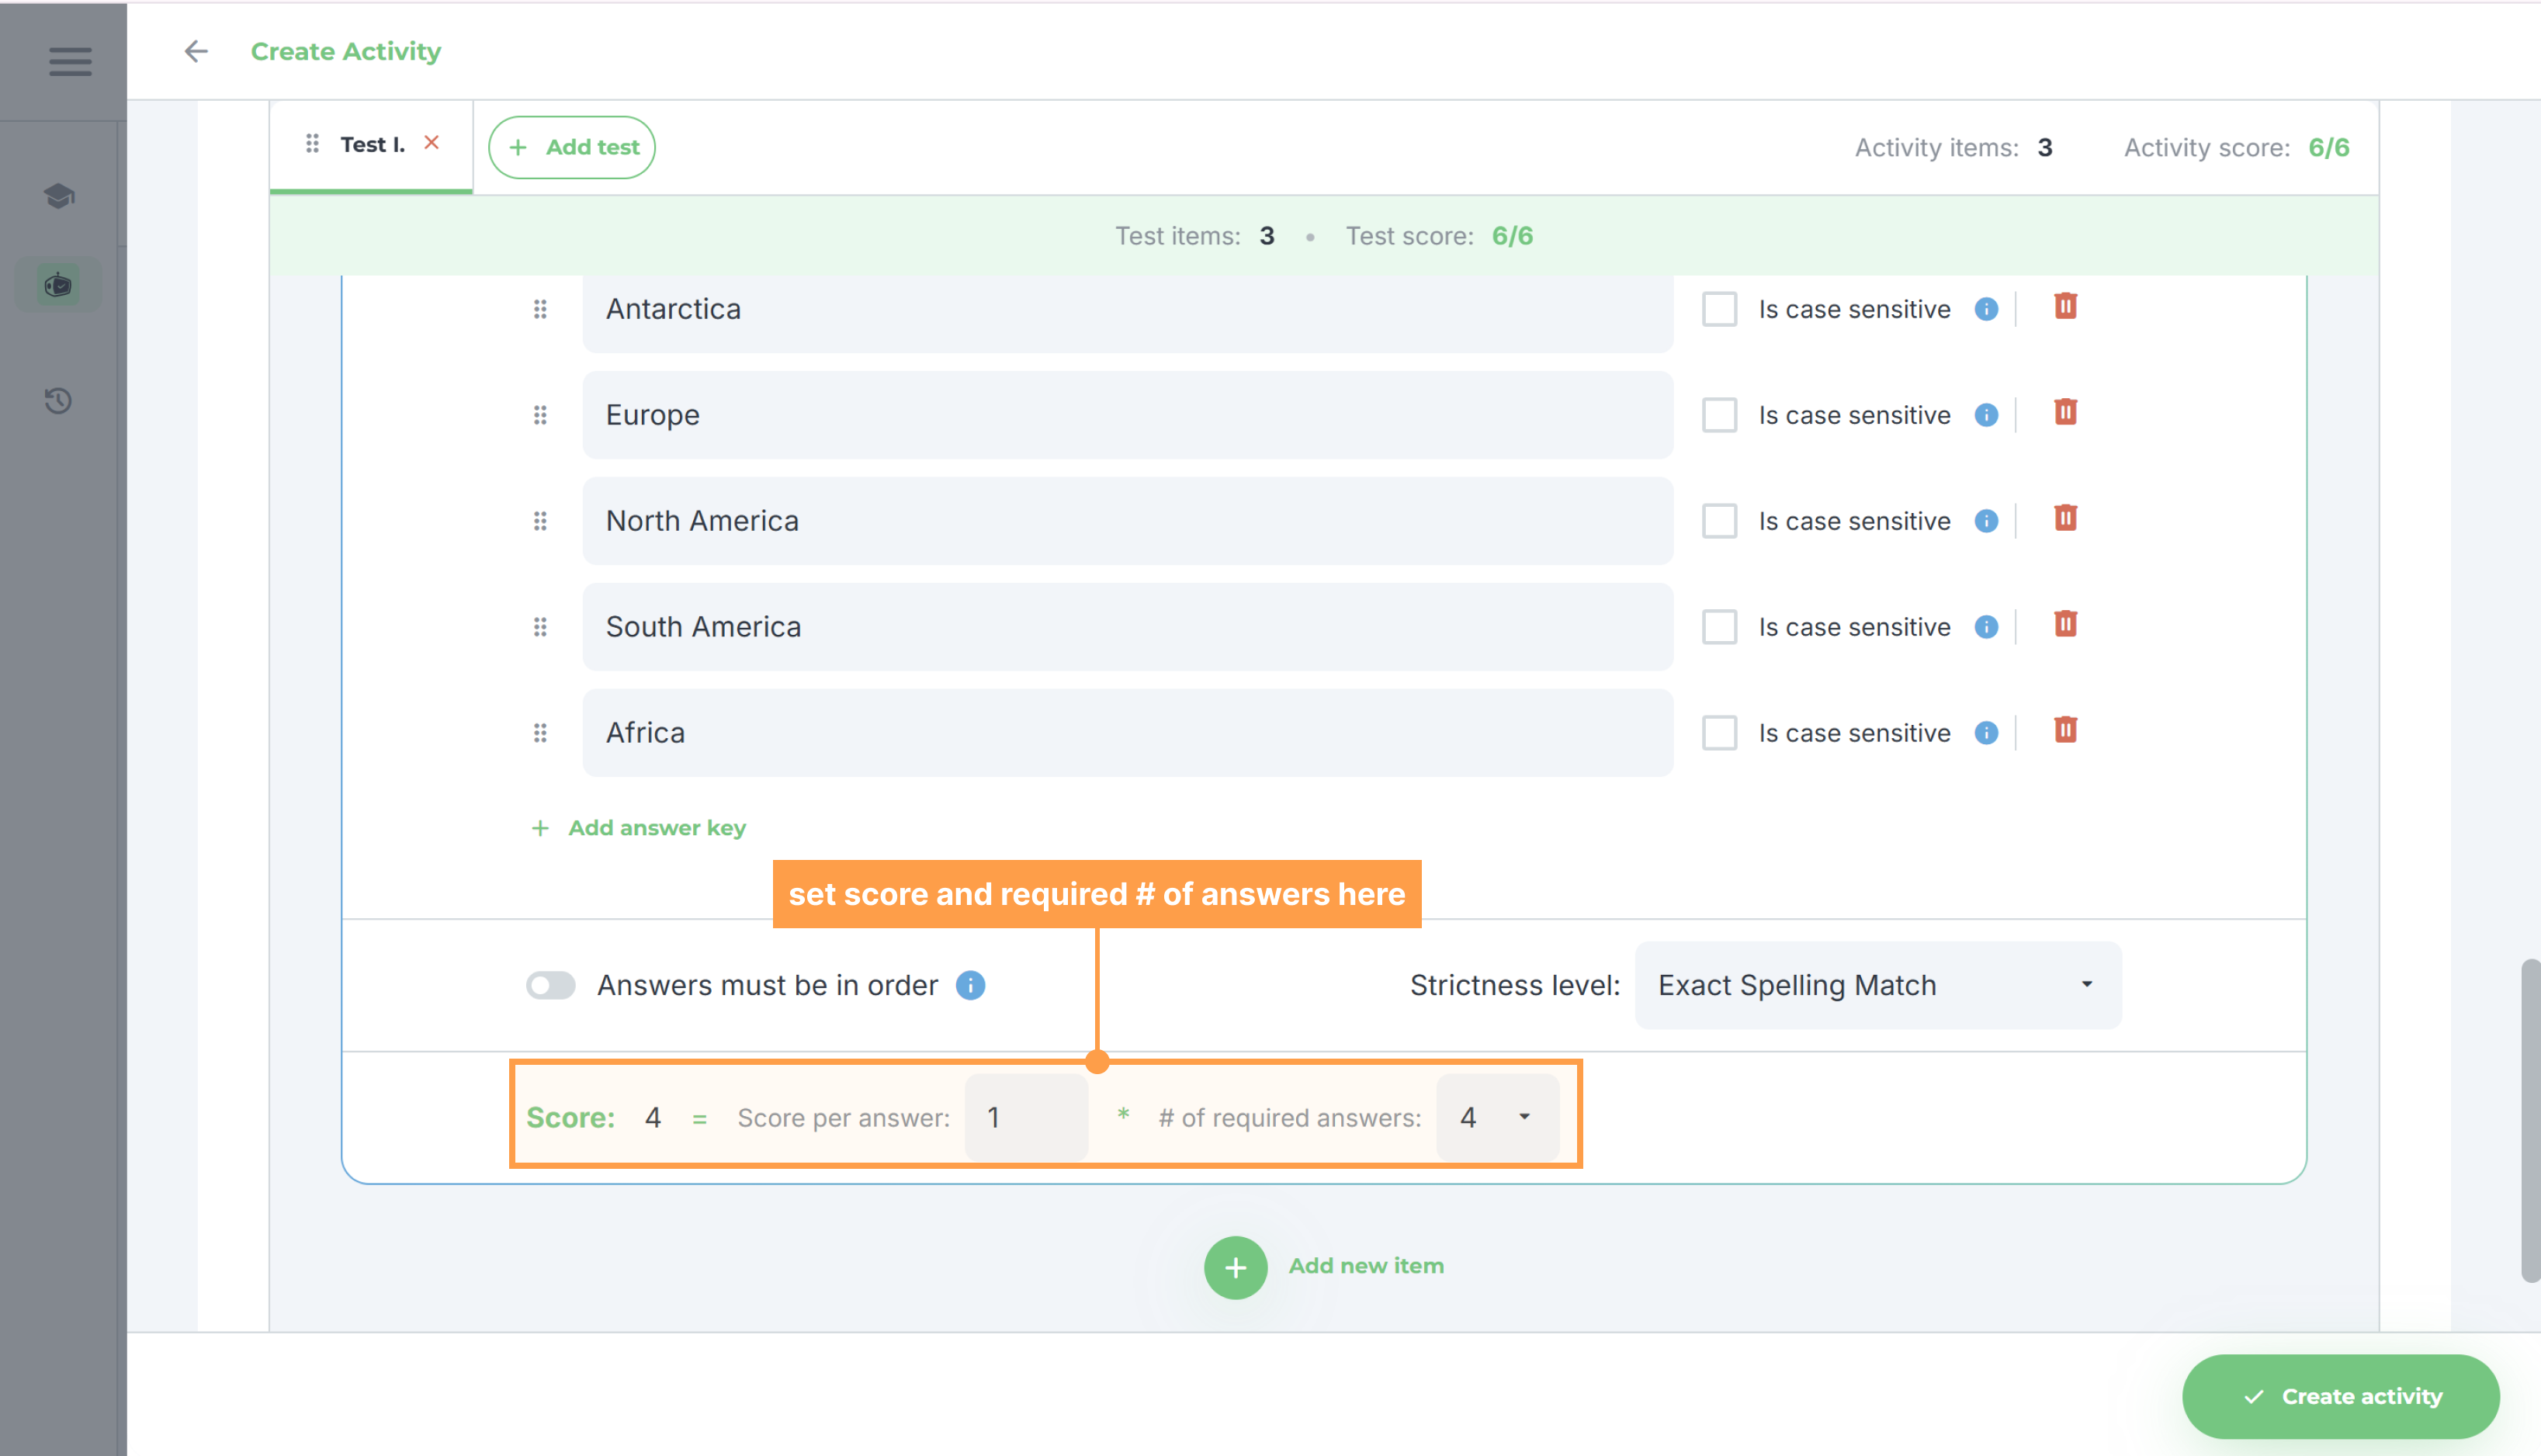
- Finally, set the score and the number of required answers for this item. The item's score comes from the test's default points and is divided evenly across the required answers, so Score per answer is filled in for you. By default, all of the answer keys are required answers.
d. Essay
For items with Essay as the item type:
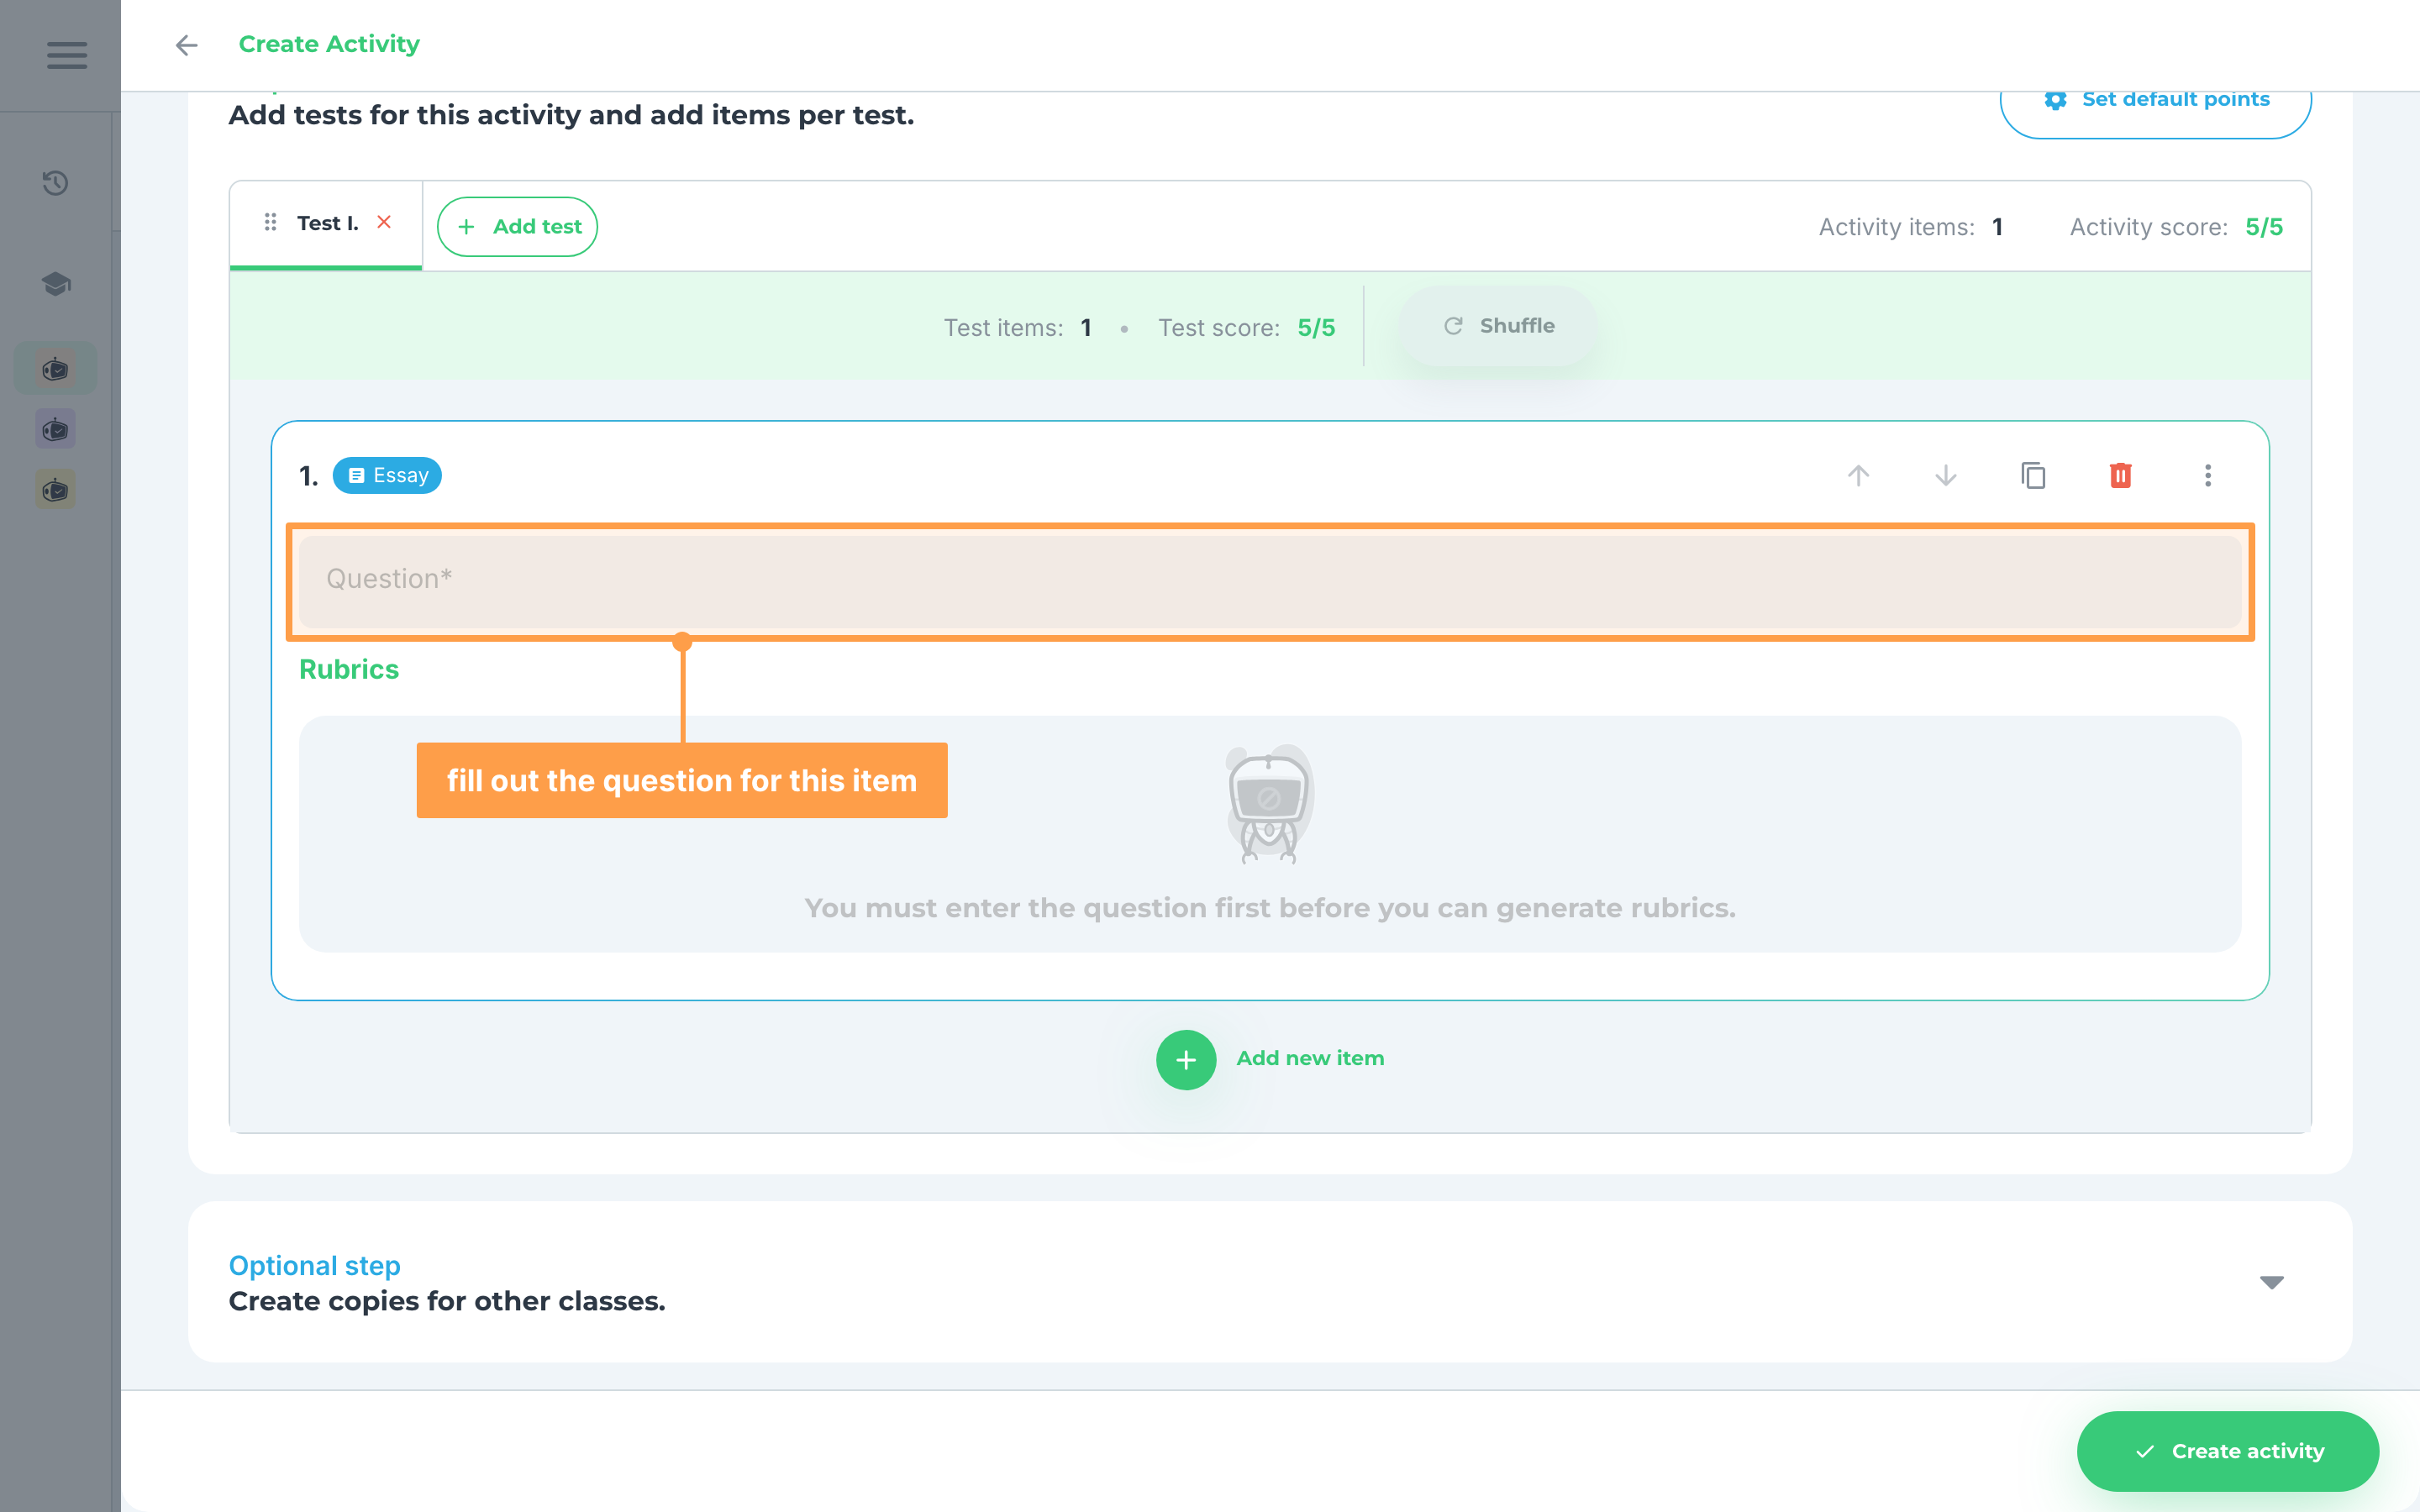
- Fill out the question for this item.
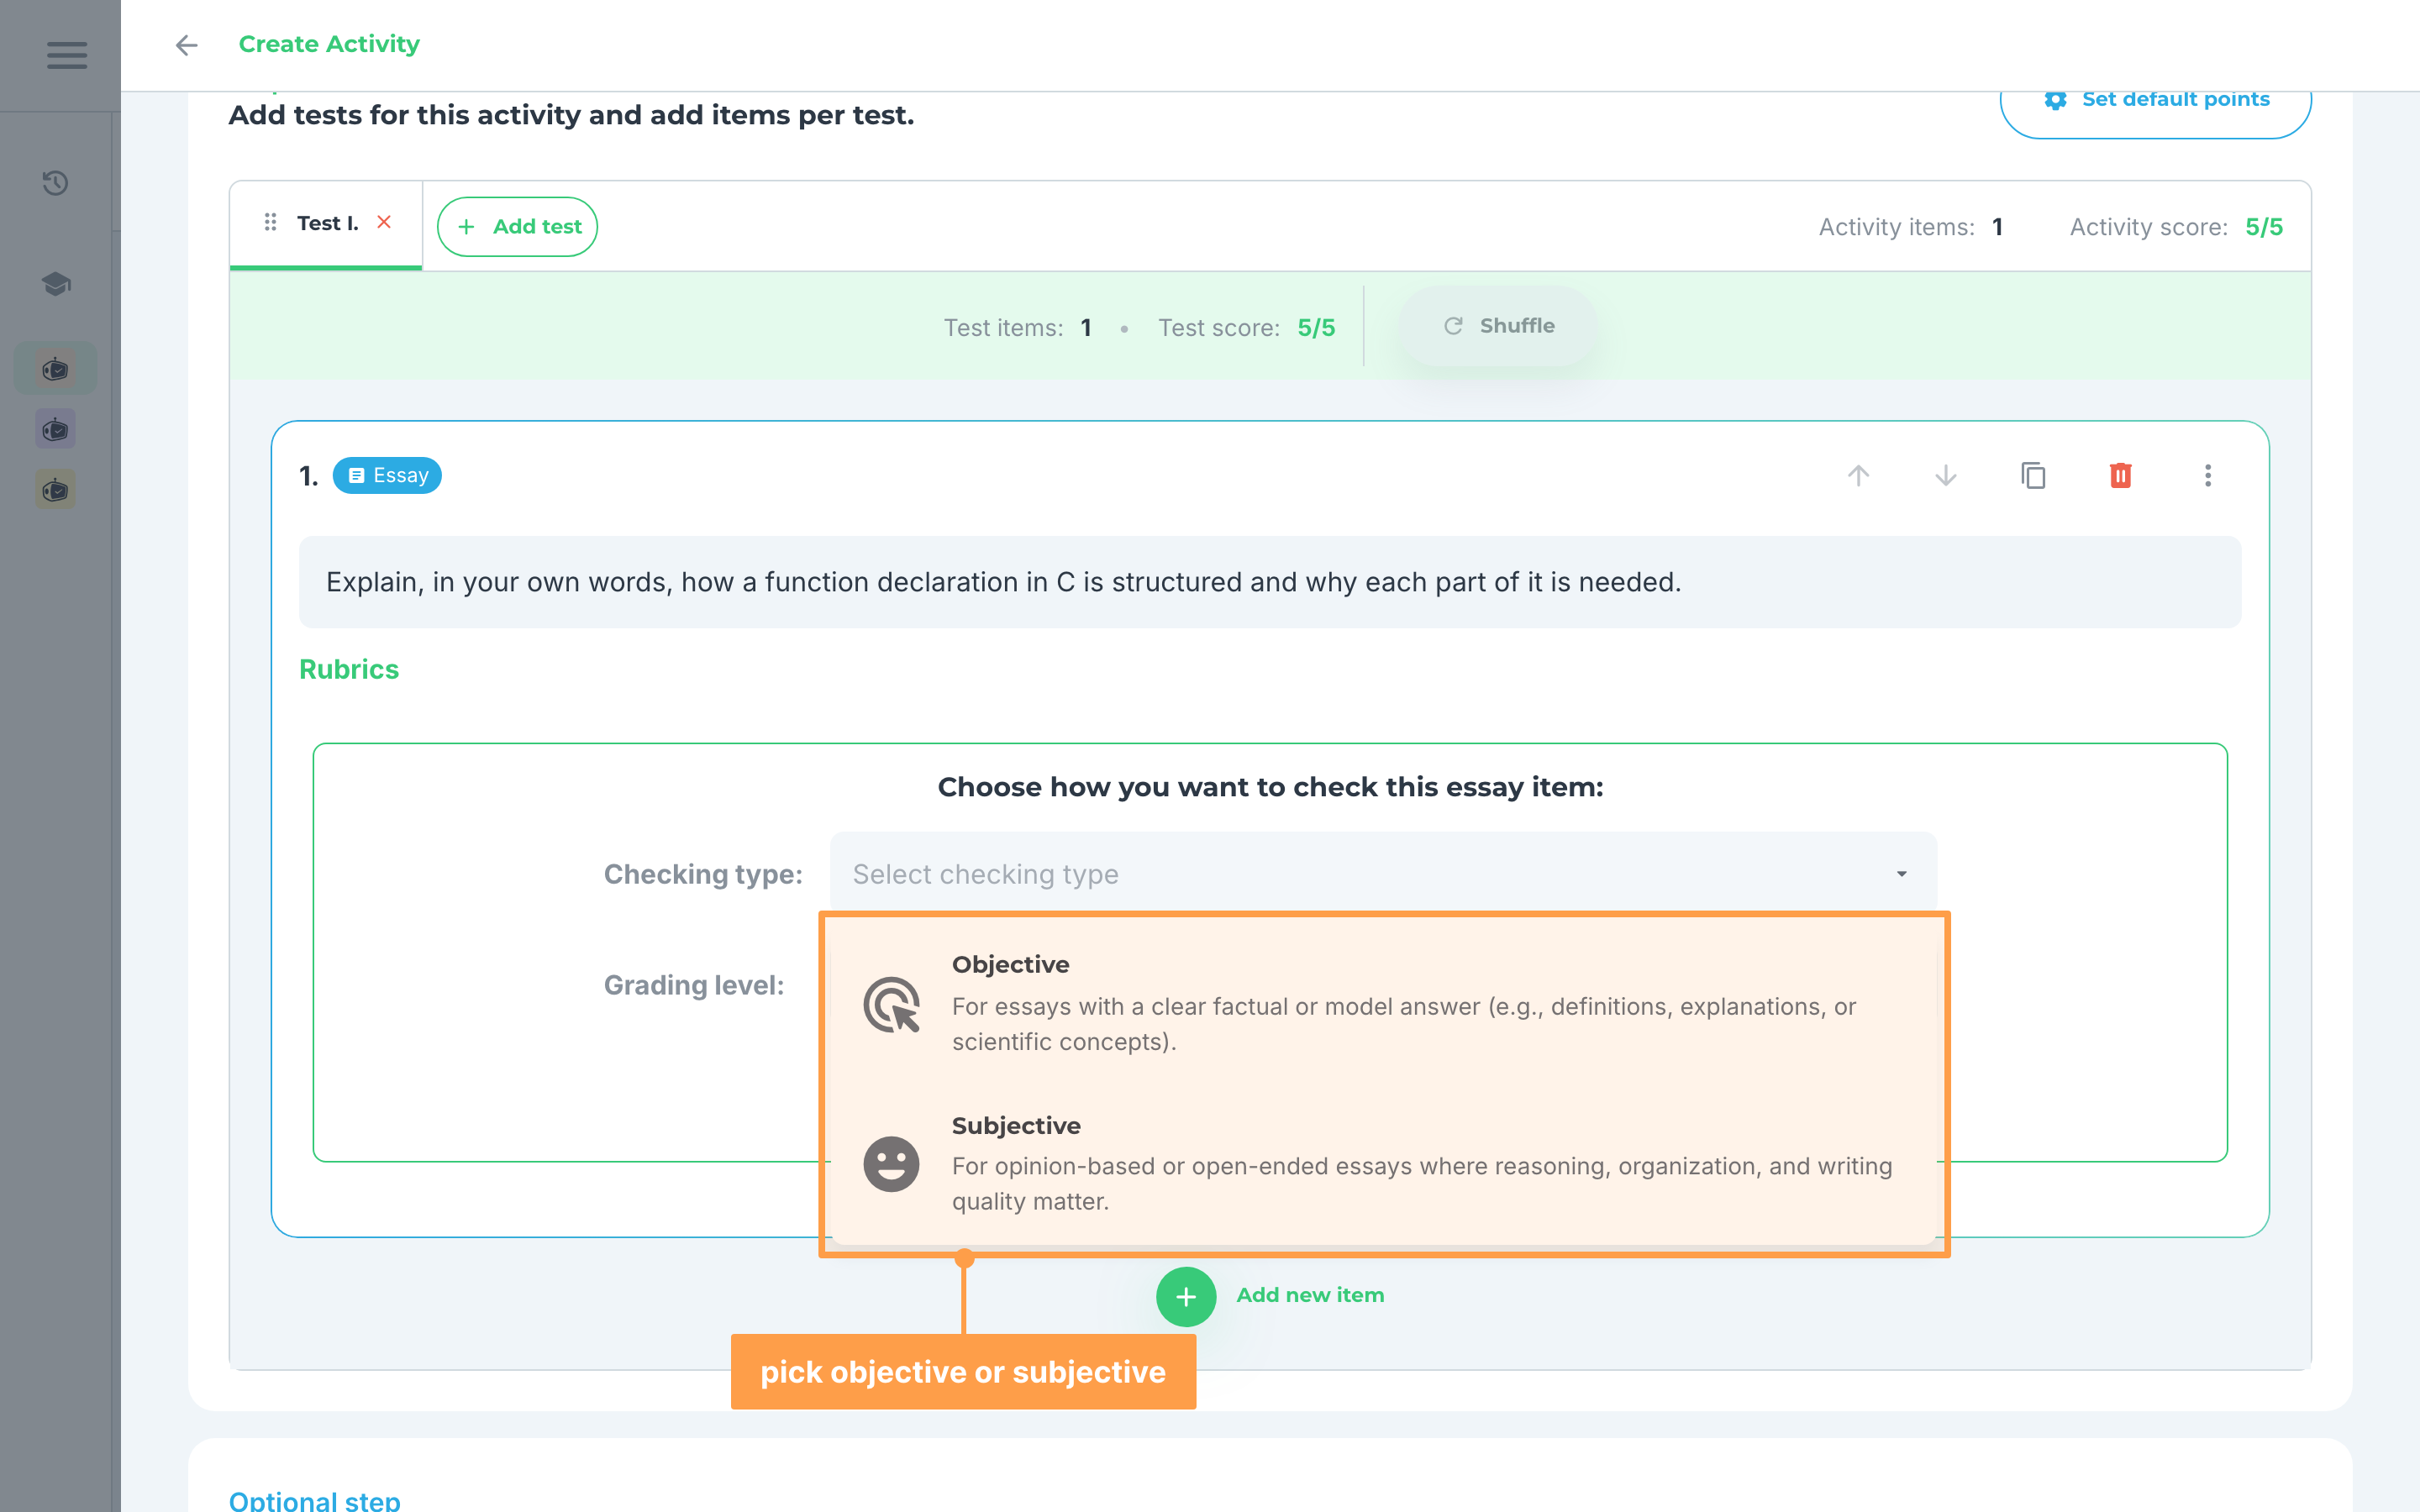
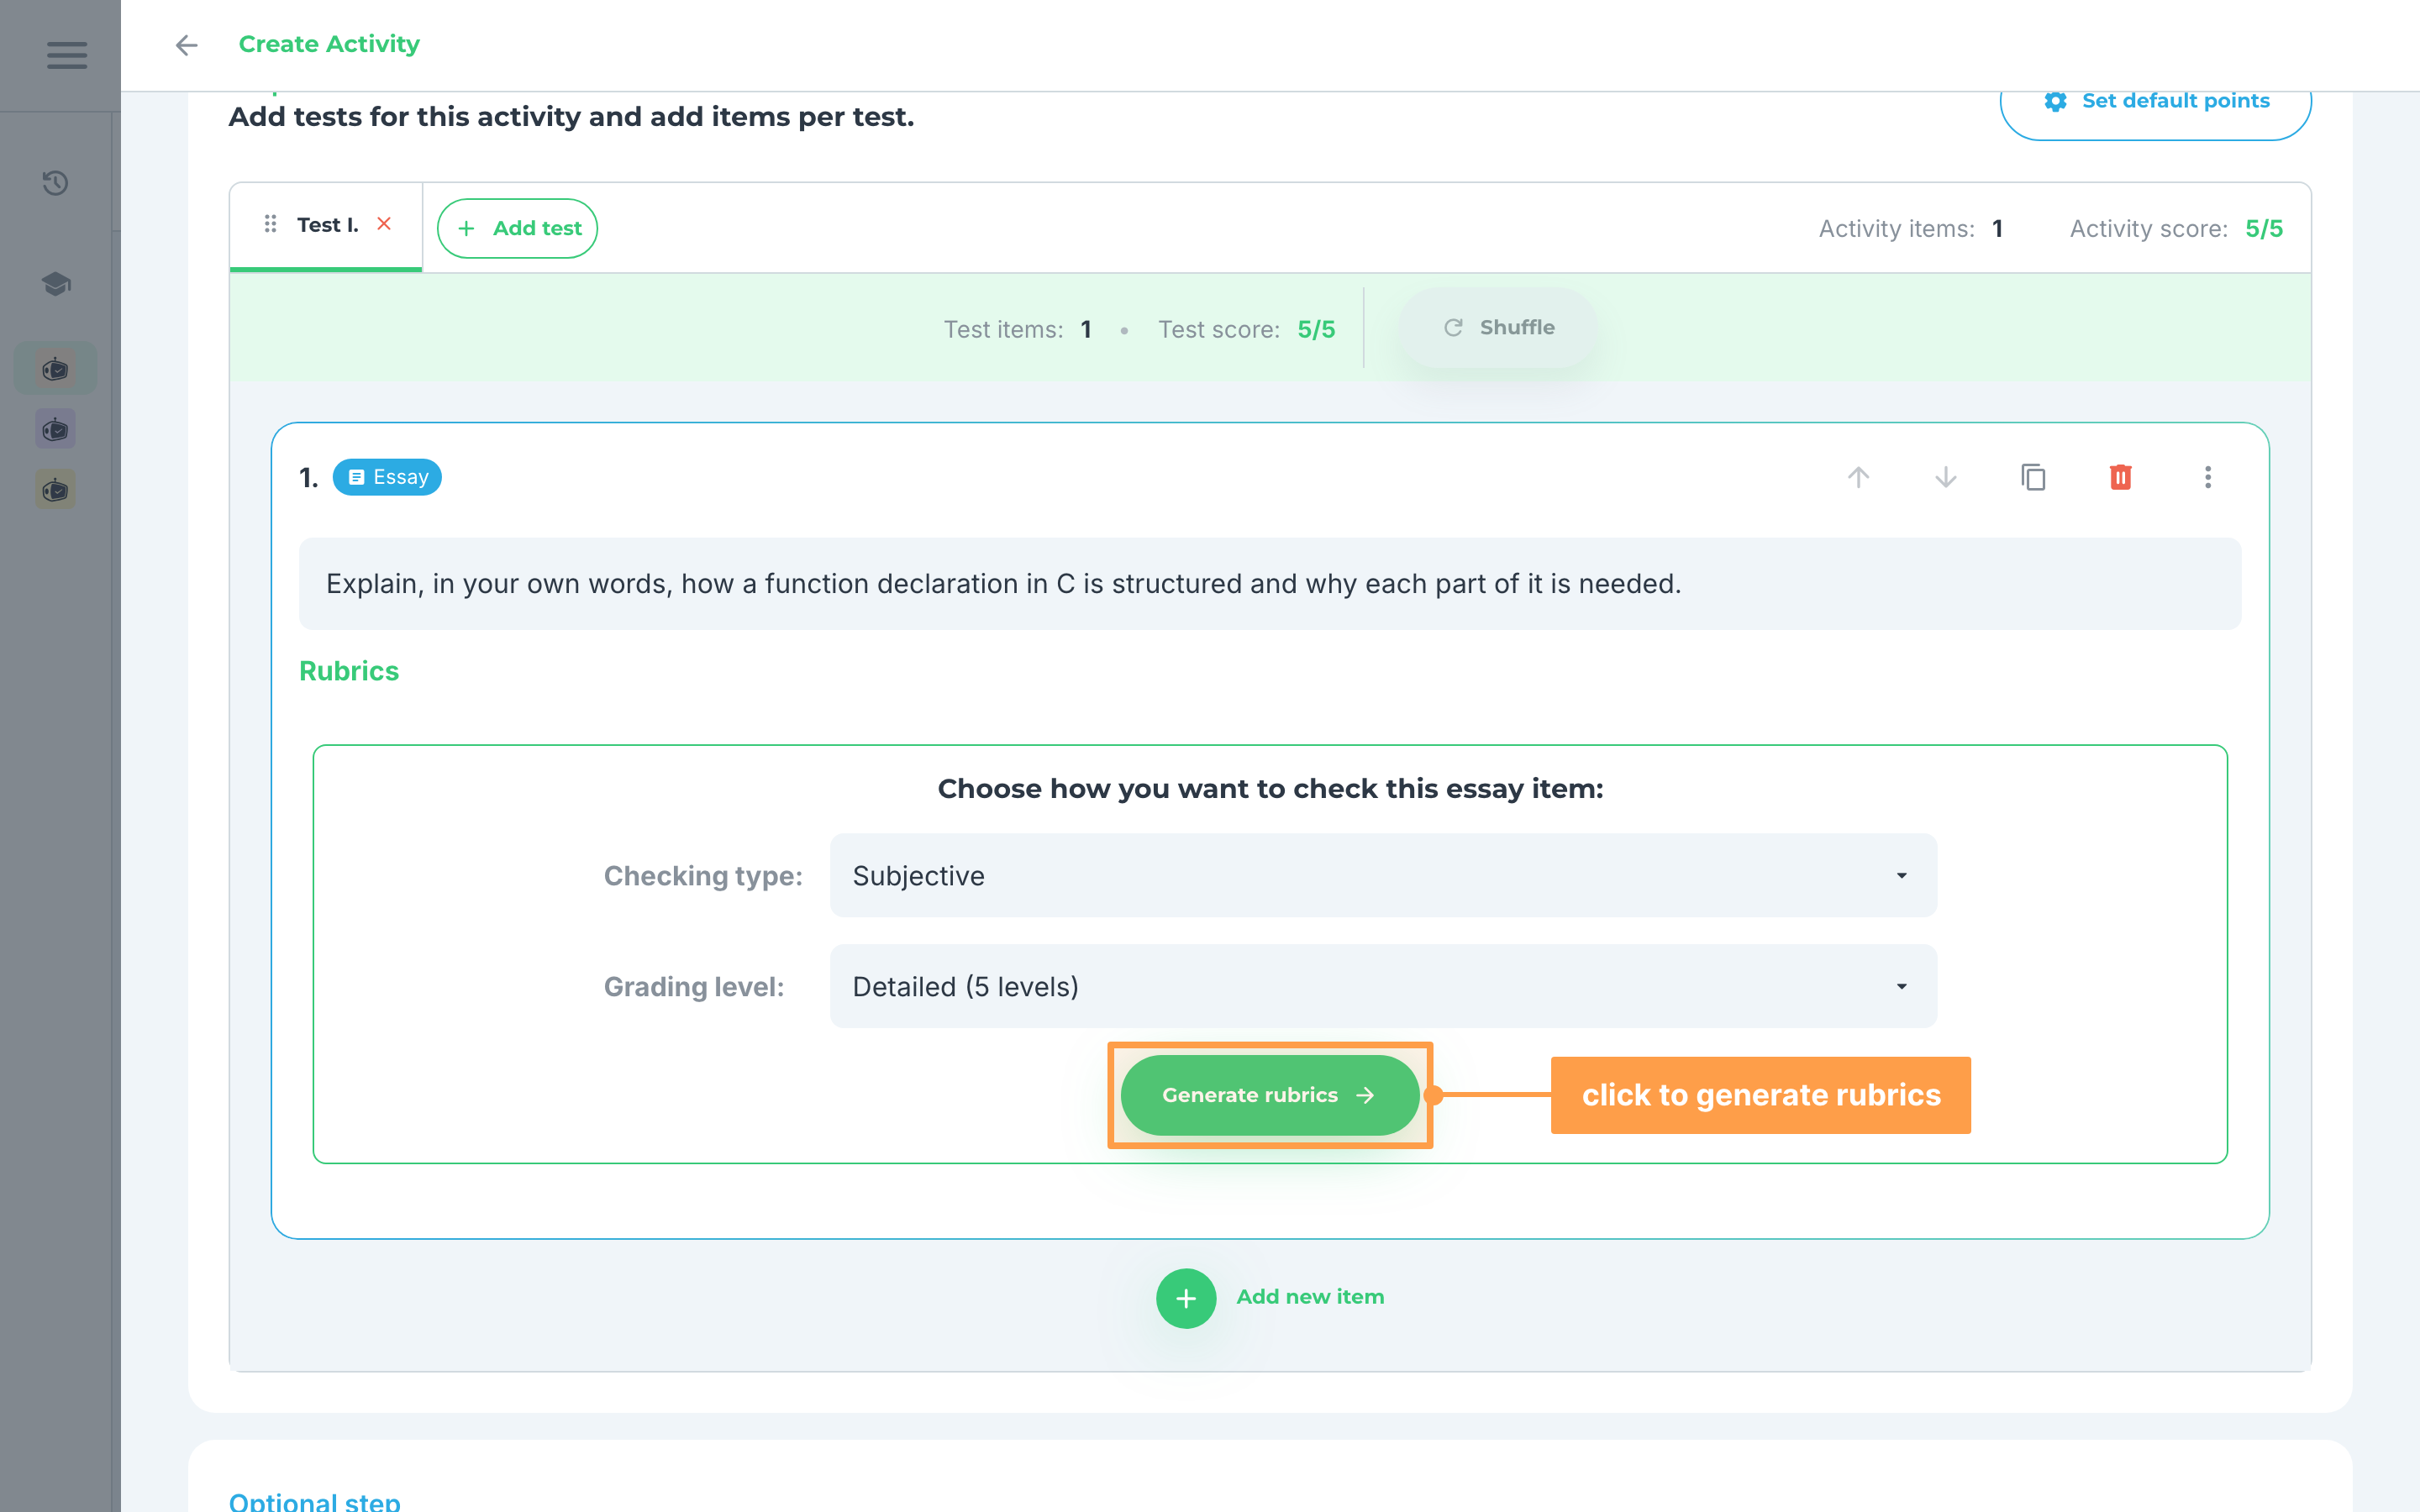
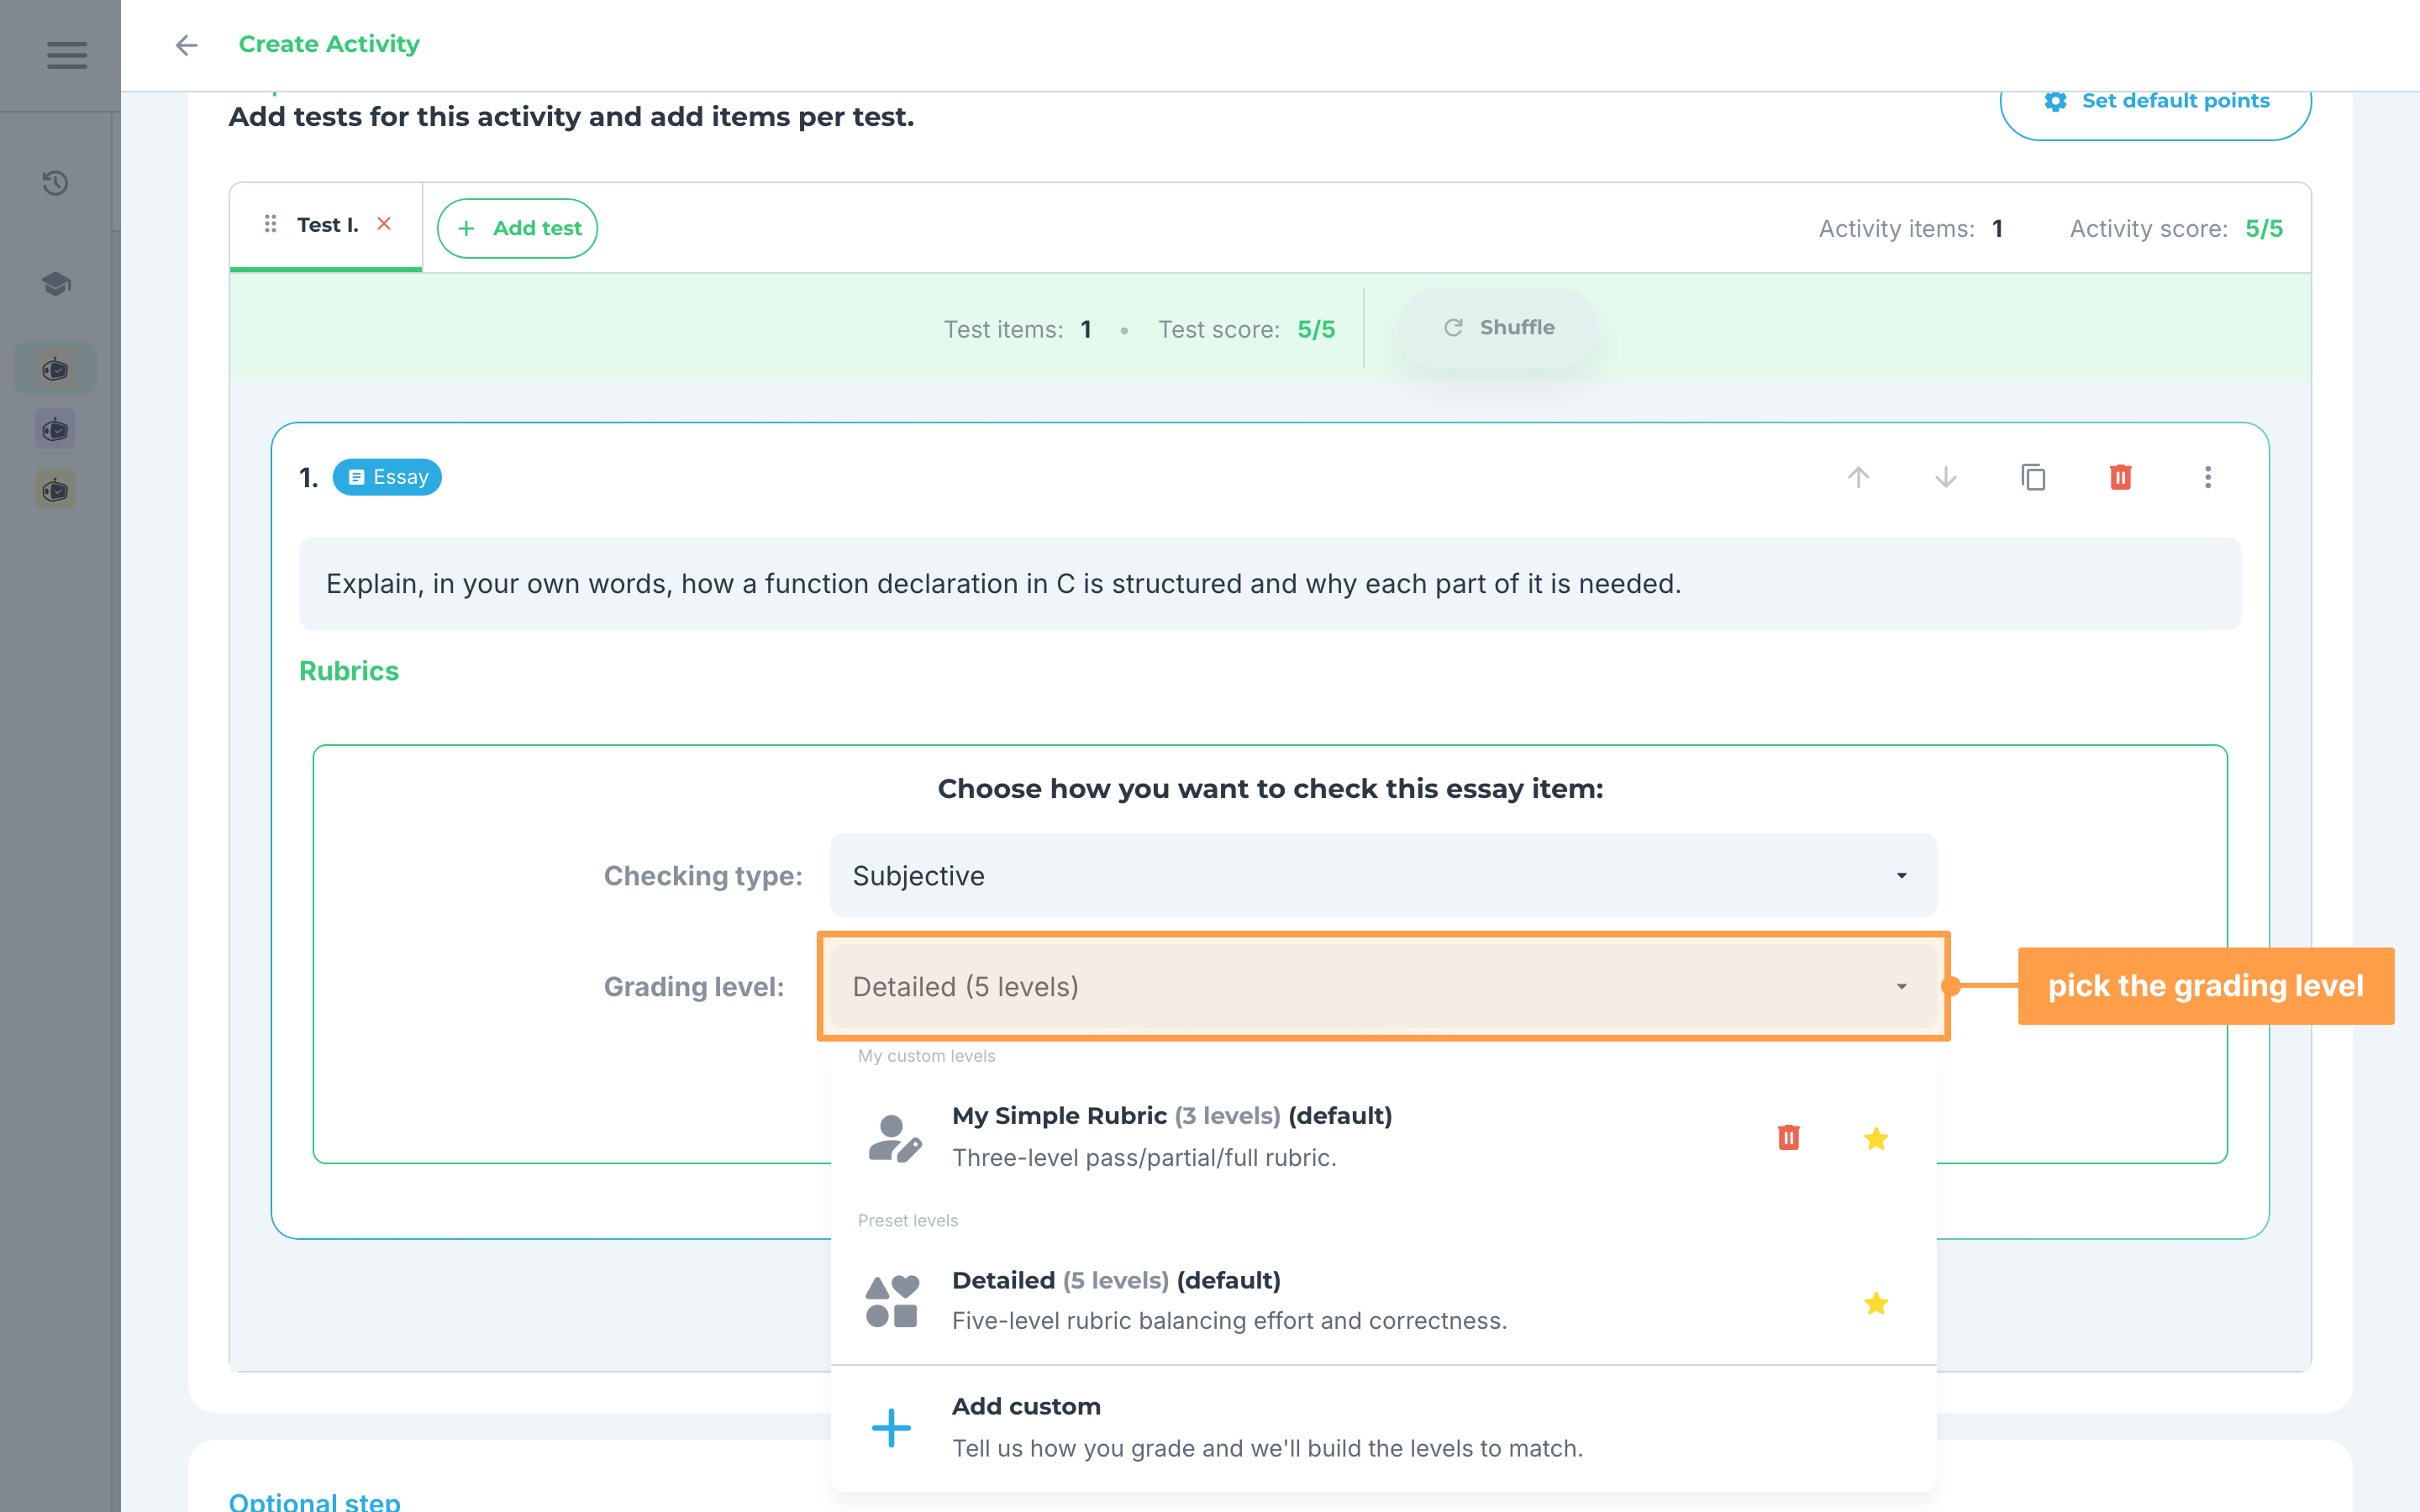
- Then, in the Choose how you want to check this essay item: panel, set the Checking type. There are two ways to do so:
a. Objective - for essays with a clear factual or model answer. This also adds an Expected key idea (optional) box, where you can type or upload an image of the key idea the answer should contain.
b. Subjective - for opinion-based or open-ended essays where reasoning, organization and writing quality matters
Then set the Grading level in the same panel. That is the set of scoring levels every rubric will be written for, and it starts on Detailed (5 levels).
- Afterwards, click Generate rubrics and wait for our system to finish creating your rubrics.
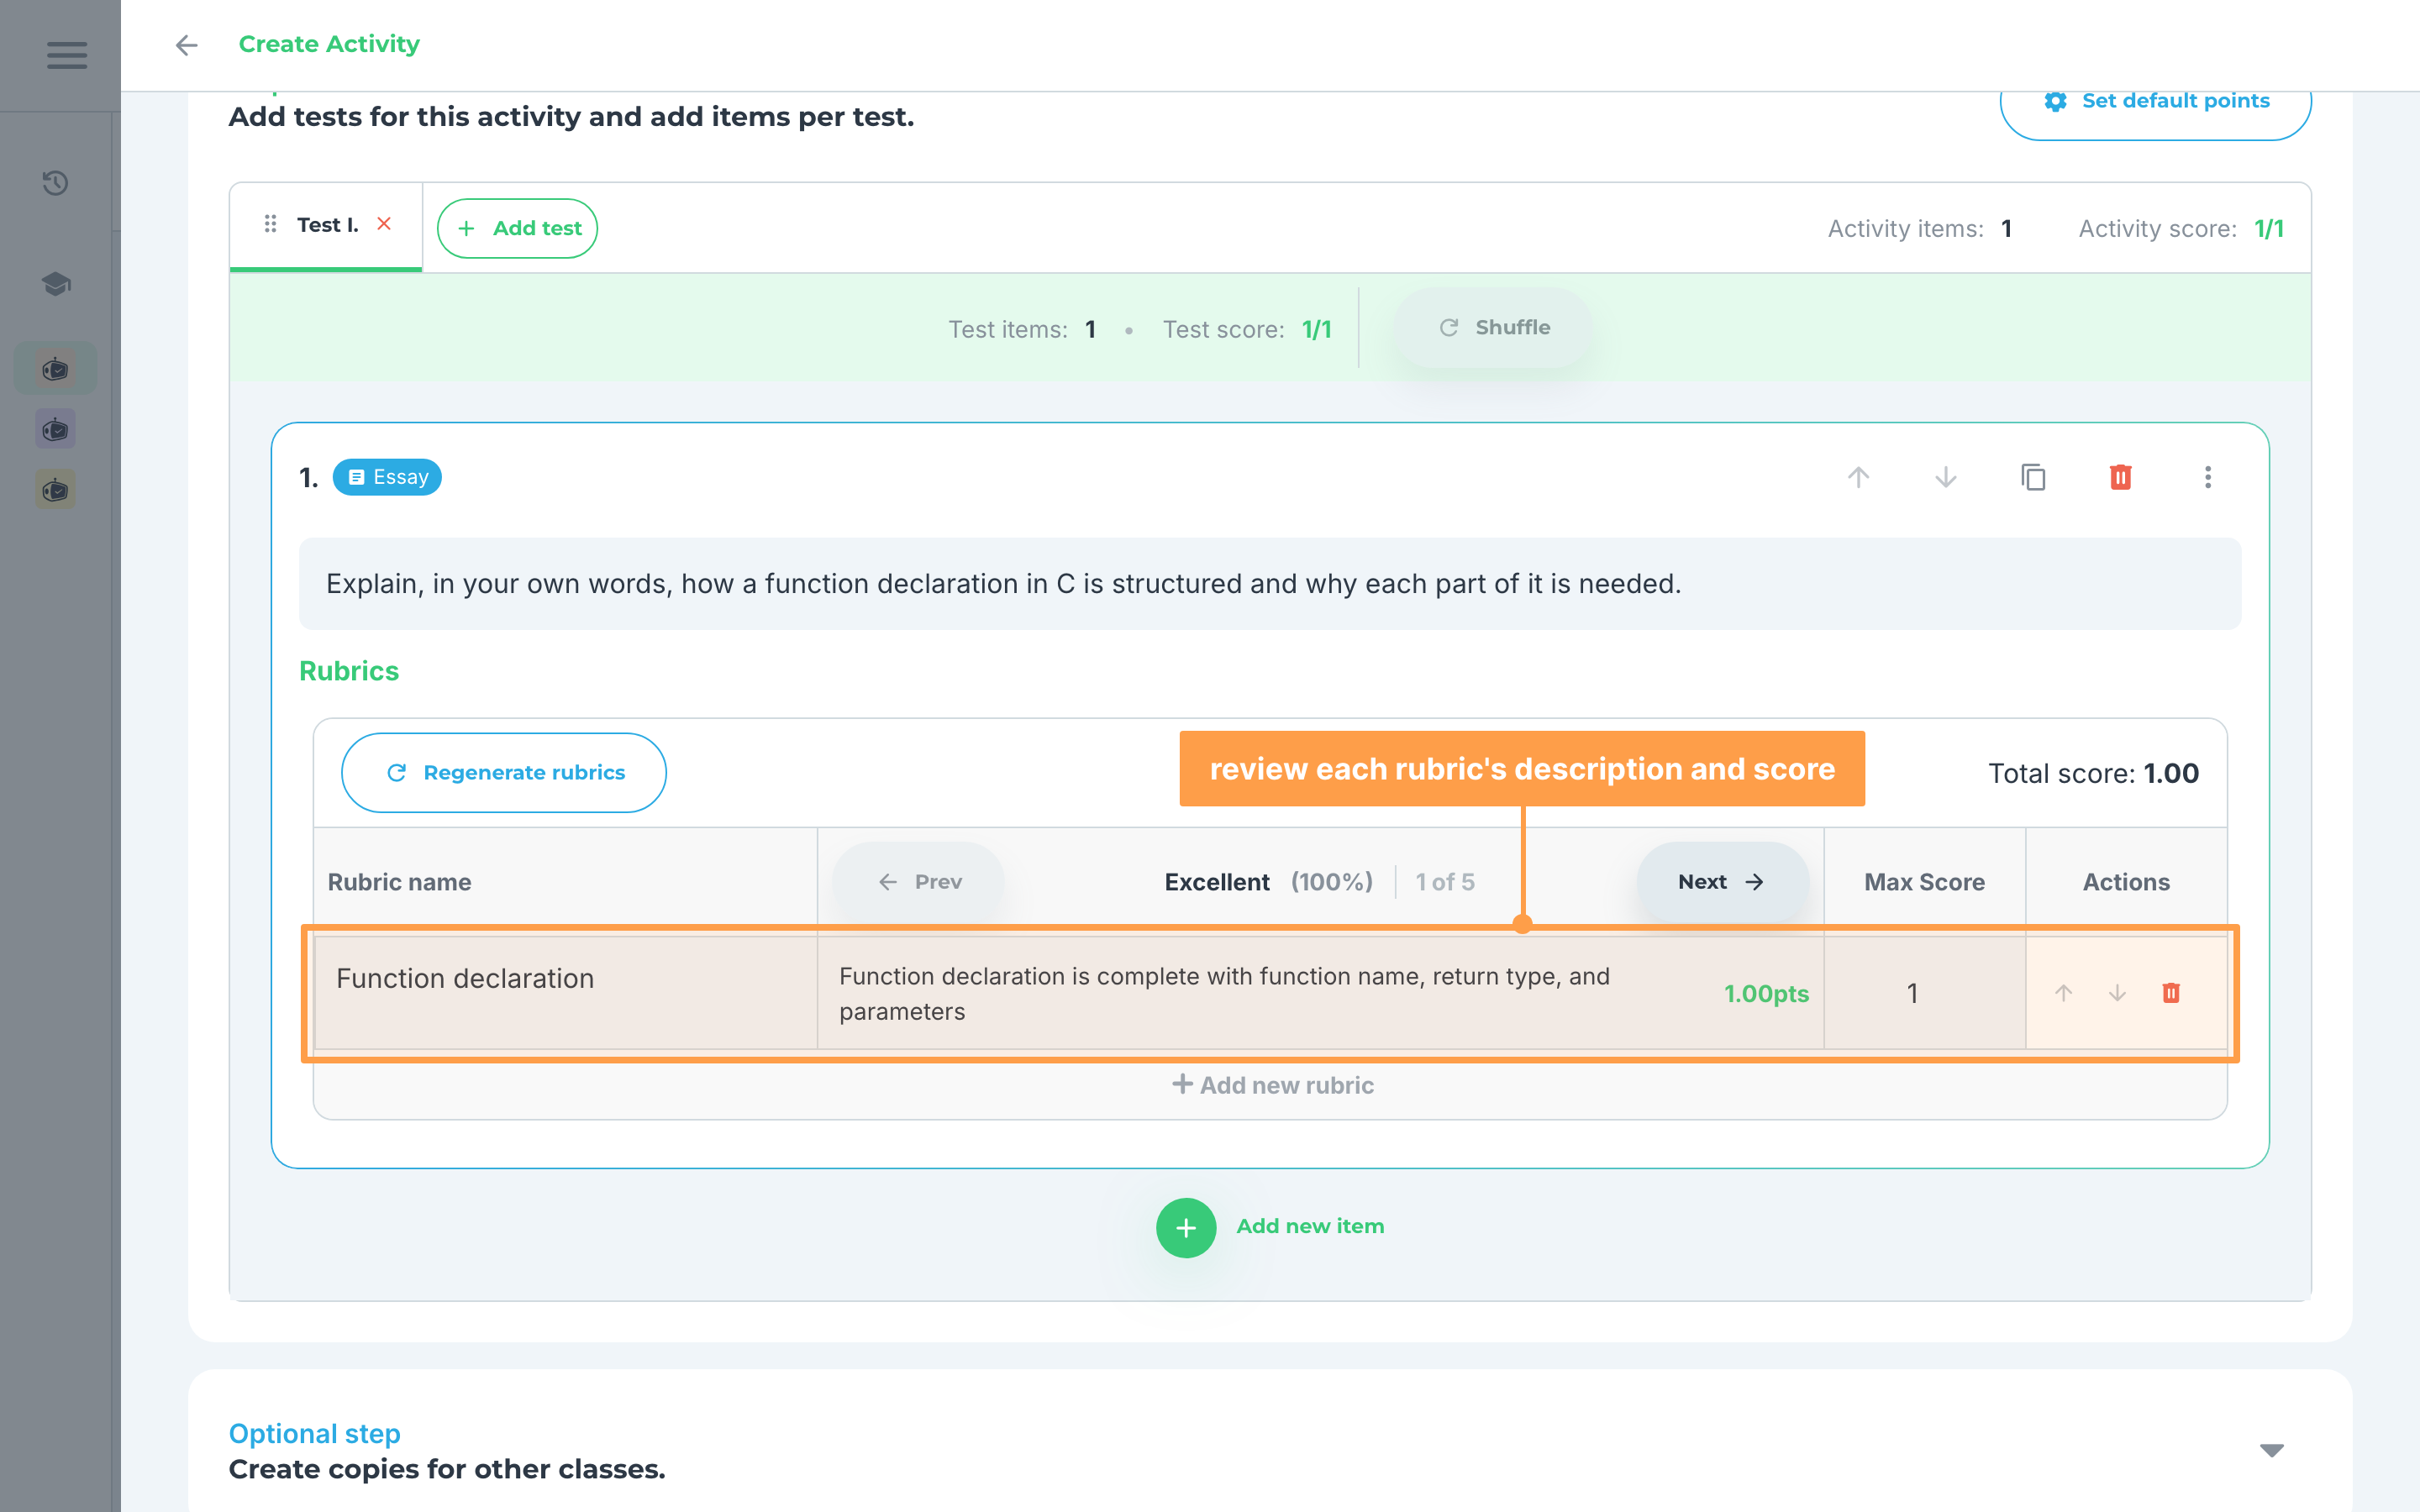
- Review the rubrics to see if it is to your liking, especially the description and score for each rubric.
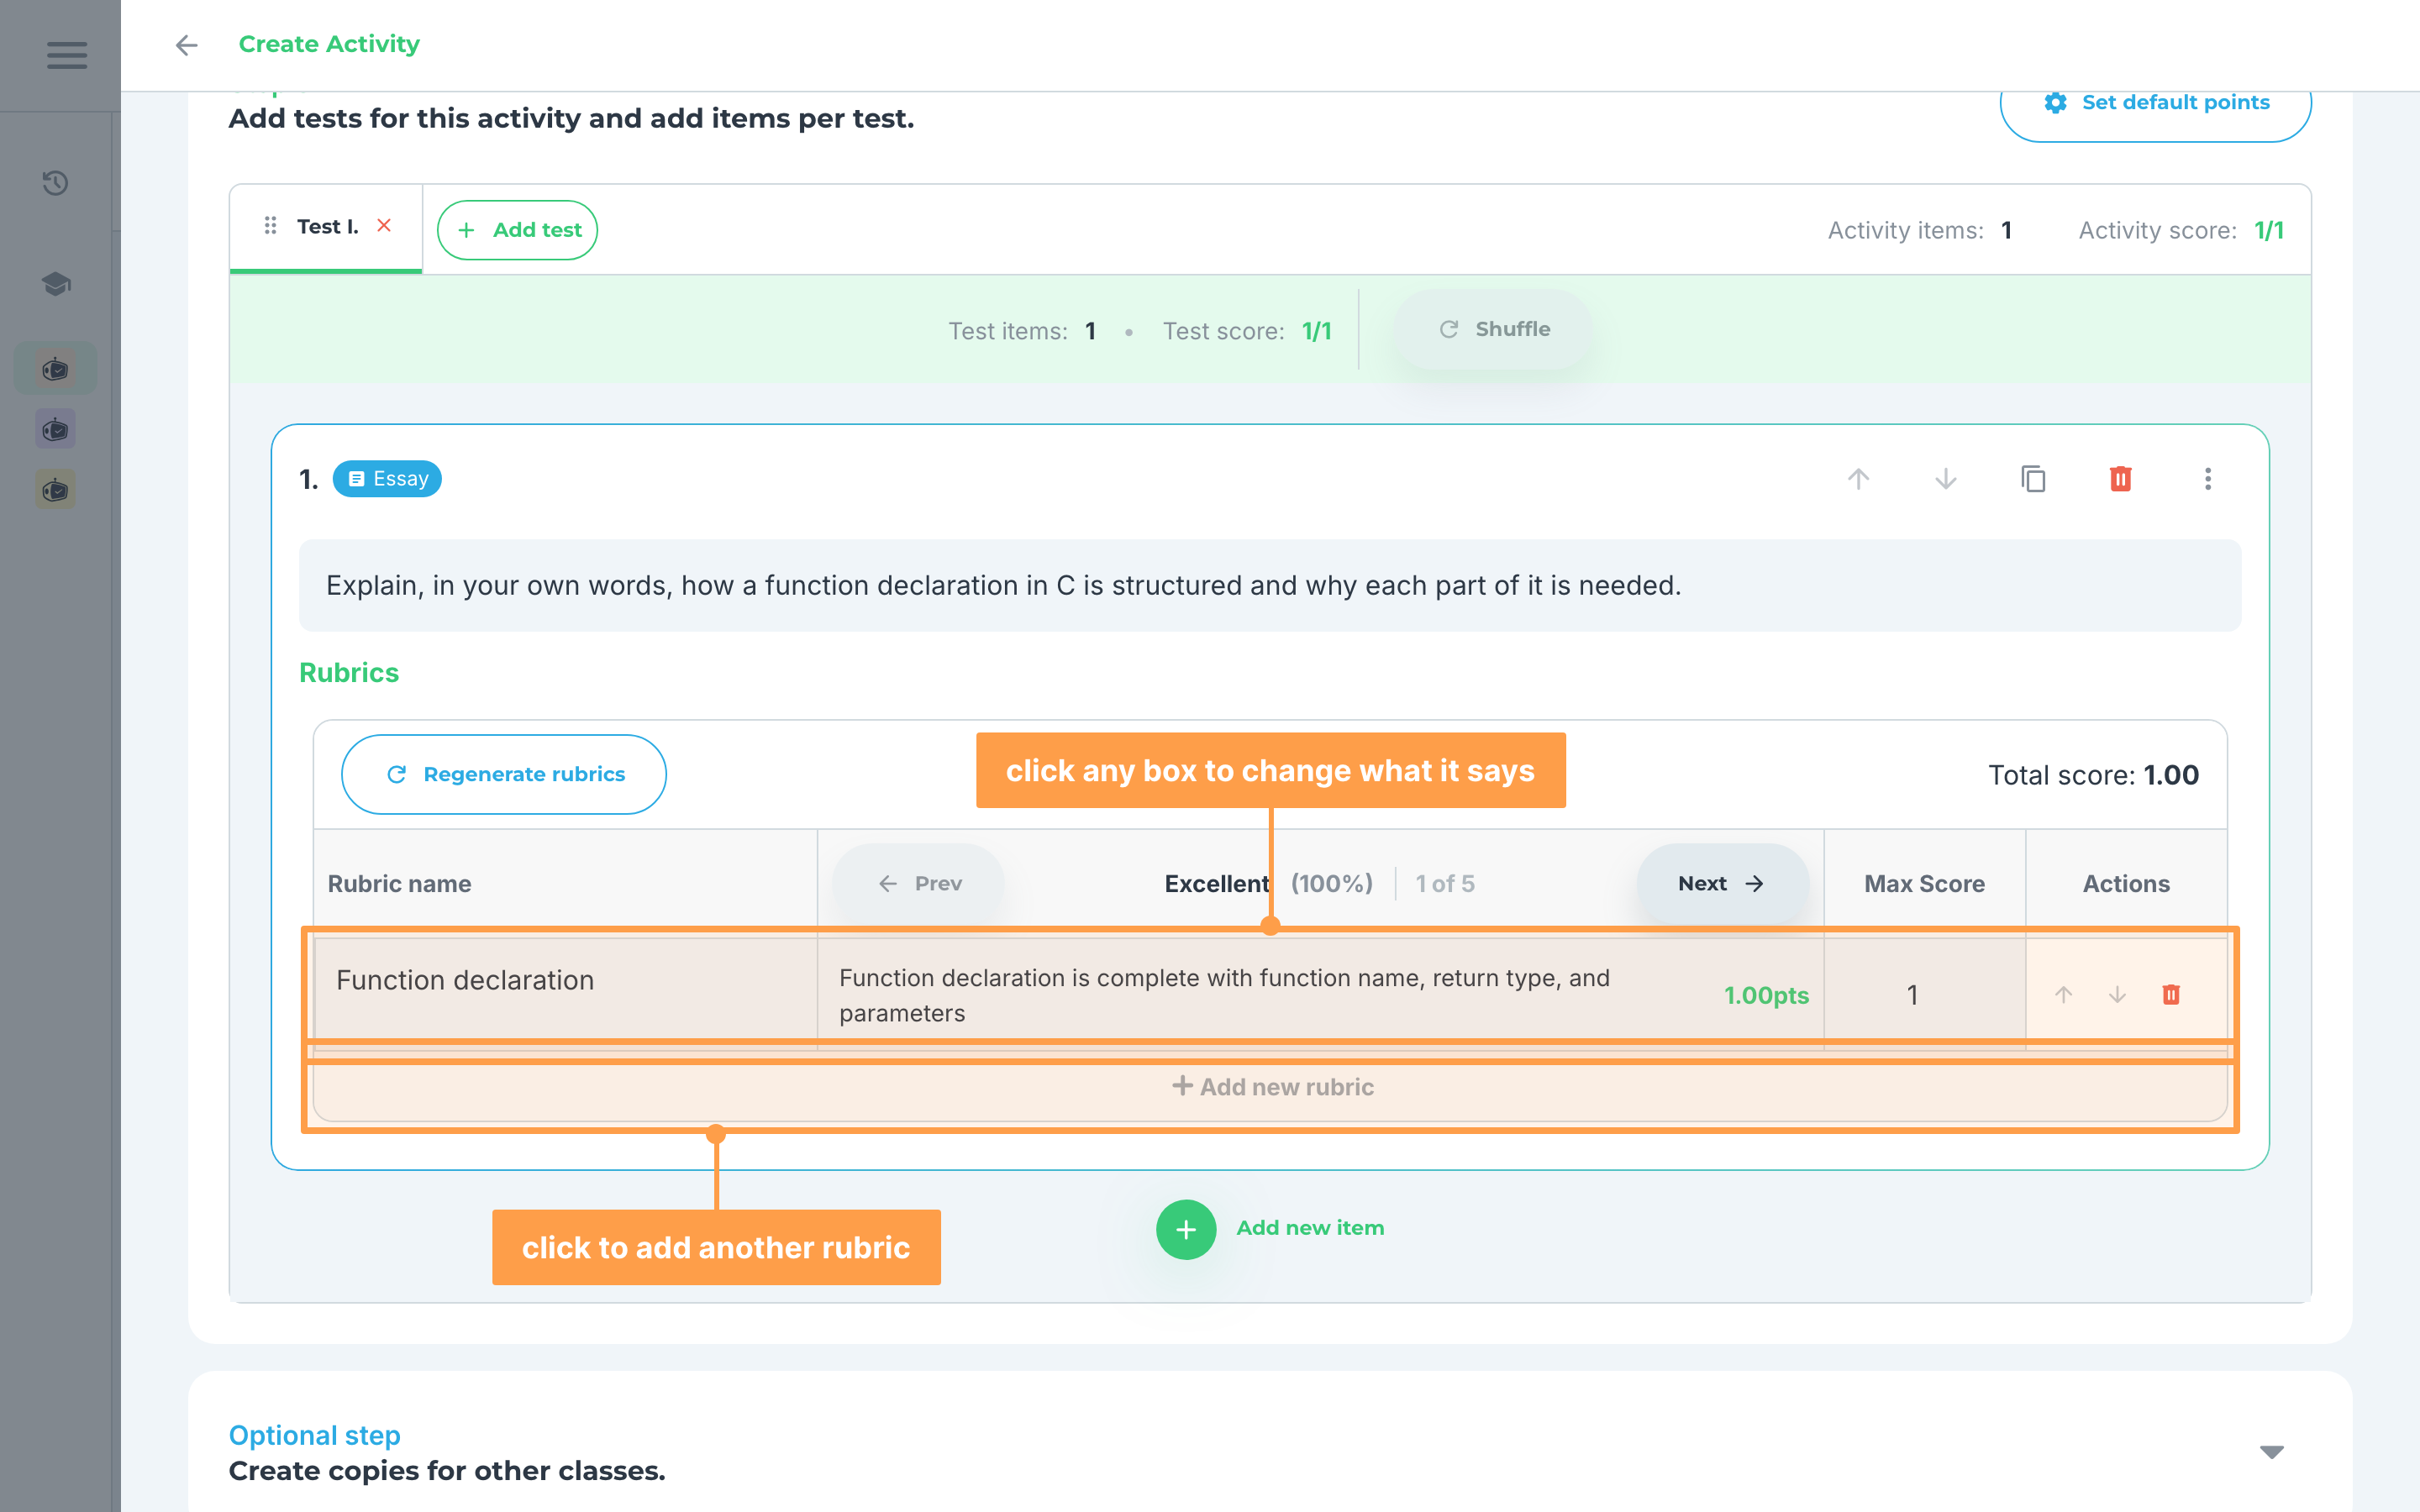
- If you wish to edit any detail to the rubrics, you can make your changes in the table by clicking the boxes and adding your modification. Each rubric carries one scoring guide per grading level, so use Prev and Next above the table to move between levels before you edit. You can also add another rubric by clicking + Add new rubric after the last rubric, or use the Actions column to move a rubric up or down or delete it.
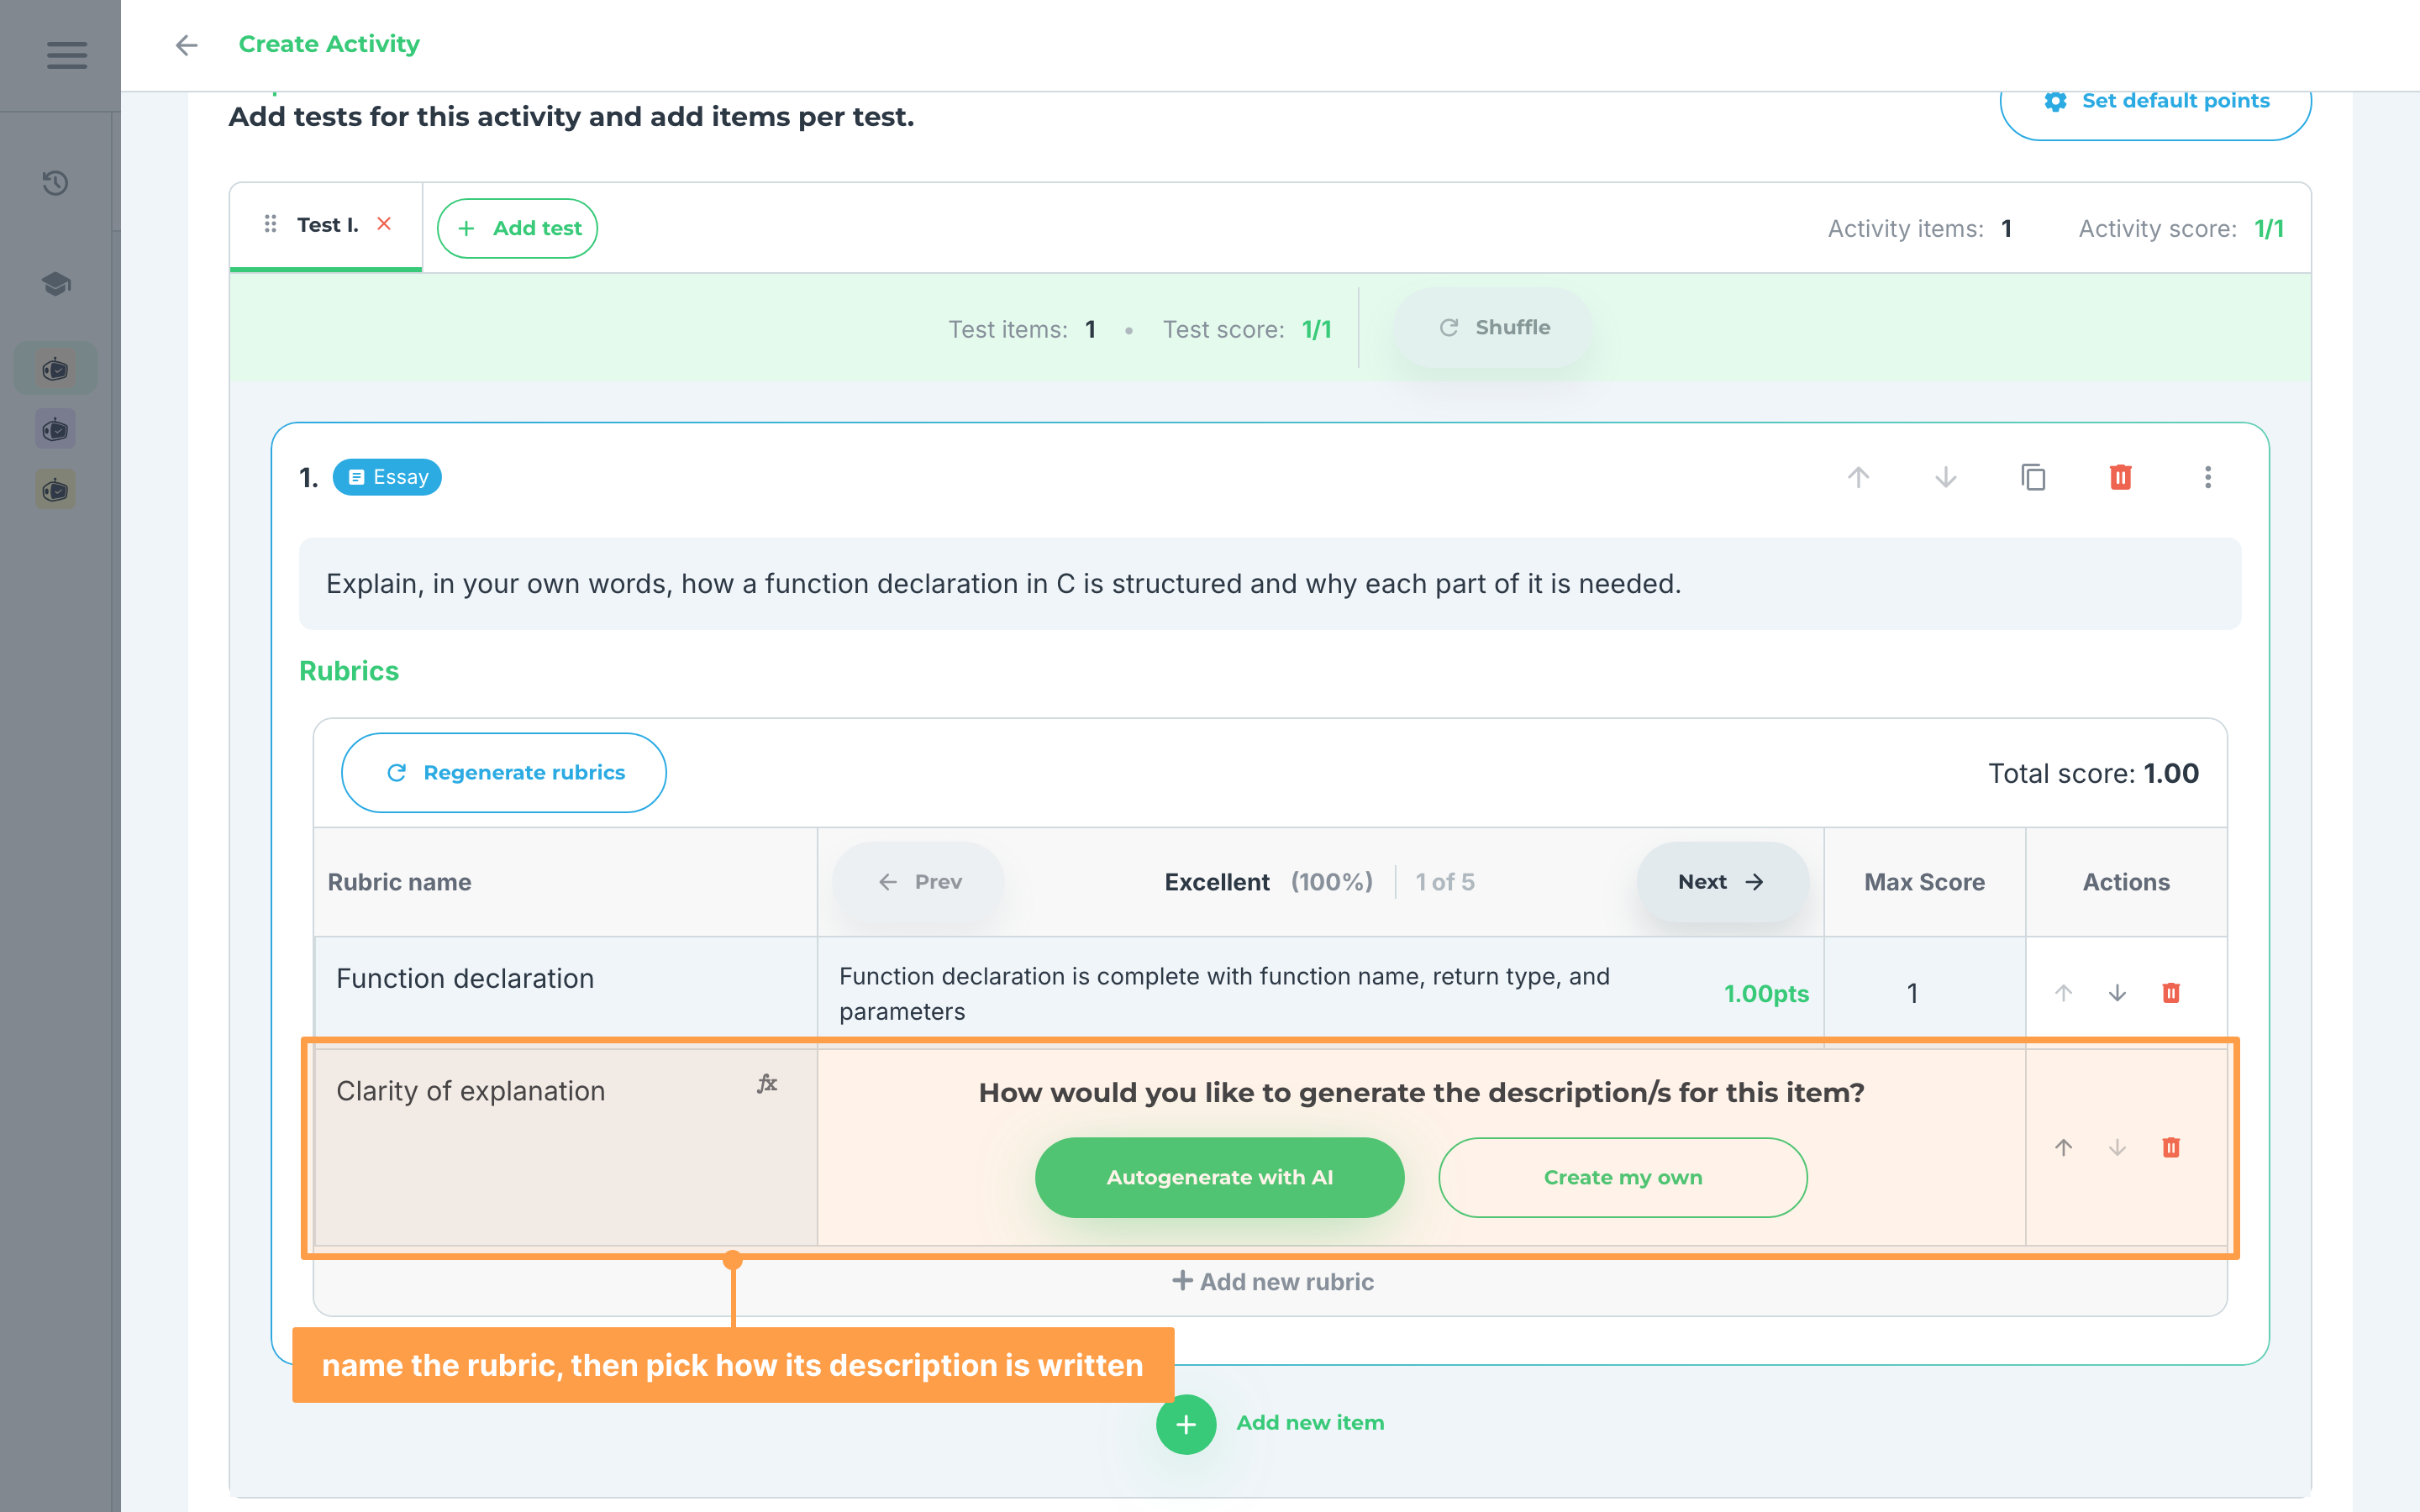
- Provide a rubric name then you can opt to Autogenerate with AI or Create my own the description/s of the rubric then set the score.
- The Grading level you chose in step 2 is what decides how many scoring guides each rubric carries. To change it once the rubrics exist, click Regenerate rubrics above the table, pick a different level and generate again.
e. Problem-solving (without visuals)
For items with Problem-solving as the item type:
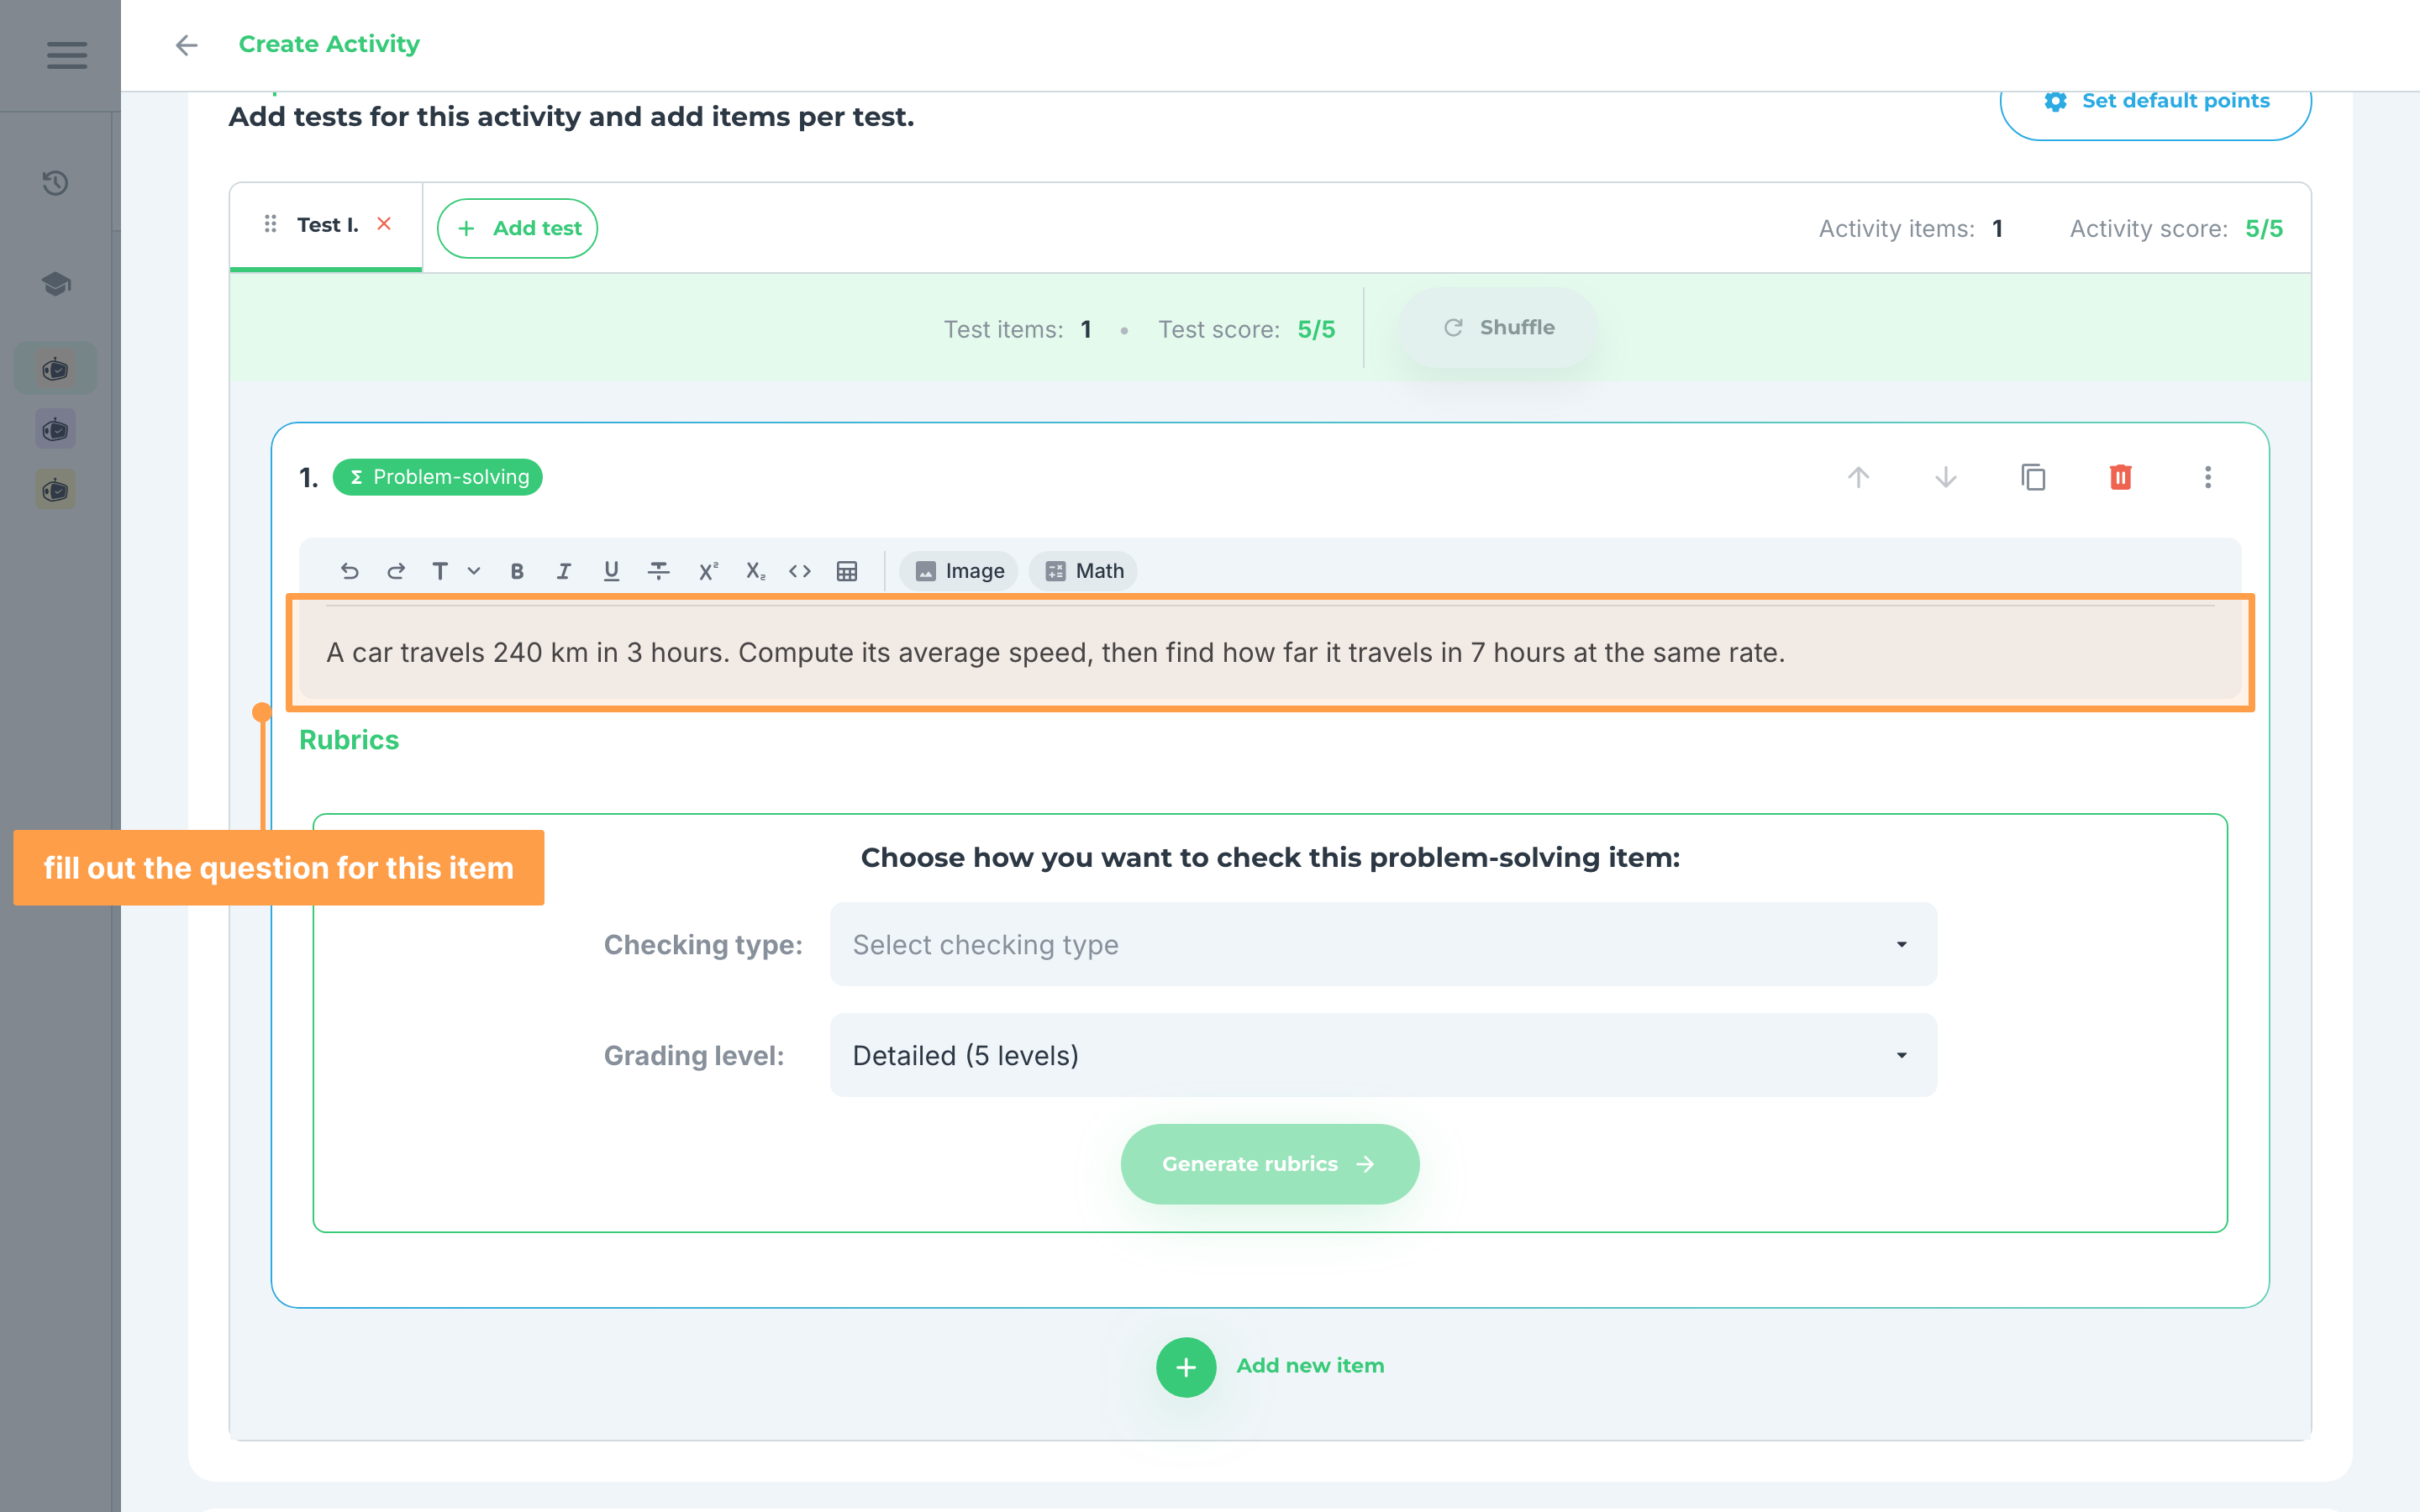
- Fill out the question for this item.
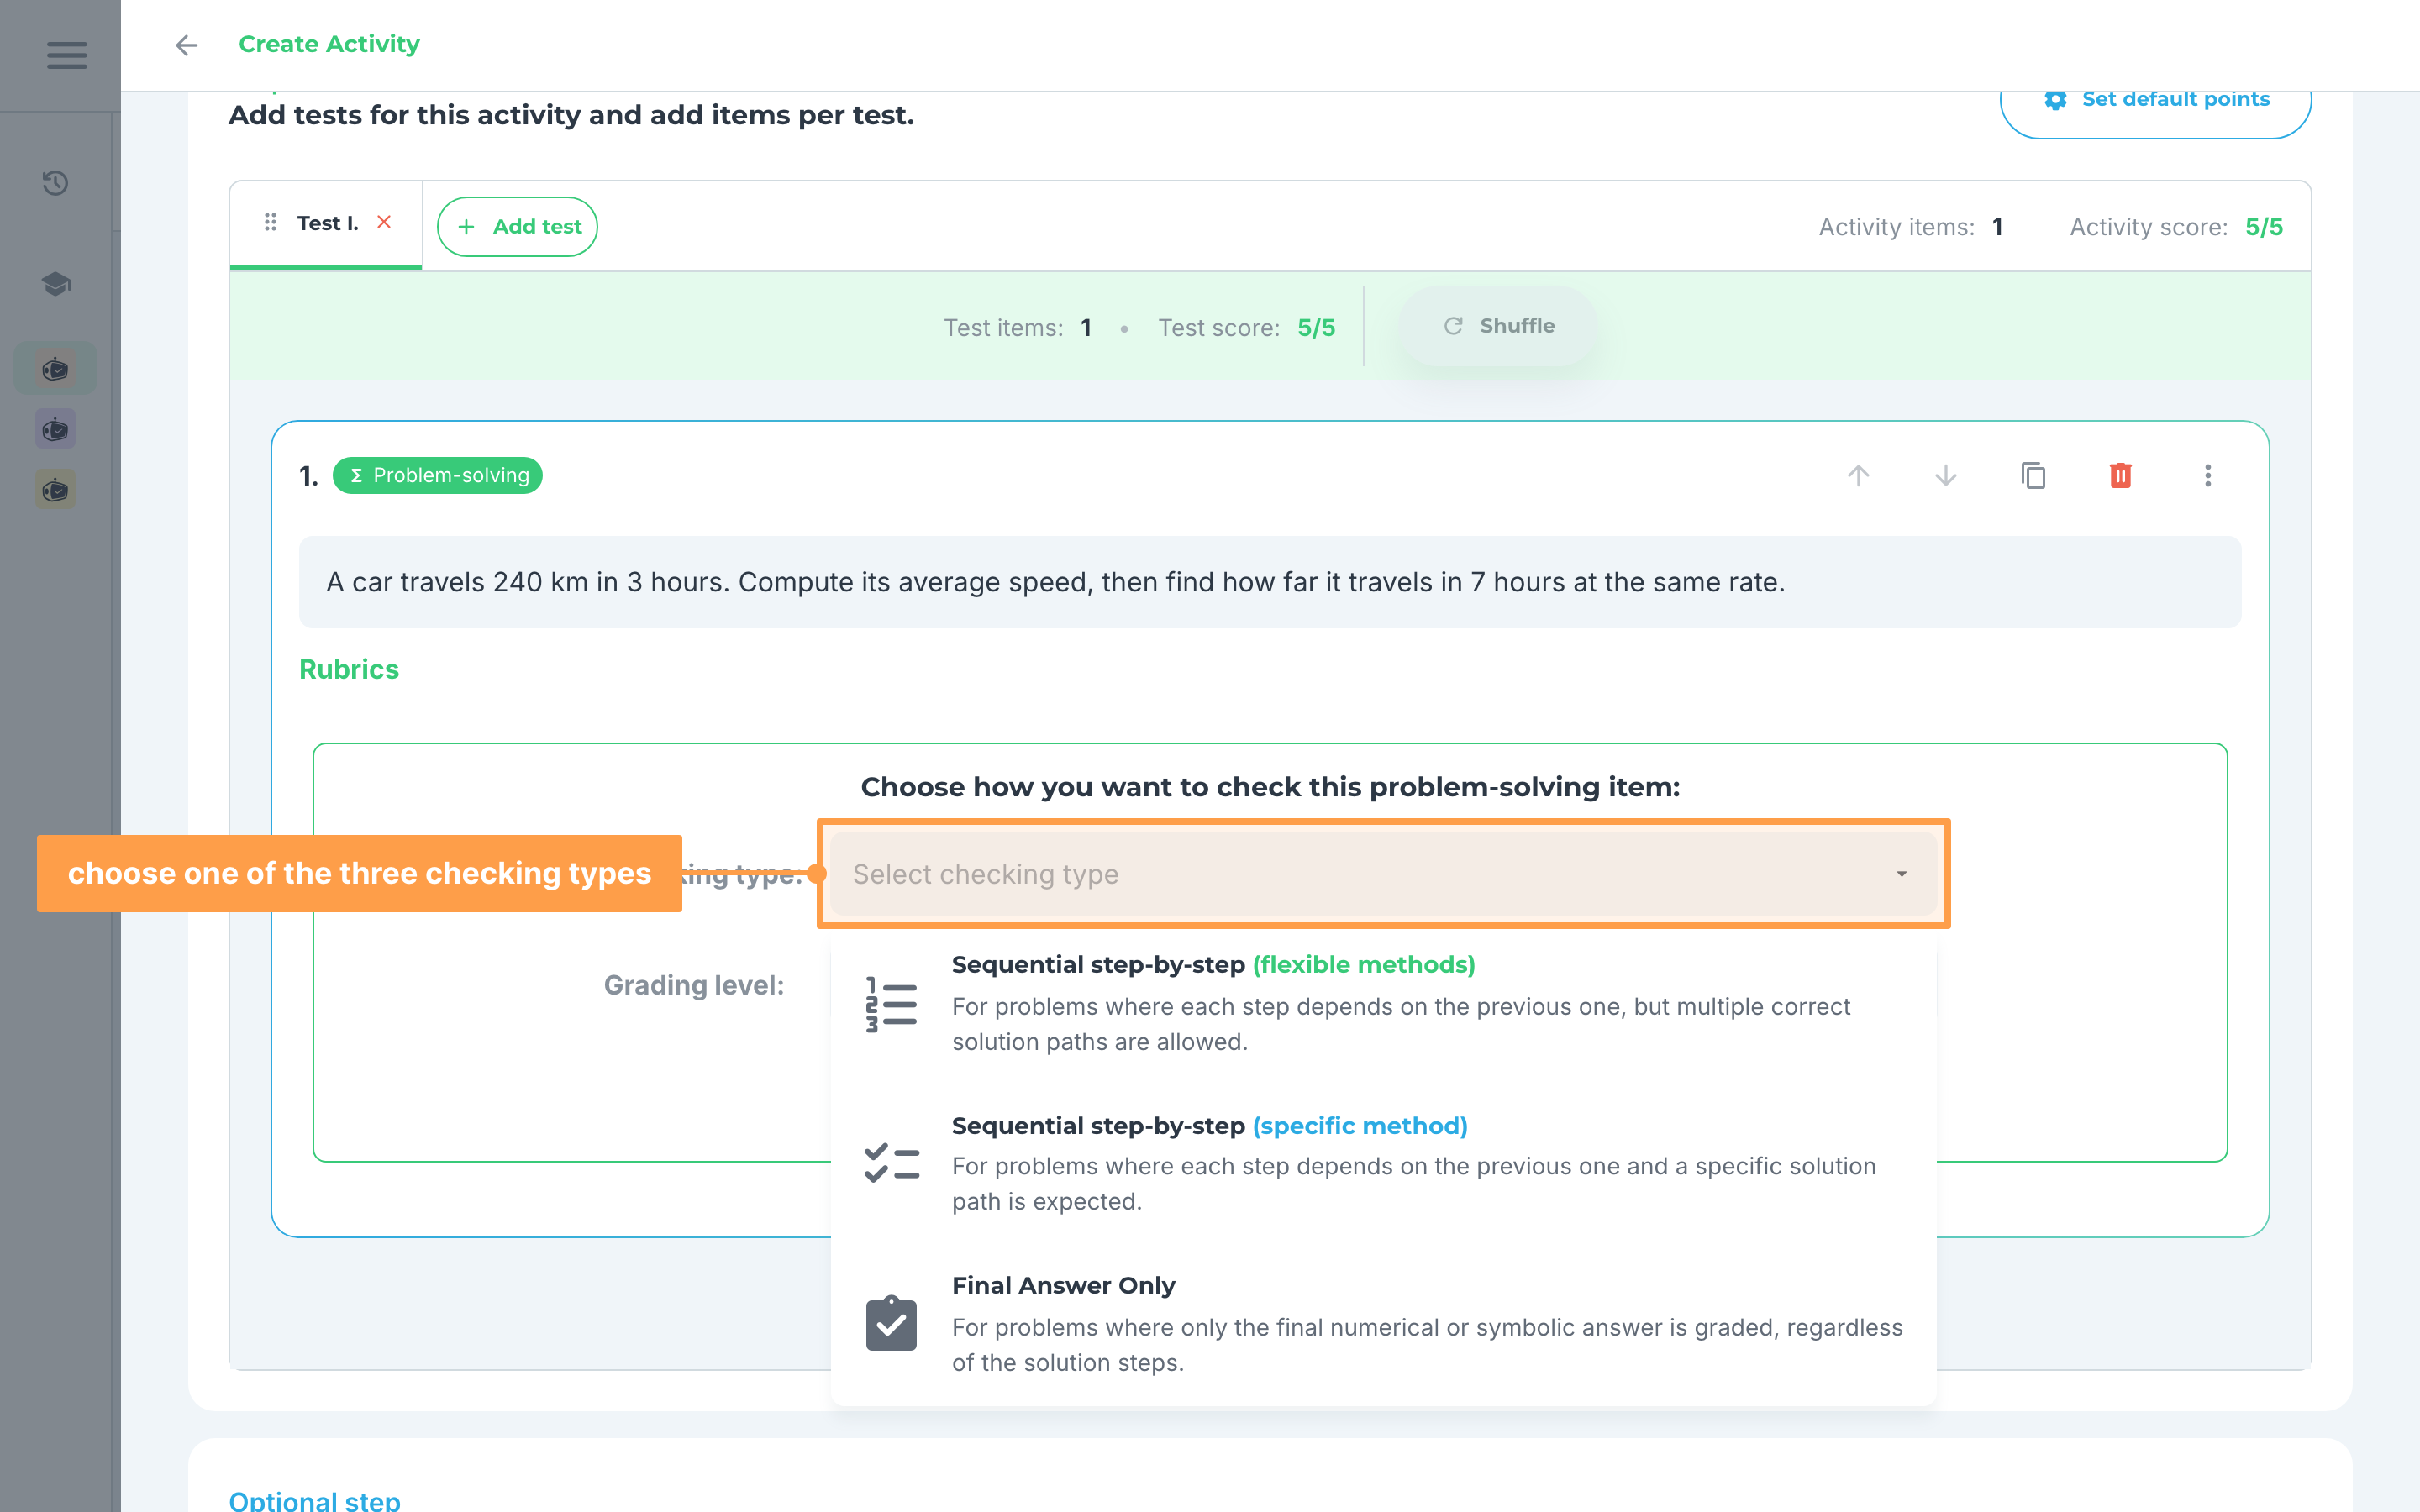
- Then, in the Checking type dropdown, select how you wish the item to be checked. There are three ways to do so:
a. Sequential step-by-step (flexible) - for problems where each step depends on the previous one, but multiple correct solution paths are allowed.
b. Sequential step-by-step (specific method) - for problems where each step depends on the previous one and a specific solution path is expected.
c. Final Answer Only - for problems where only the final numerical or symbolic answer is graded, regardless of the solution steps.
If you choose Sequential step-by-step (specific method), an Expected solution method box appears under the dropdown. Type or upload the solution you expect there. Generate rubrics stays disabled until you do.
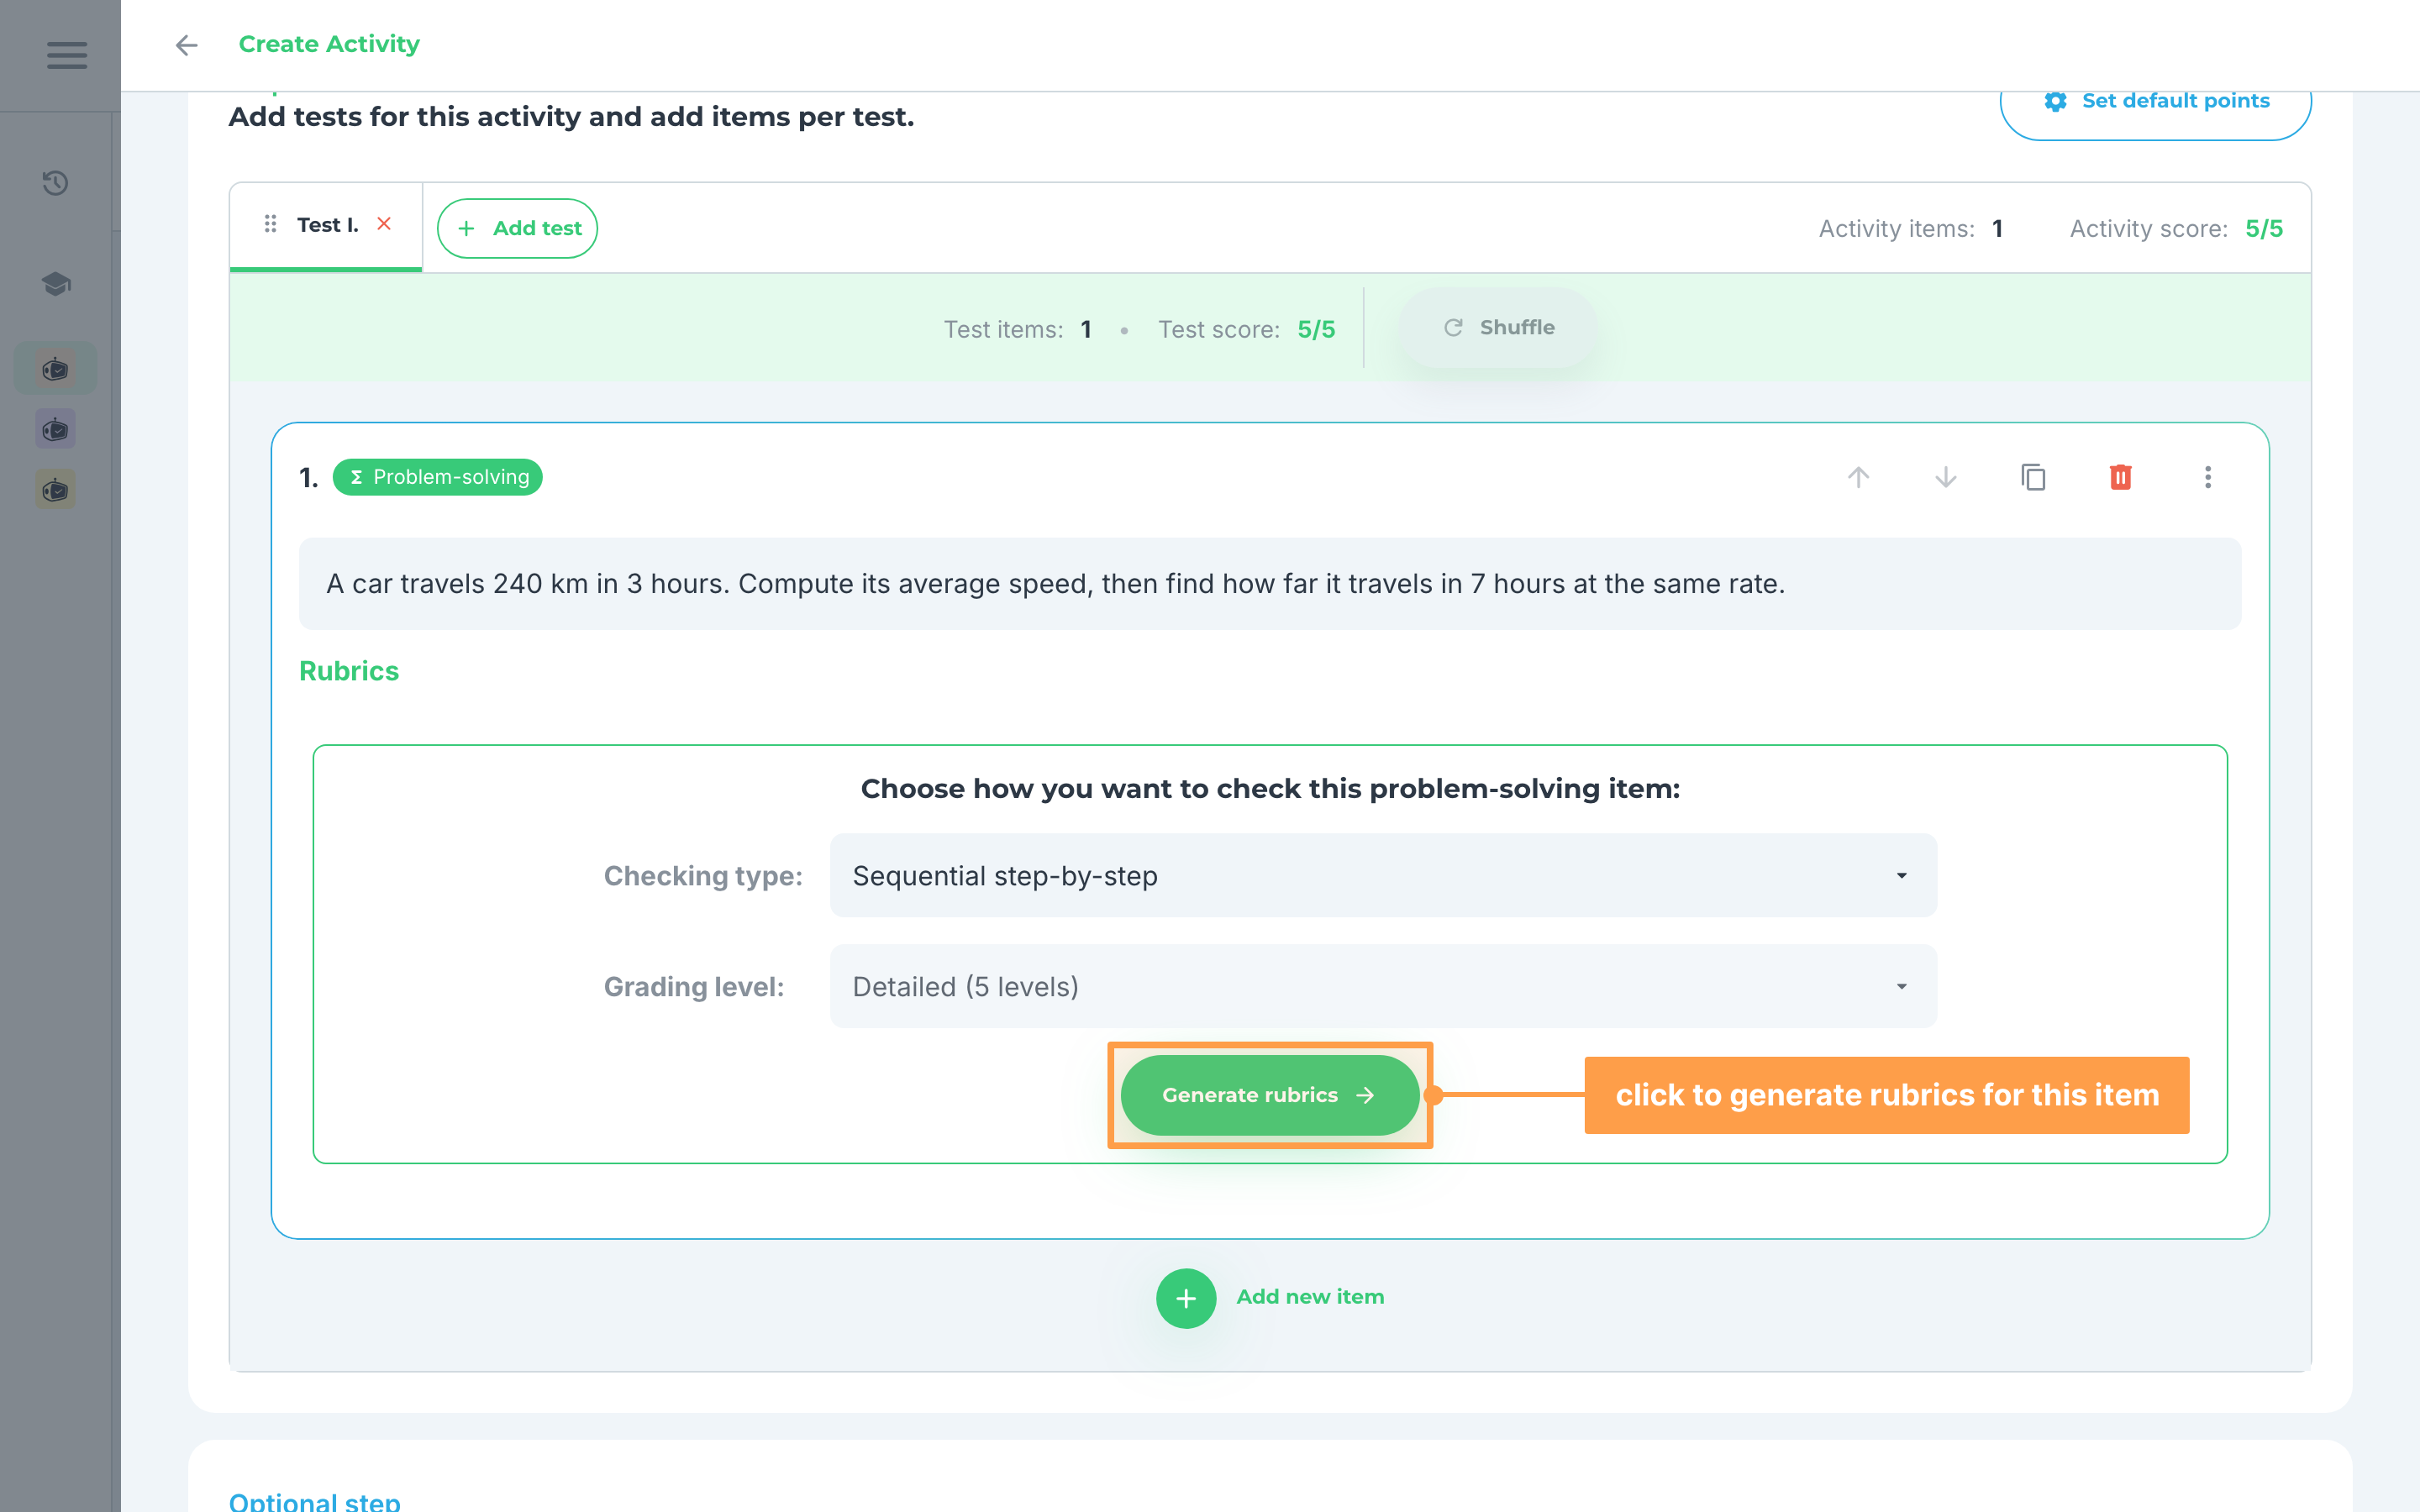
- Afterwards, click Generate rubrics and wait for our system to finish creating your rubrics.
- Review the rubrics to see if it is to your liking, especially the description for each grading level and the Max Score for each rubric. The table shows one grading level at a time, so use Prev and Next in the header to move through them.
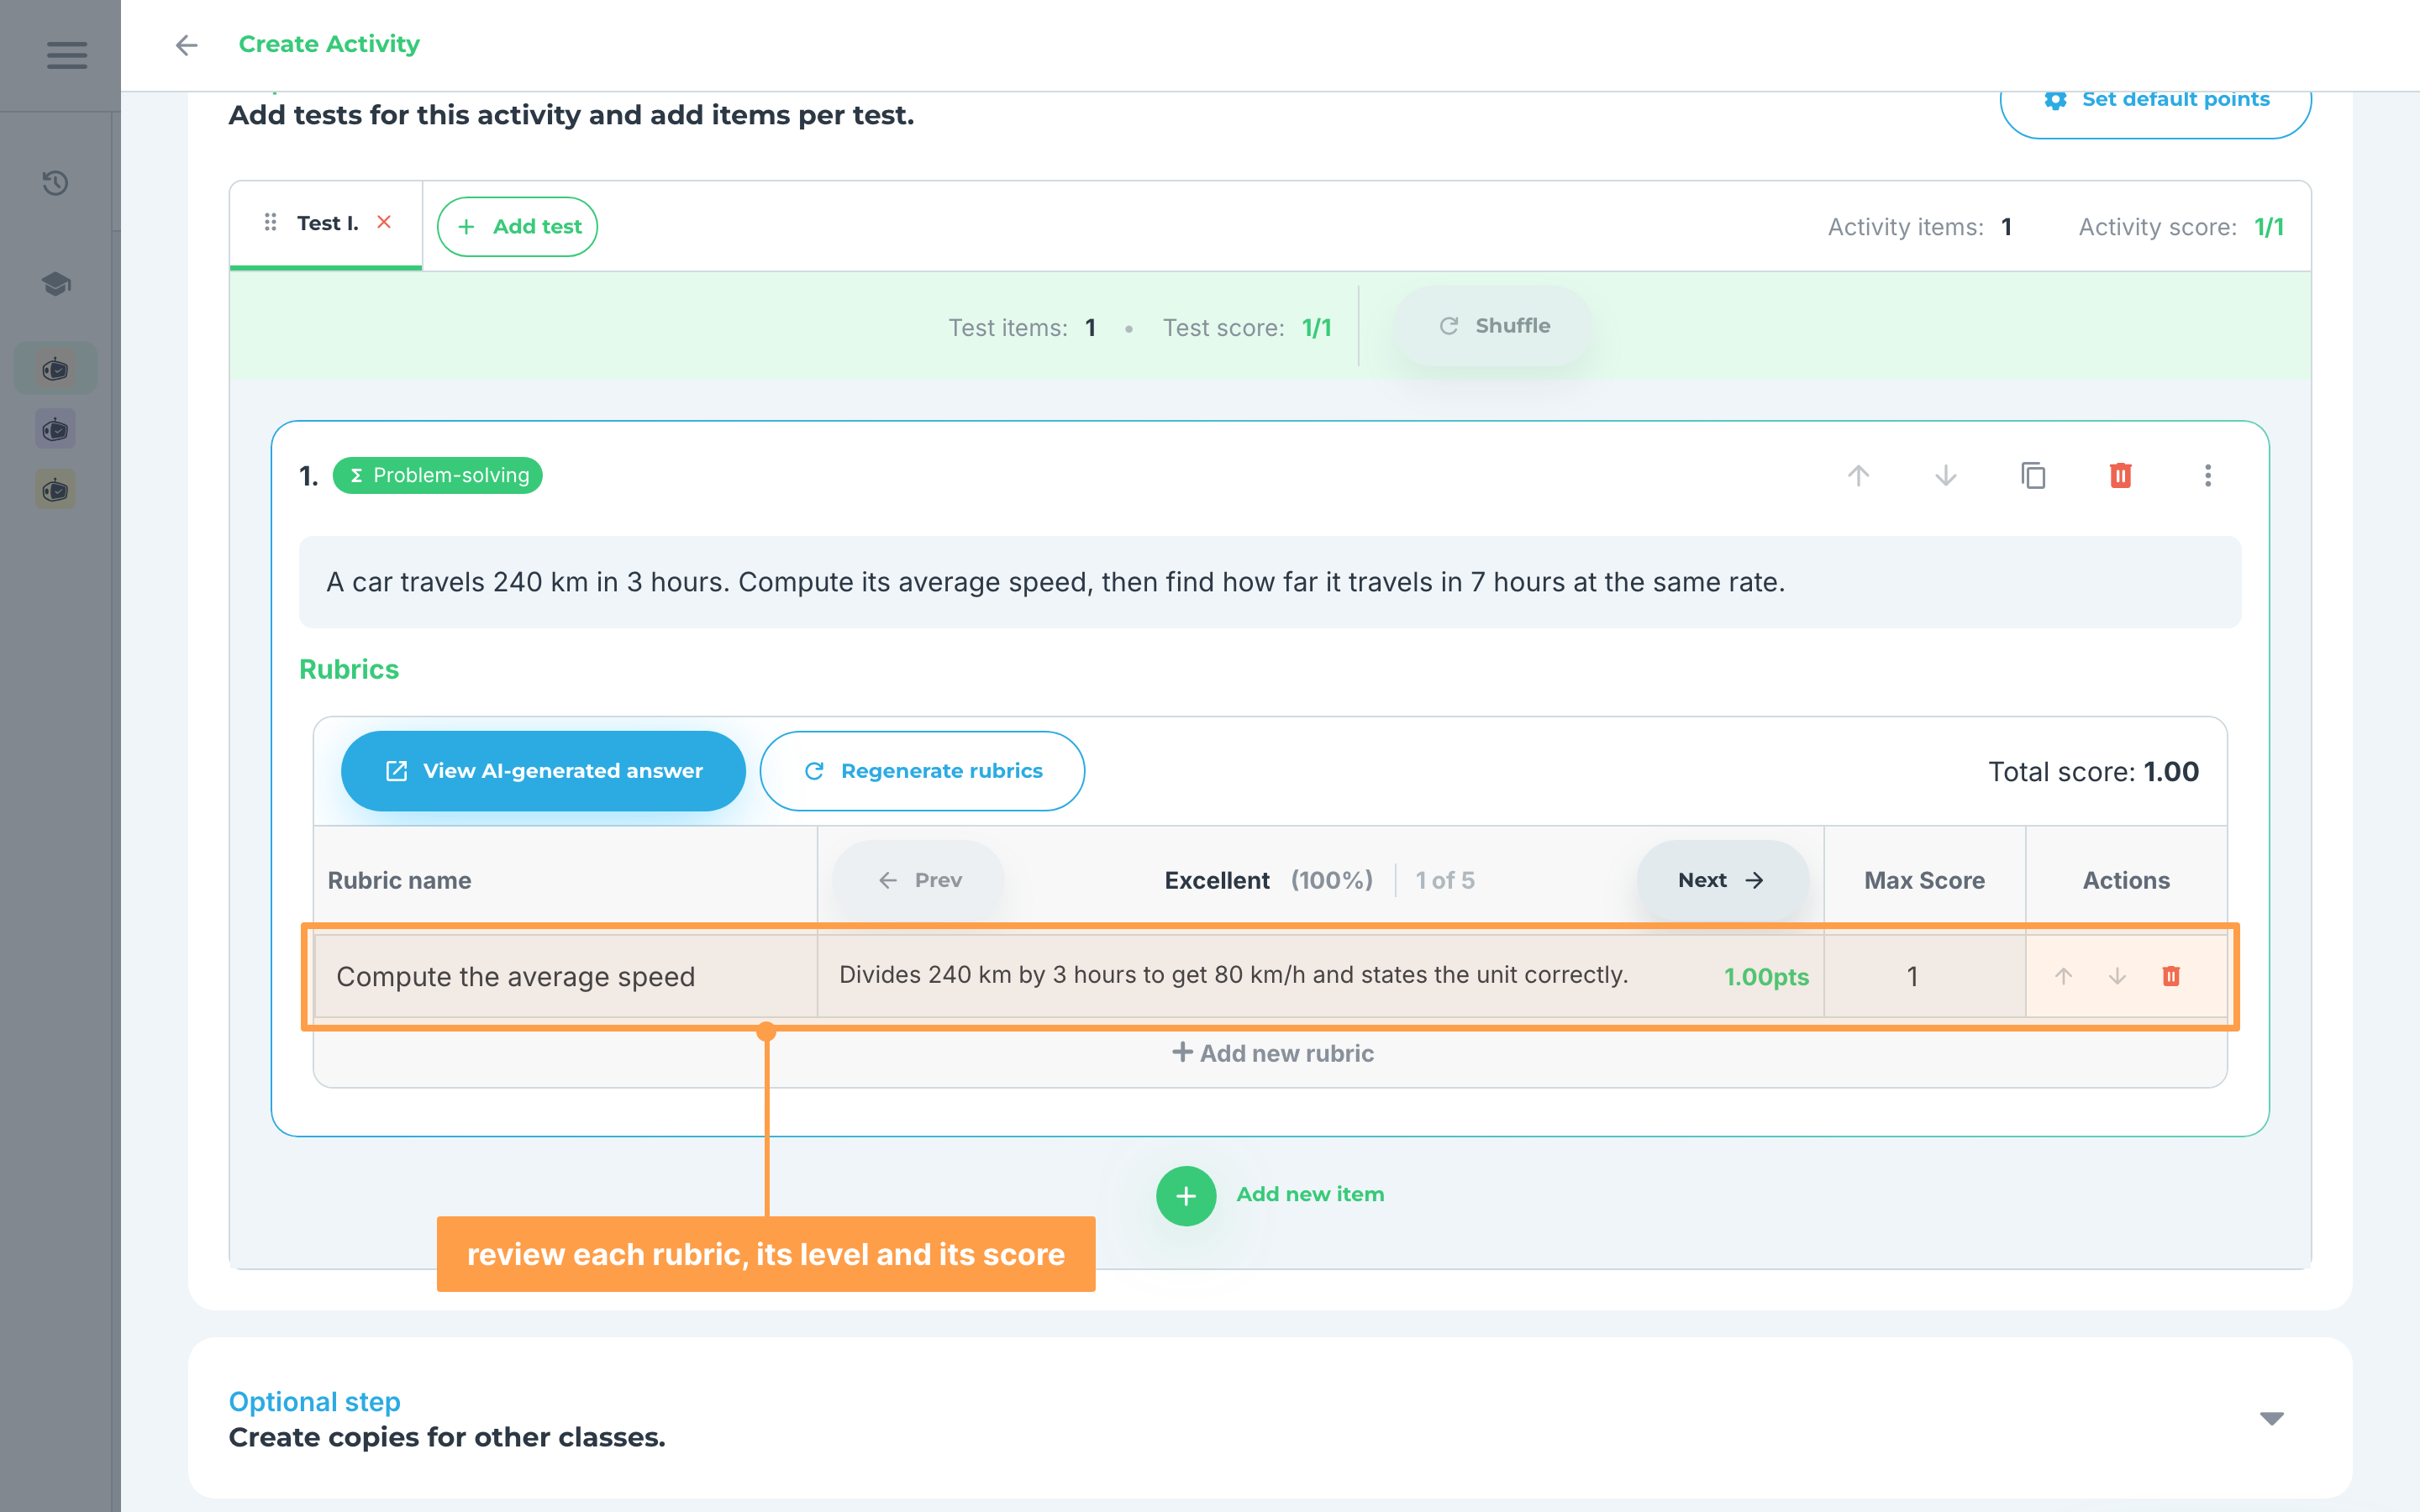
- If you wish to edit any detail to the rubrics, you can make your changes in the table by clicking the boxes and adding your modification. You can also add another rubric by clicking + Add new rubric after the last rubric.
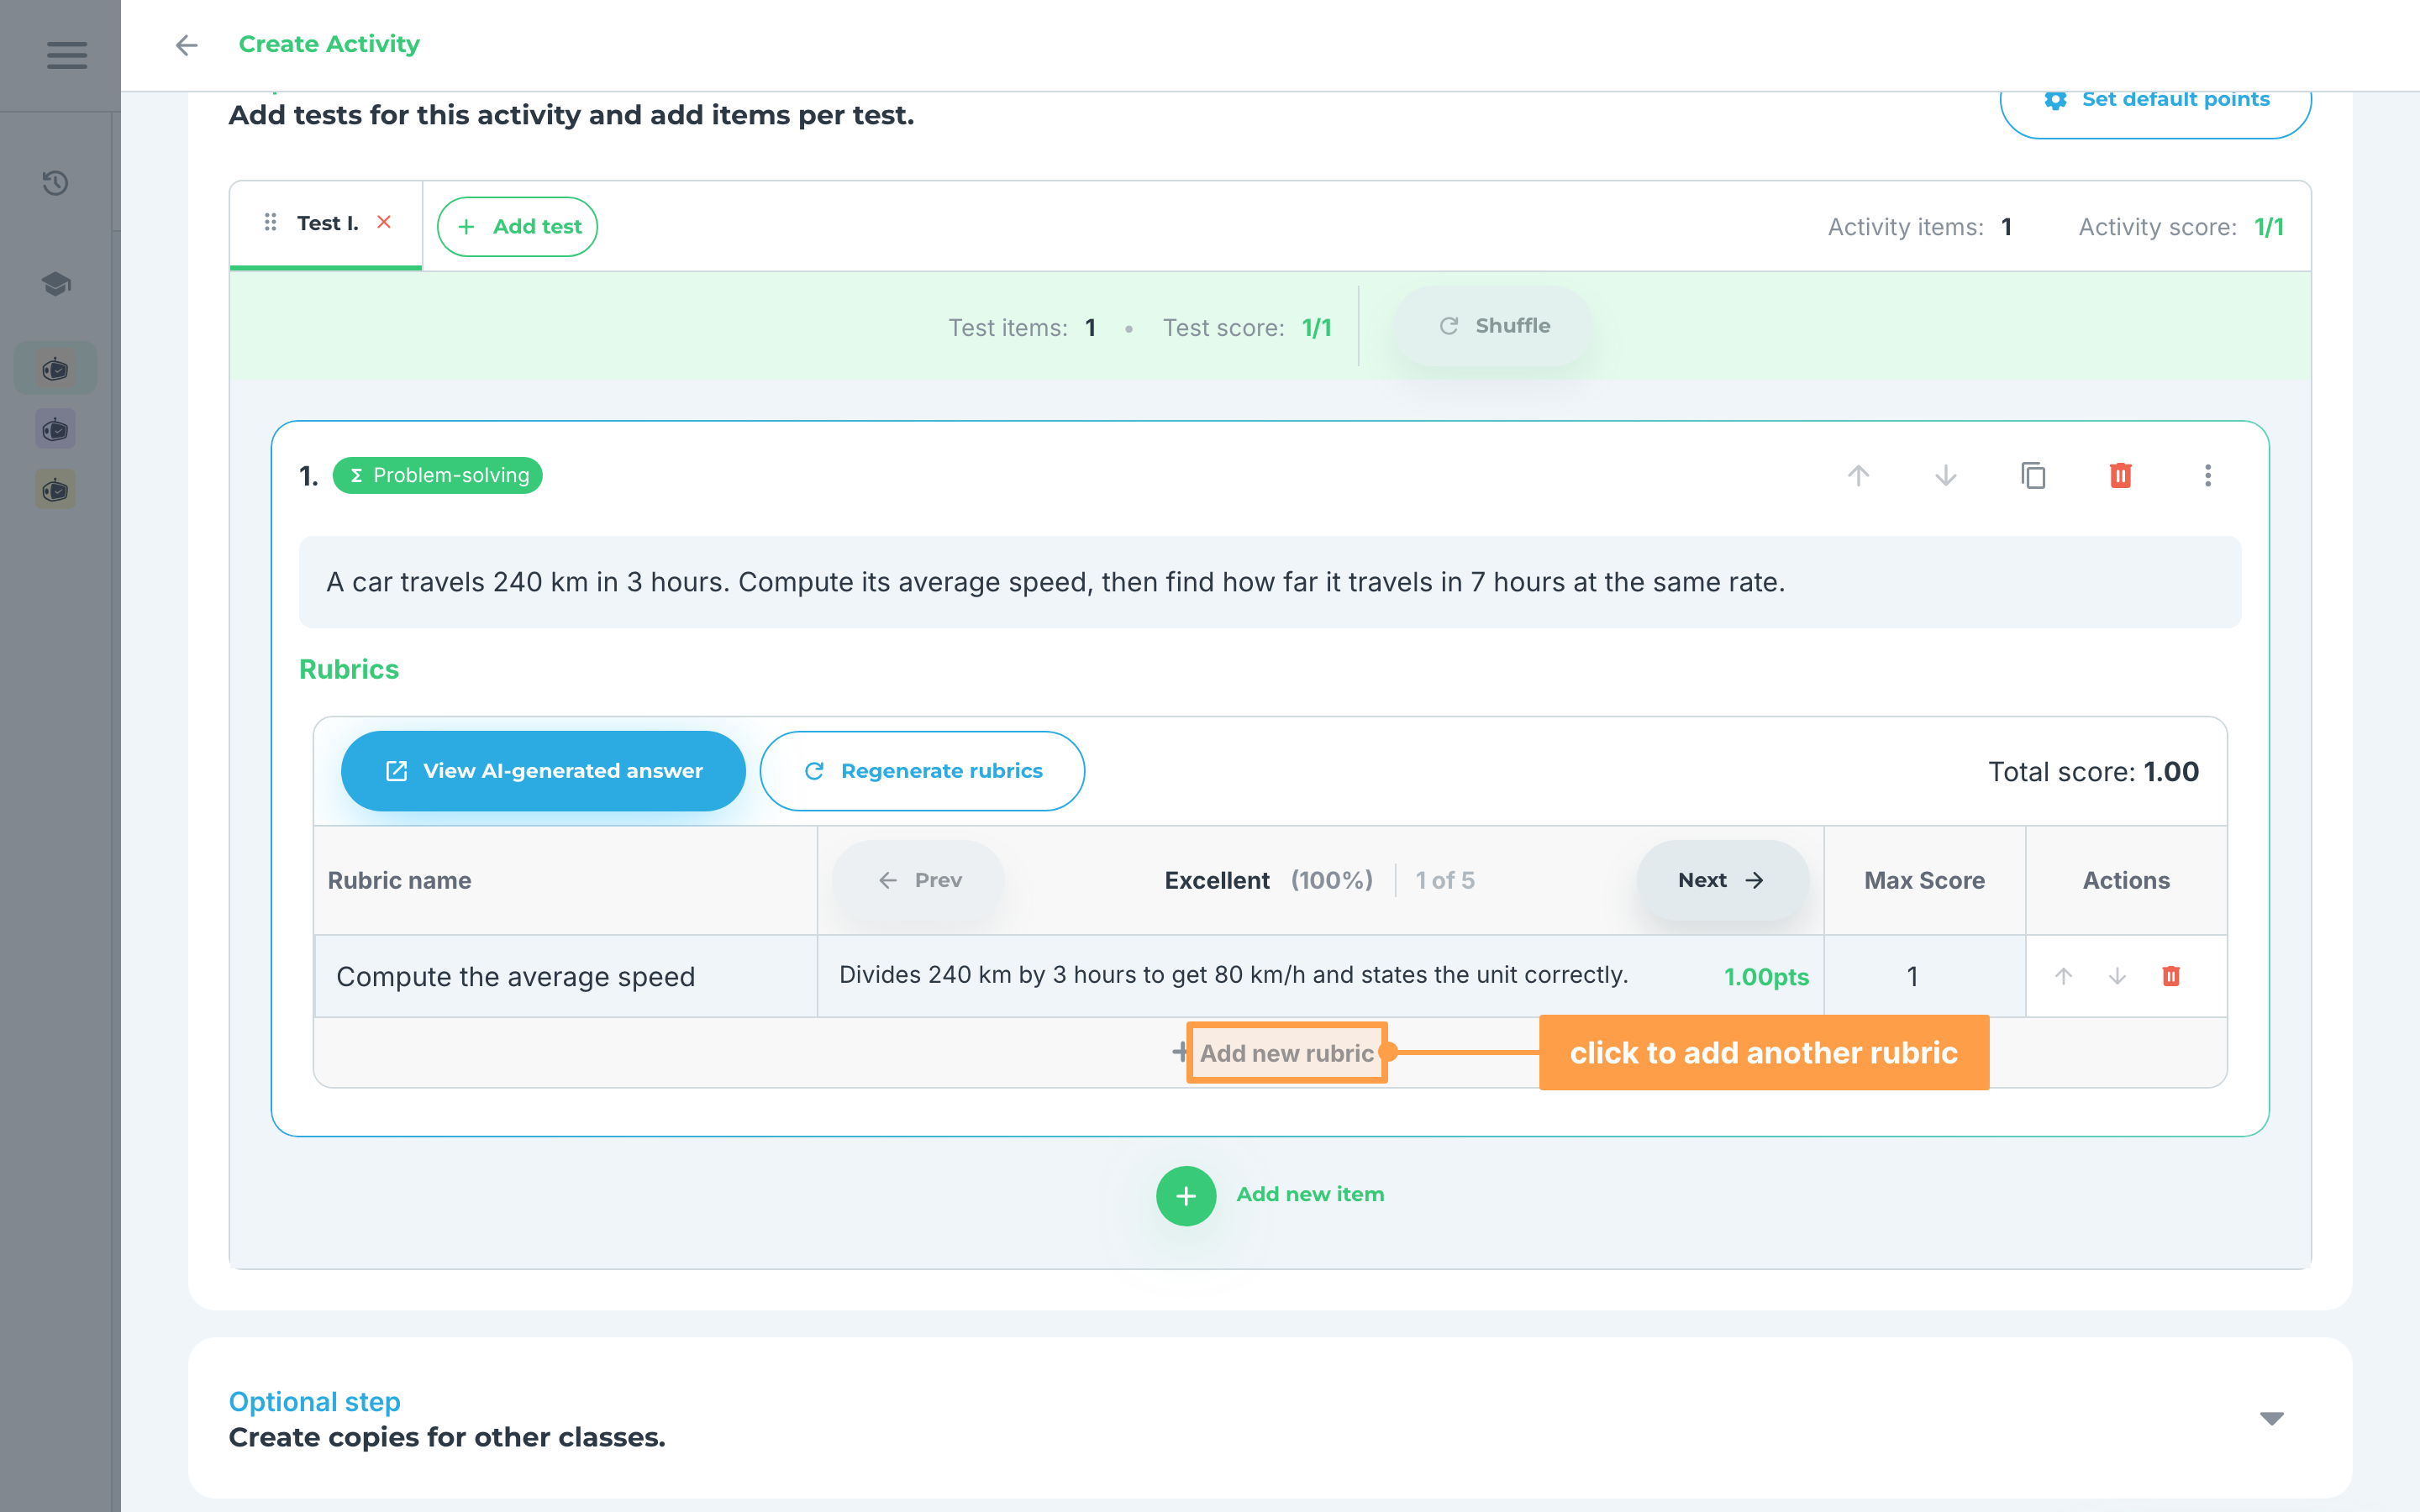
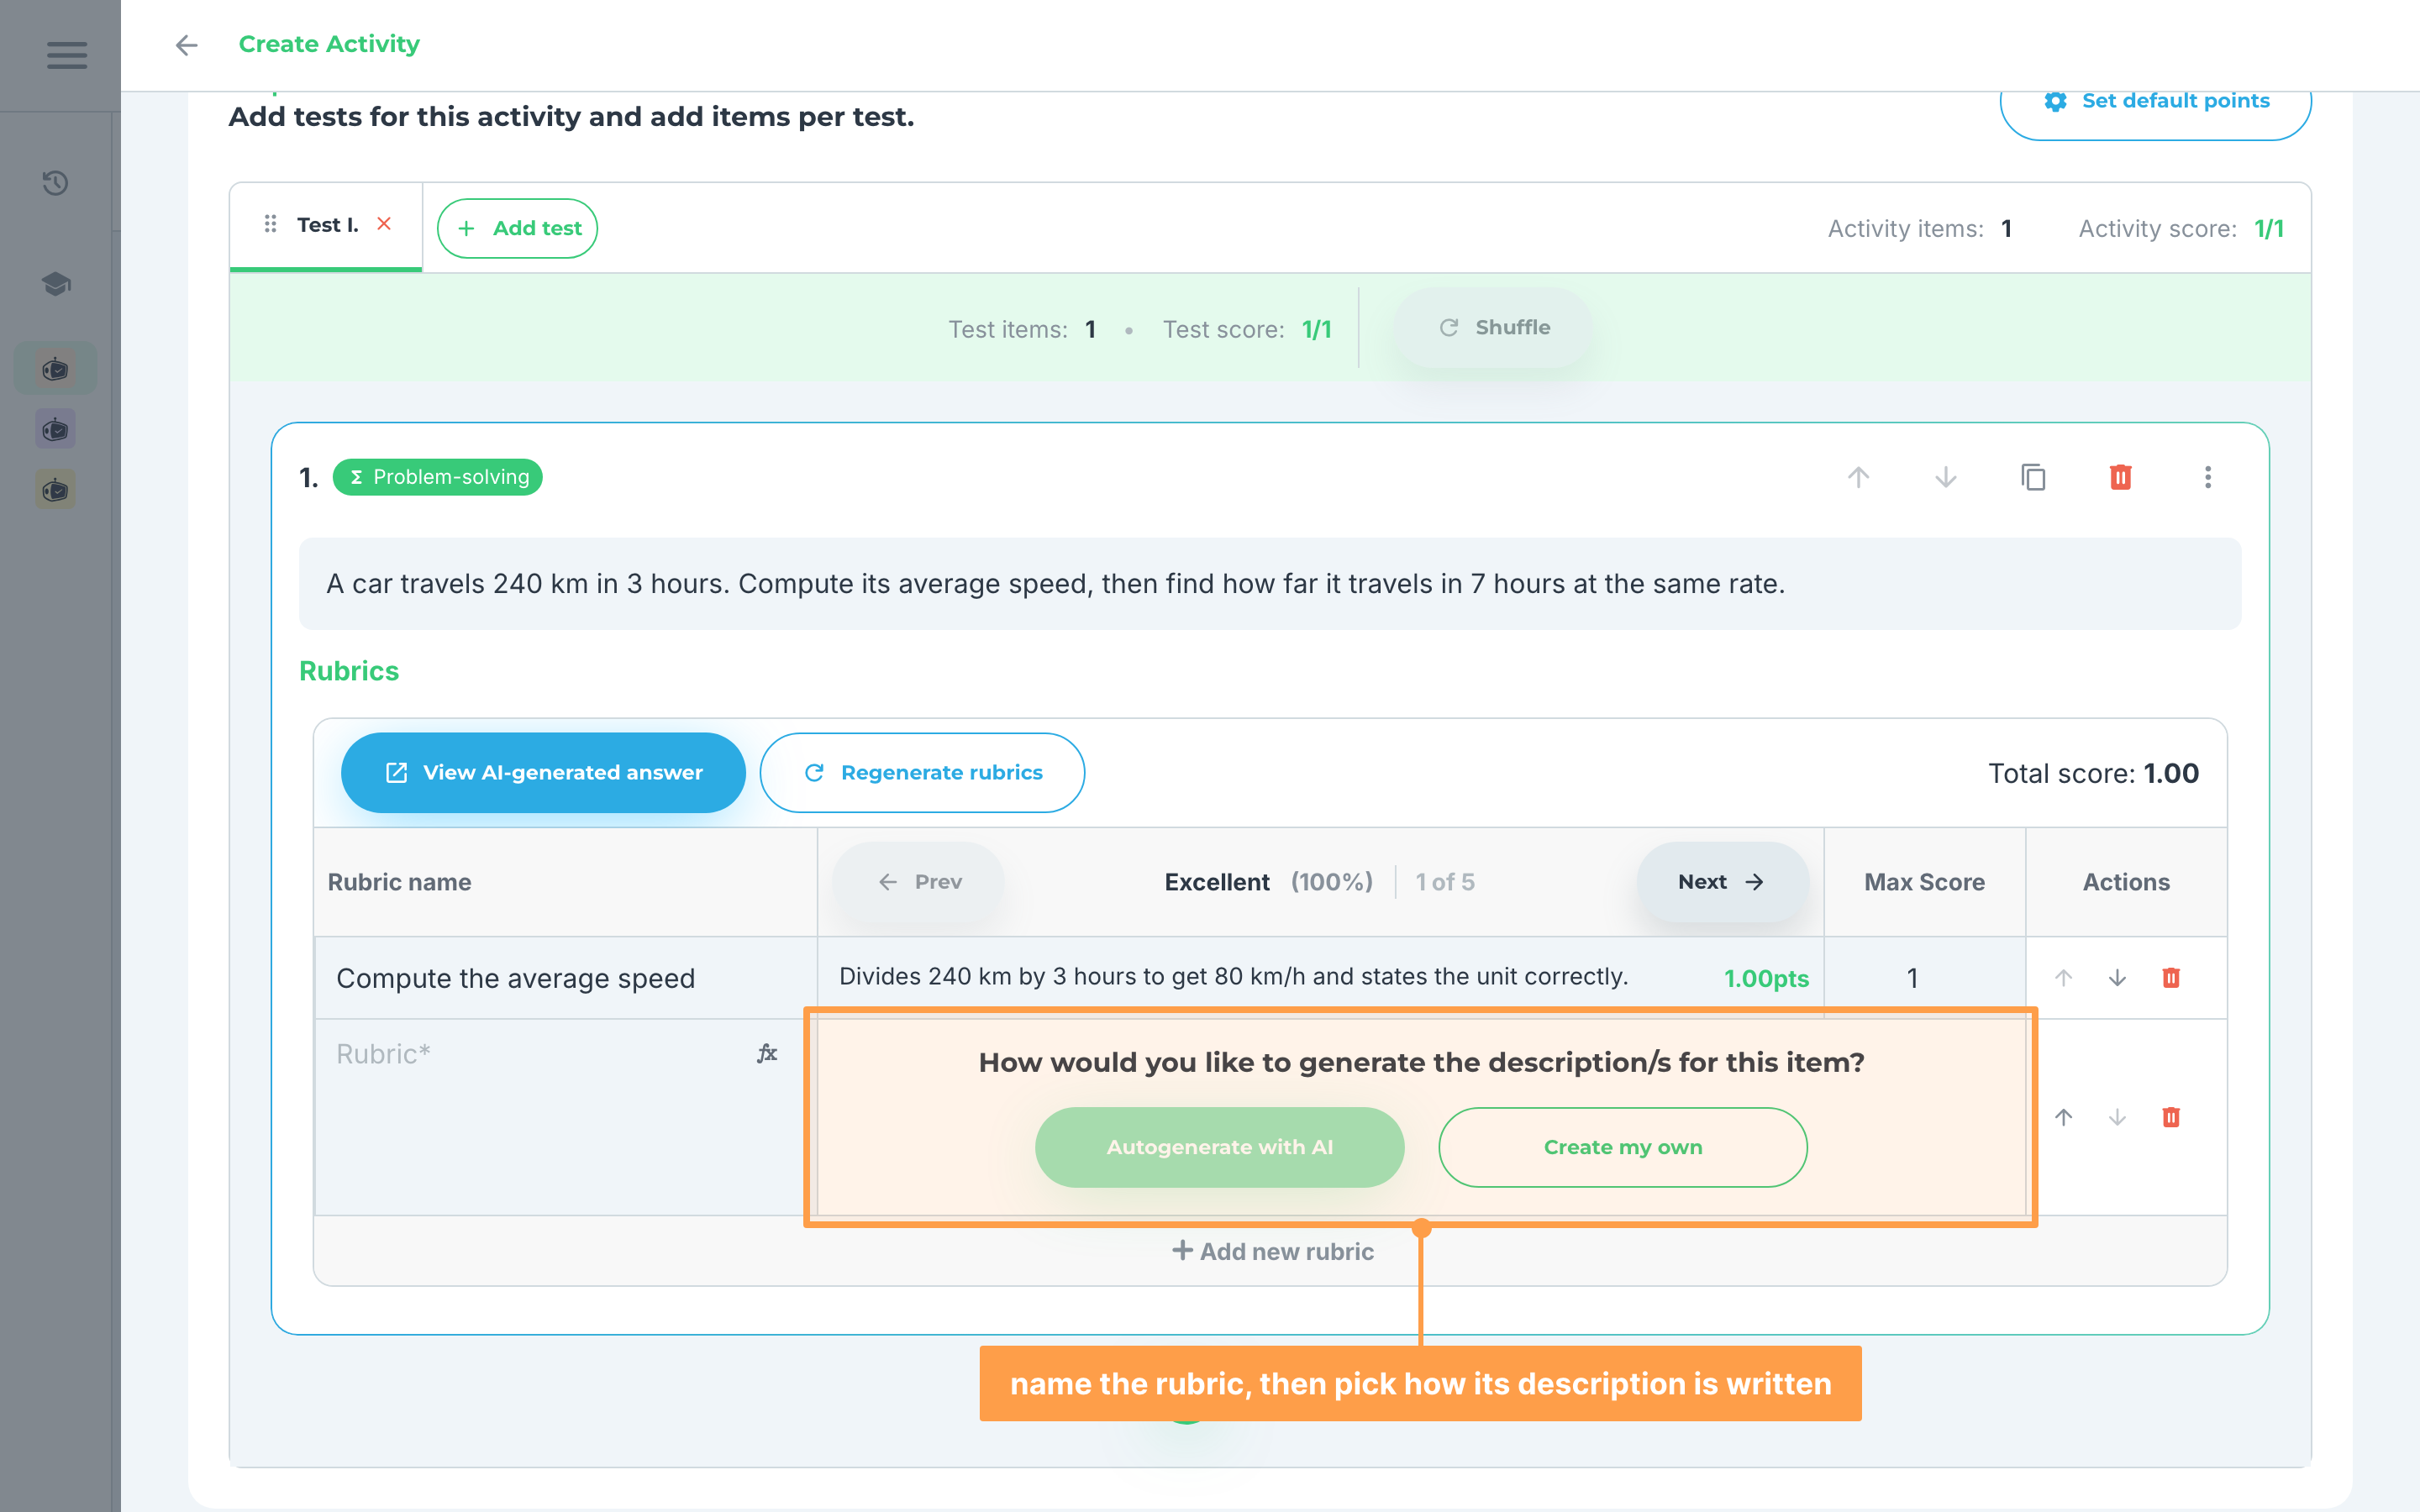
- Provide a rubric name then you can opt to Autogenerate with AI or Create my own the description of the rubric then set the score.
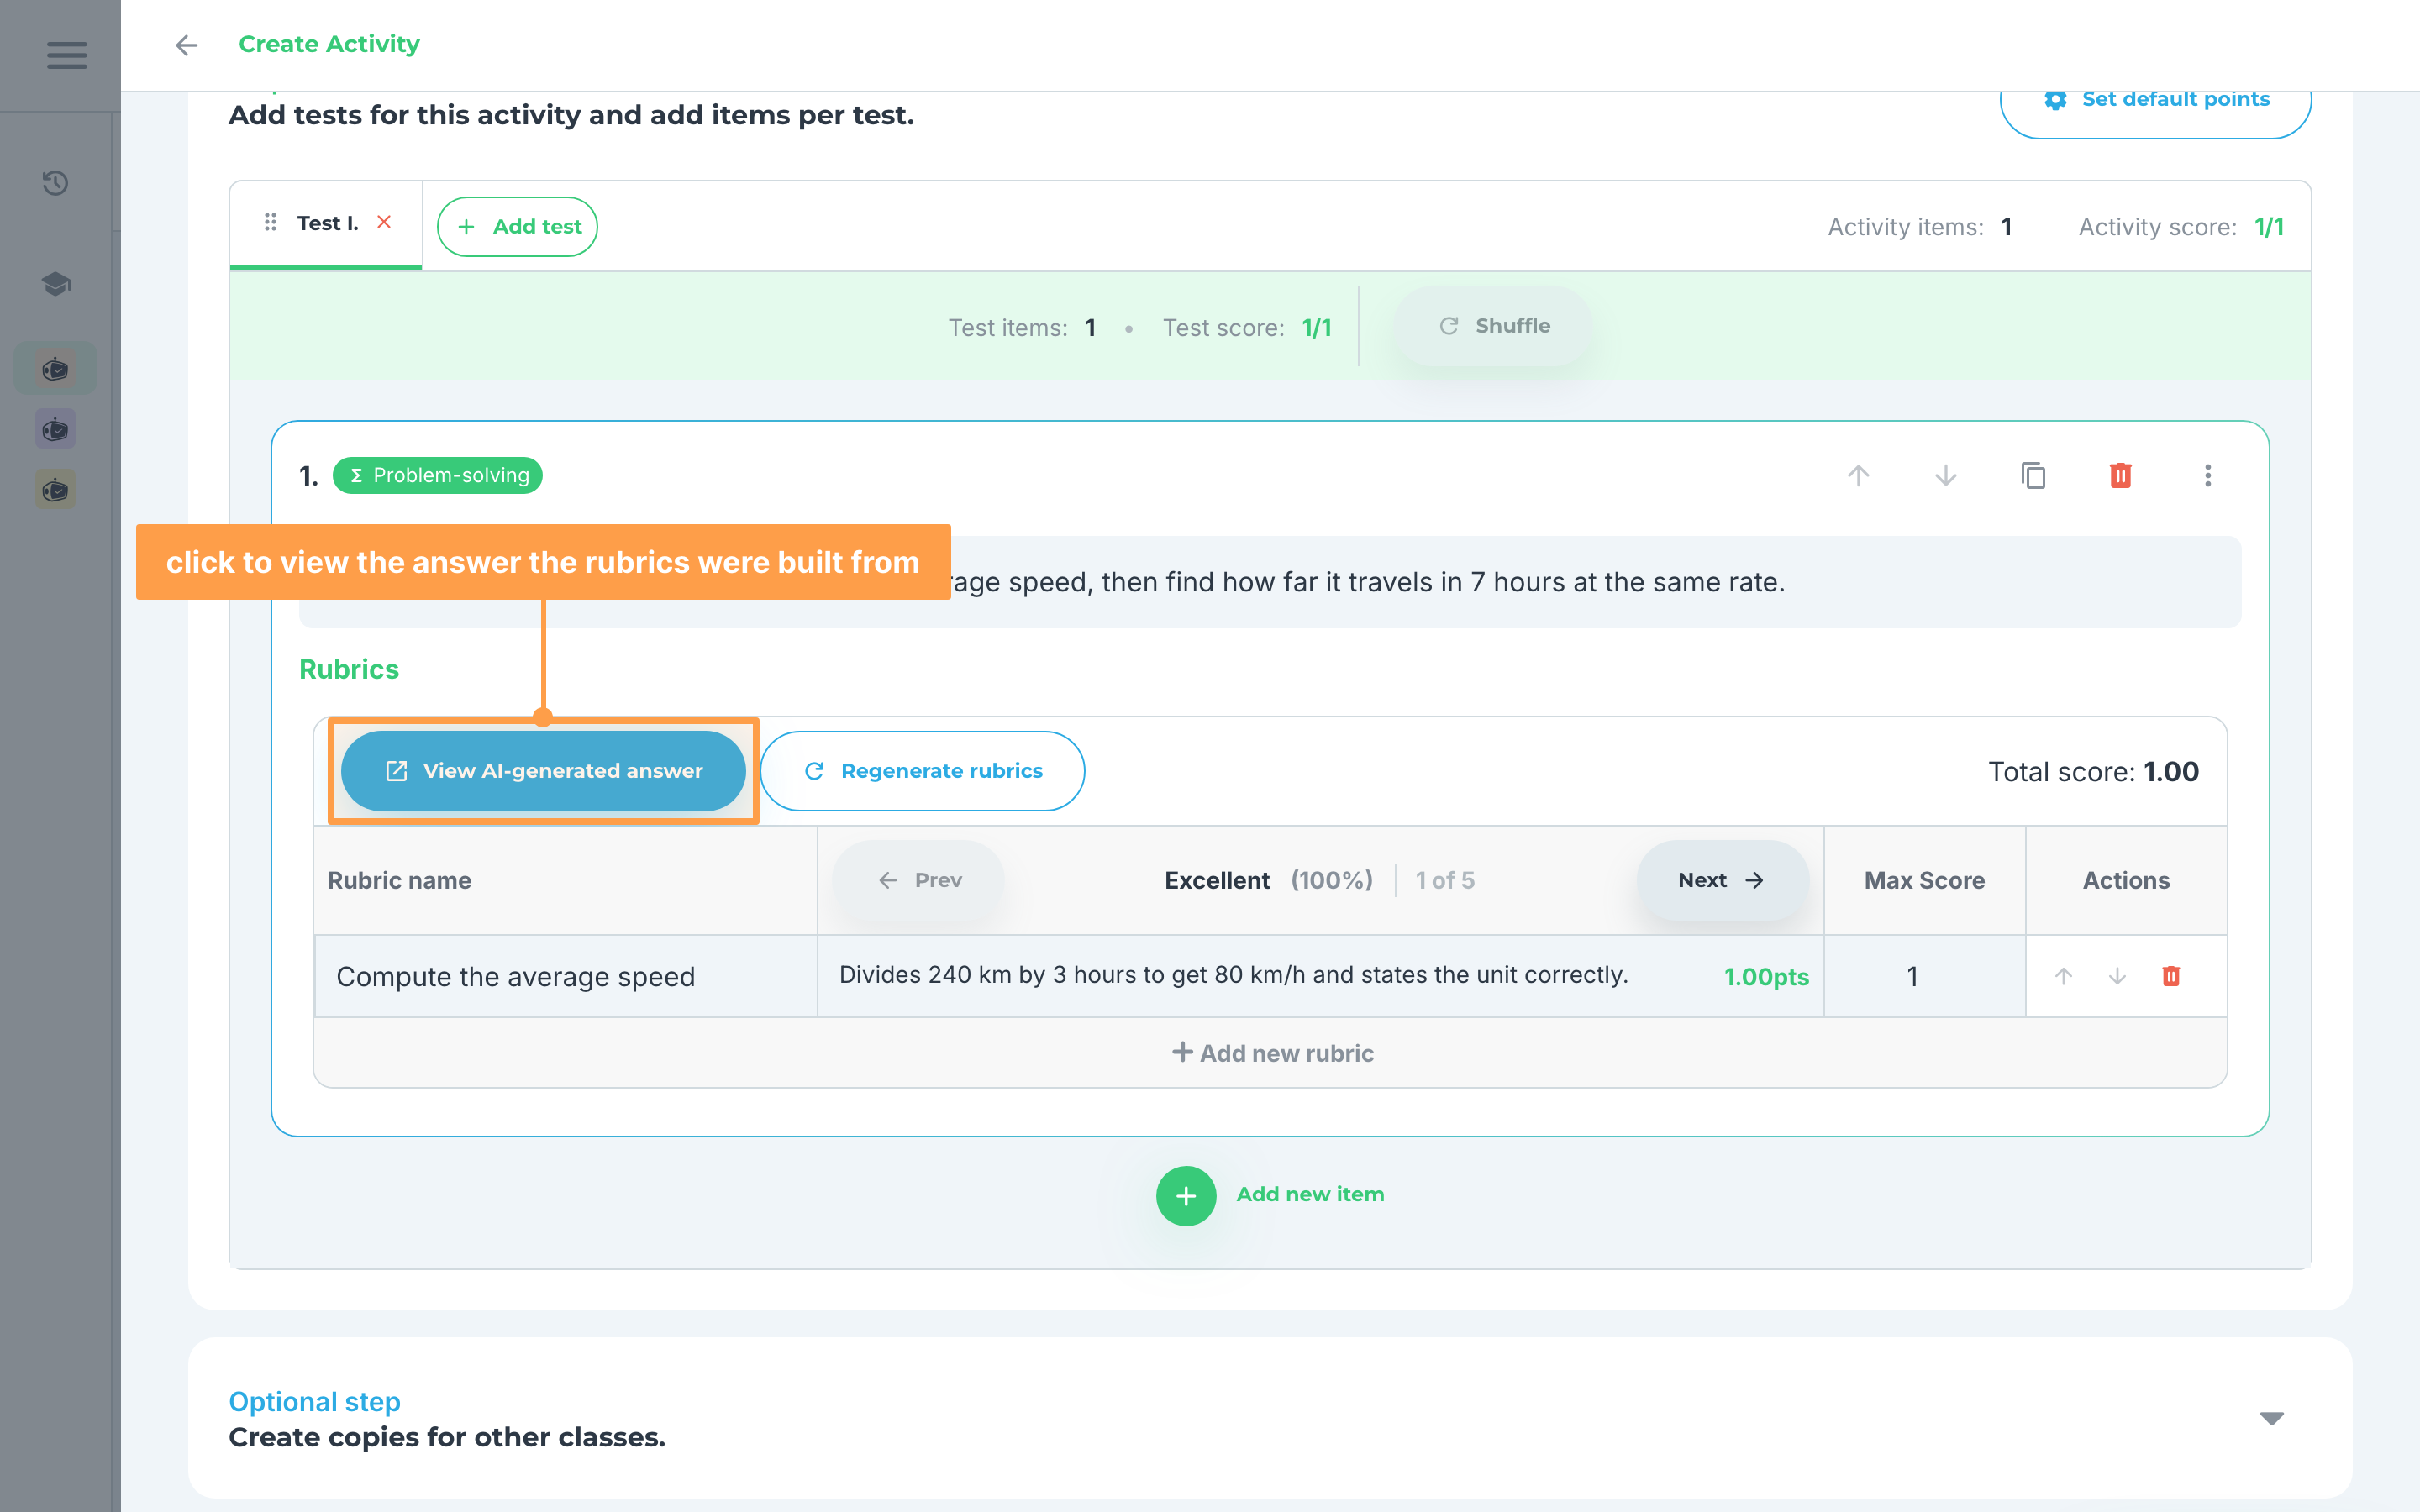
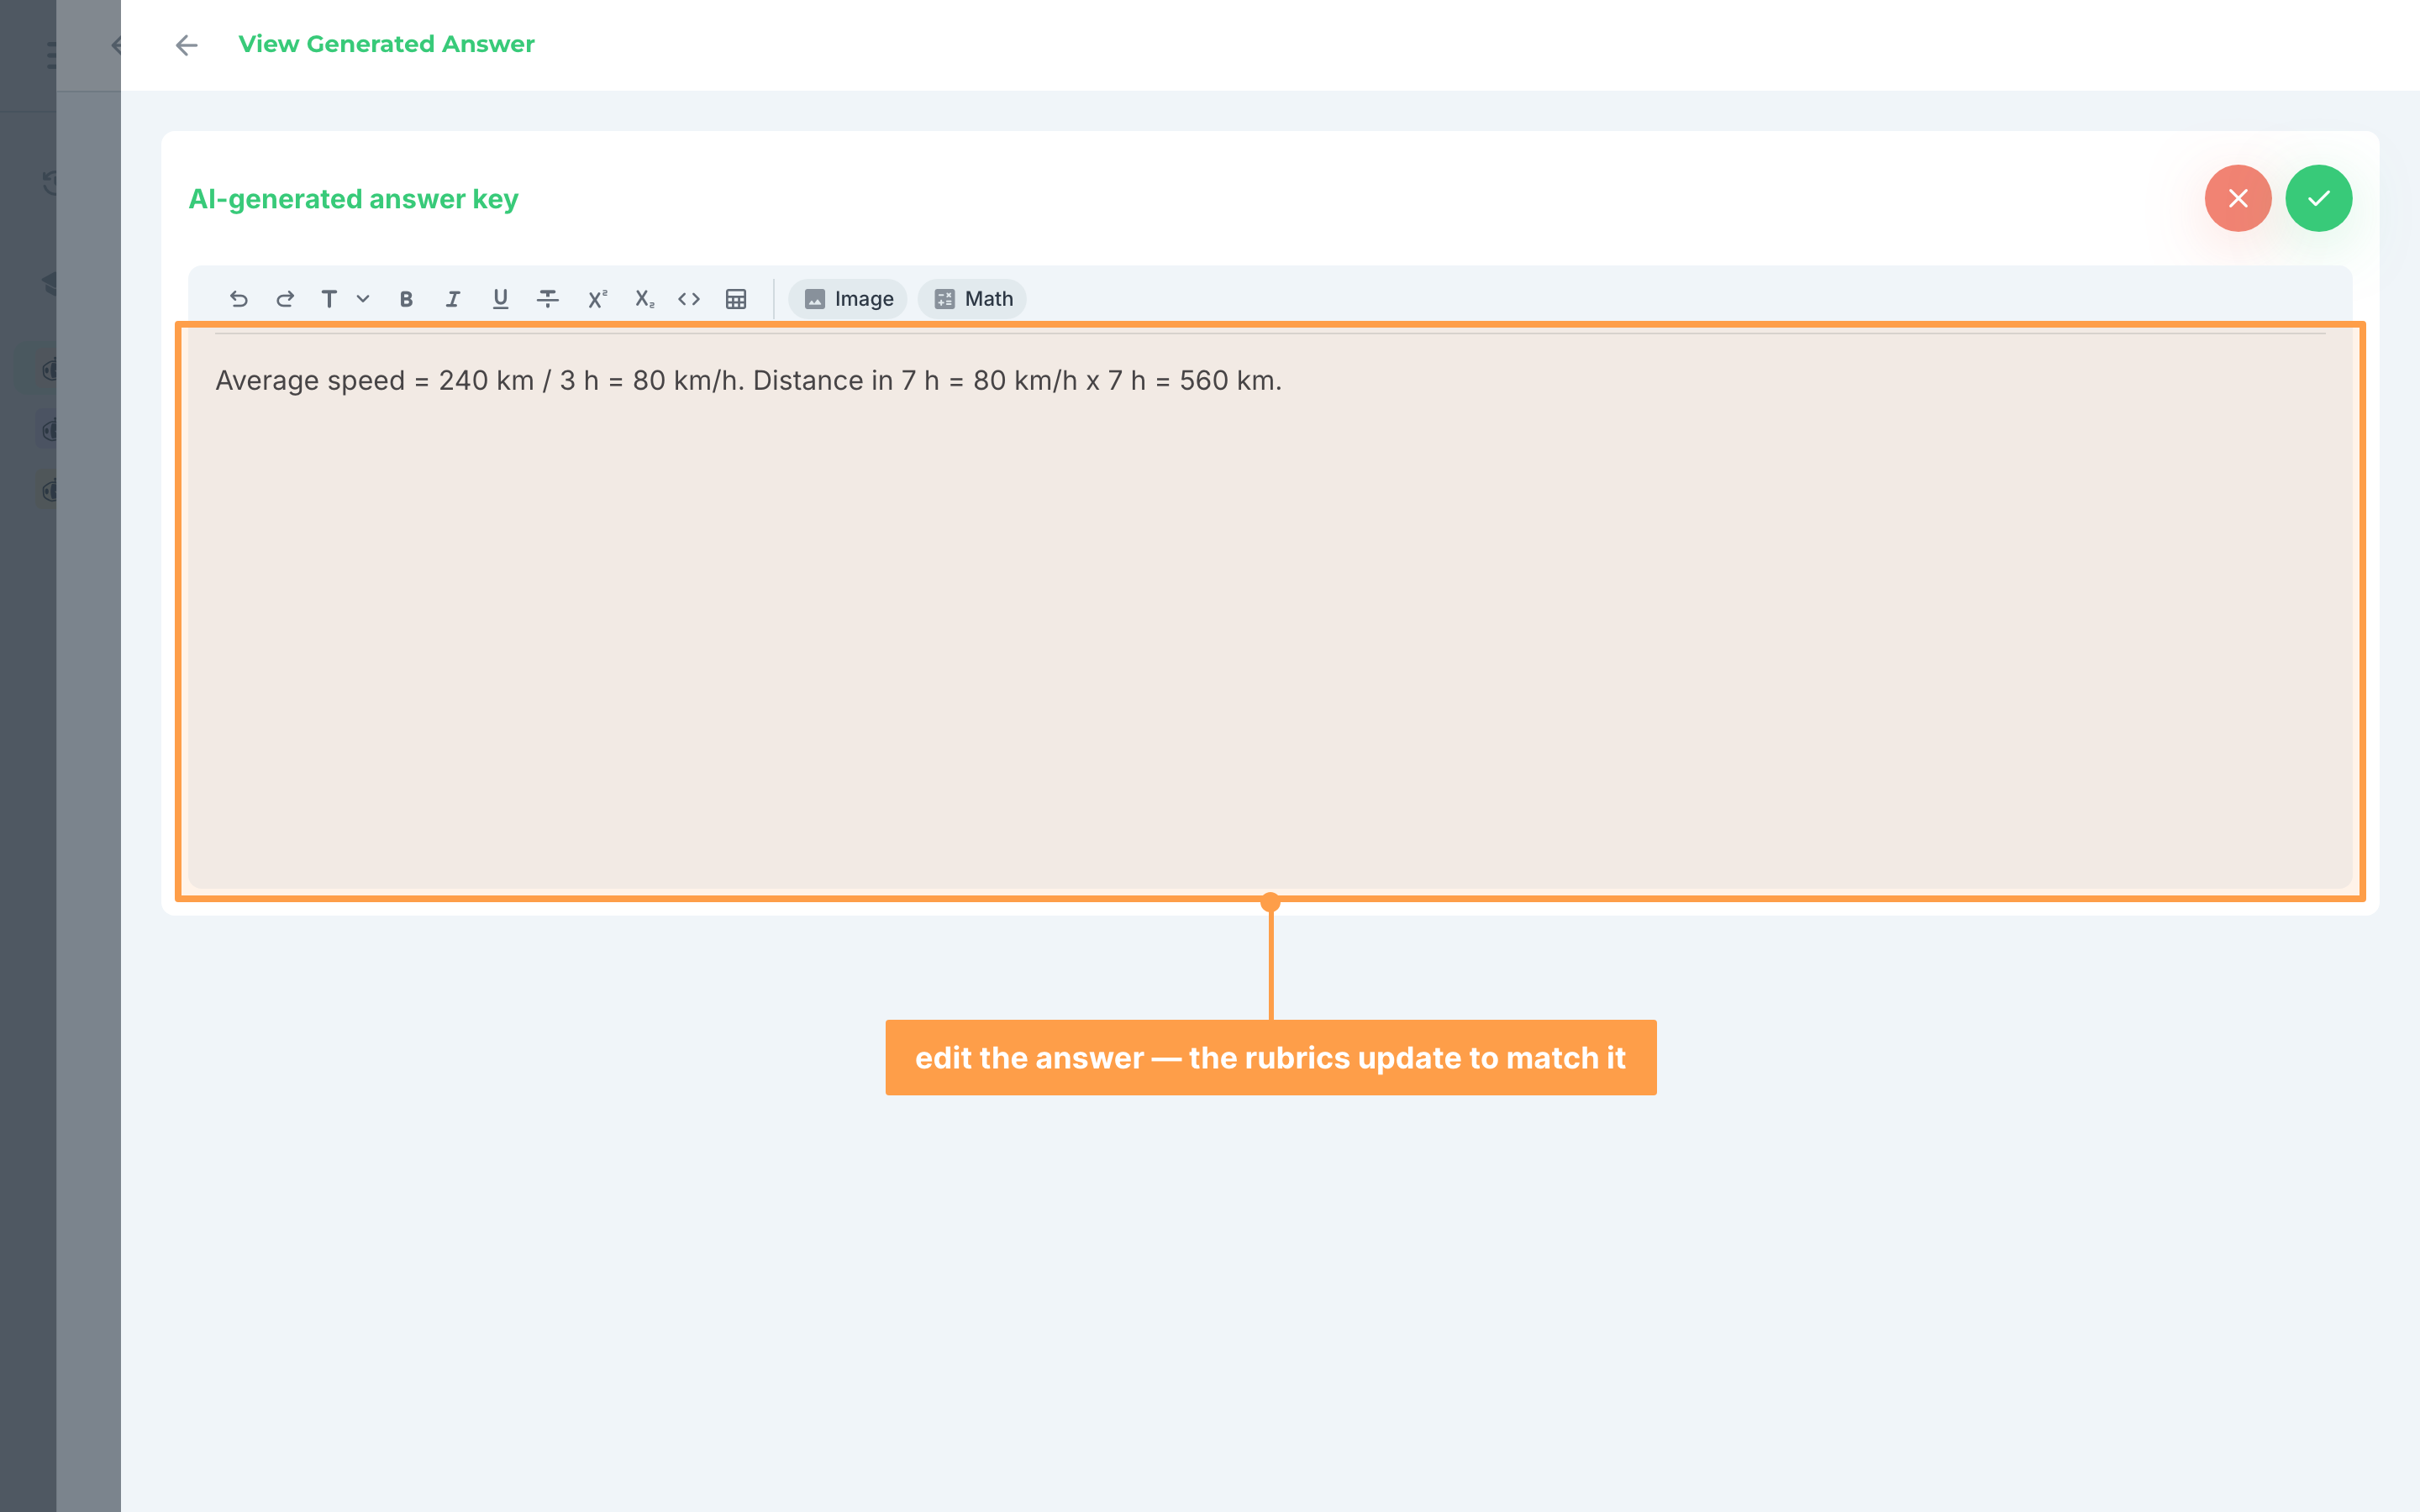
- Click on the View AI-generated answer button above the table to view the answer your rubrics were based upon.
- You may also edit the answer if you wish. Click Edit answer, make your changes, then save them. GradeChum will ask Generate again? and warn you that you will lose your changes in the current rubrics; confirm and a new set of rubrics is built from your edited answer.
- The Grading level decides how many levels your rubrics are scored across and how strict our system will be in checking the students' answers. It sits under Checking type in the same panel, so you set it before you click Generate rubrics; the default is Detailed (5 levels). To change it once the rubrics exist, click Regenerate rubrics.
f. Code on paper
For items with Code on paper as the item type (currently in beta):
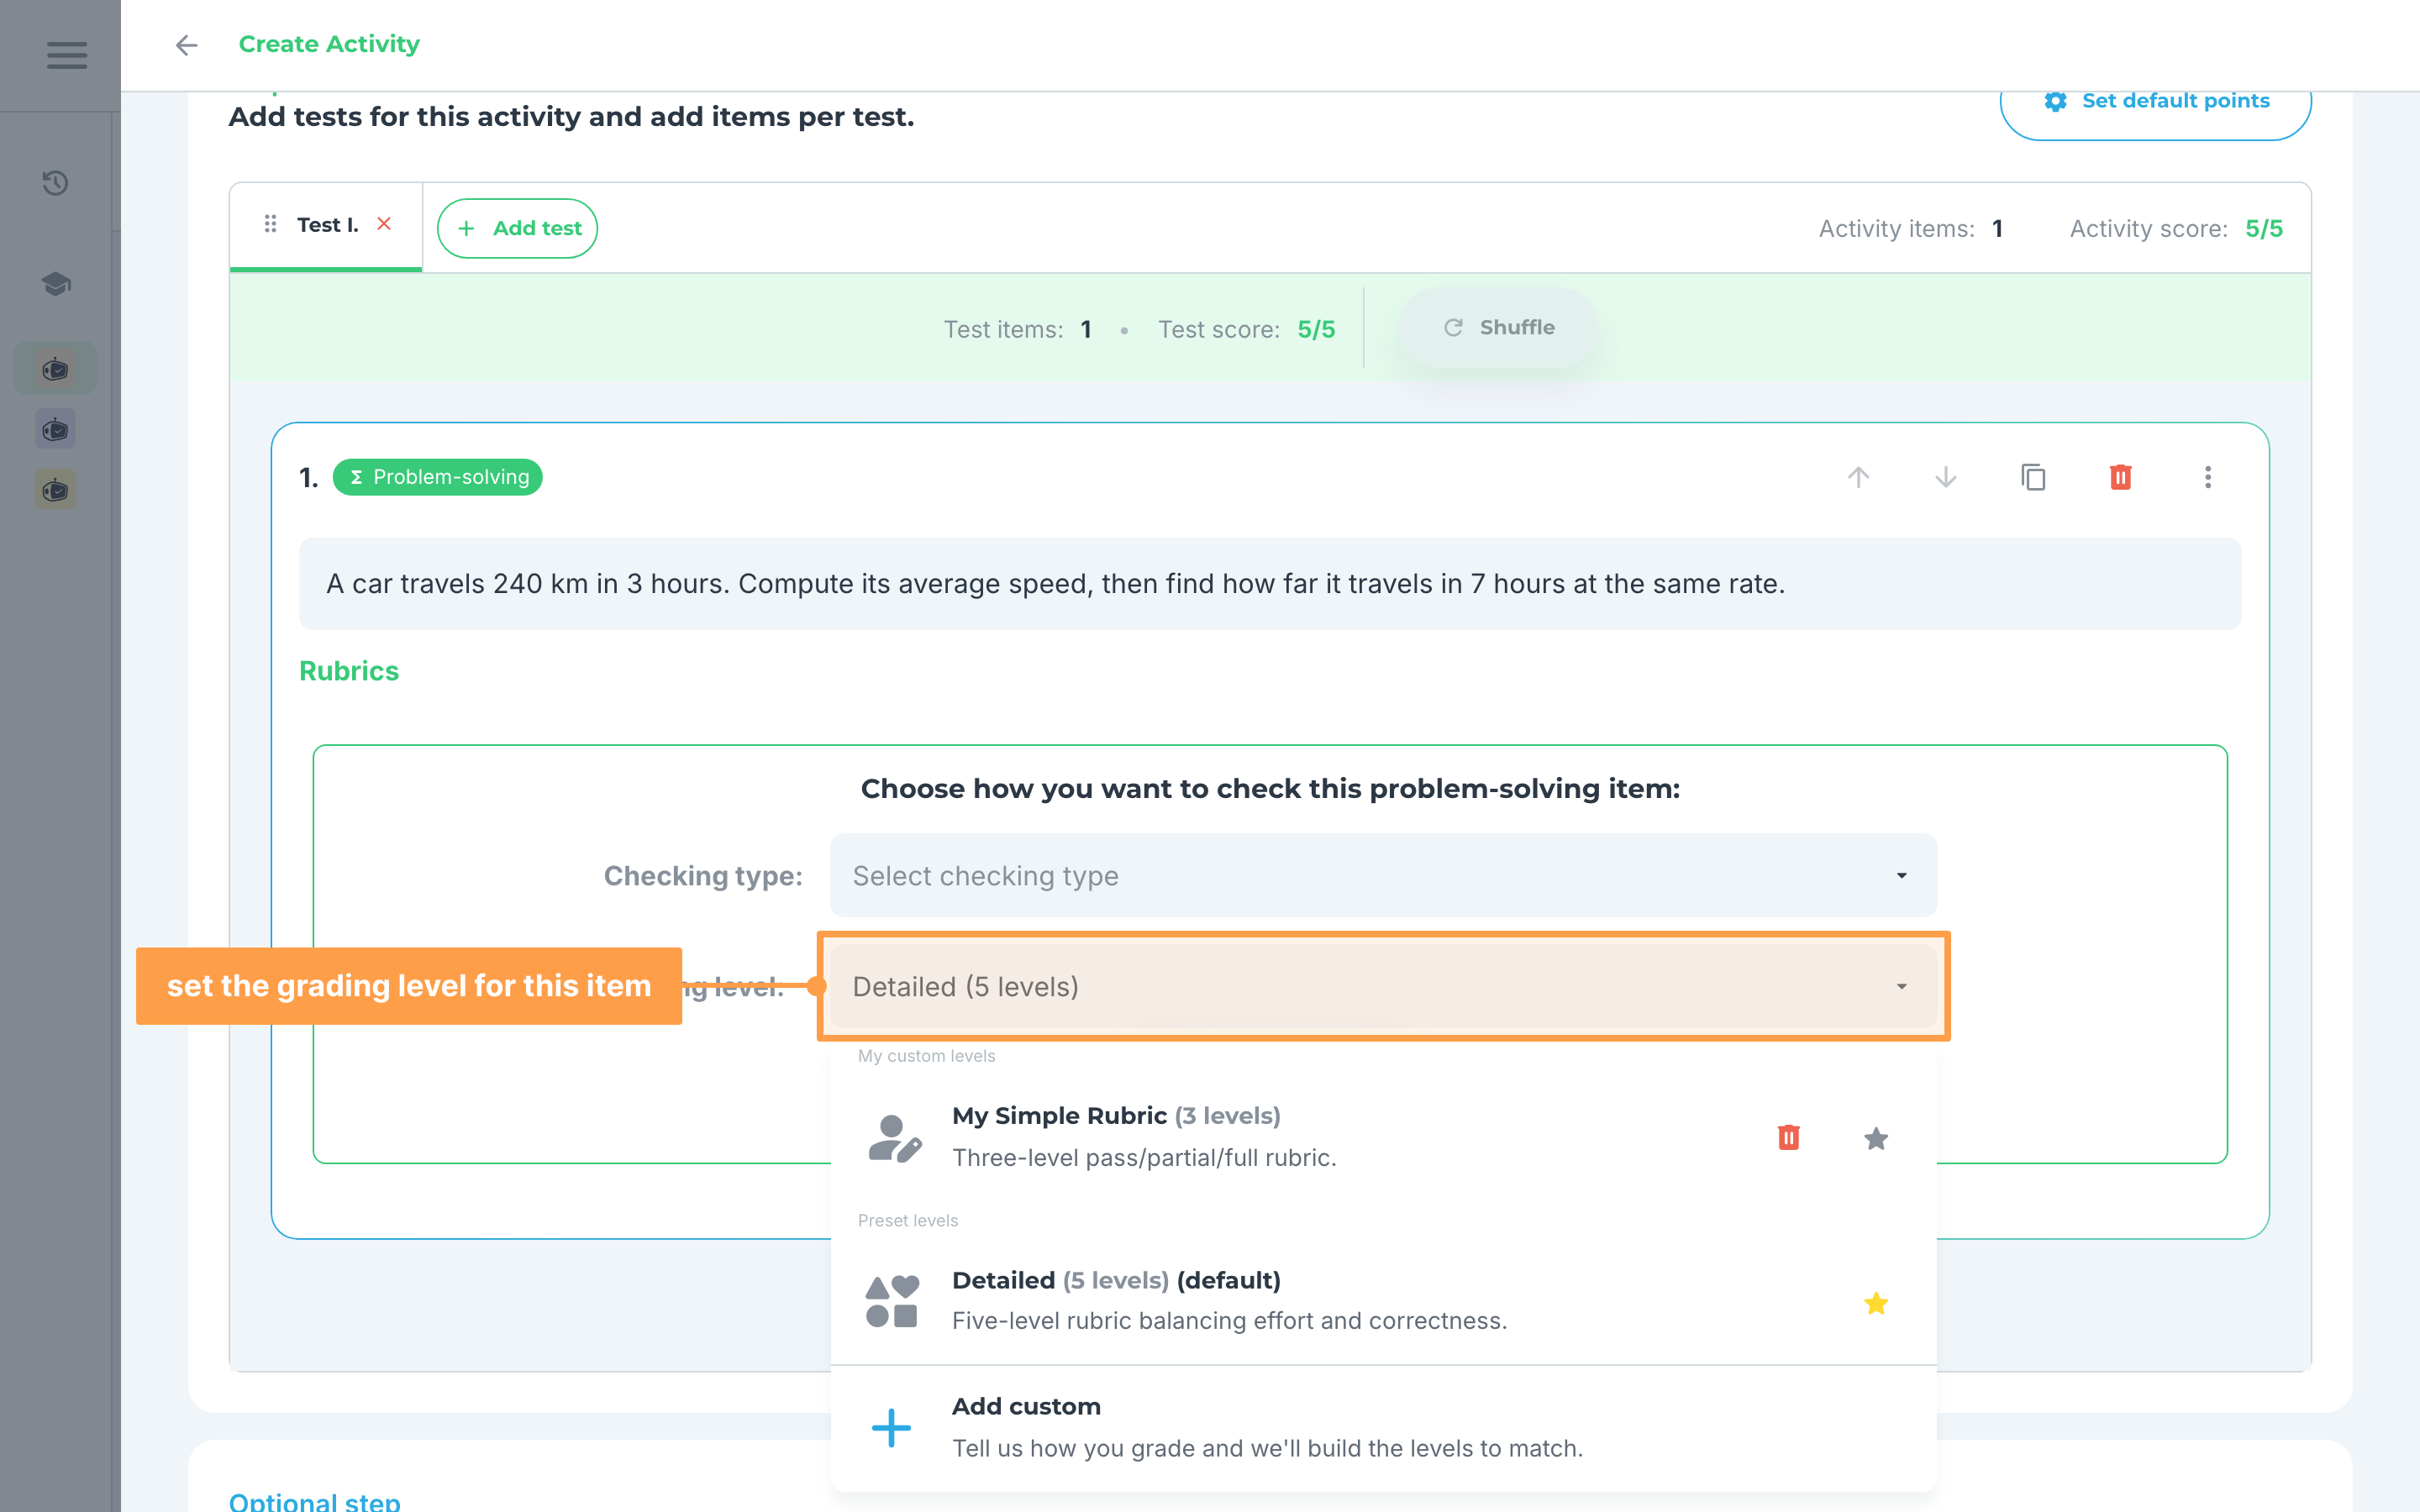
- Fill out the question for this item.
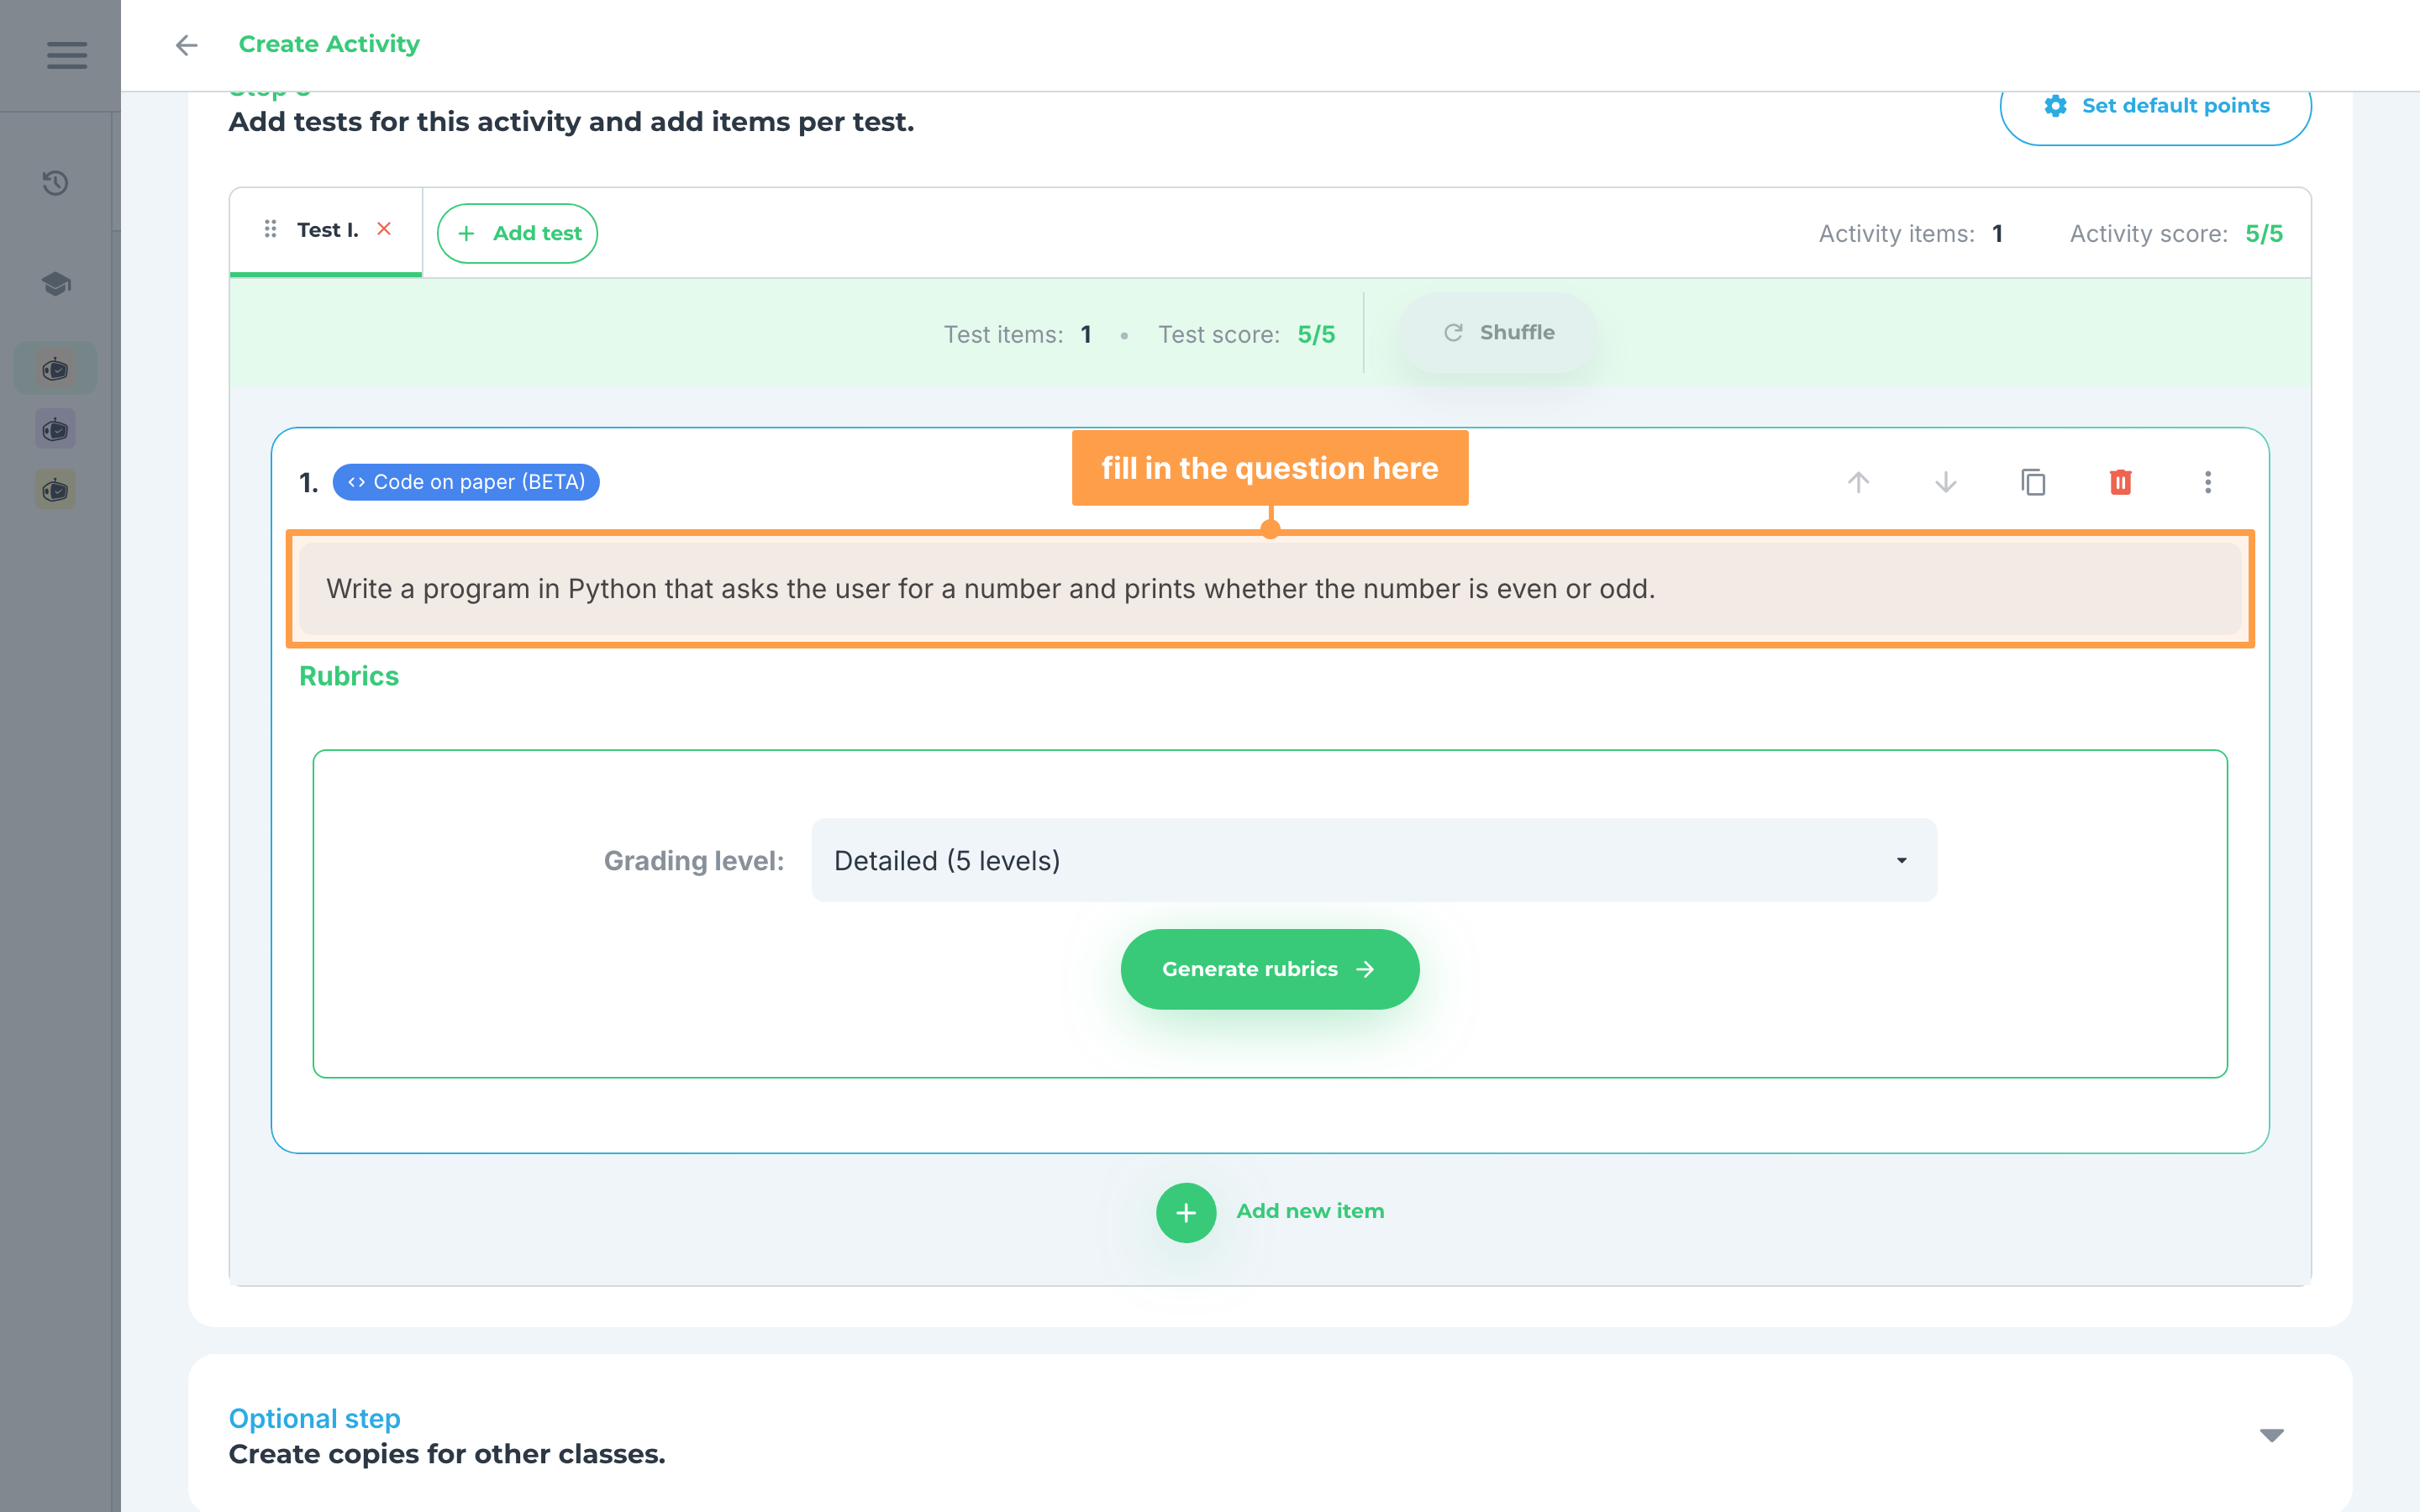
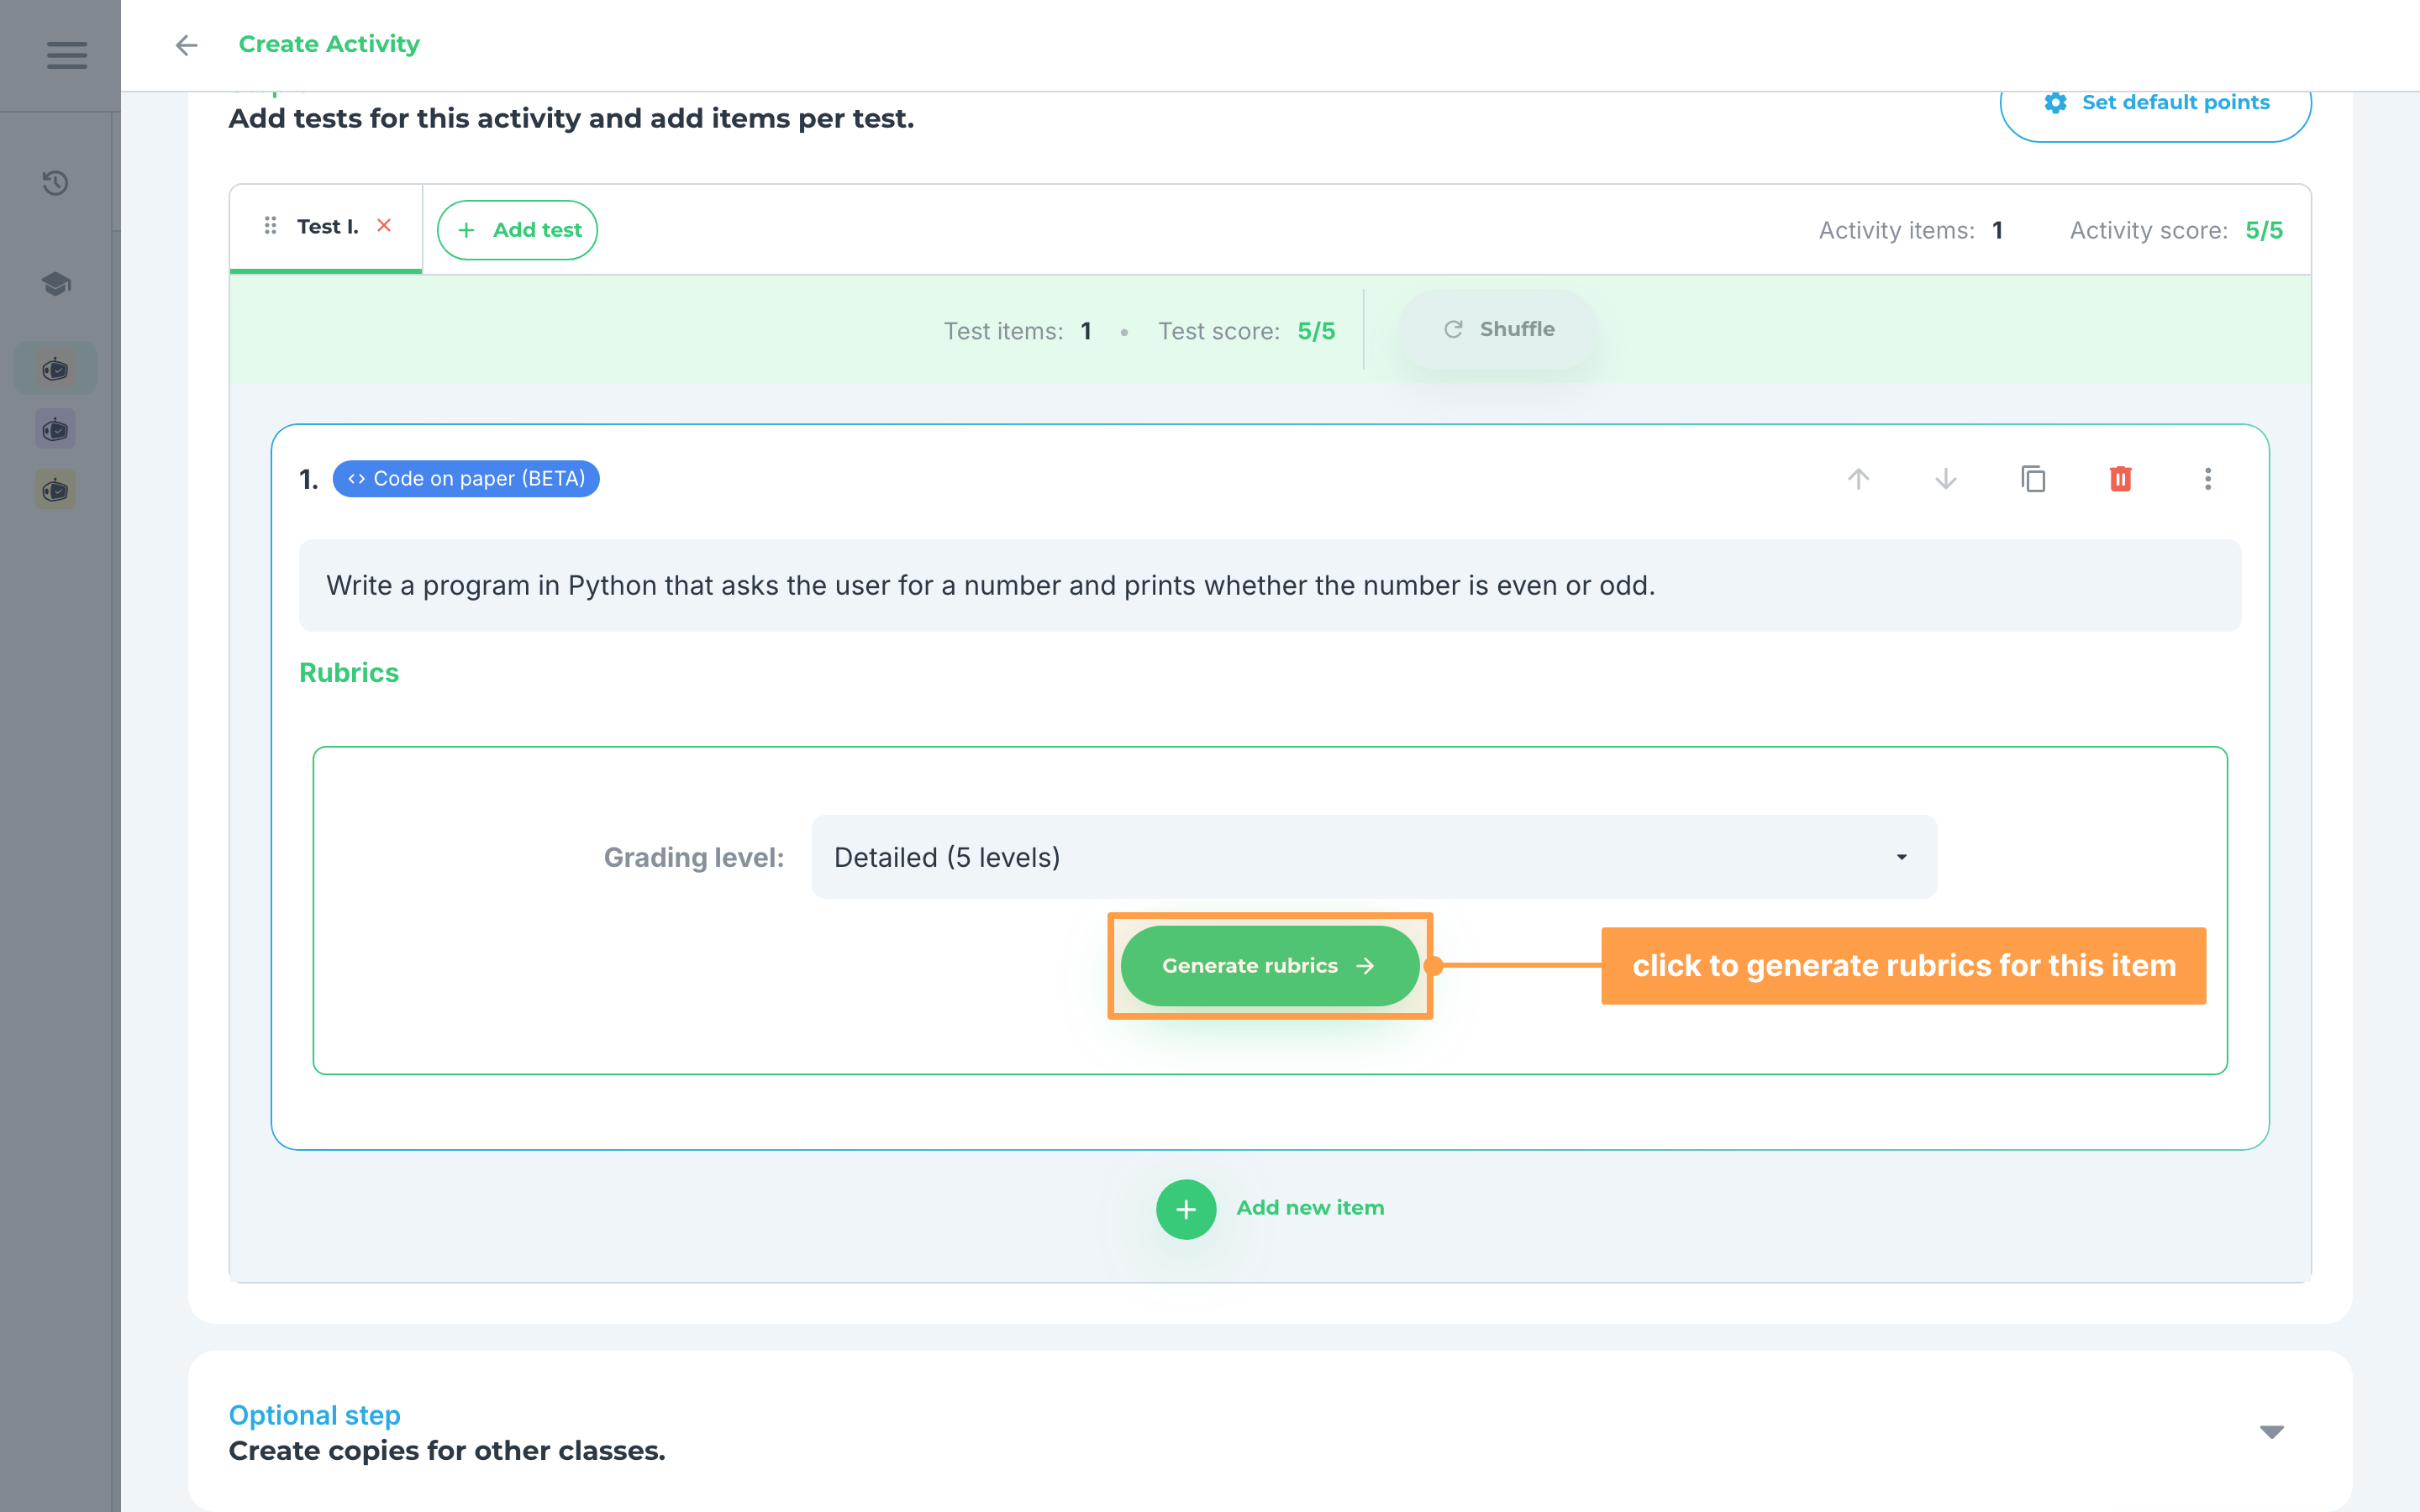
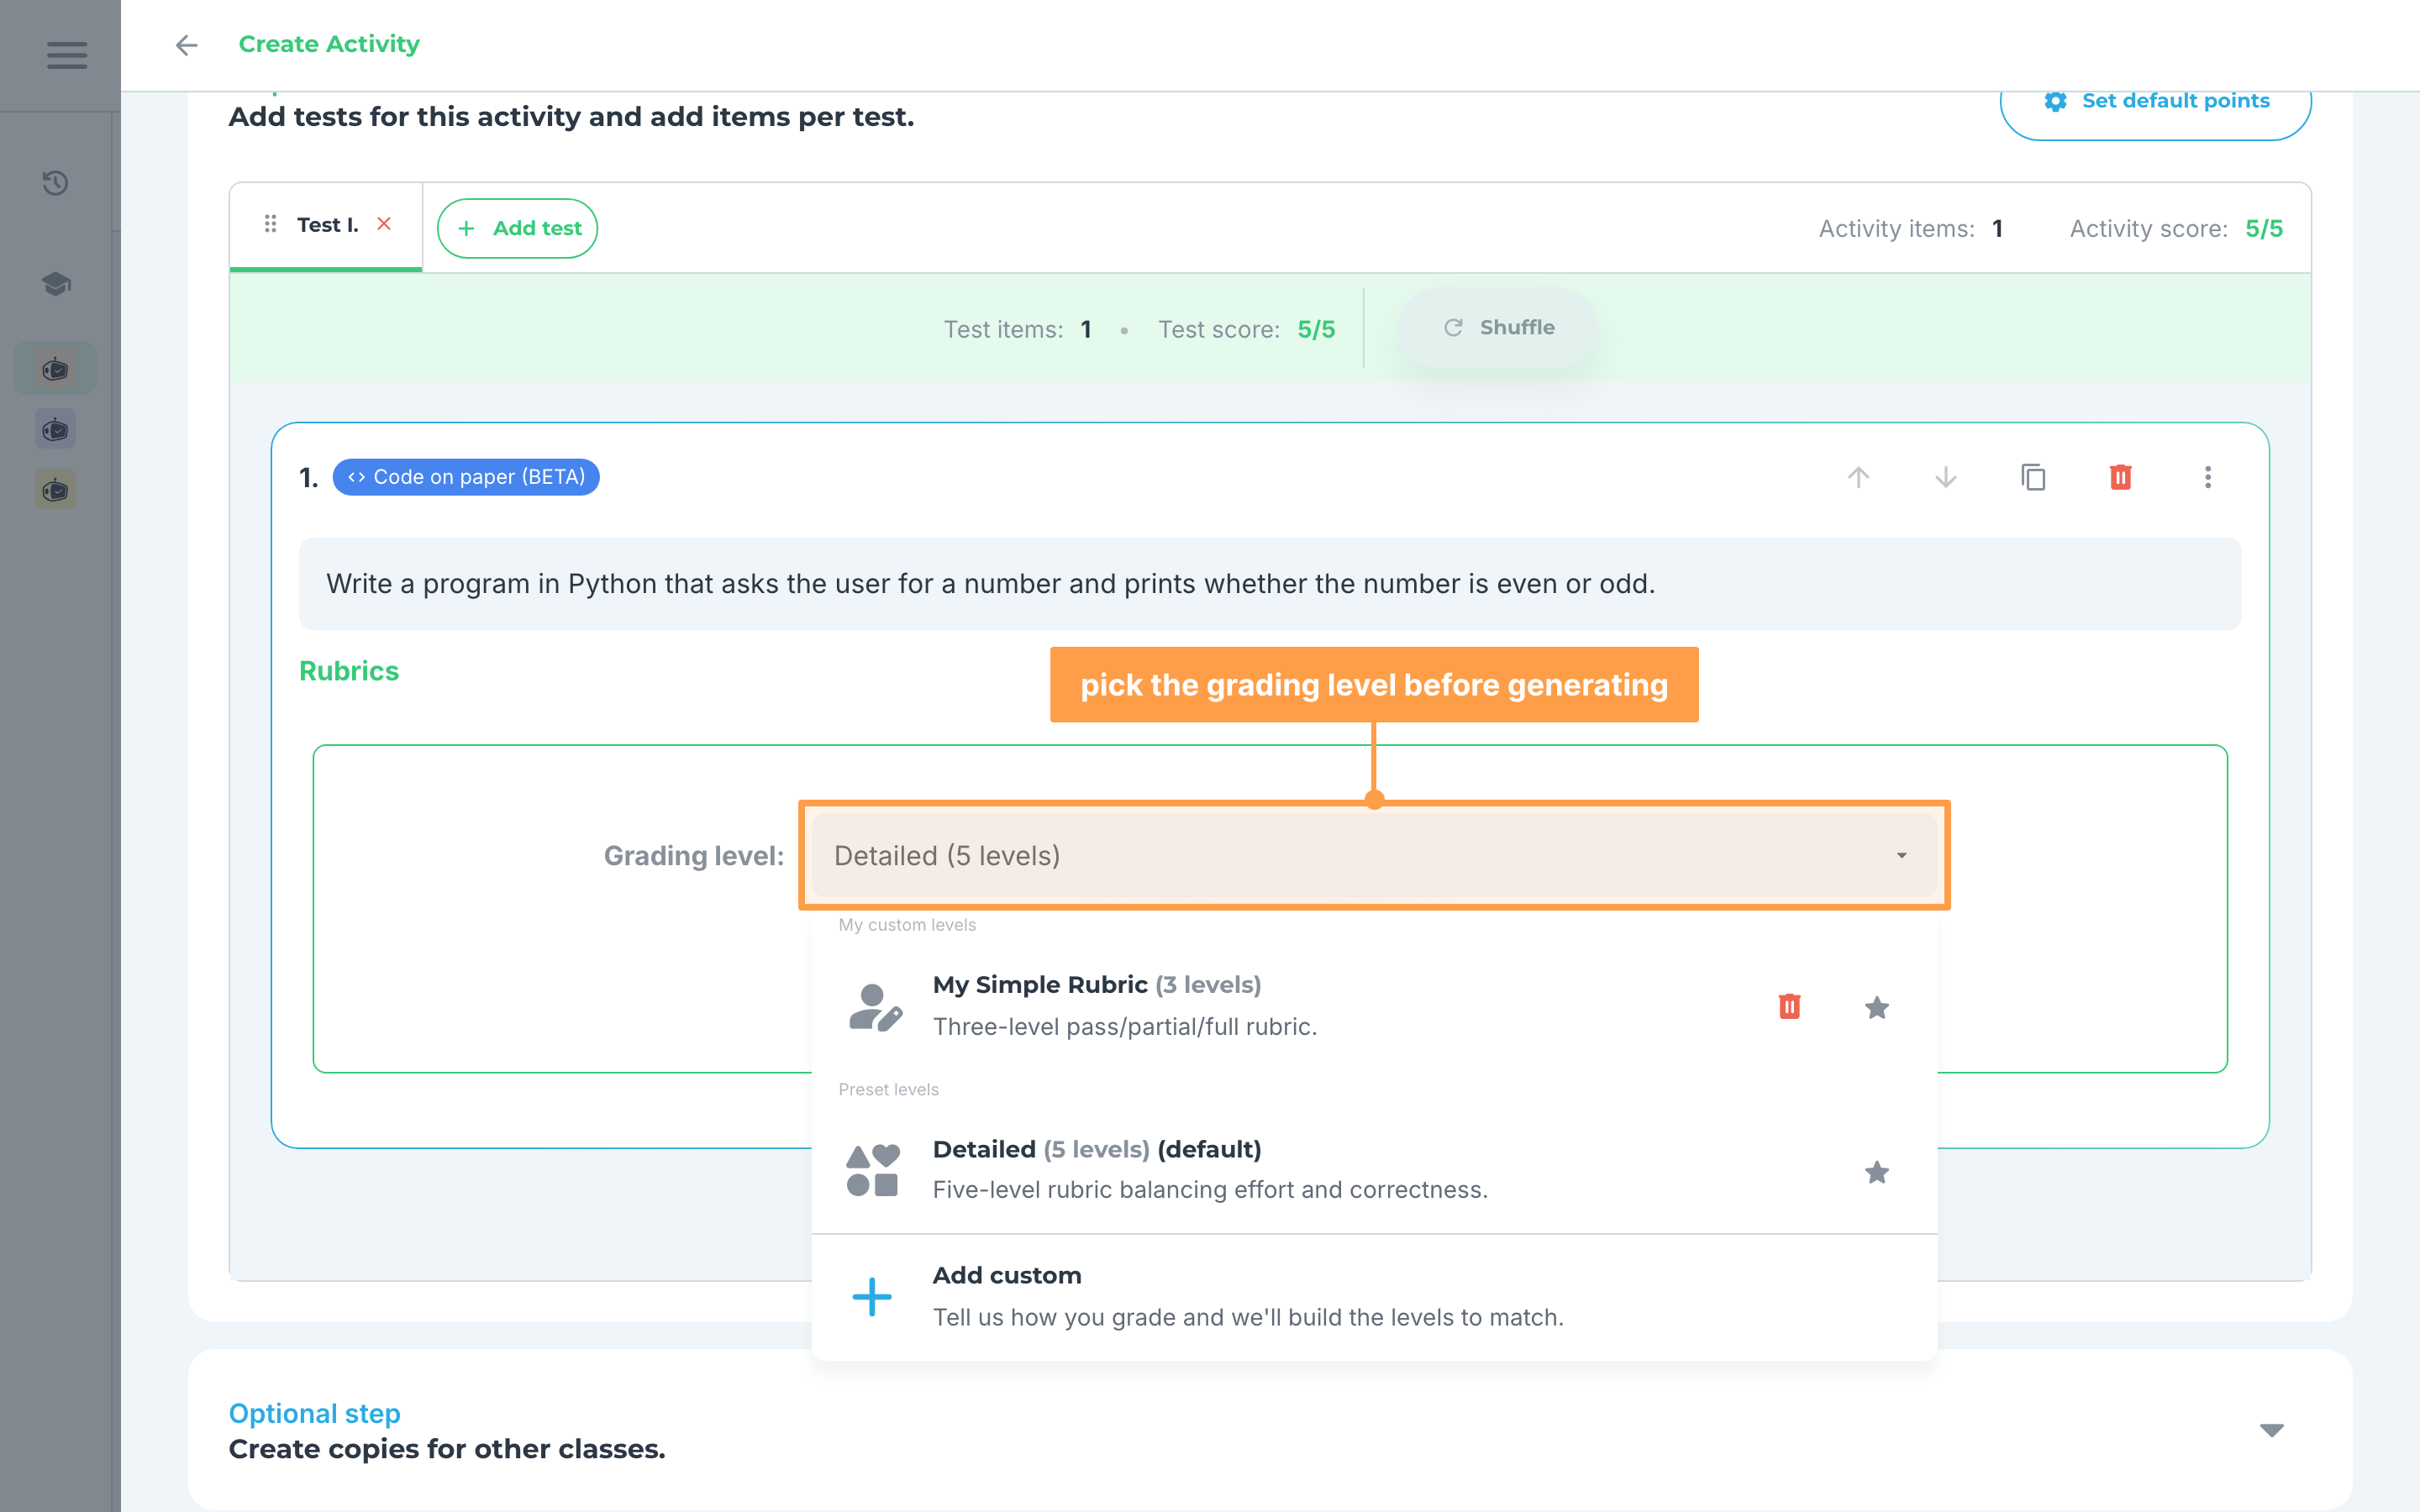
- Pick a Grading level for this item. The grading level decides how many performance levels your rubrics are written against: pick one of your own saved levels, a preset such as Detailed (5 levels), or Add custom to describe how you grade and have the levels built to match. Then click Generate rubrics and wait for our system to finish creating your rubrics.
- Review the rubrics to see if they are to your liking. Each rubric has one description per performance level (use Prev and Next in the table header to page through them) plus a Max Score. The running Total score for the item is shown above the table.
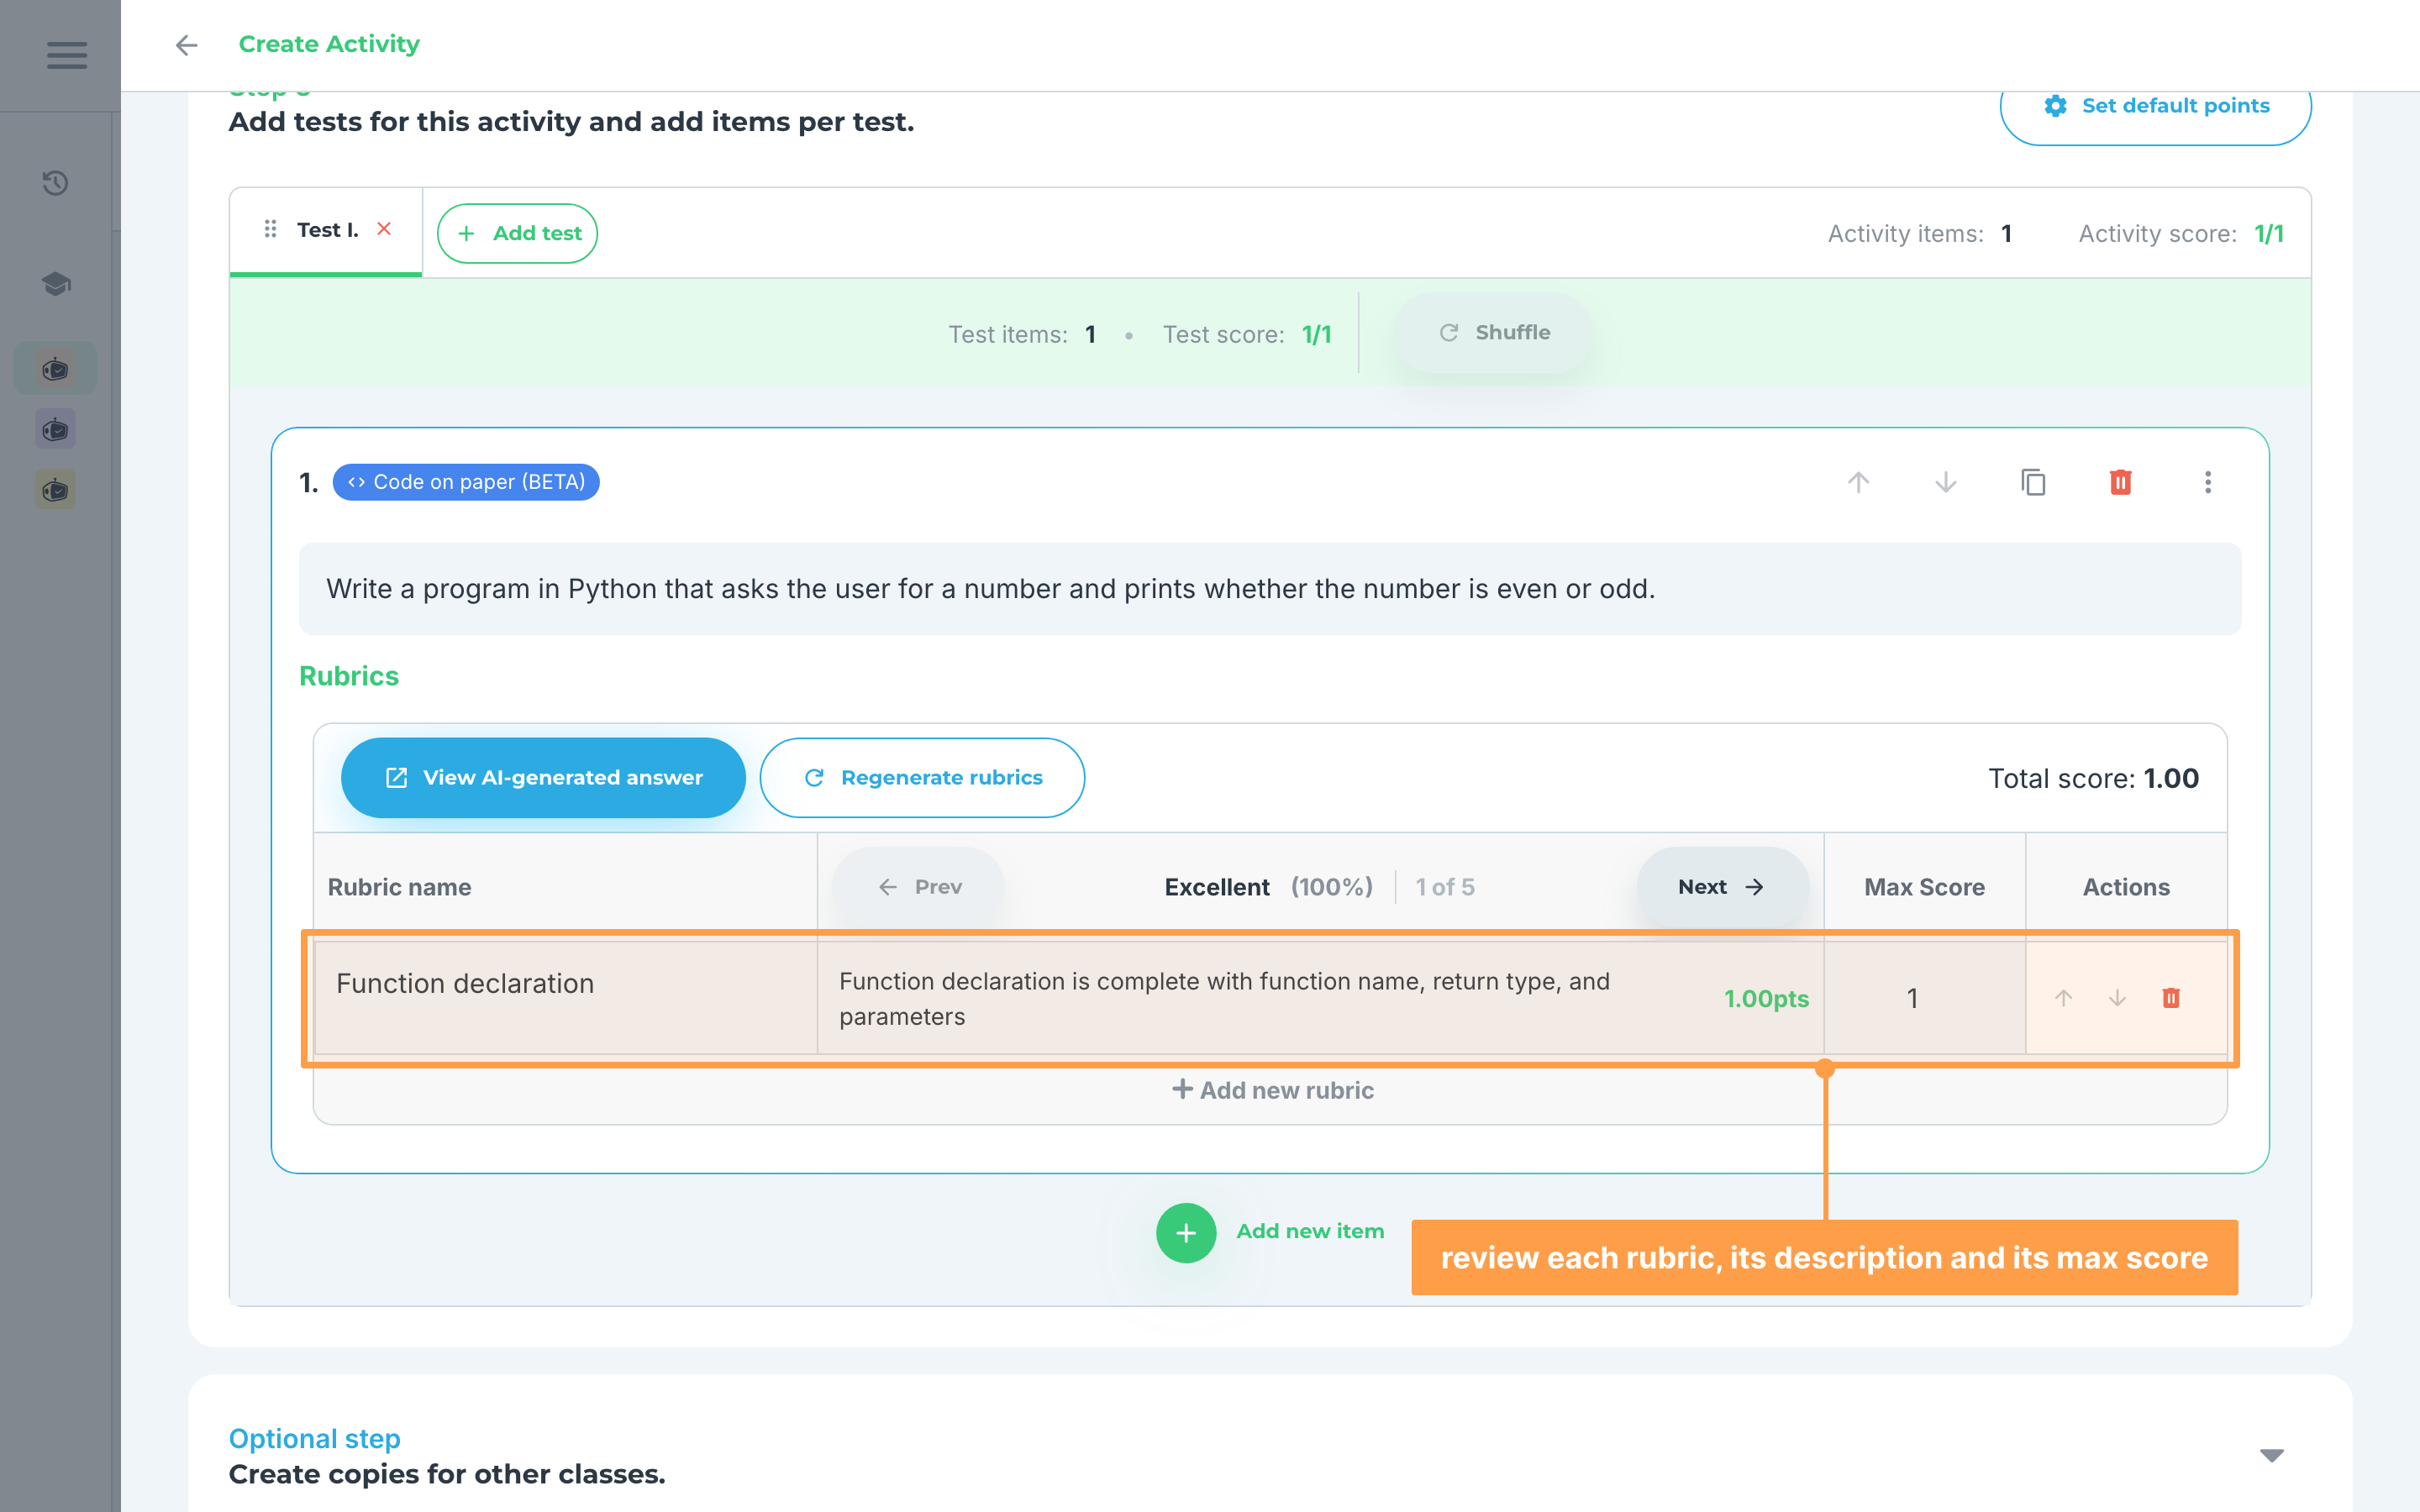
- If you wish to edit any detail to the rubrics, you can make your changes in the table by clicking the boxes and adding your modification. You can also add another rubric by clicking + Add new rubric after the last rubric.
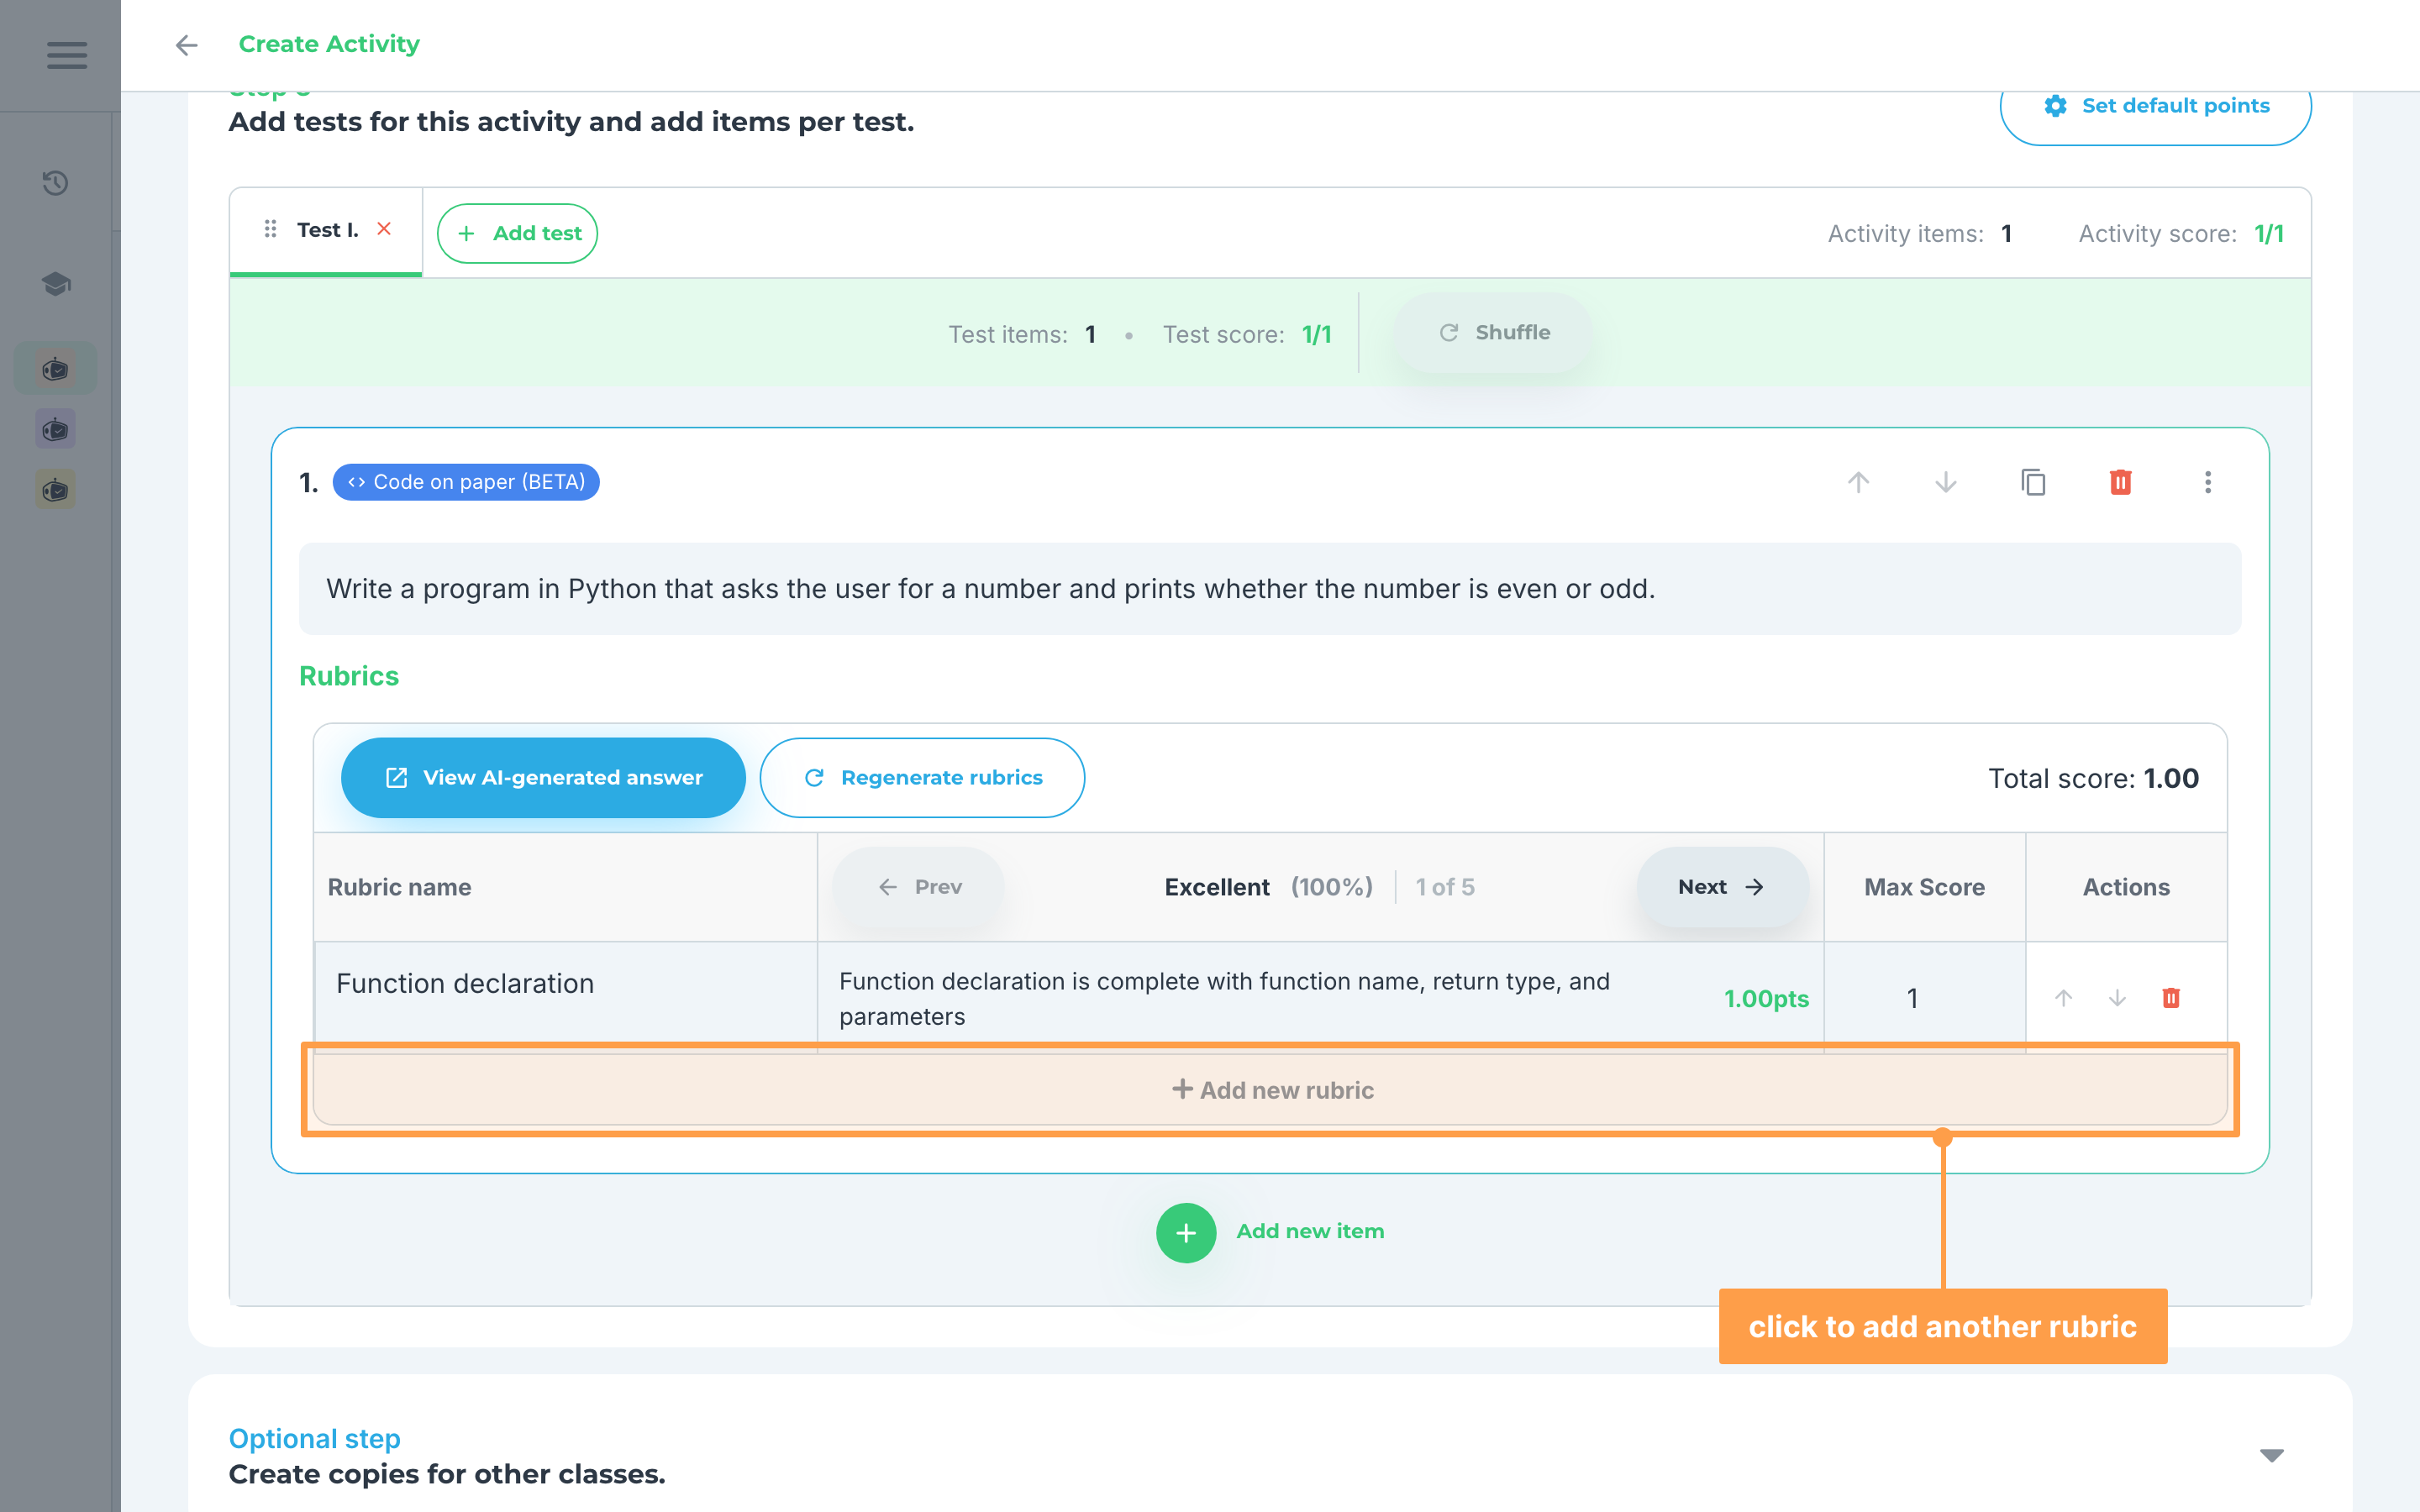
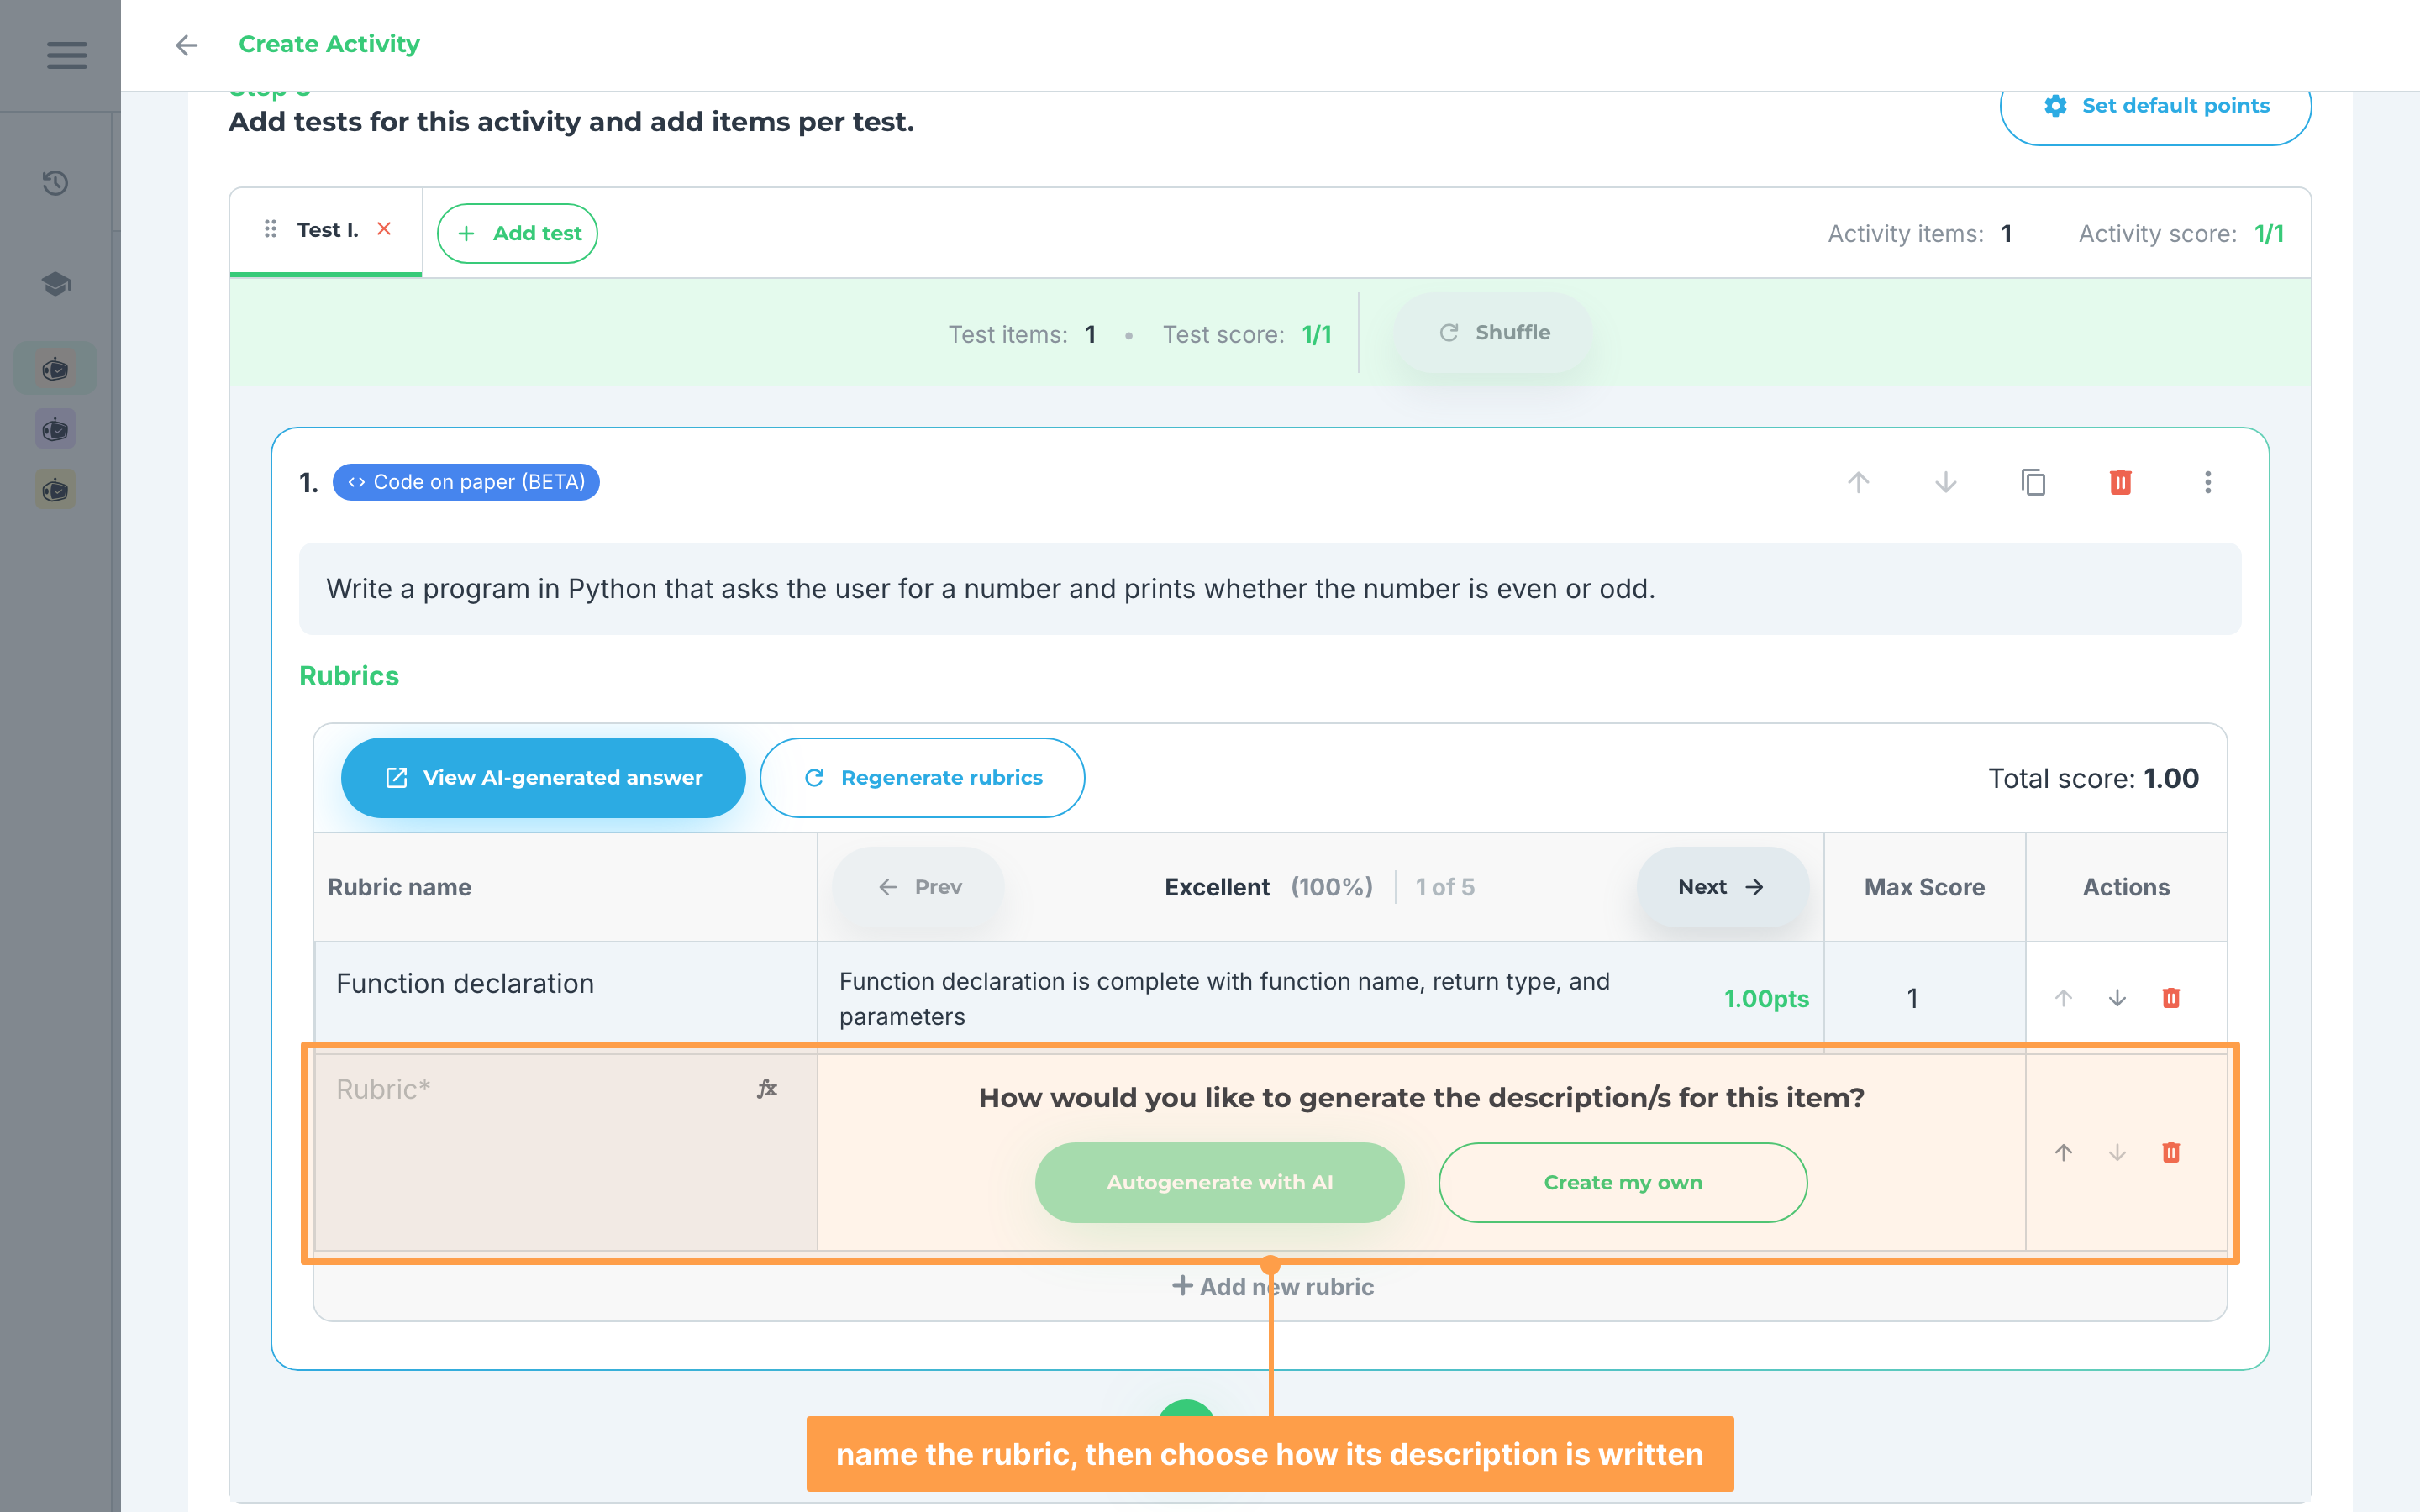
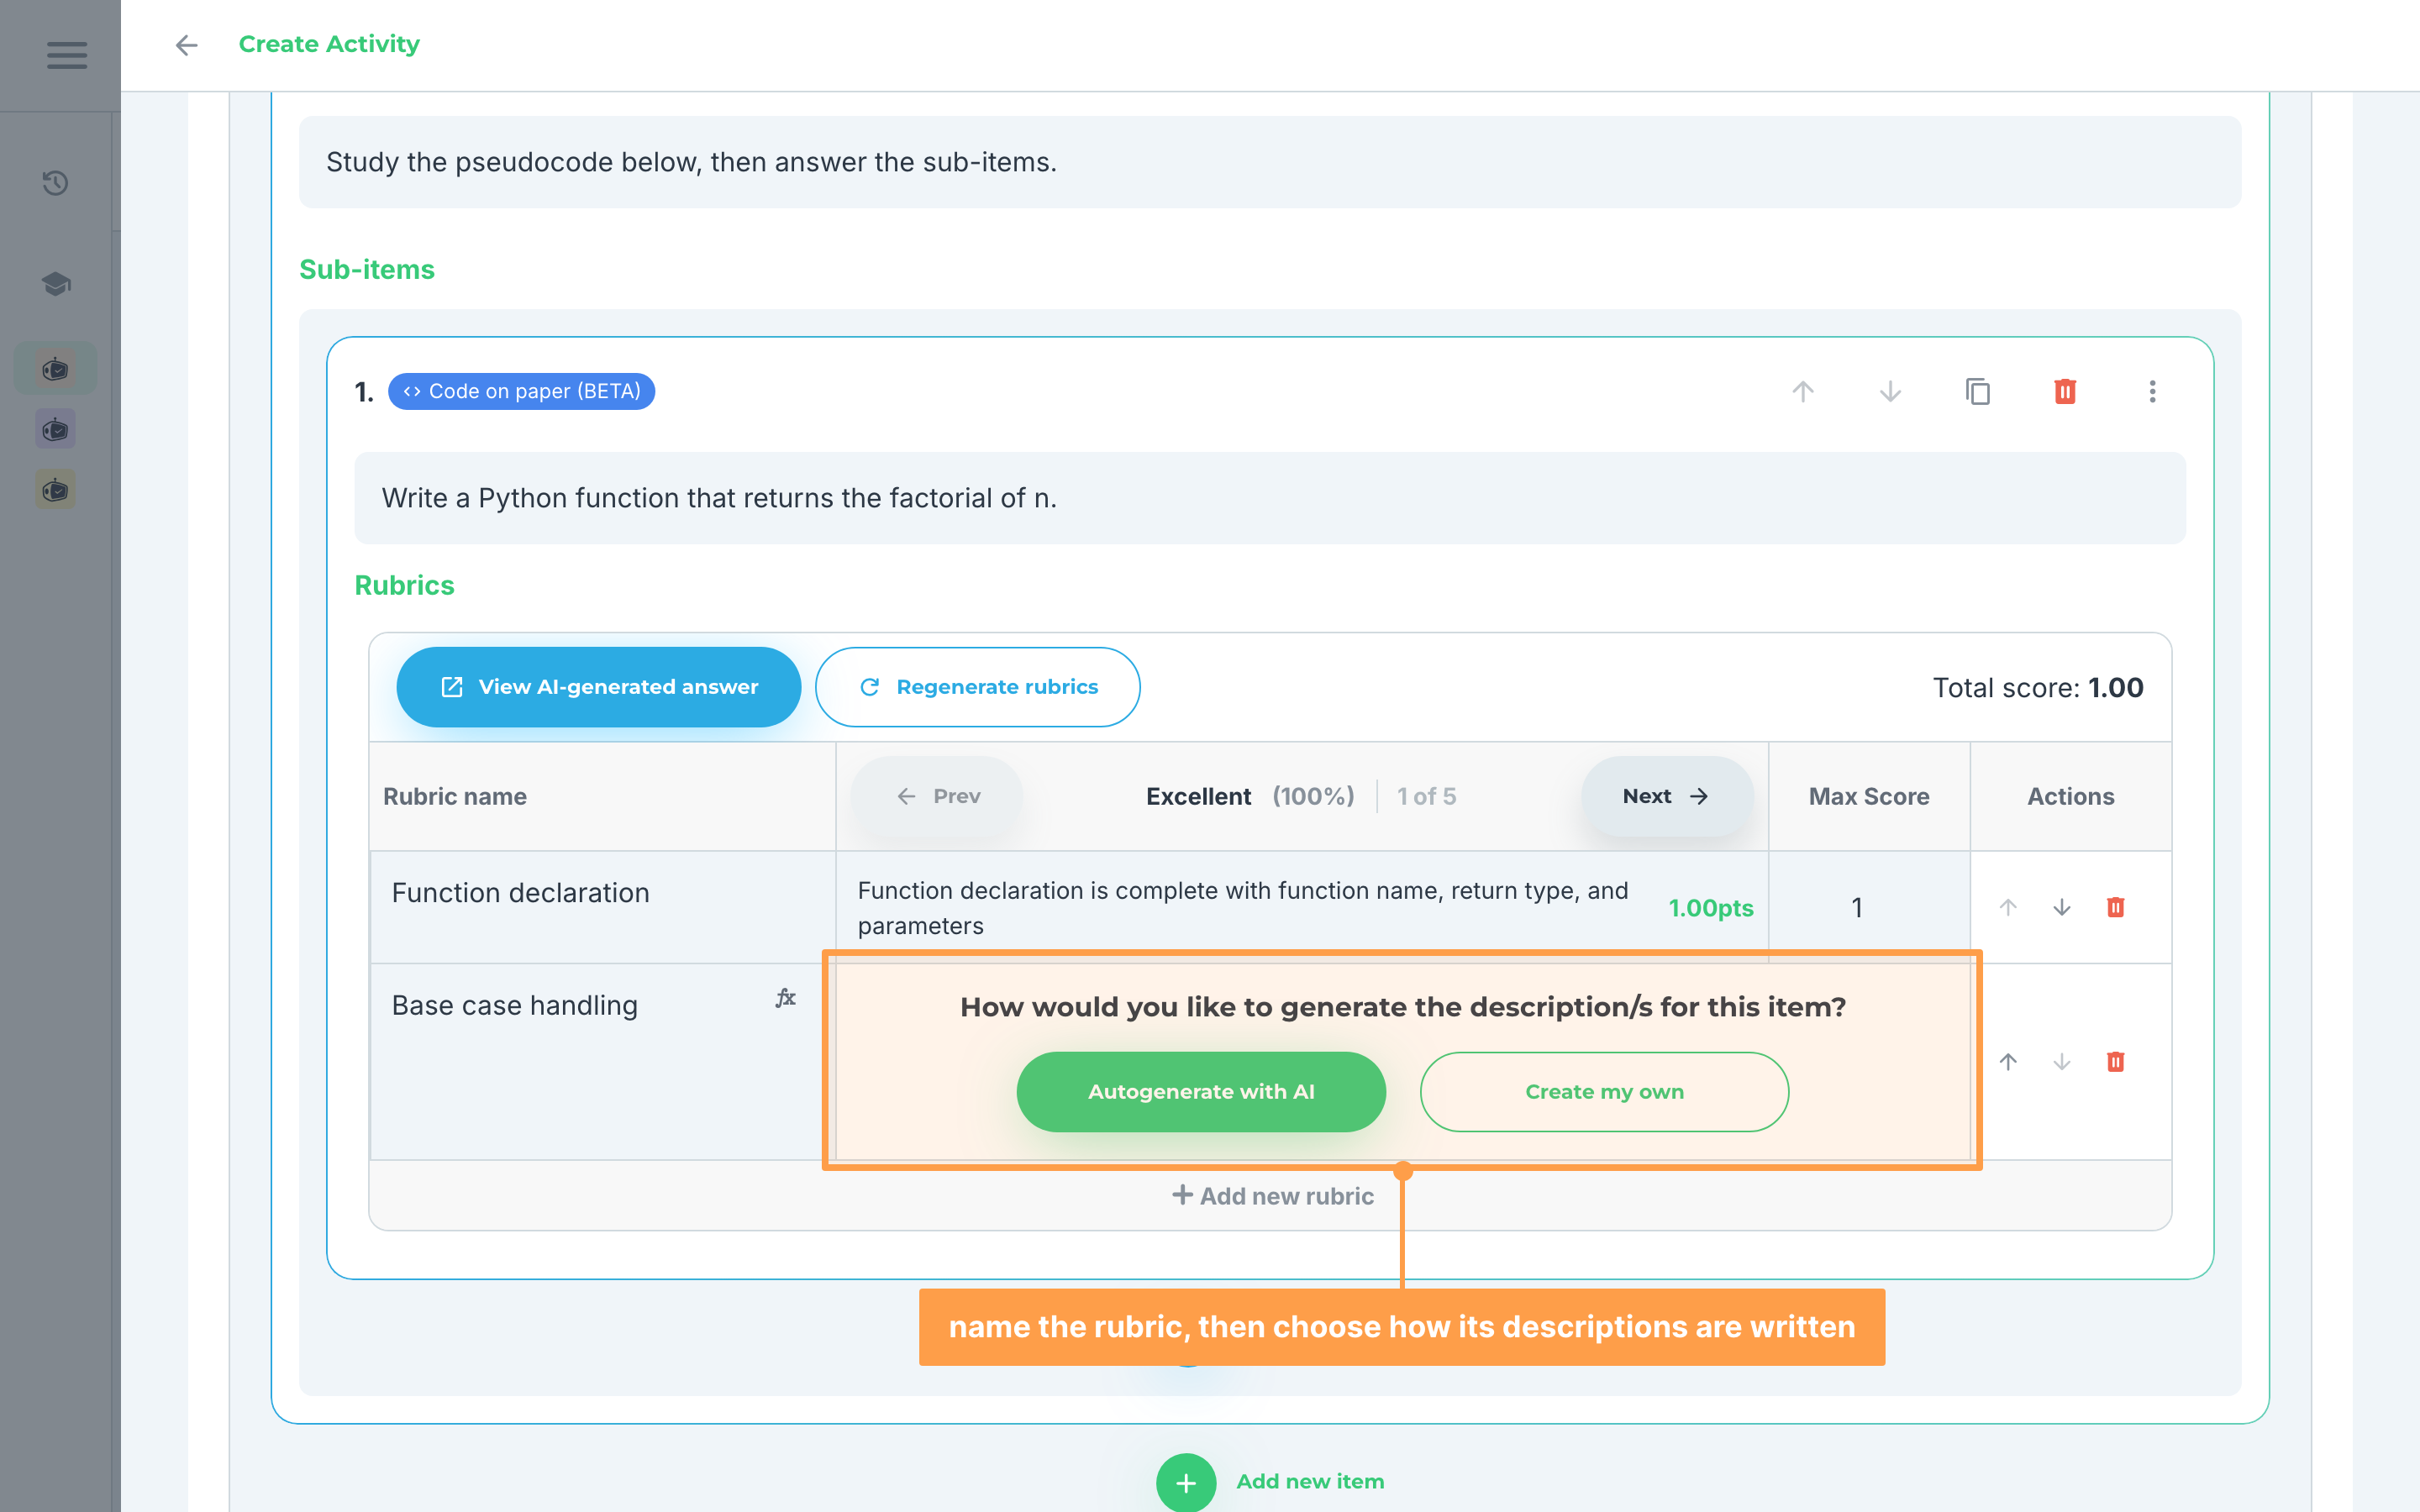
- Provide a rubric name then you can opt to Autogenerate with AI or Create my own the description of the rubric then set the score.
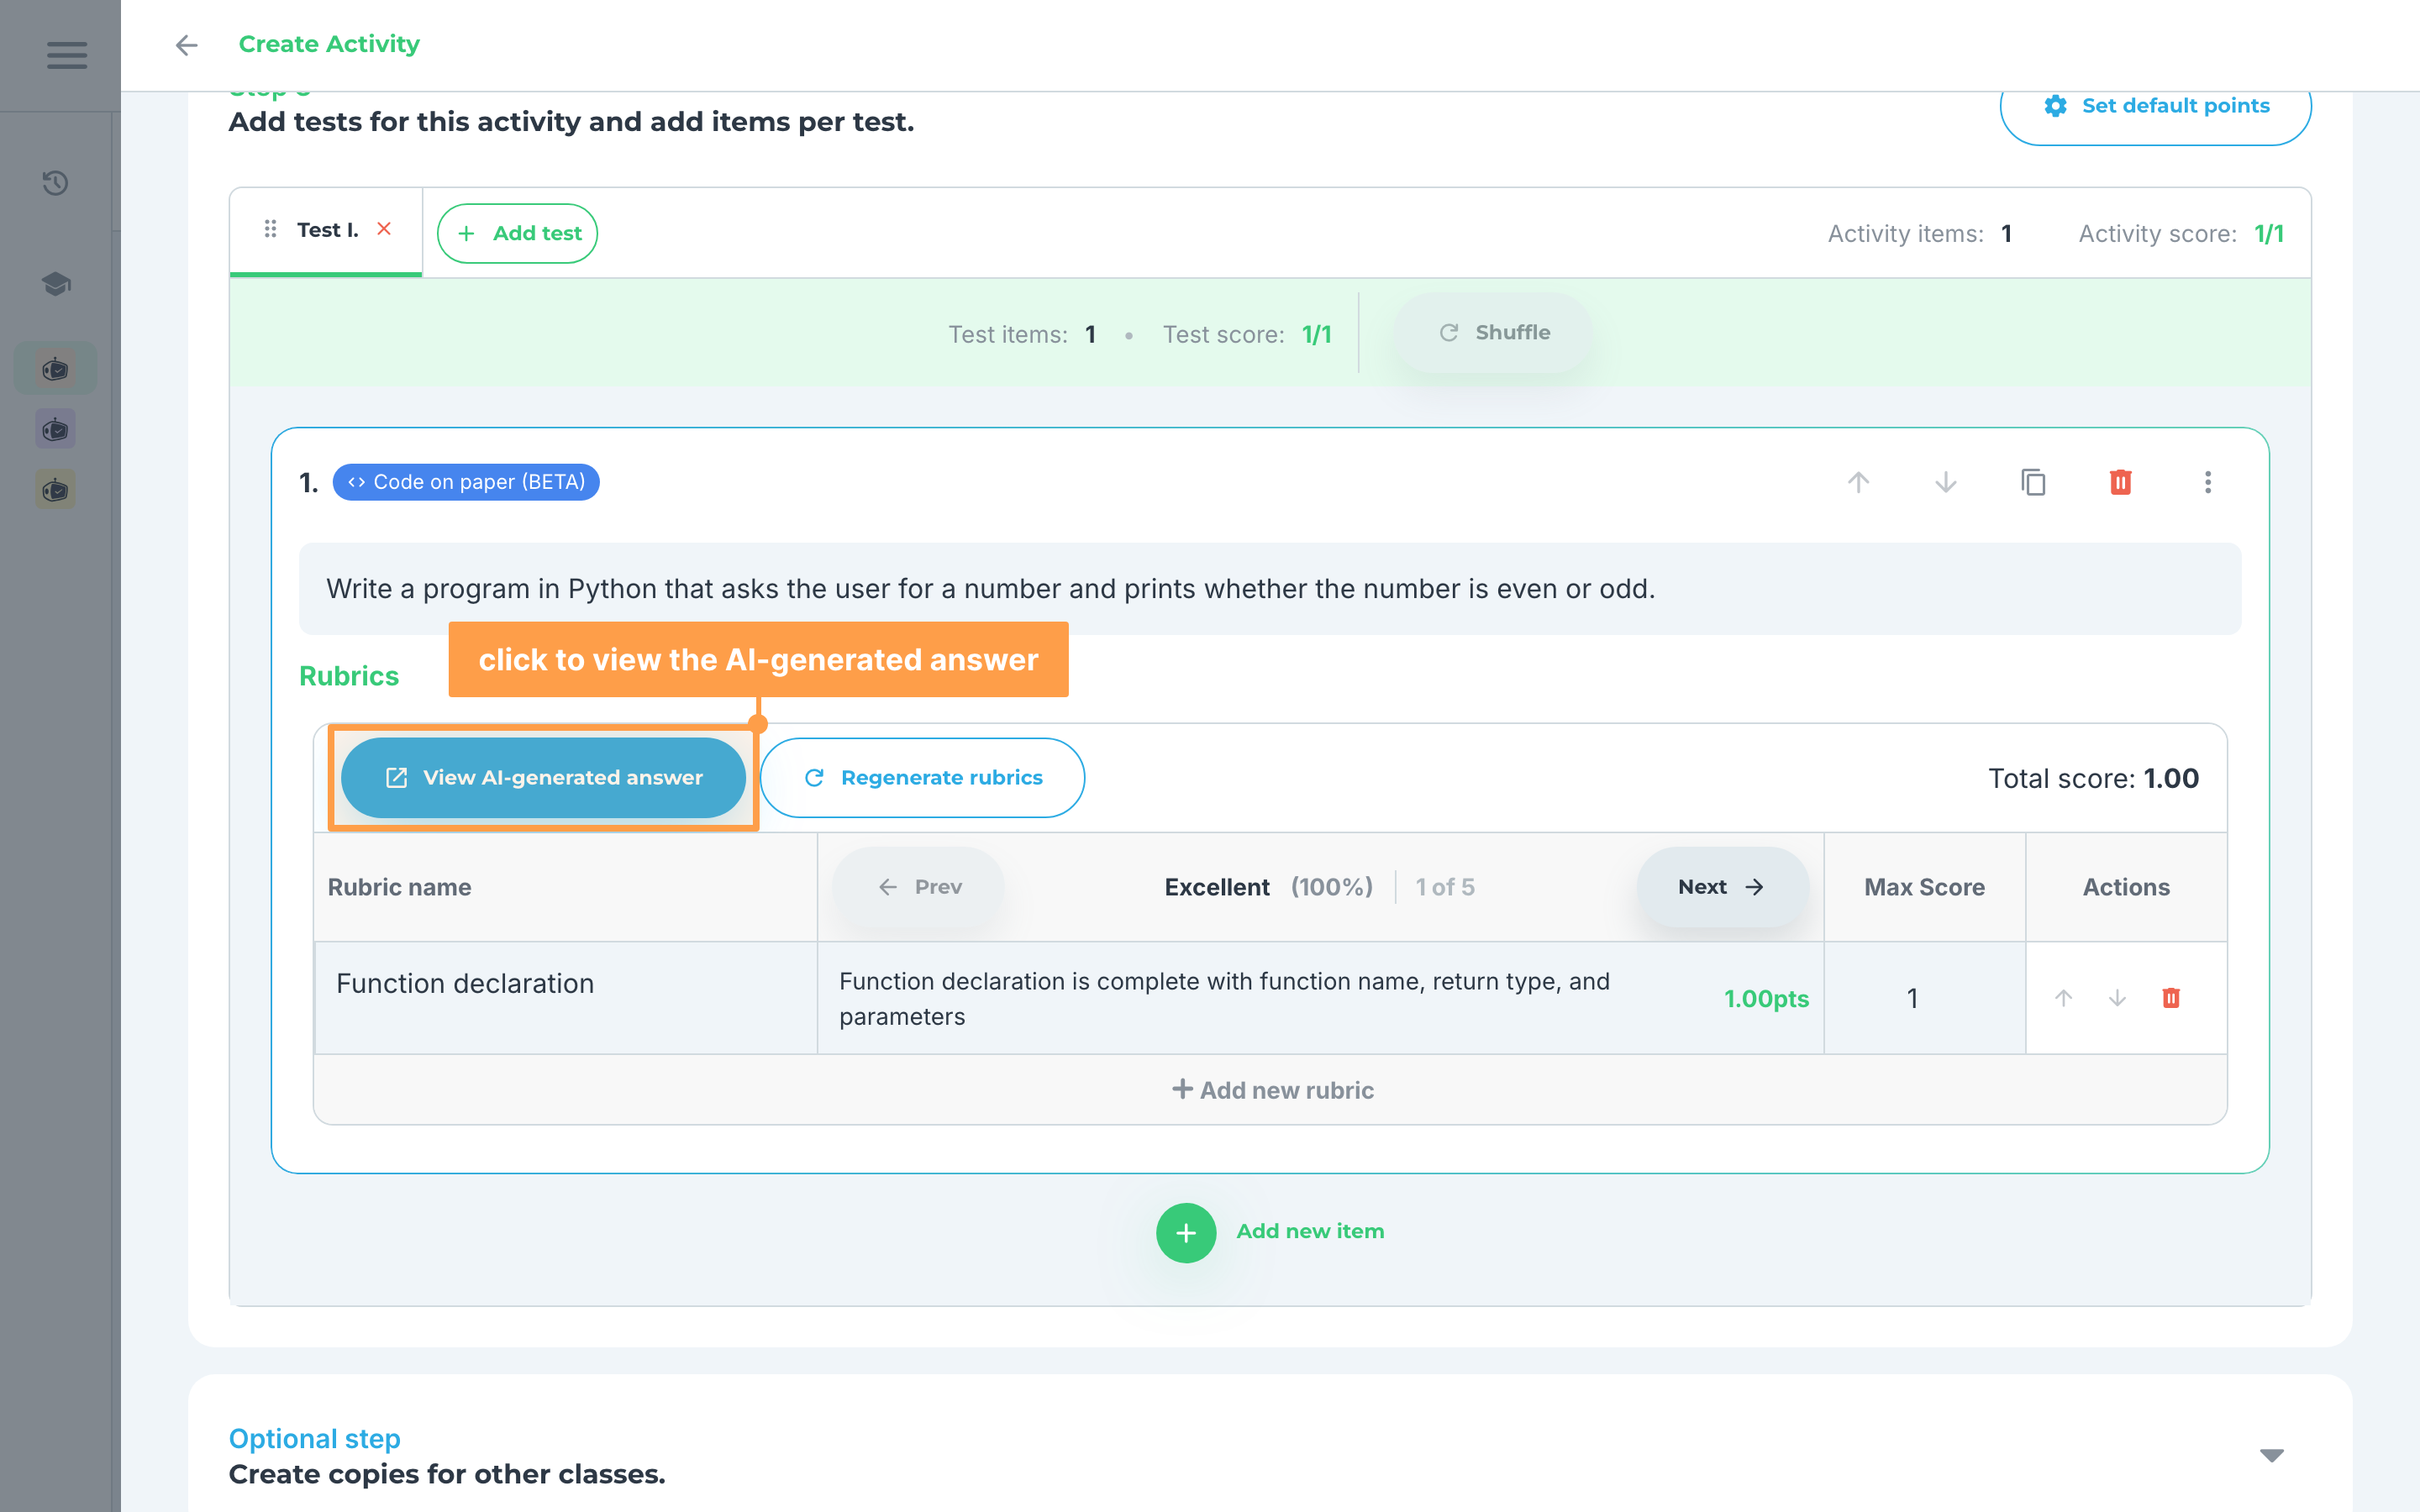
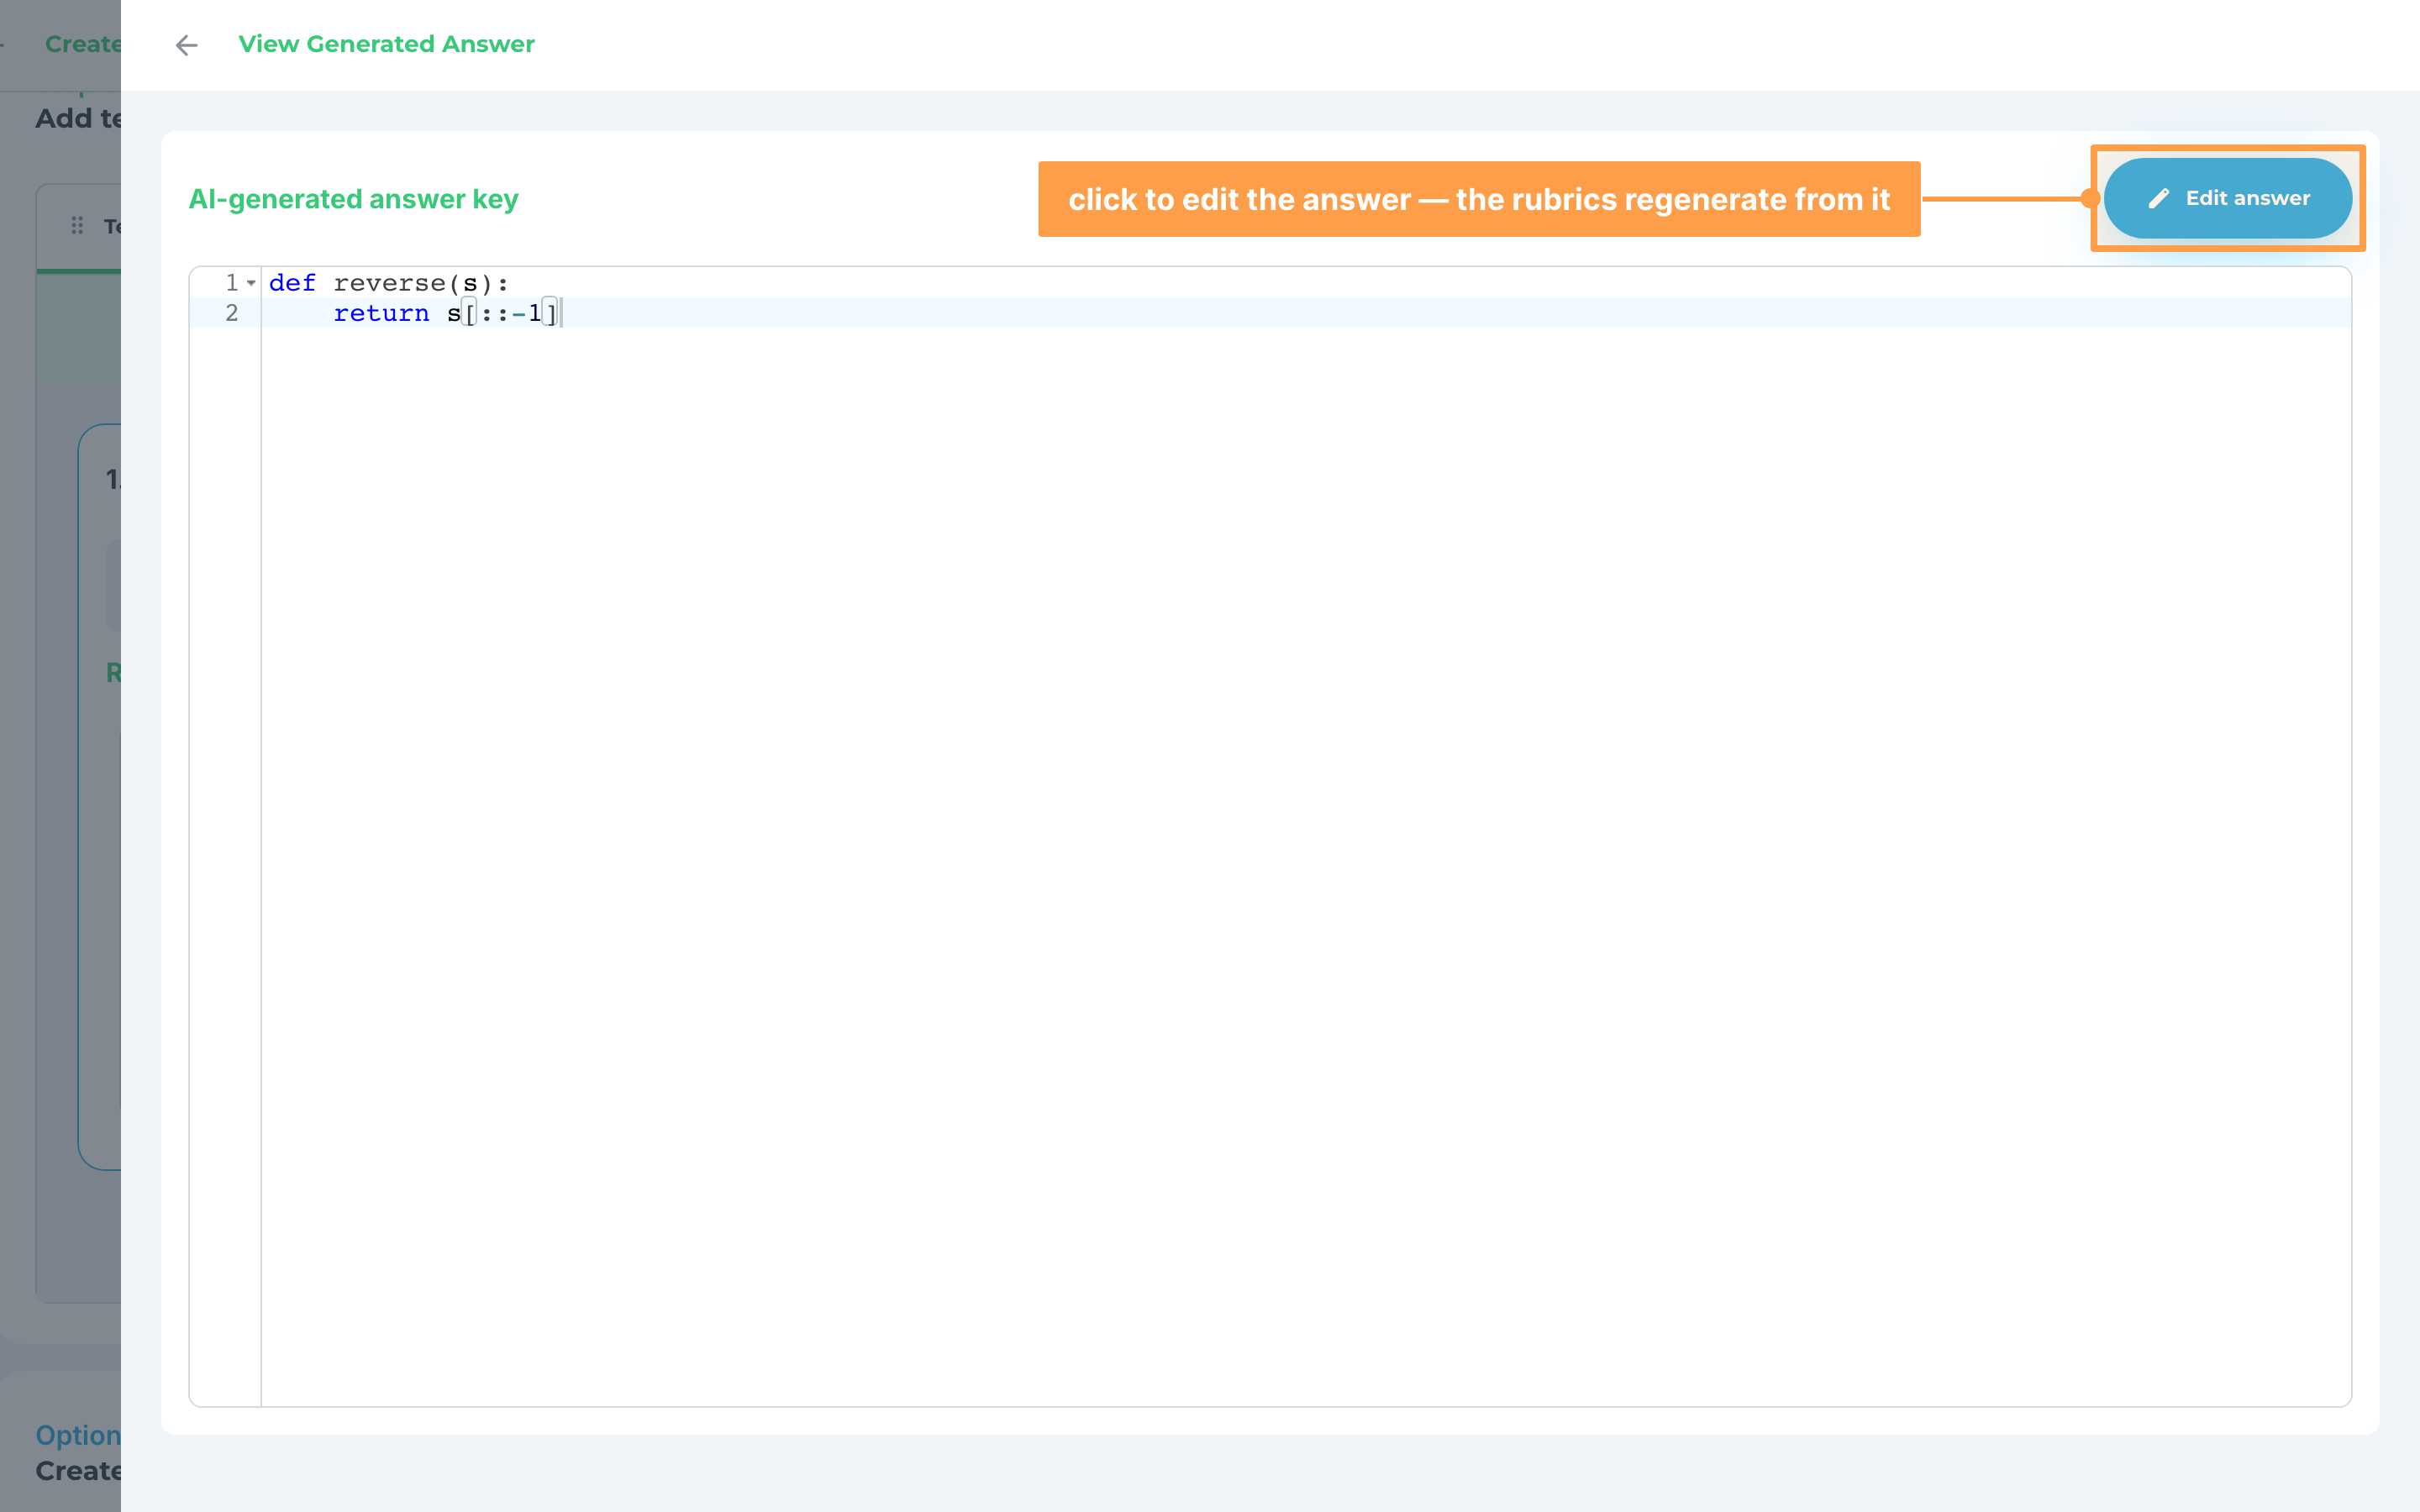
- Click on the View AI-generated answer button above the rubrics table to view the answer your rubrics were based upon.
- You may also edit the answer if you wish. Click Edit answer, make your changes, then save. GradeChum will ask "Generate again?" and warn you that a new set of rubrics will be built from your new answer: confirming discards any edits you made to the rubrics table.
(delete this step and its figure; the grading-level choice moves into step 2 above, and the remaining steps renumber 1-7)
g. Visuals
For items with Visuals as the item type:
Note: Visuals is still in BETA, and it is only available for handwritten activities. If you switch the activity to Online, GradeChum will tell you that any Visuals items will be removed.
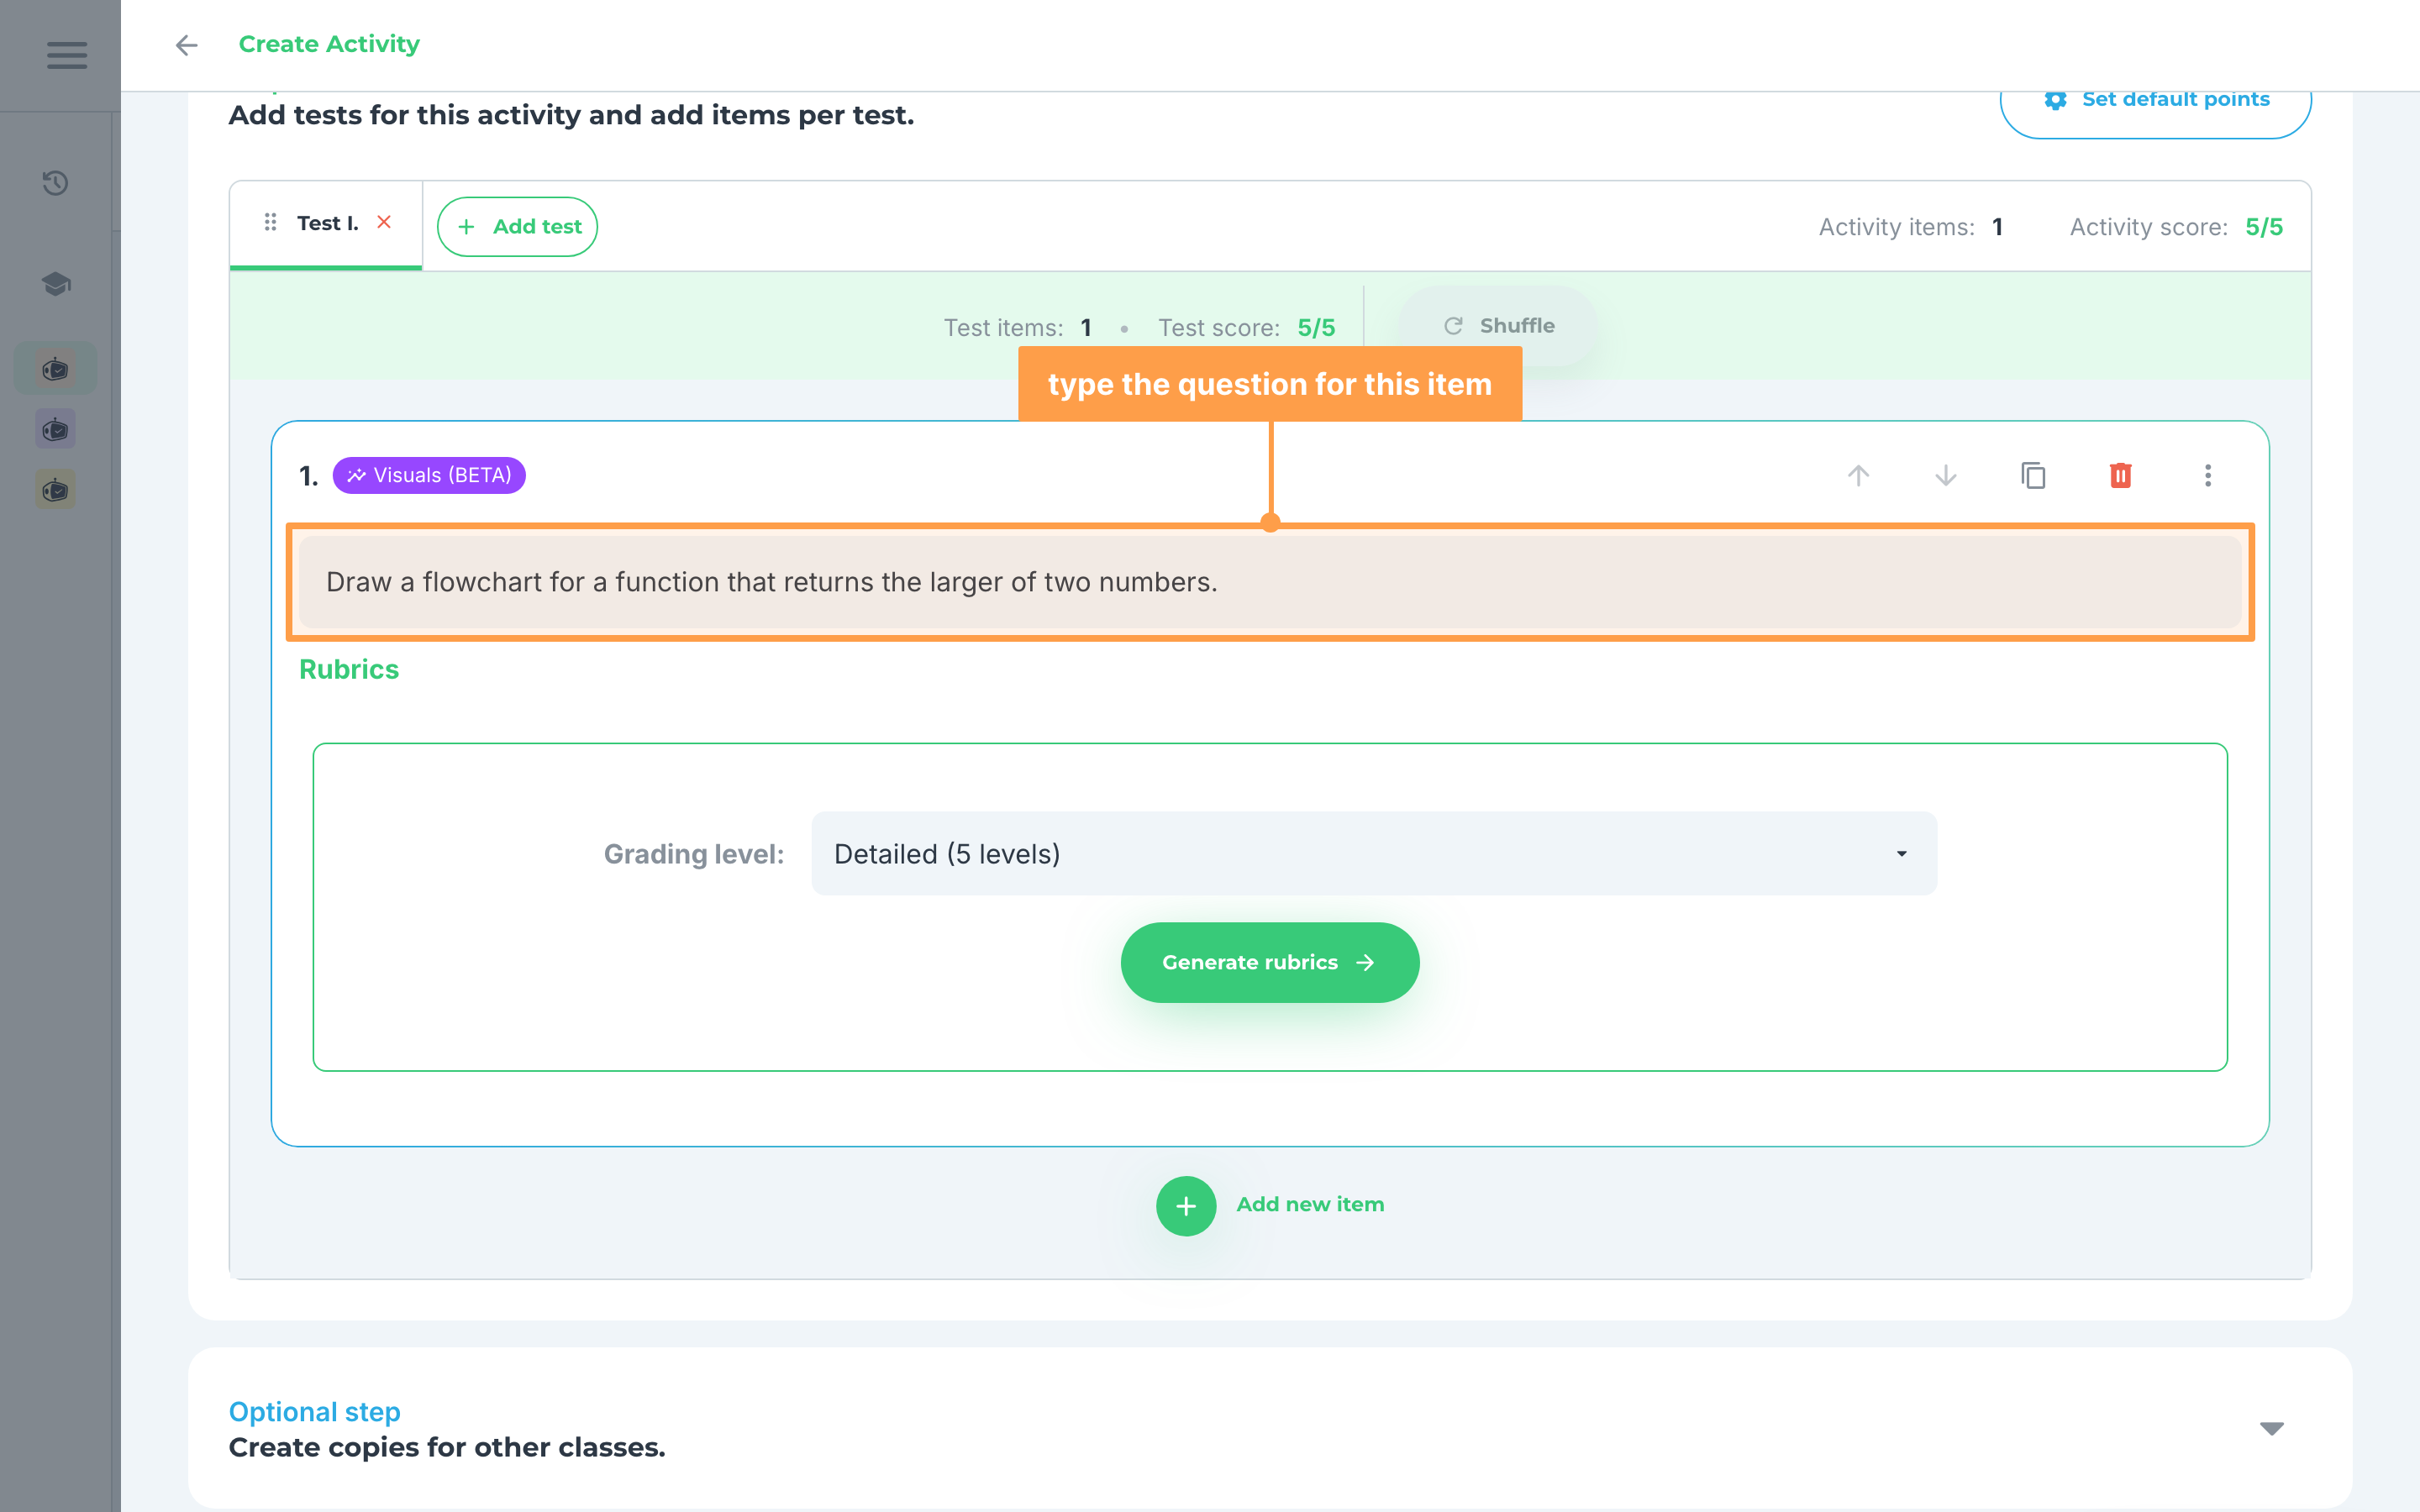
- Fill out the question for this item.
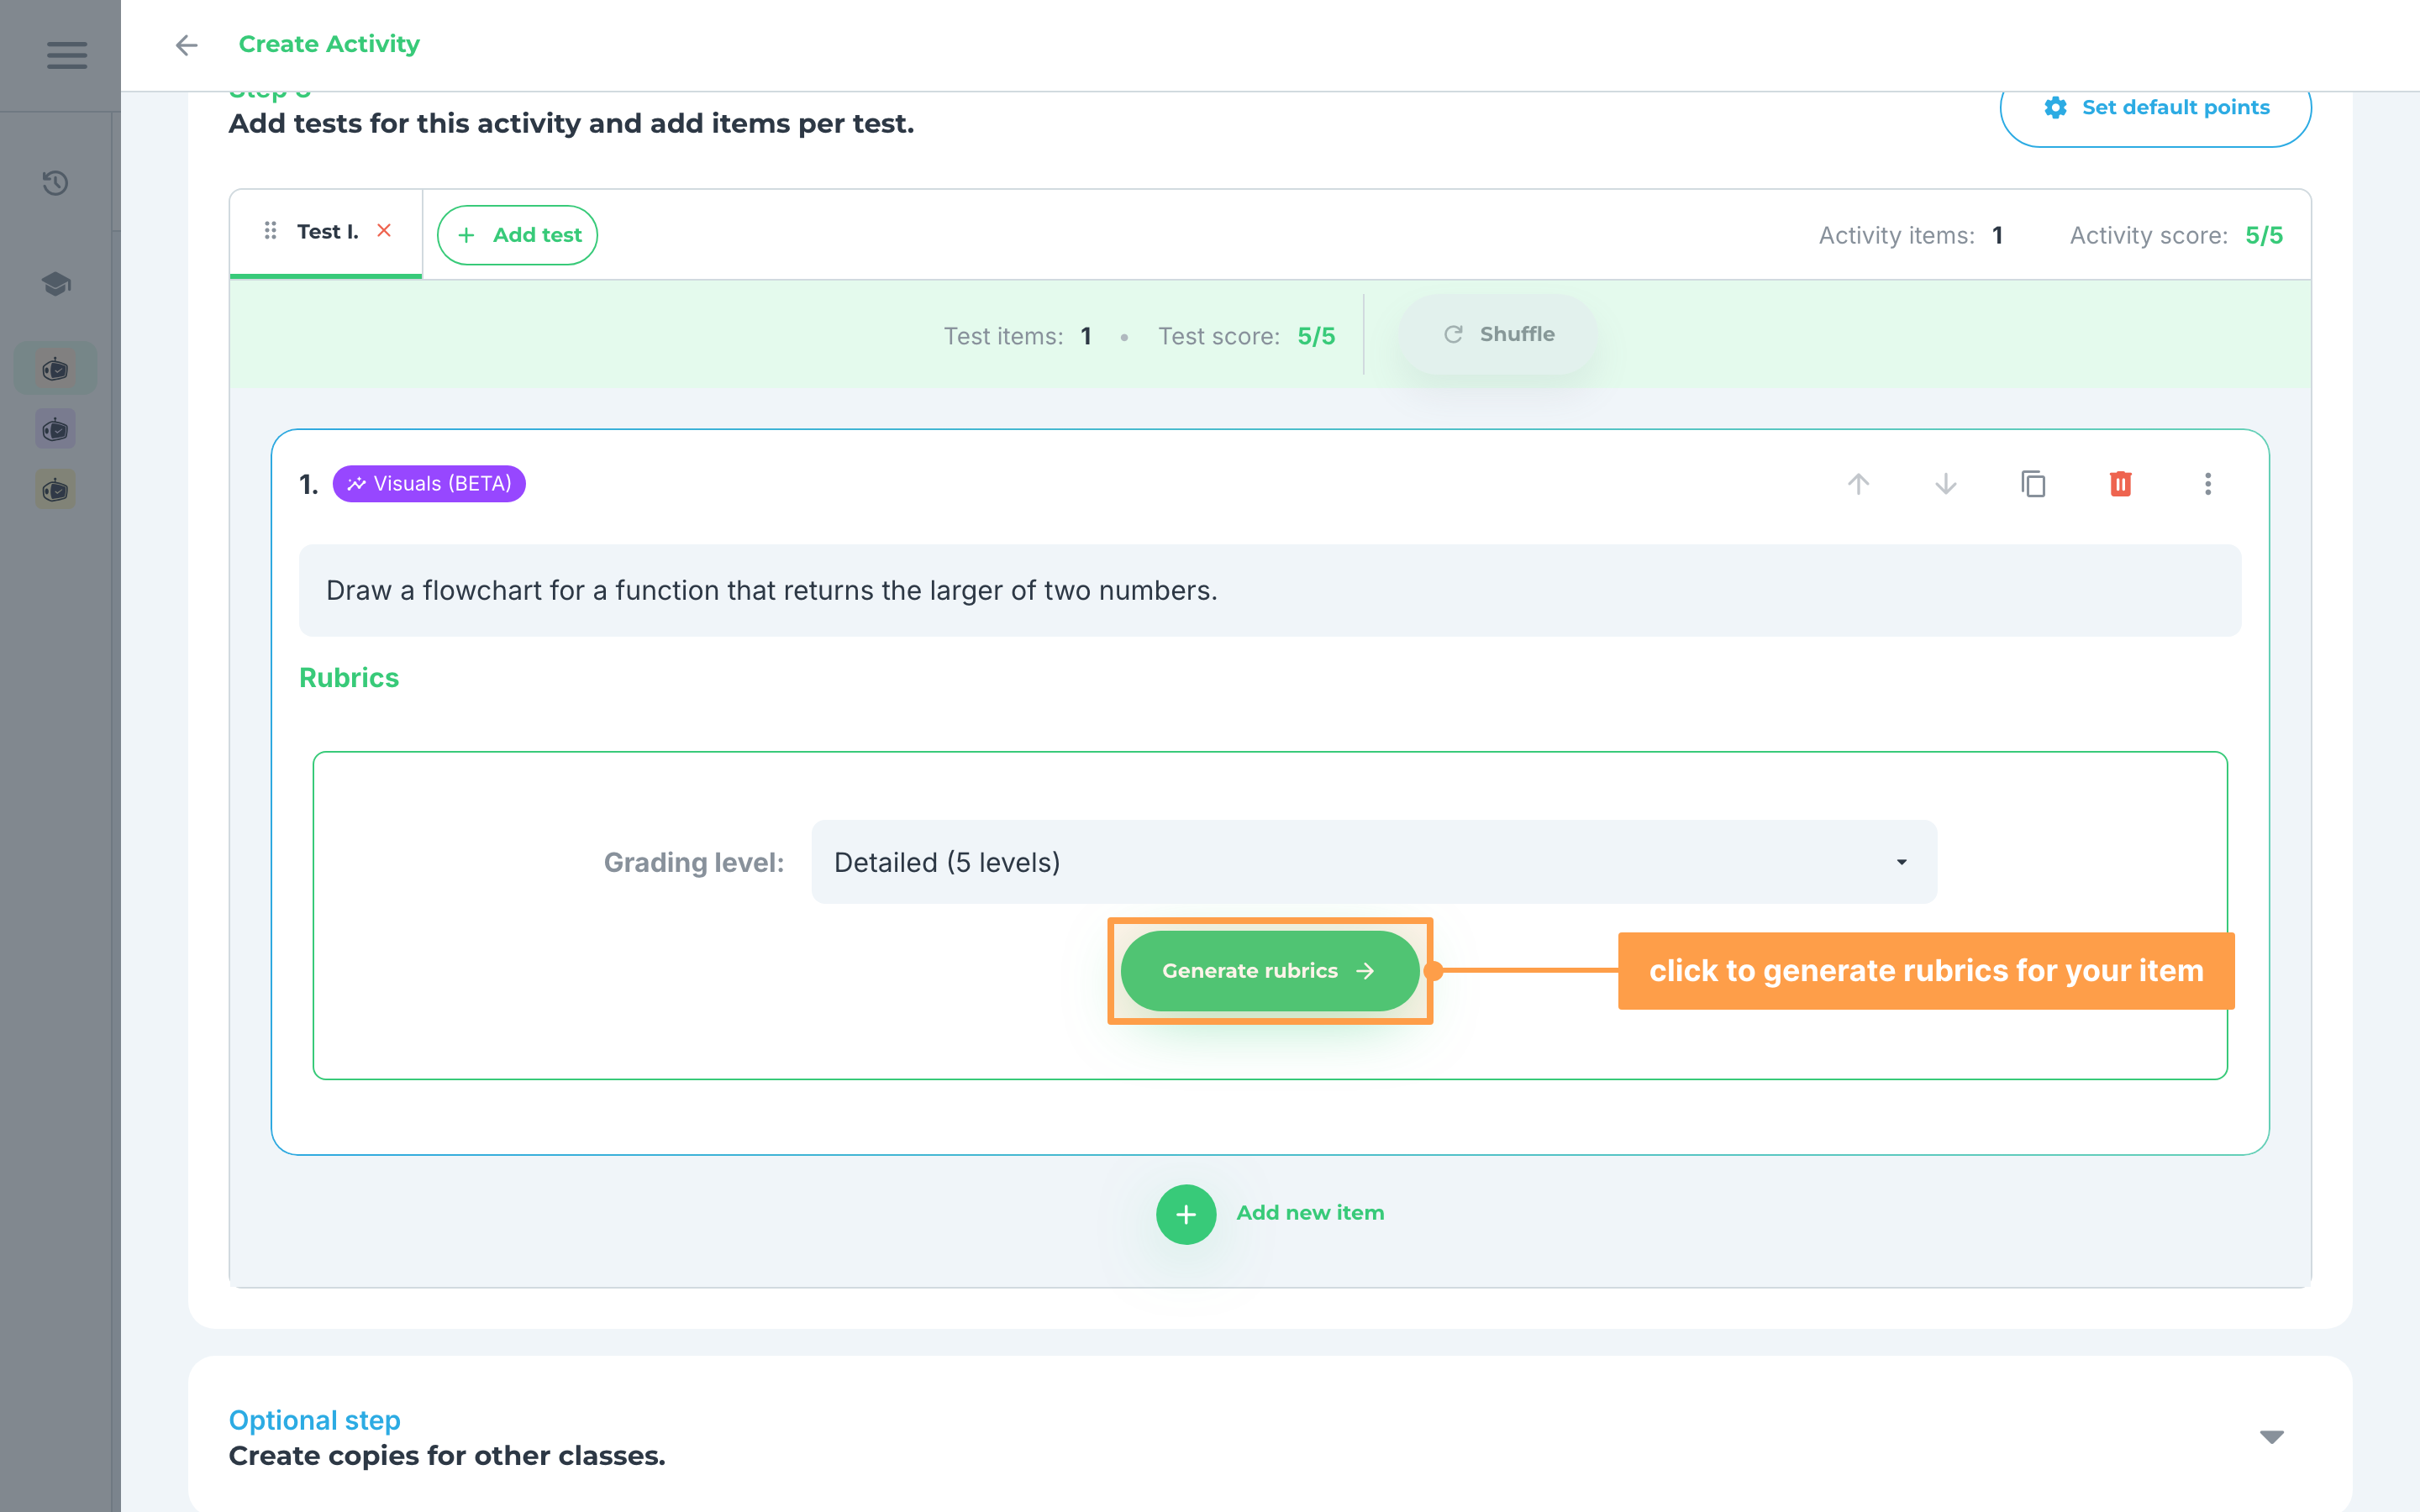
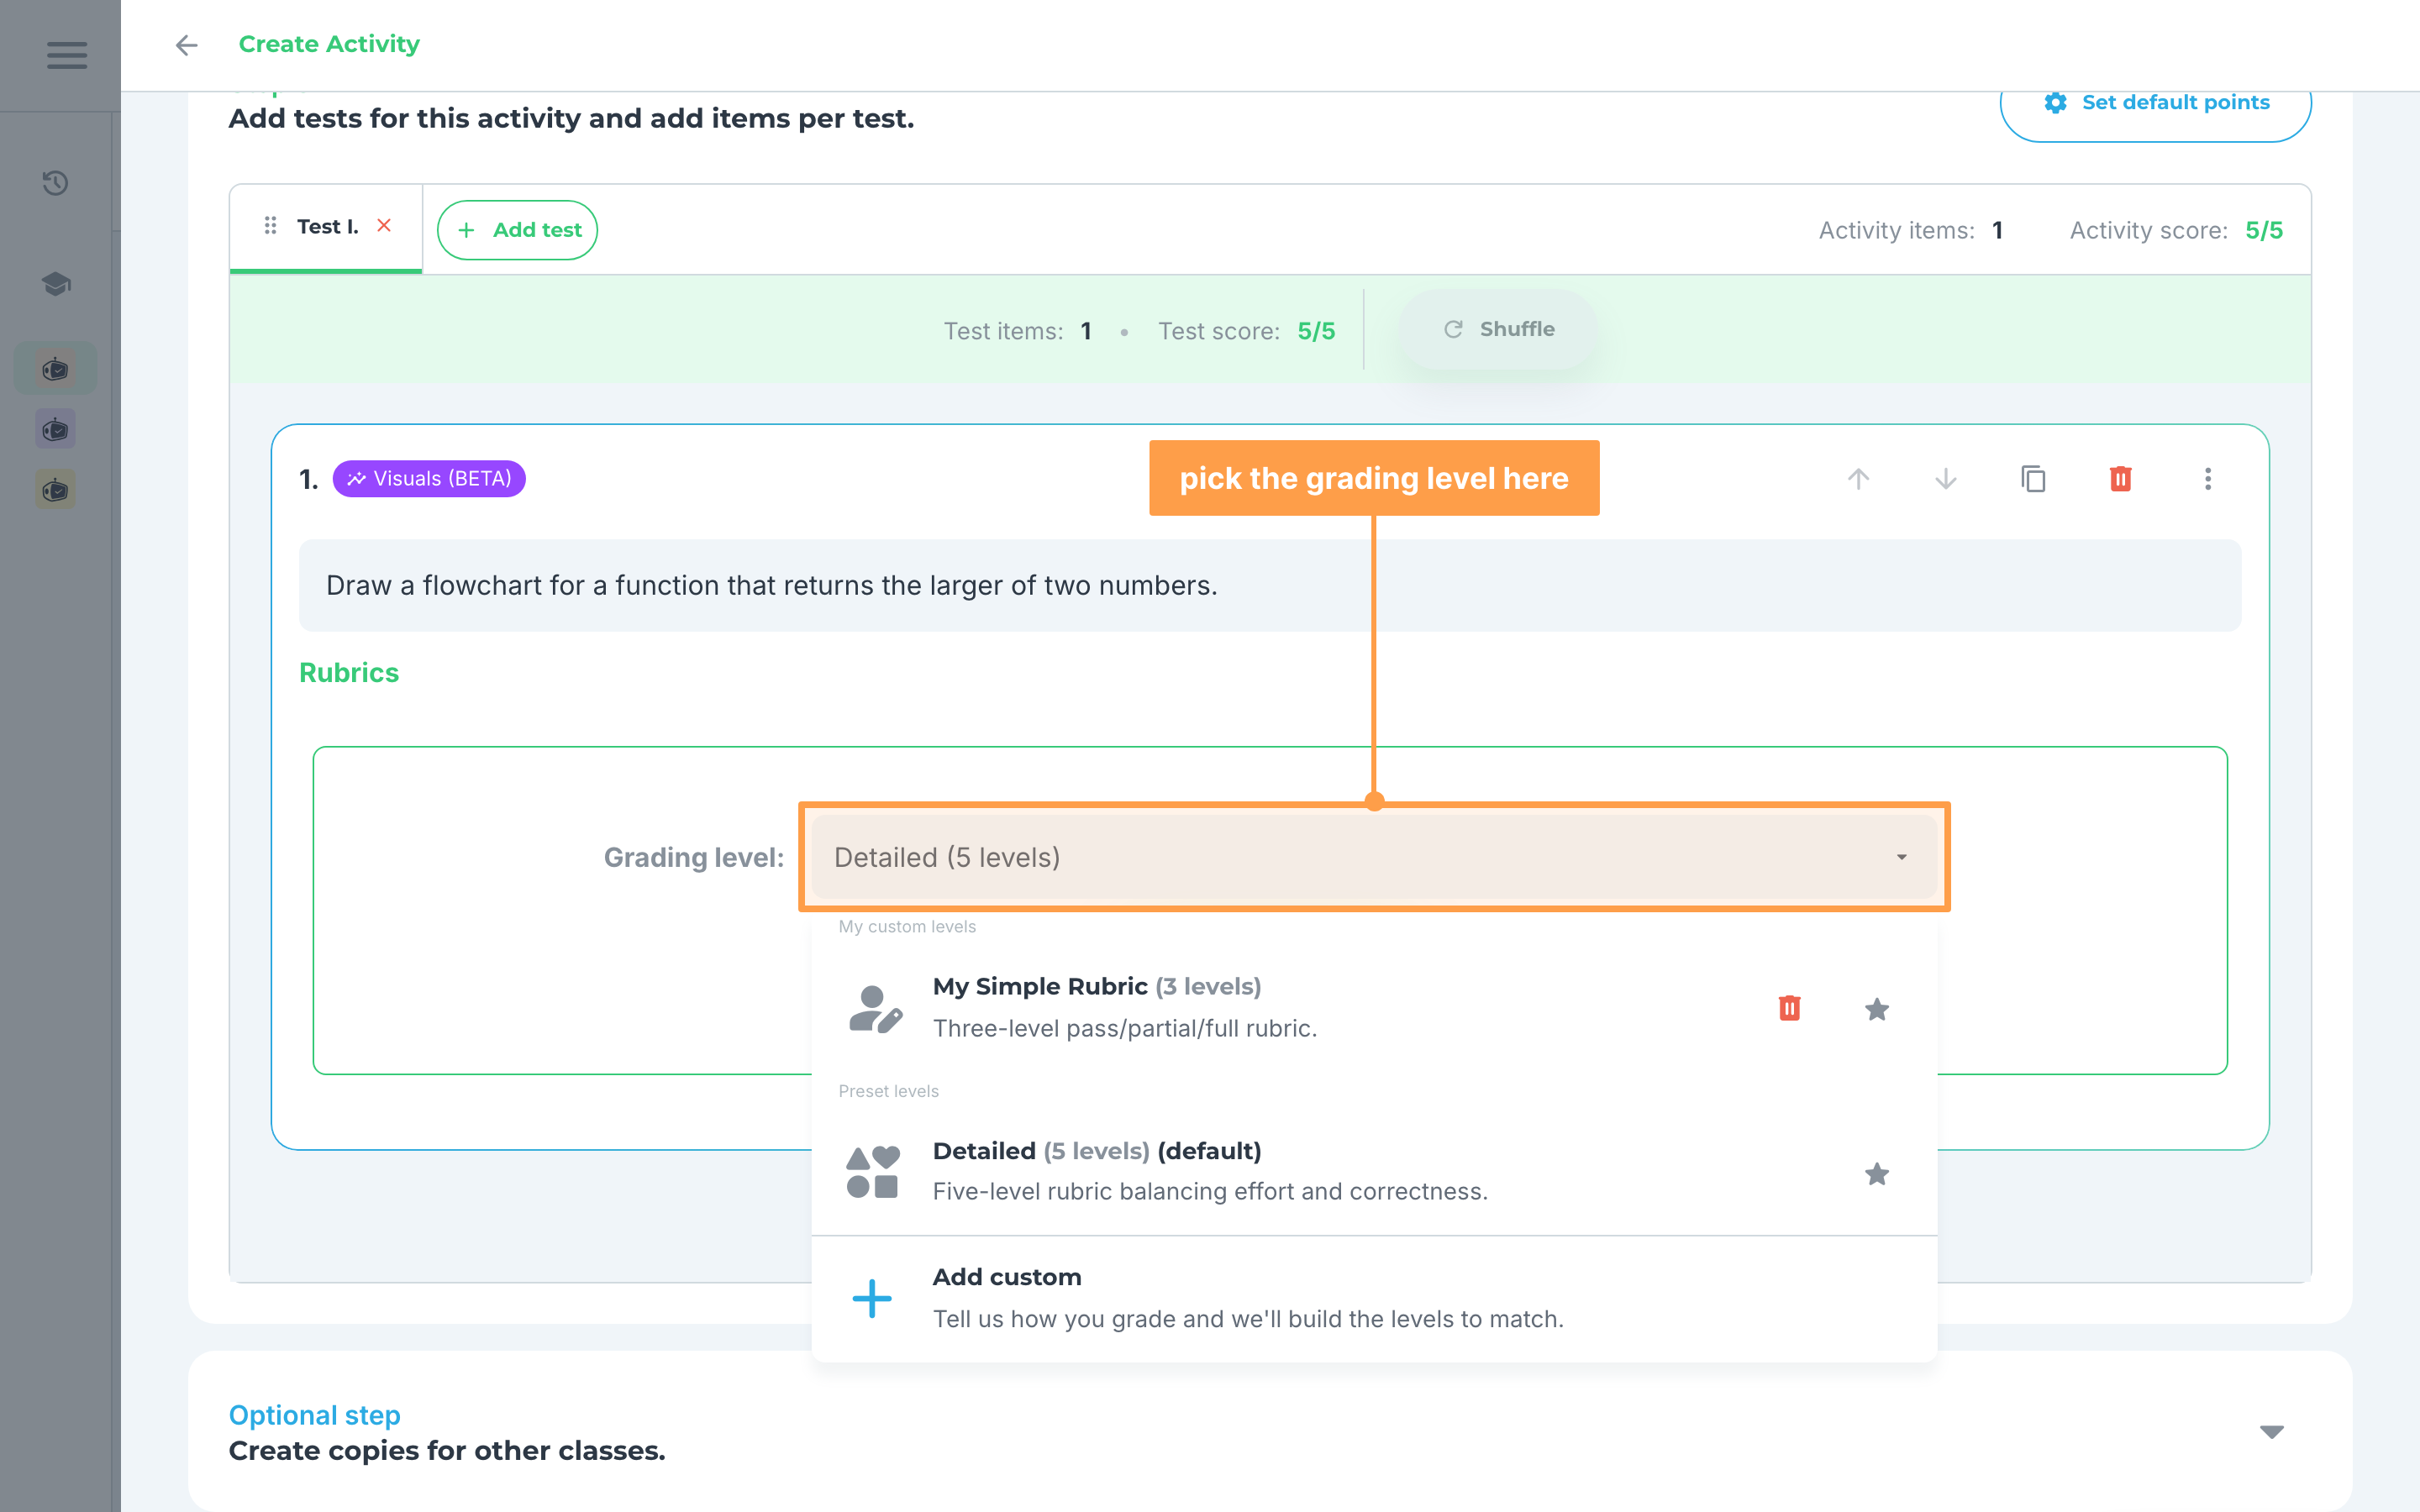
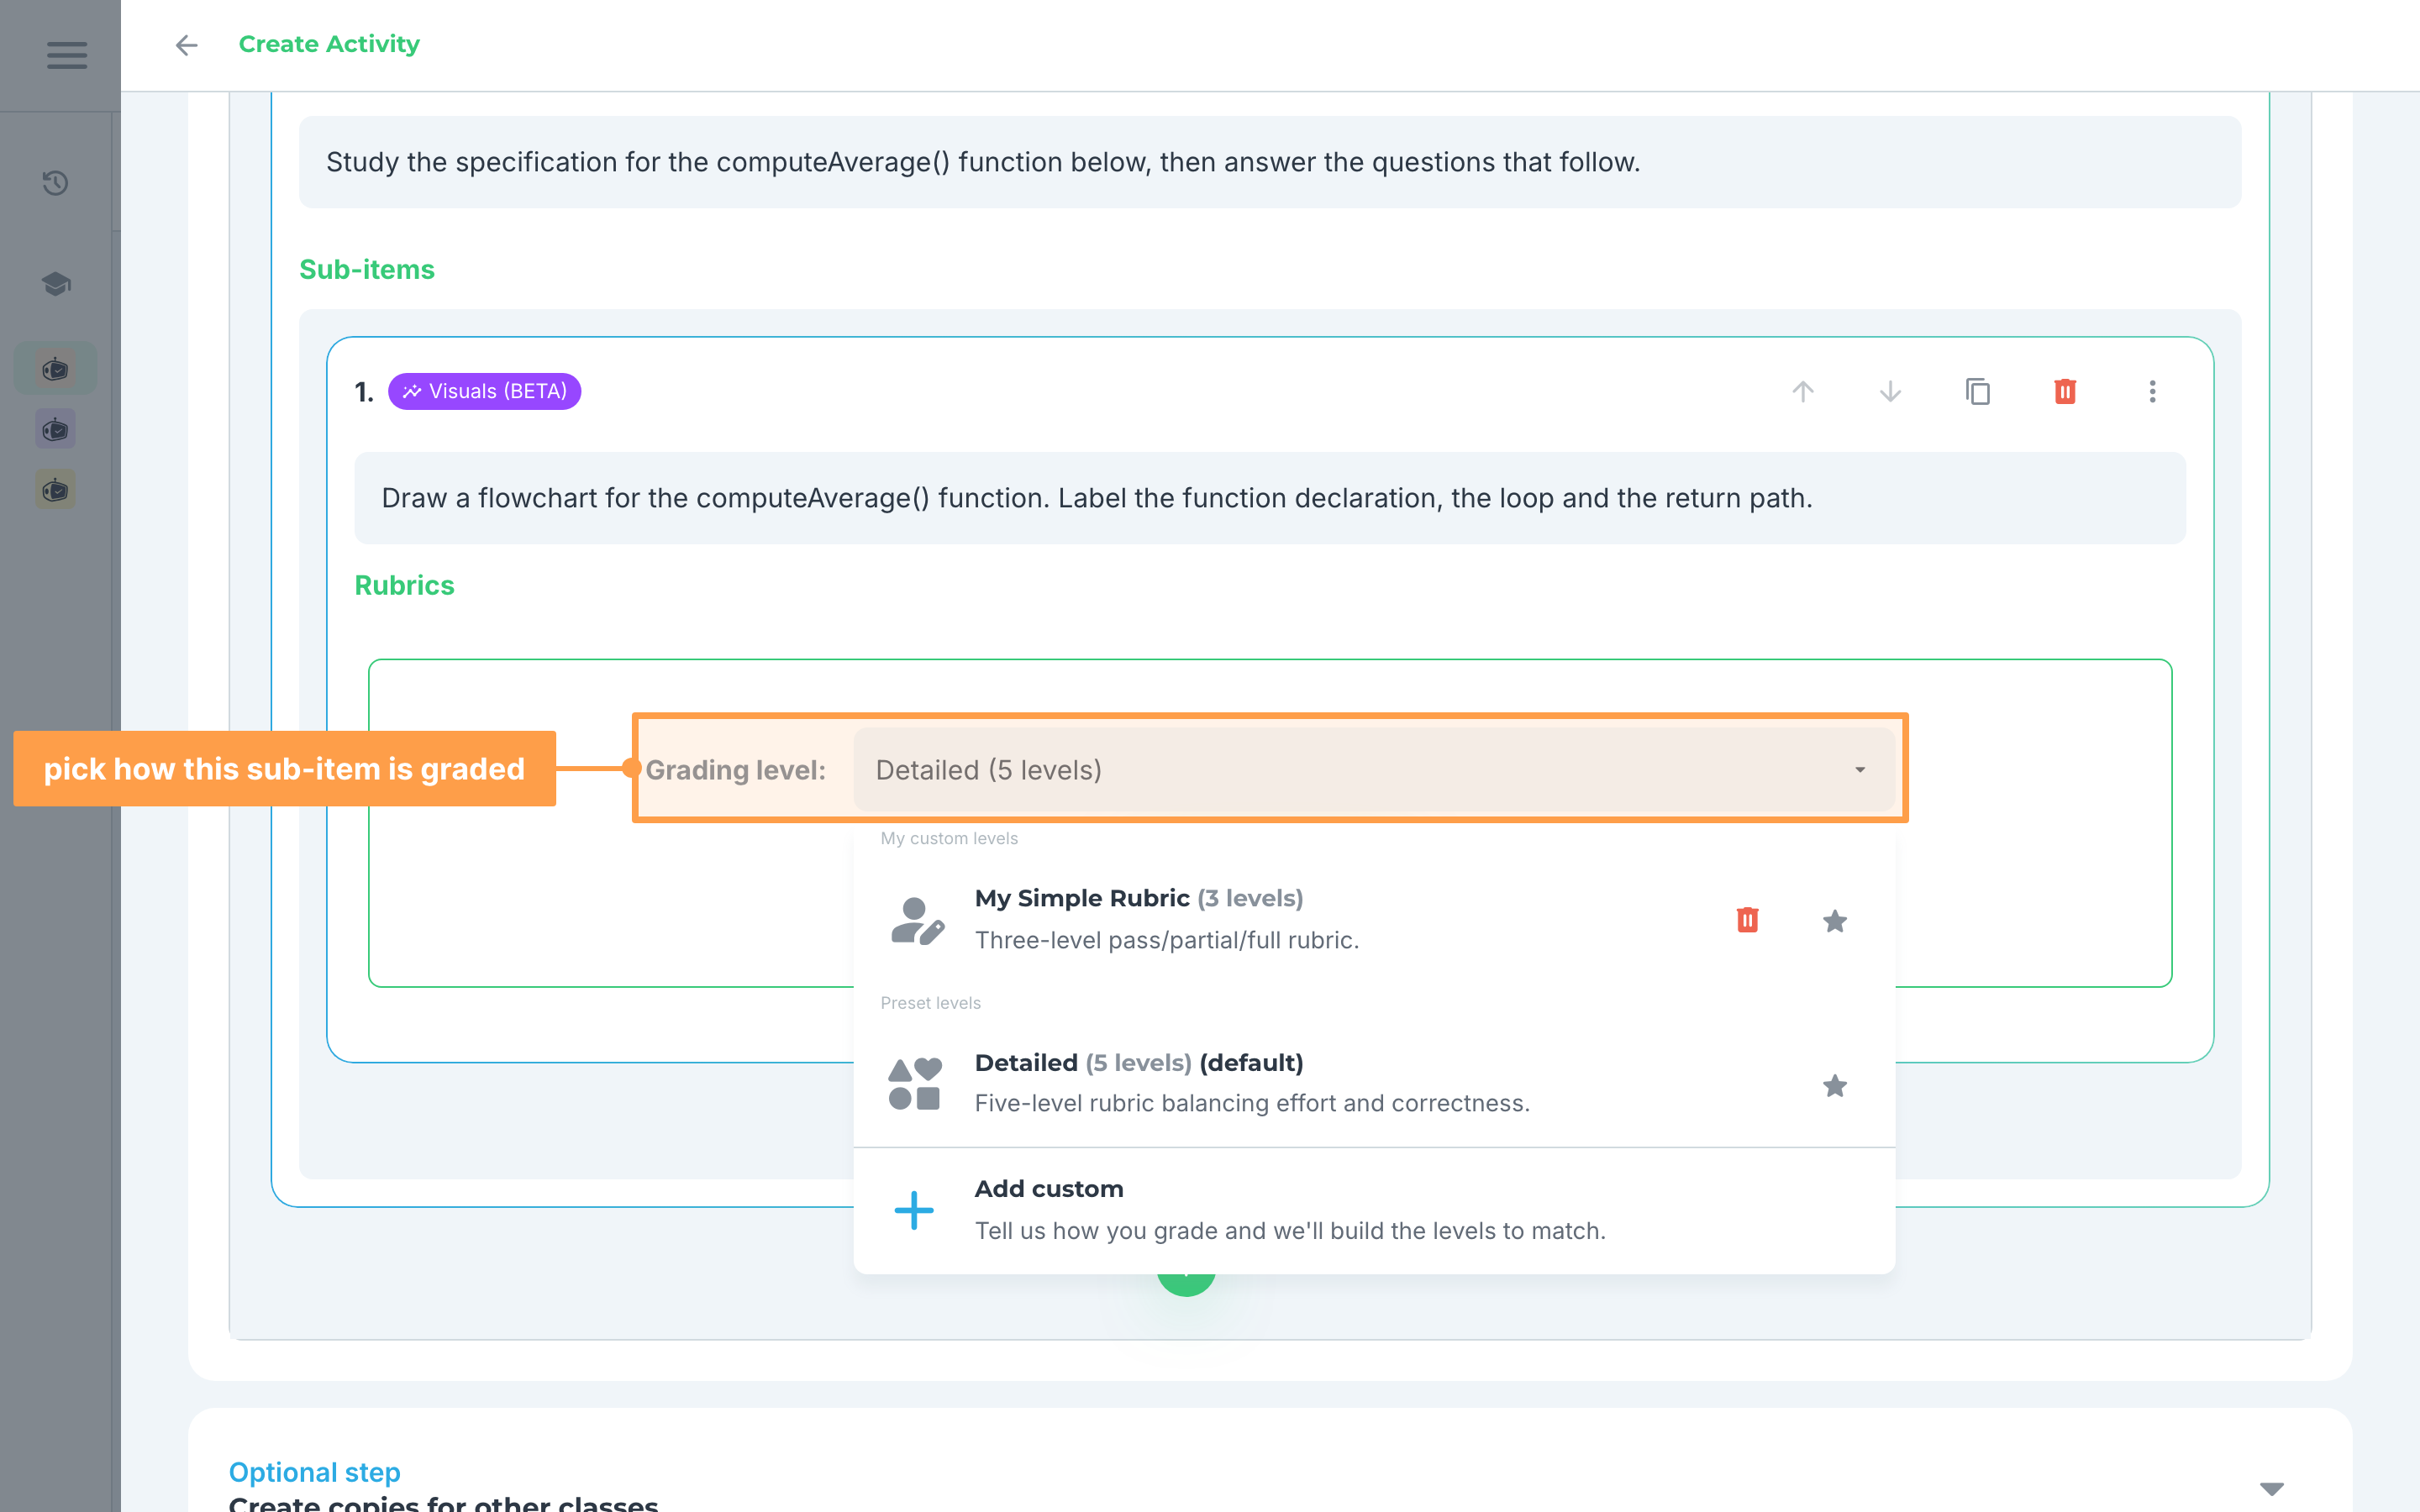
- Set the Grading level for this item, then click Generate rubrics and wait for our system to finish creating your rubrics.
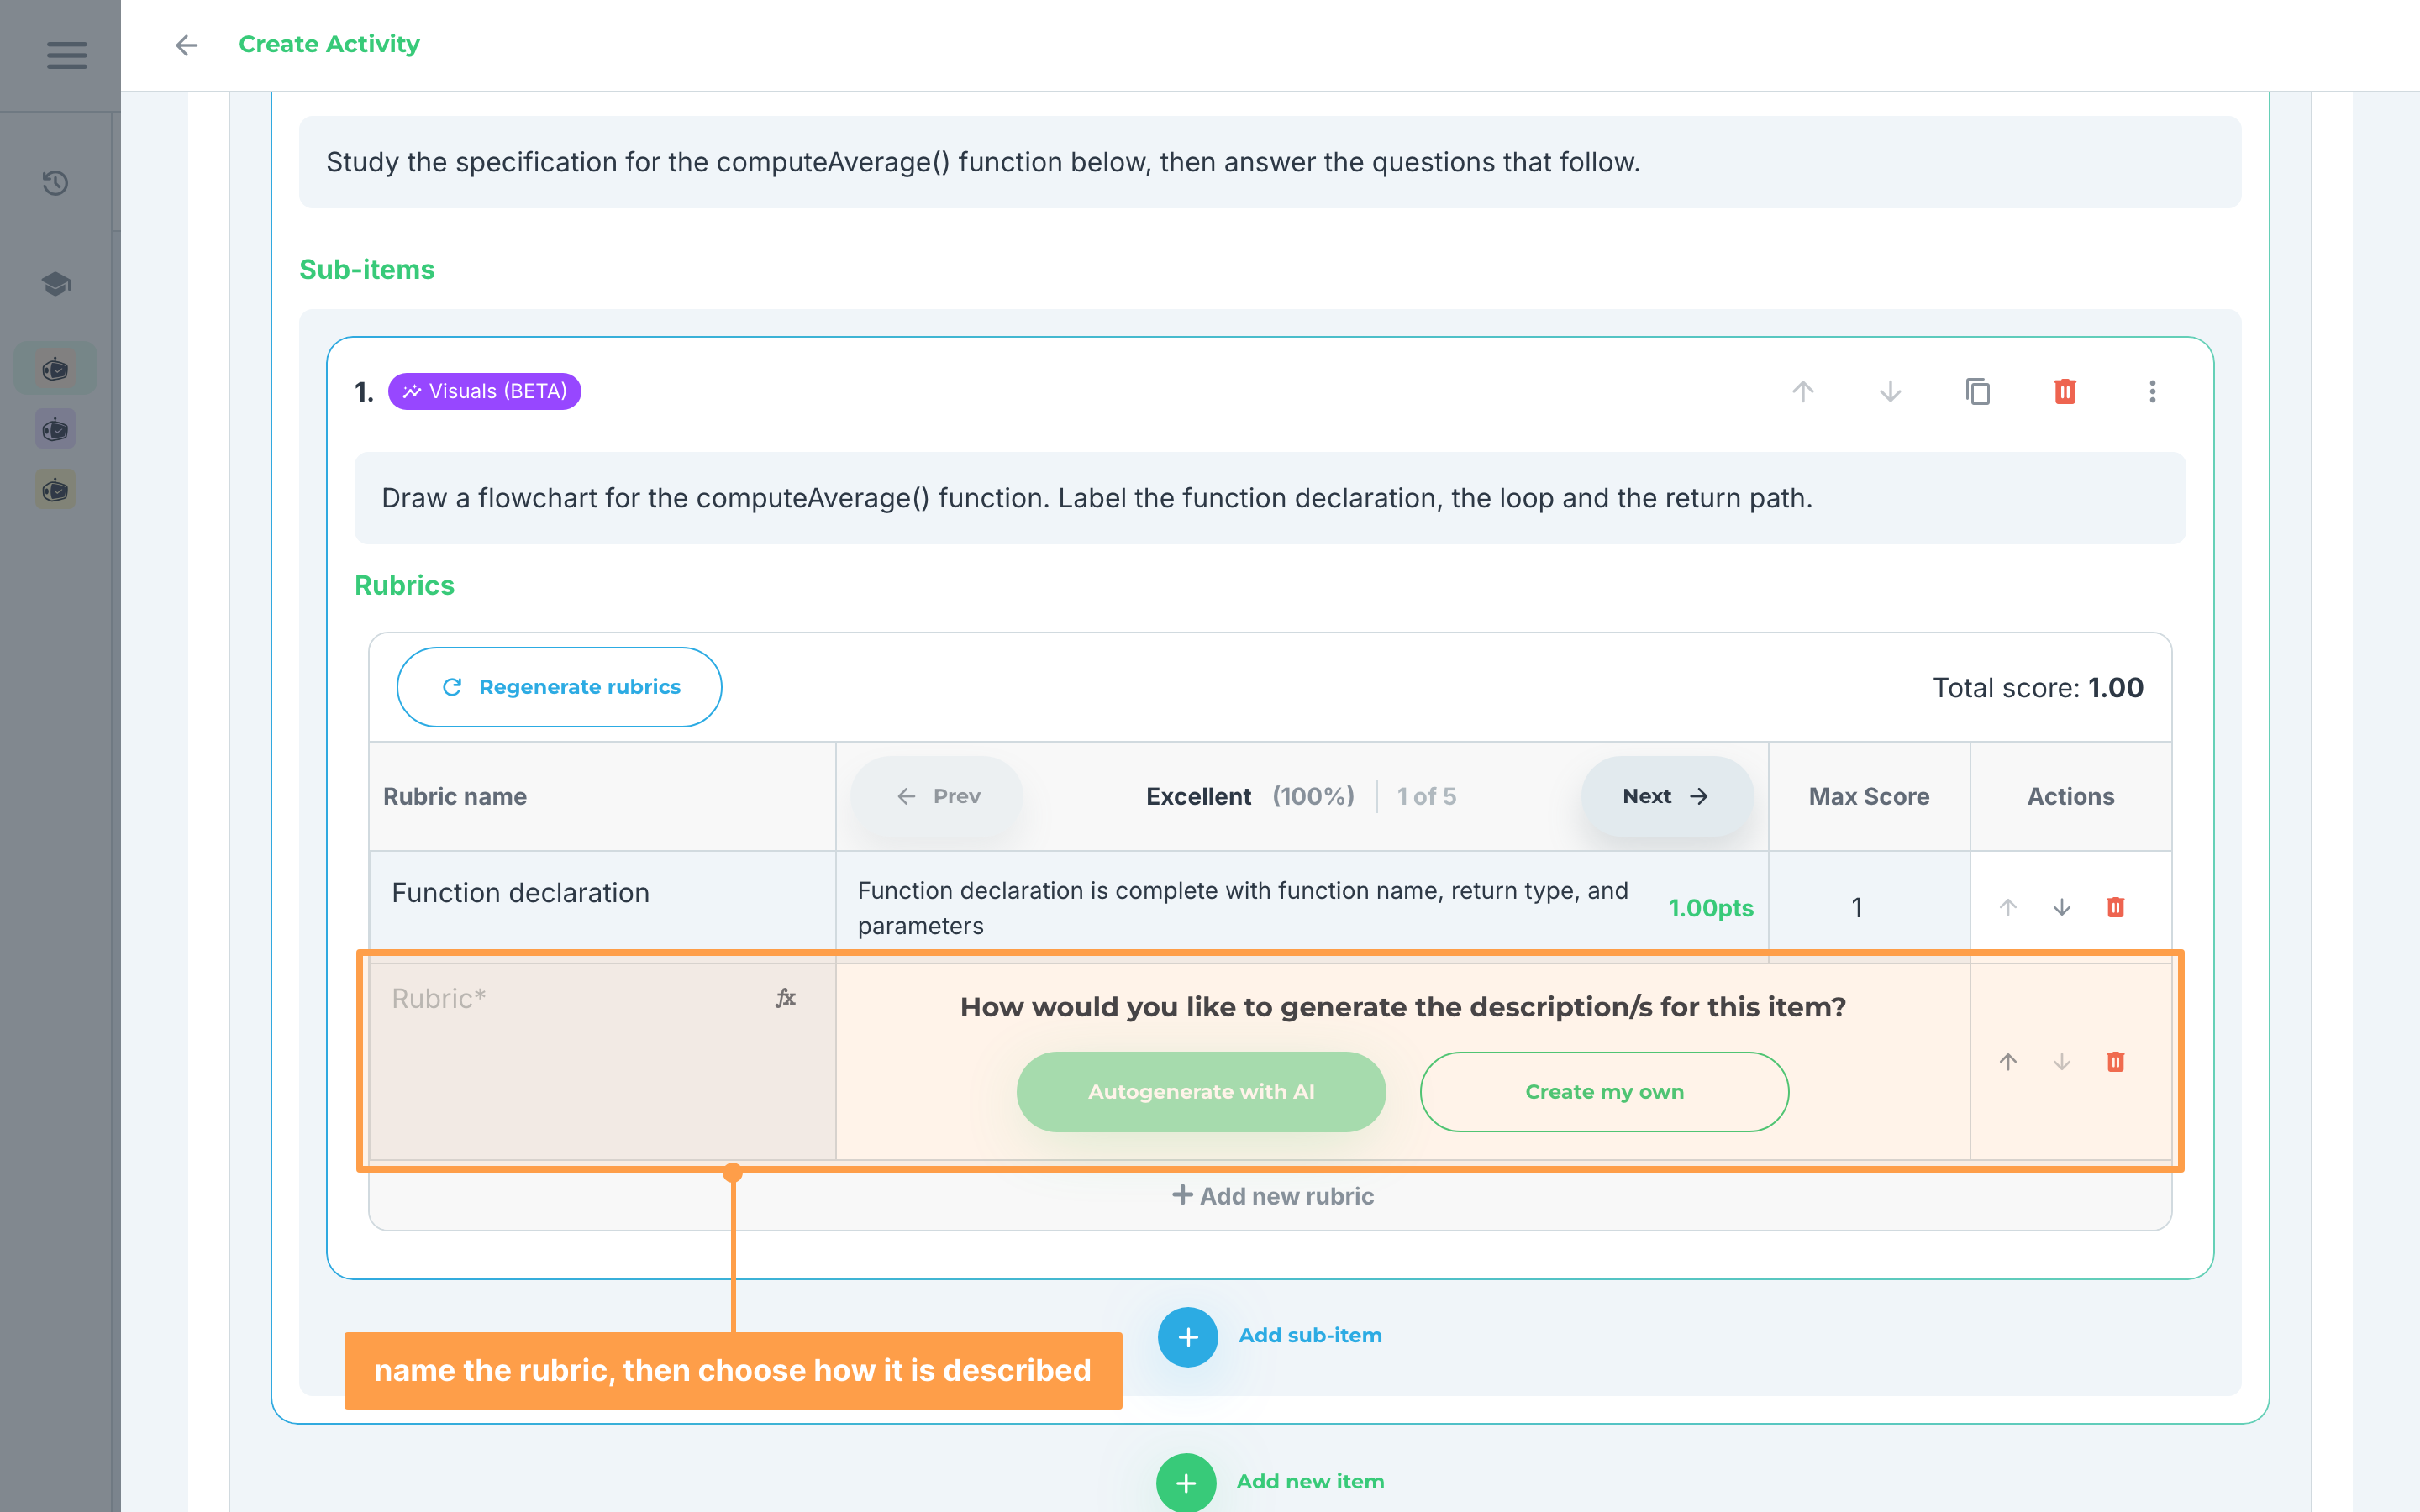
- Review the rubrics to see if it is to your liking, especially the description for each grading level and the Max Score for each rubric. The table shows one grading level at a time, starting with Excellent, so use Prev and Next in the header to move through them.
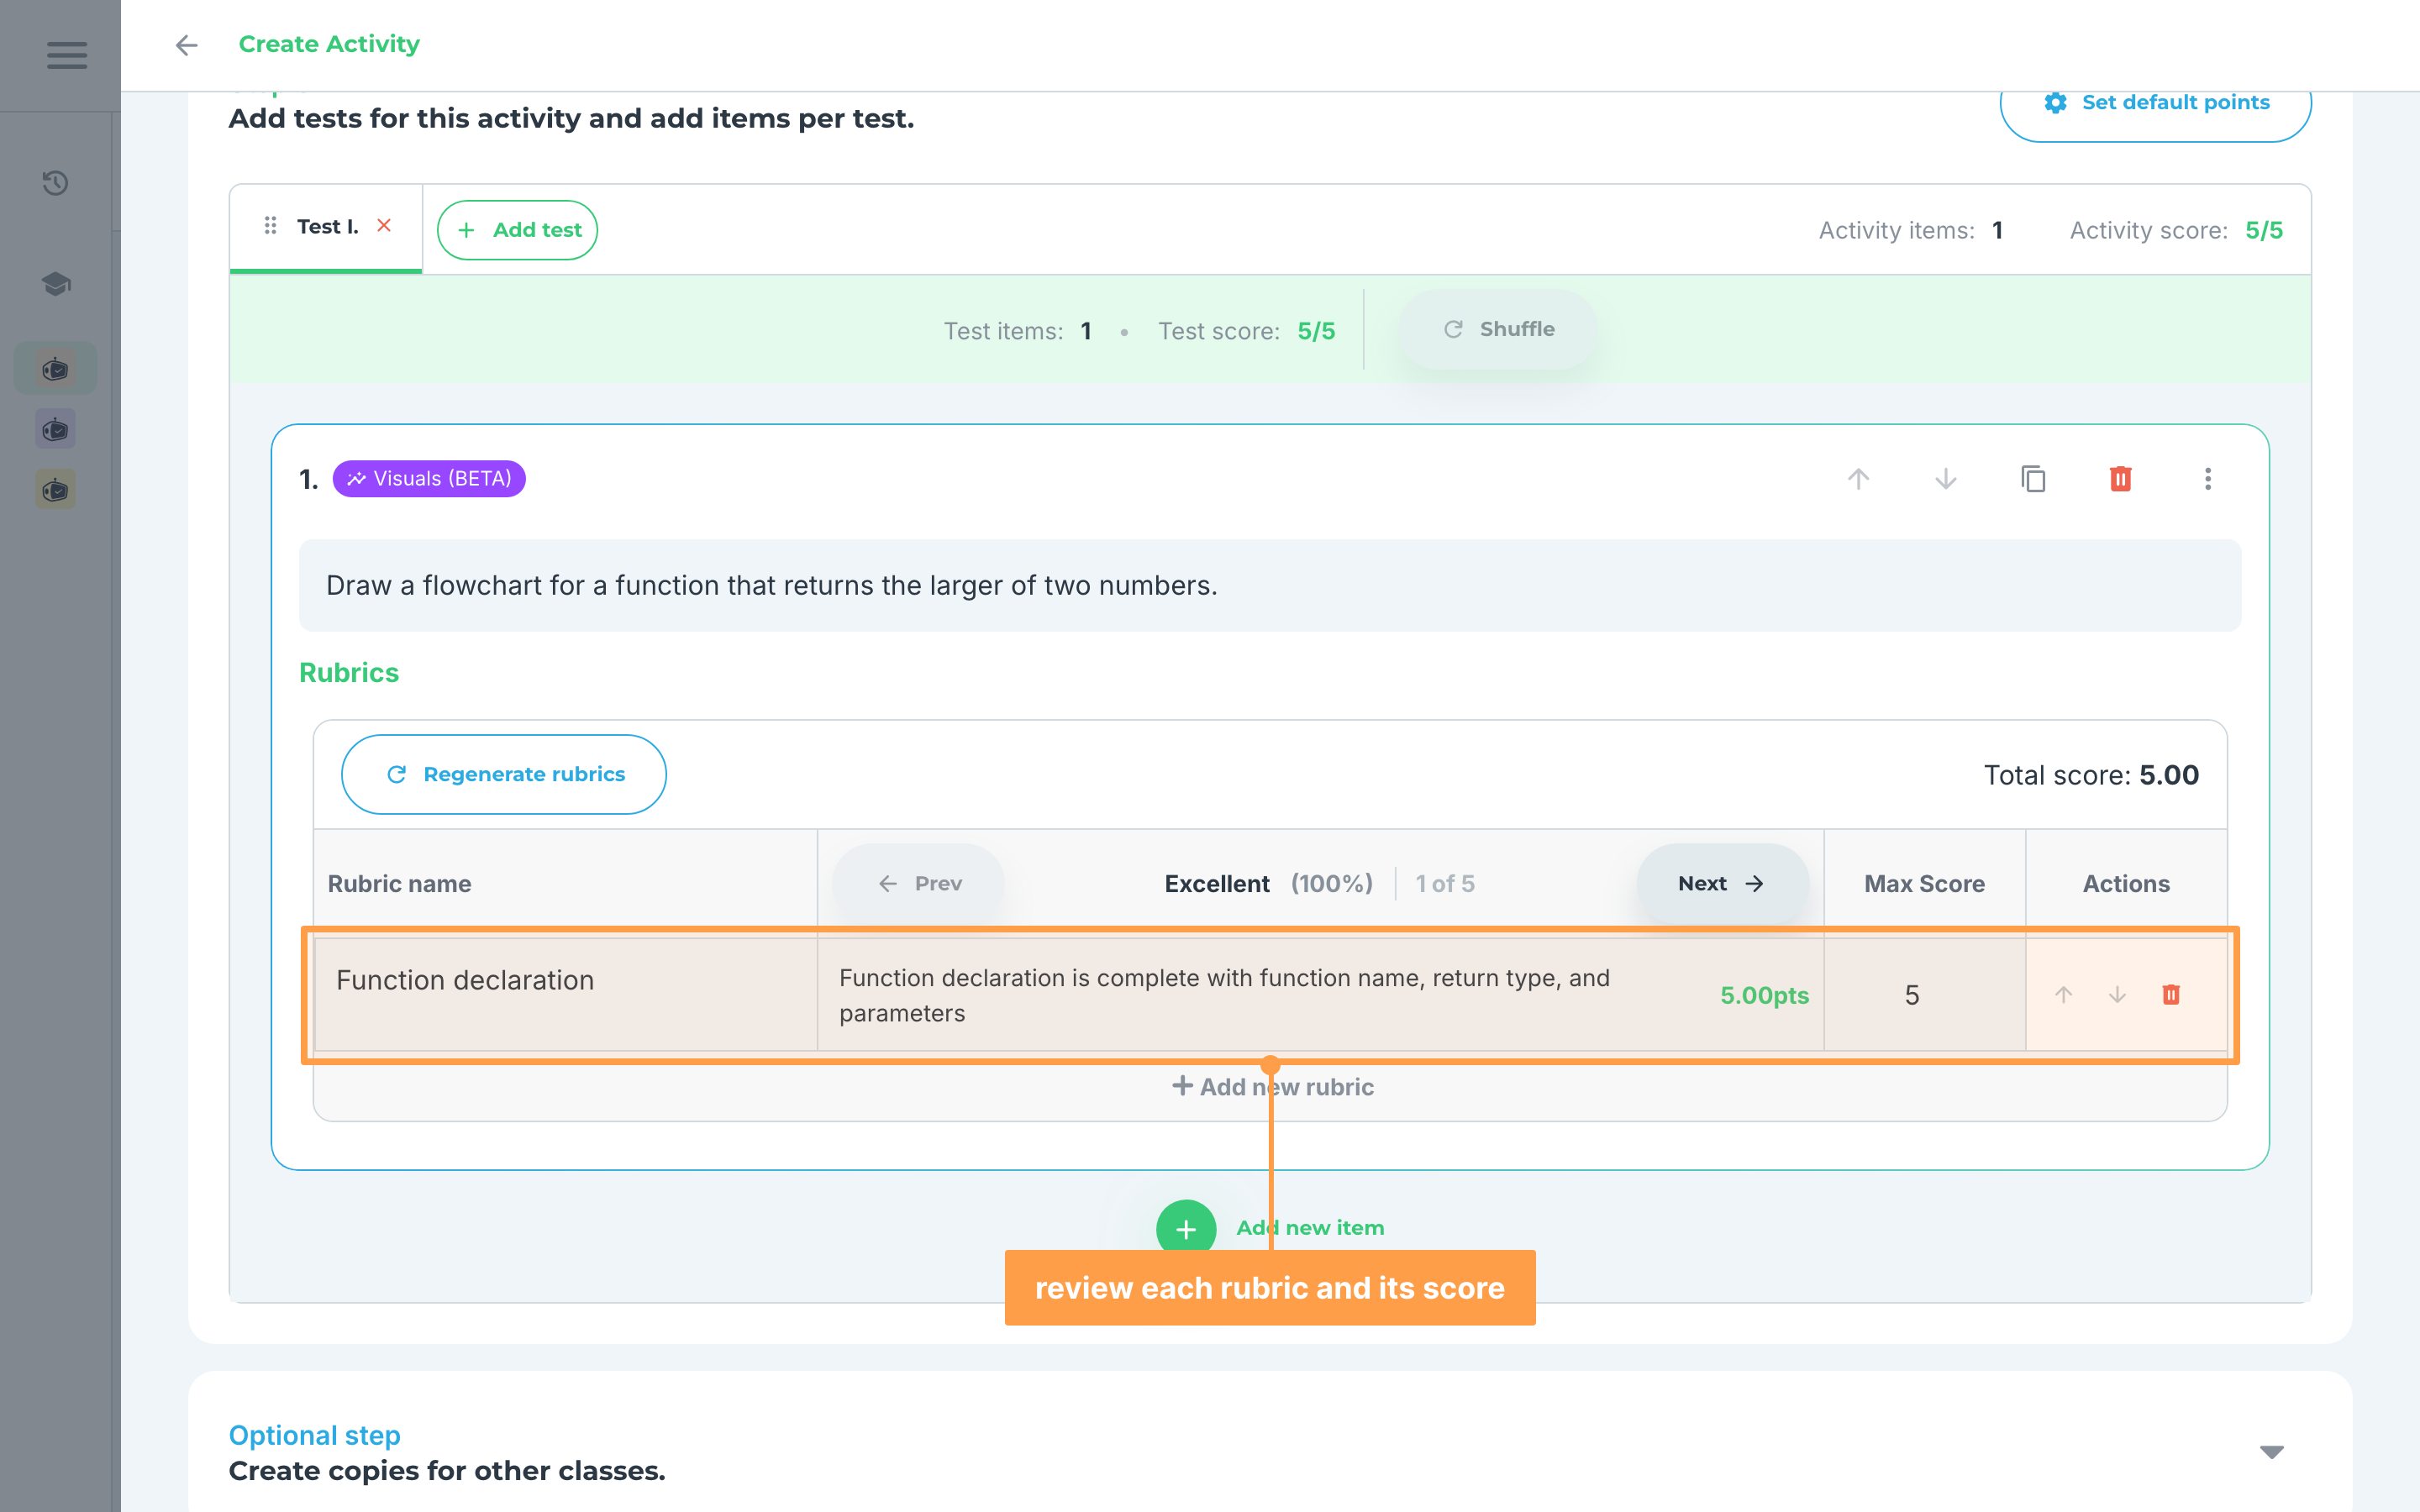
- If you wish to edit any detail to the rubrics, you can make your changes in the table by clicking the boxes and adding your modification. You can also add another rubric by clicking + Add new rubric after the last rubric.
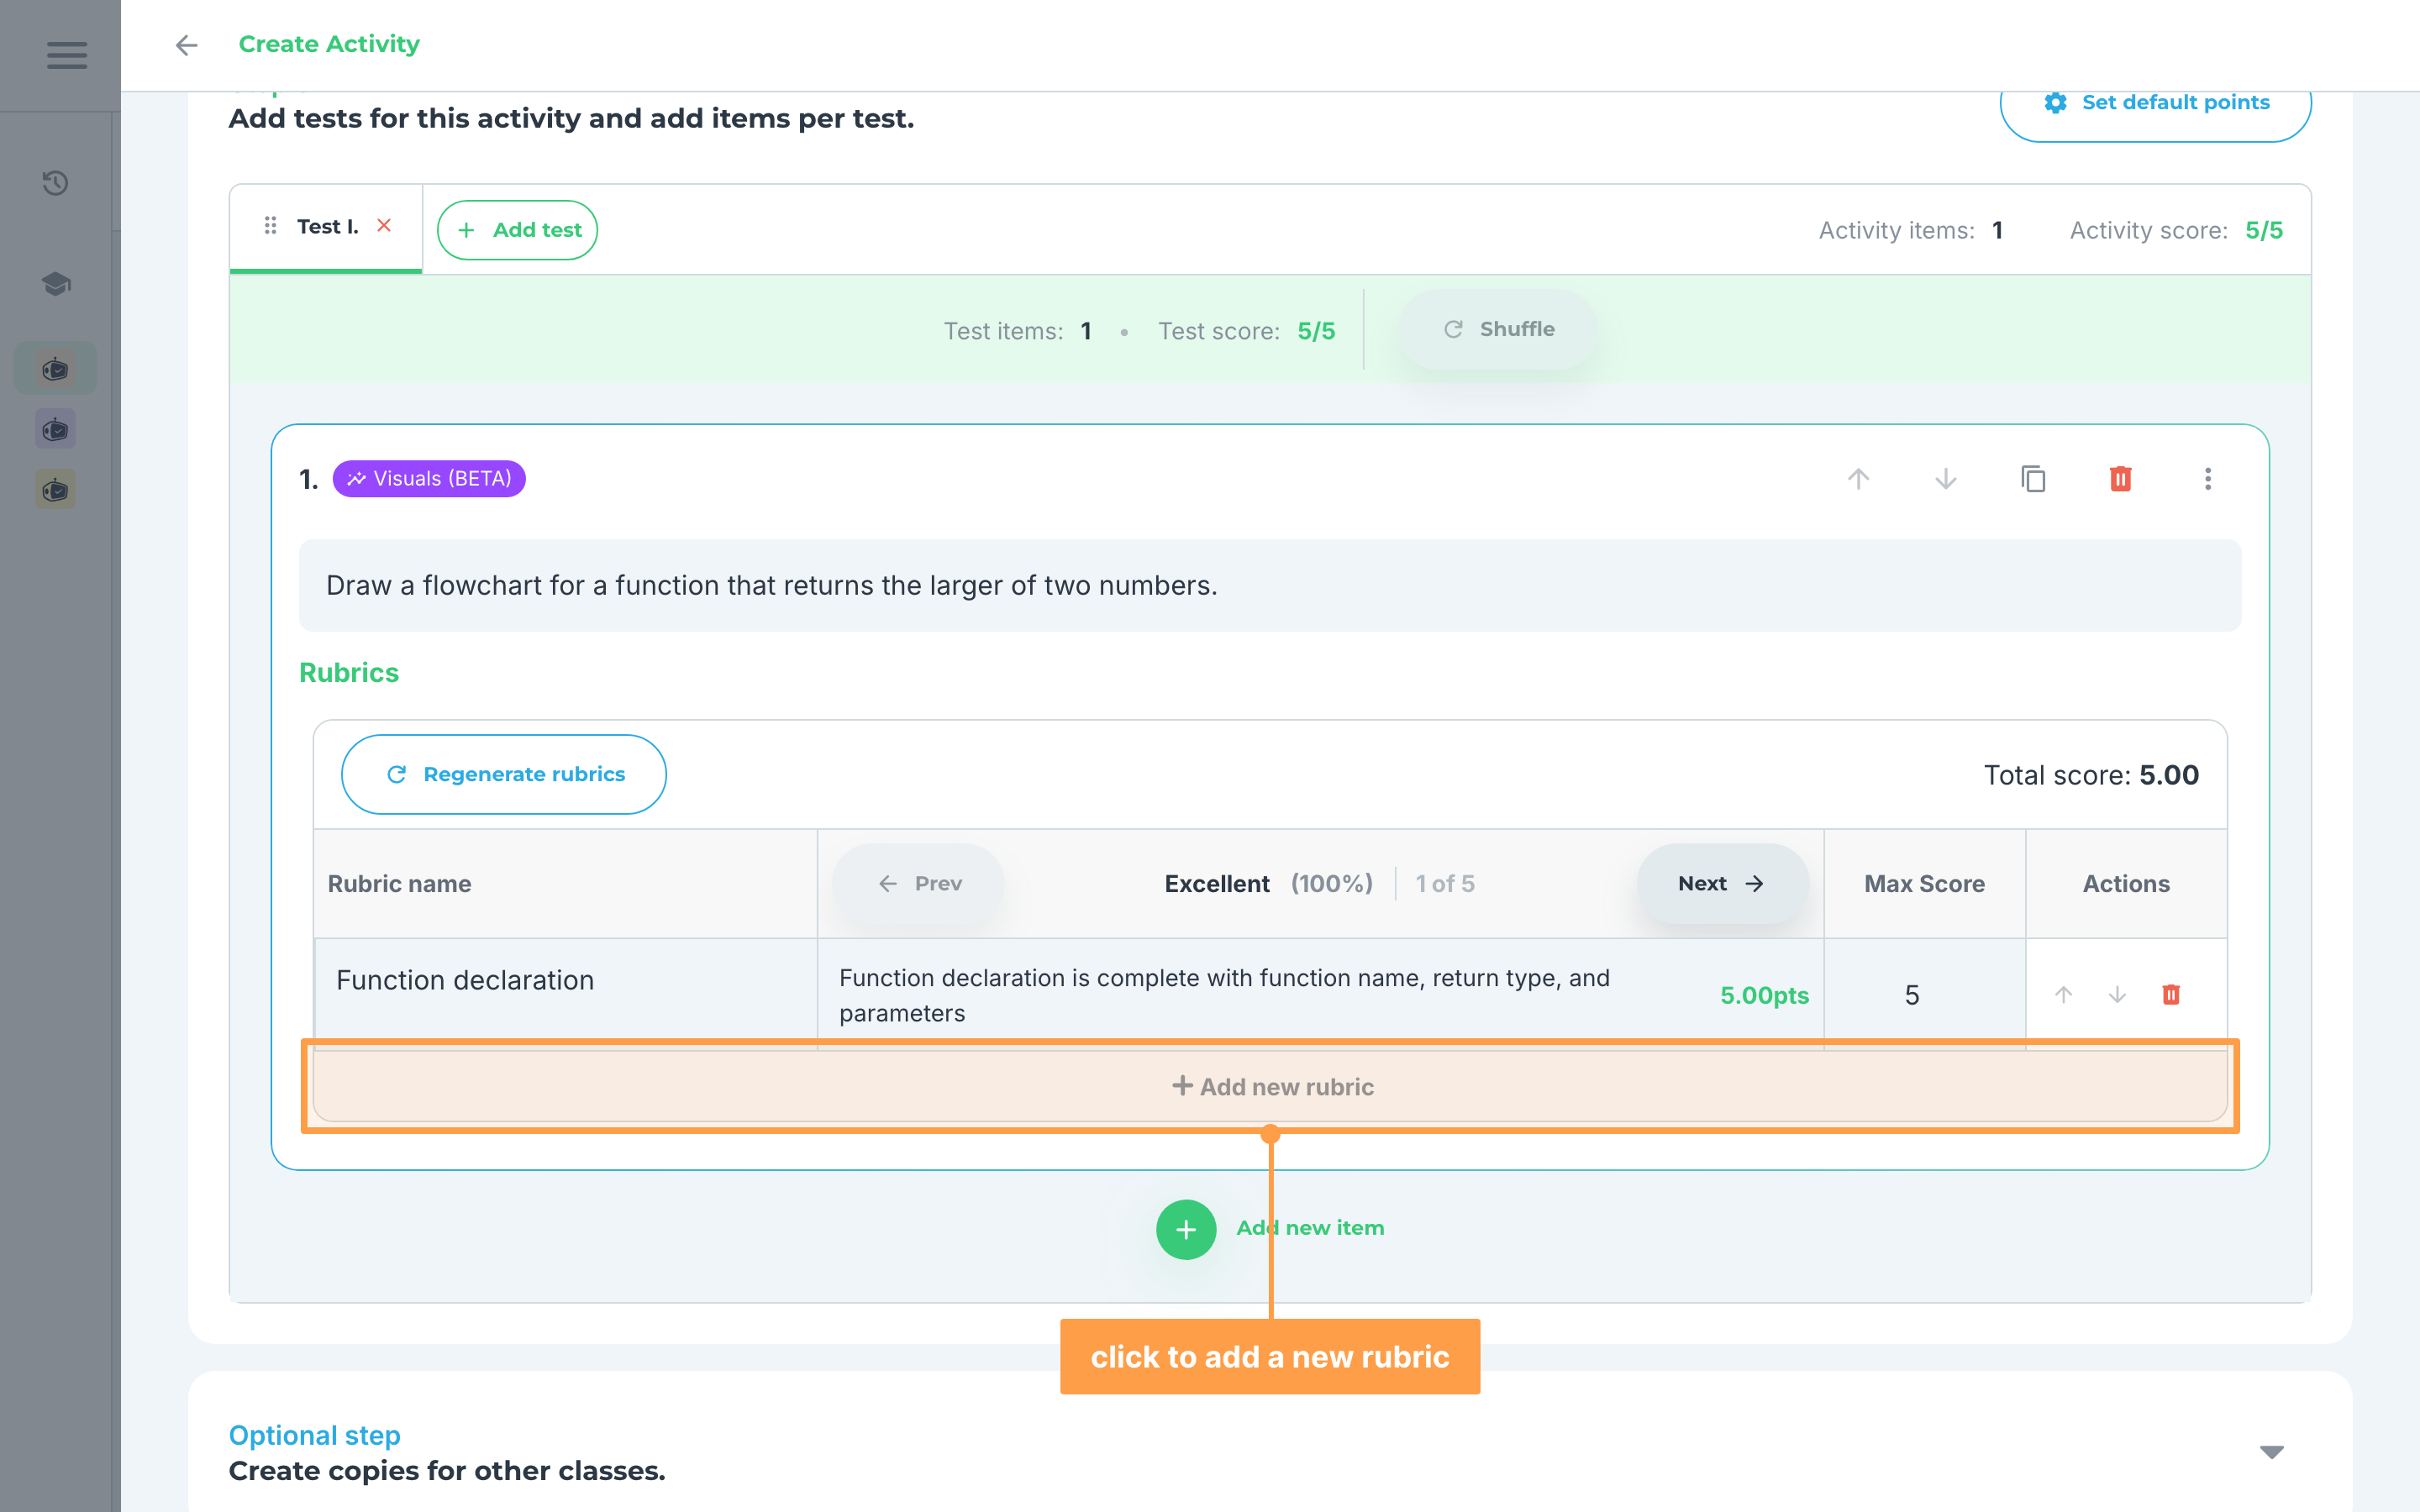
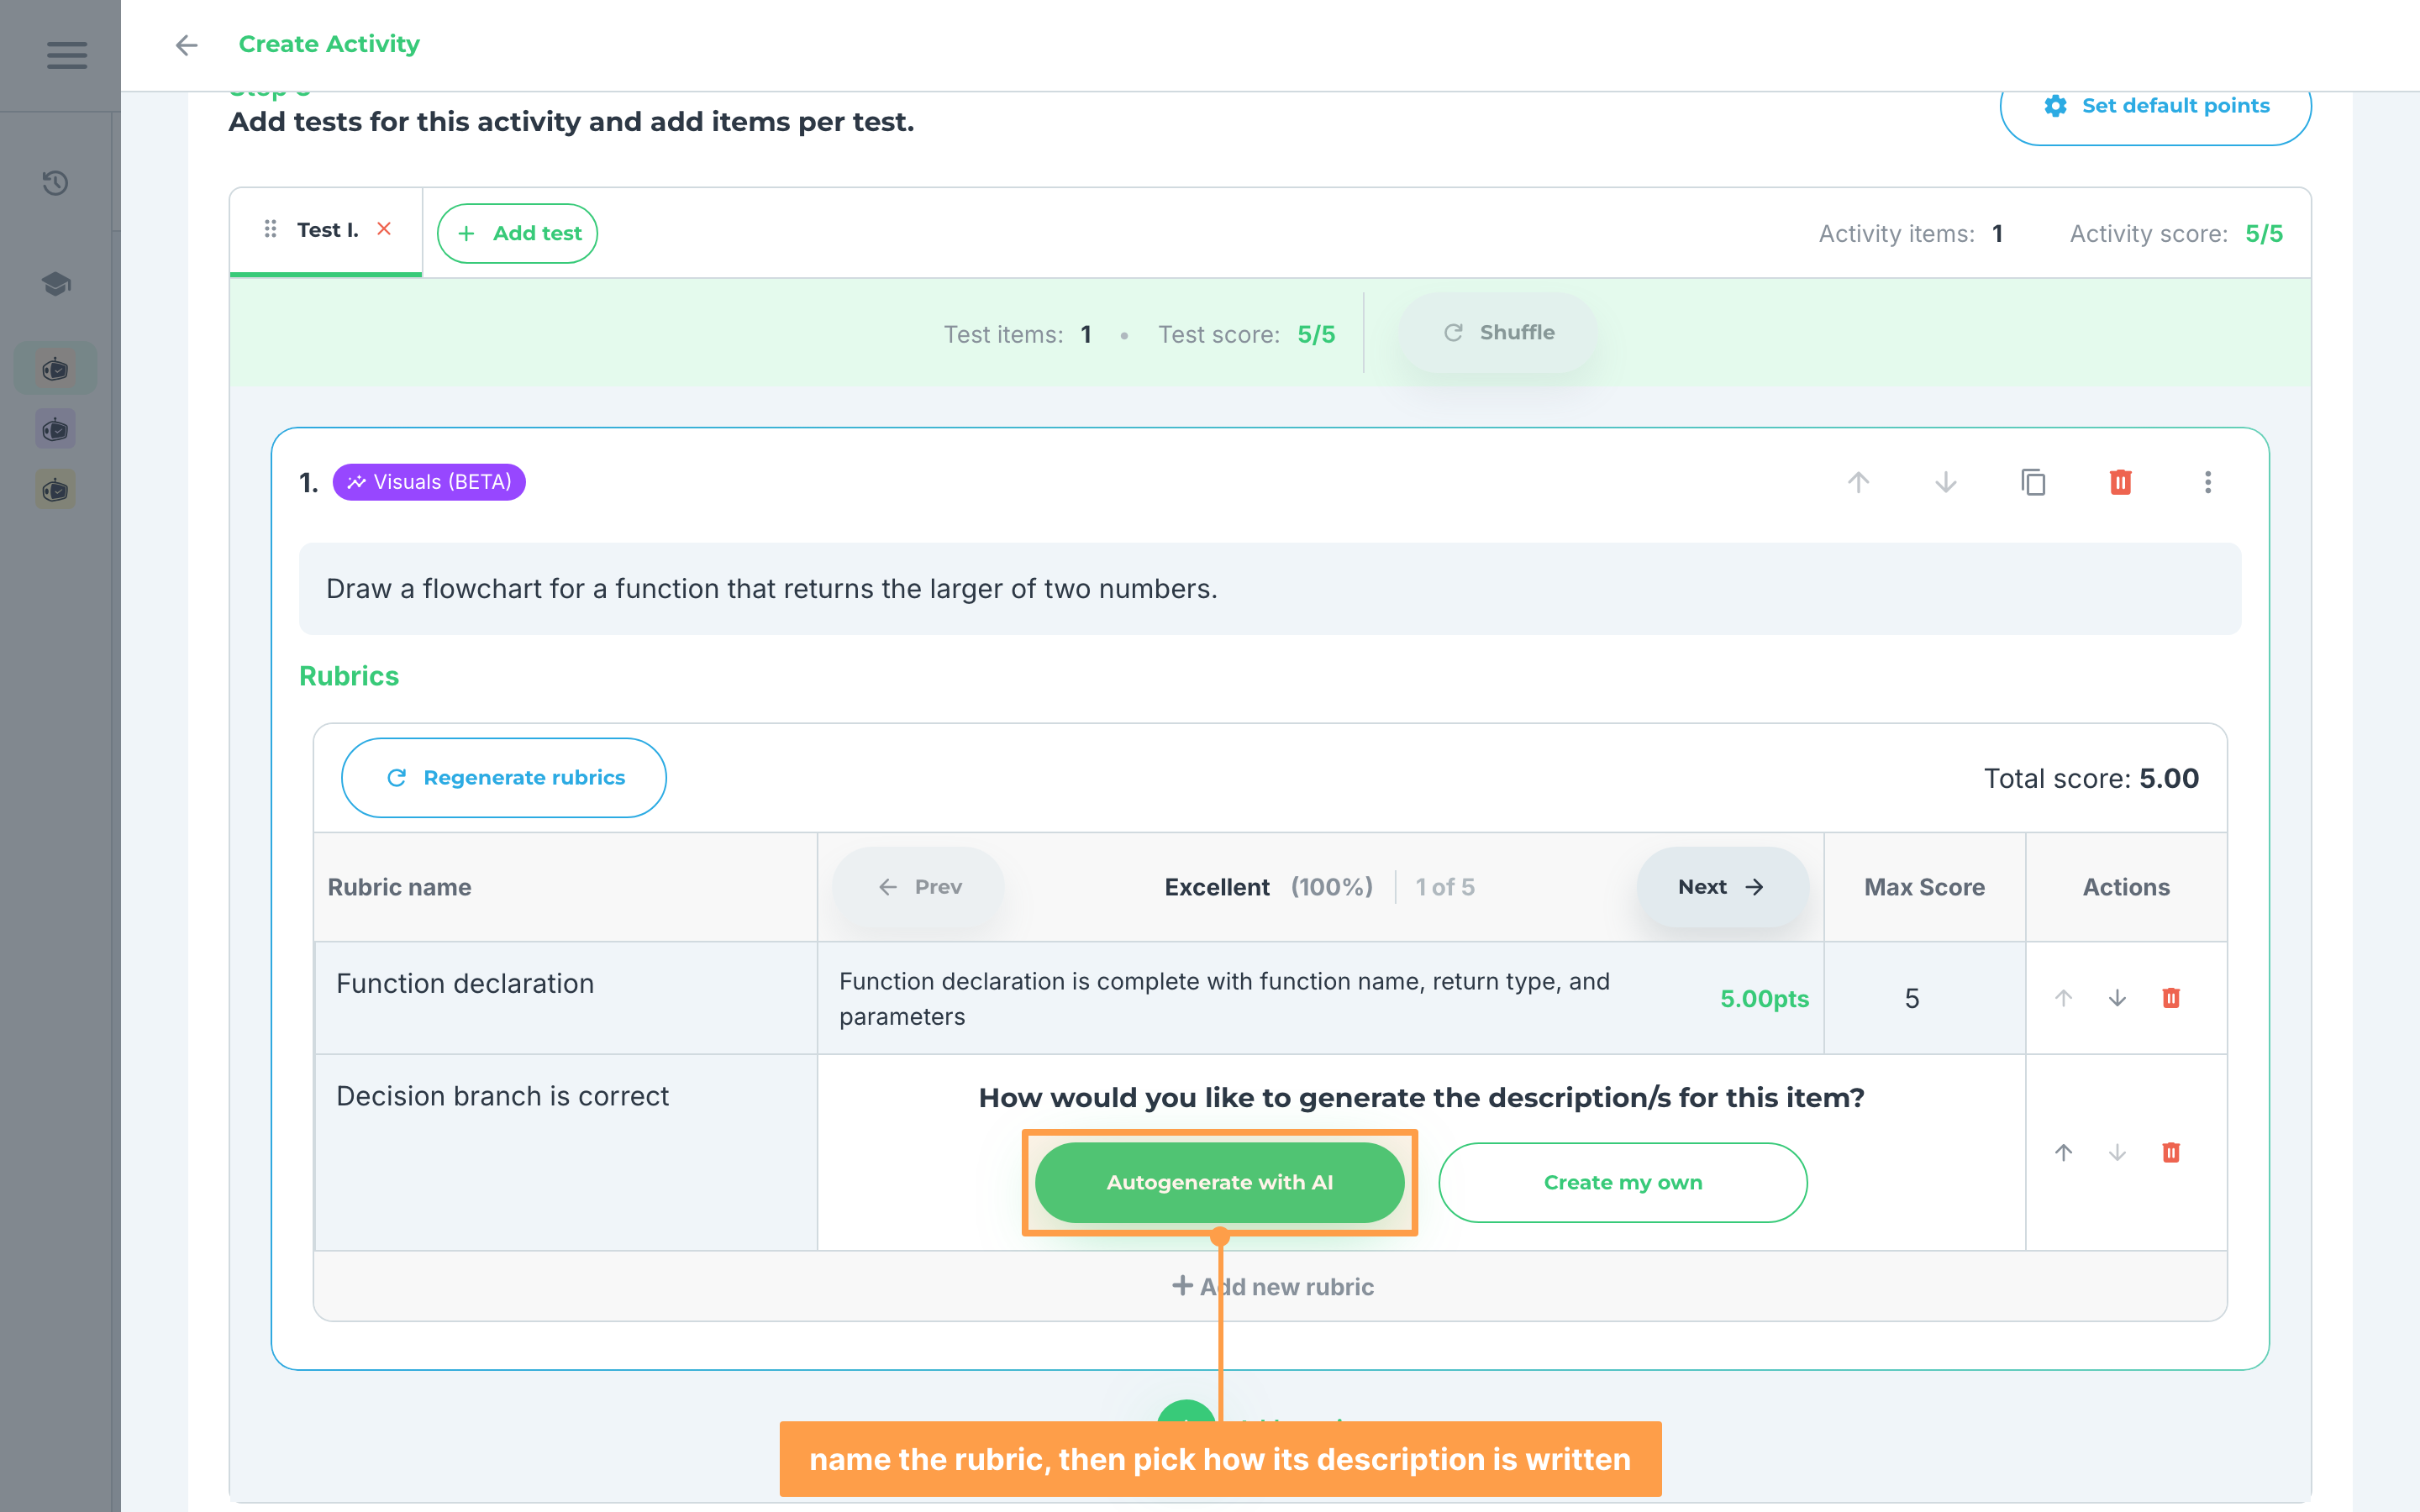
- Provide a rubric name then you can opt to Autogenerate with AI or Create my own the description of the rubric then set the score.
- The Grading level you set in step 2 determines how strict our system will be in checking the students' answers, and by default it is set to Moderate. Once the rubrics exist the dropdown is no longer on the item; to change the level, click Regenerate rubrics above the table.
- To add another single item, repeat steps 2-3.
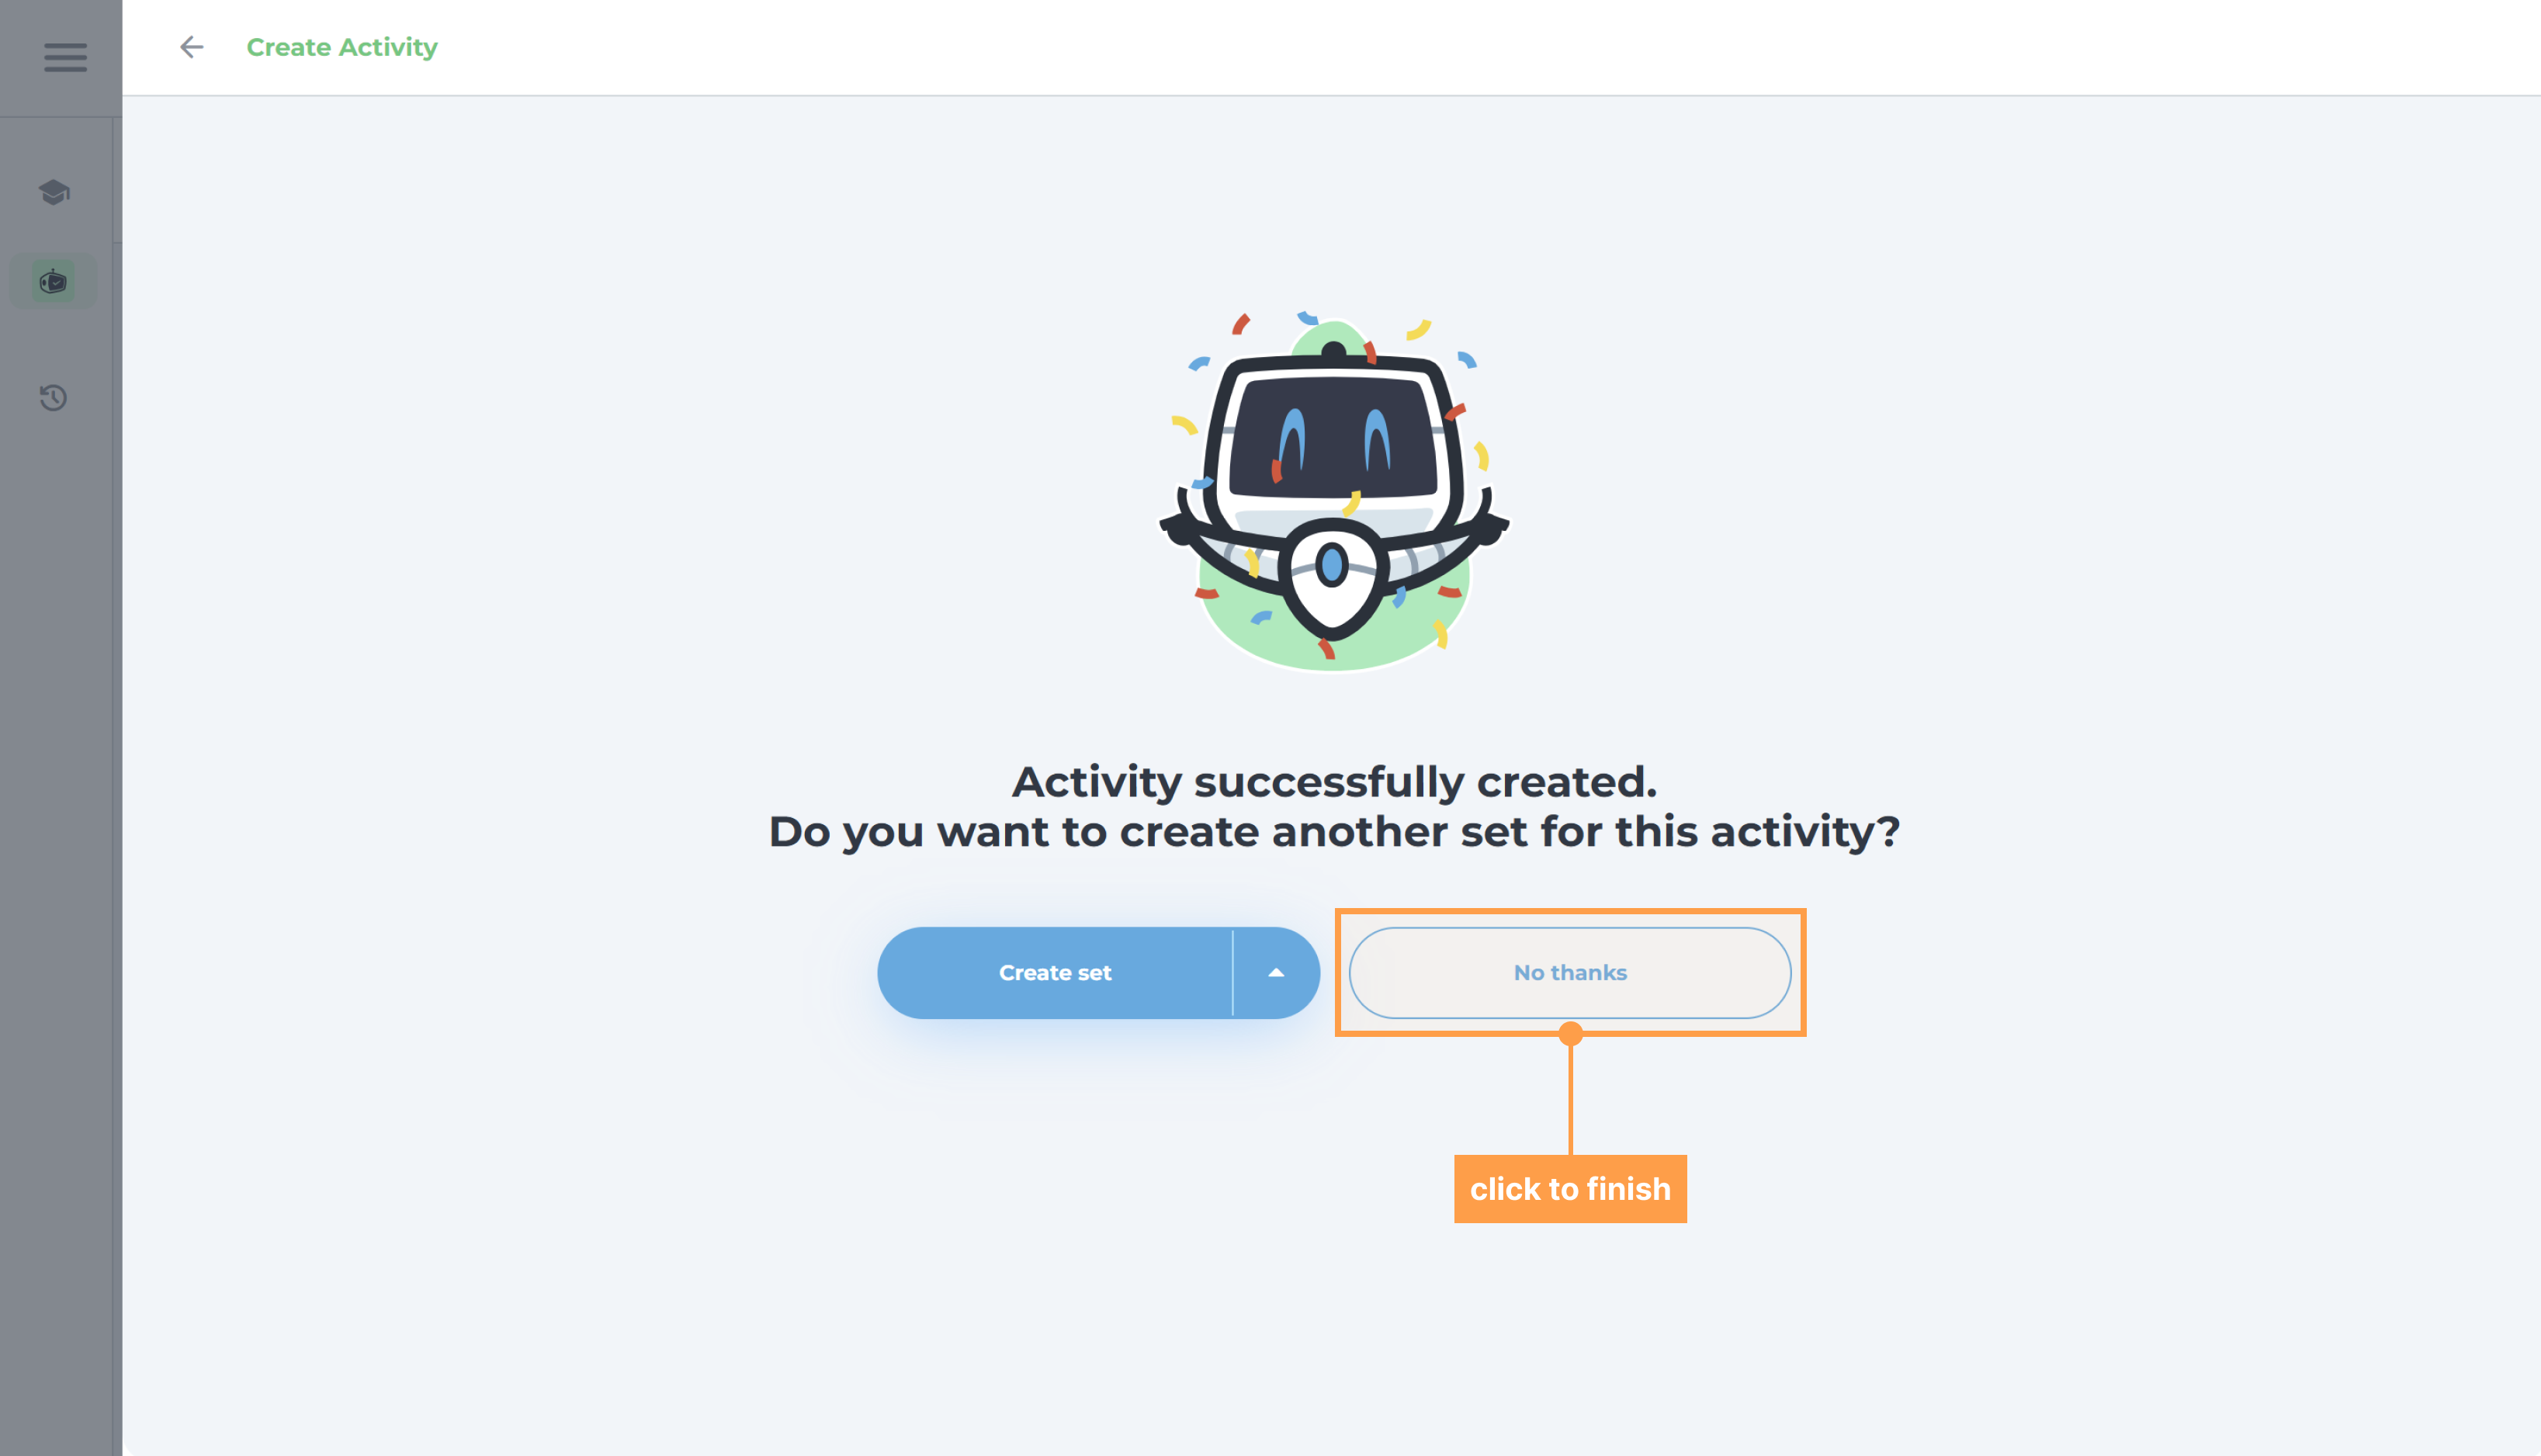
- Once done, review the activity you created. Then, click the "Create Activity" button. You will be shown an overlay that asks you to create sets for this activity.
Note: You may also opt to create a copy of your activity to other classes. Keep in mind that what changes you make in one section for a linked activity will be done as well to the activities in other classes.
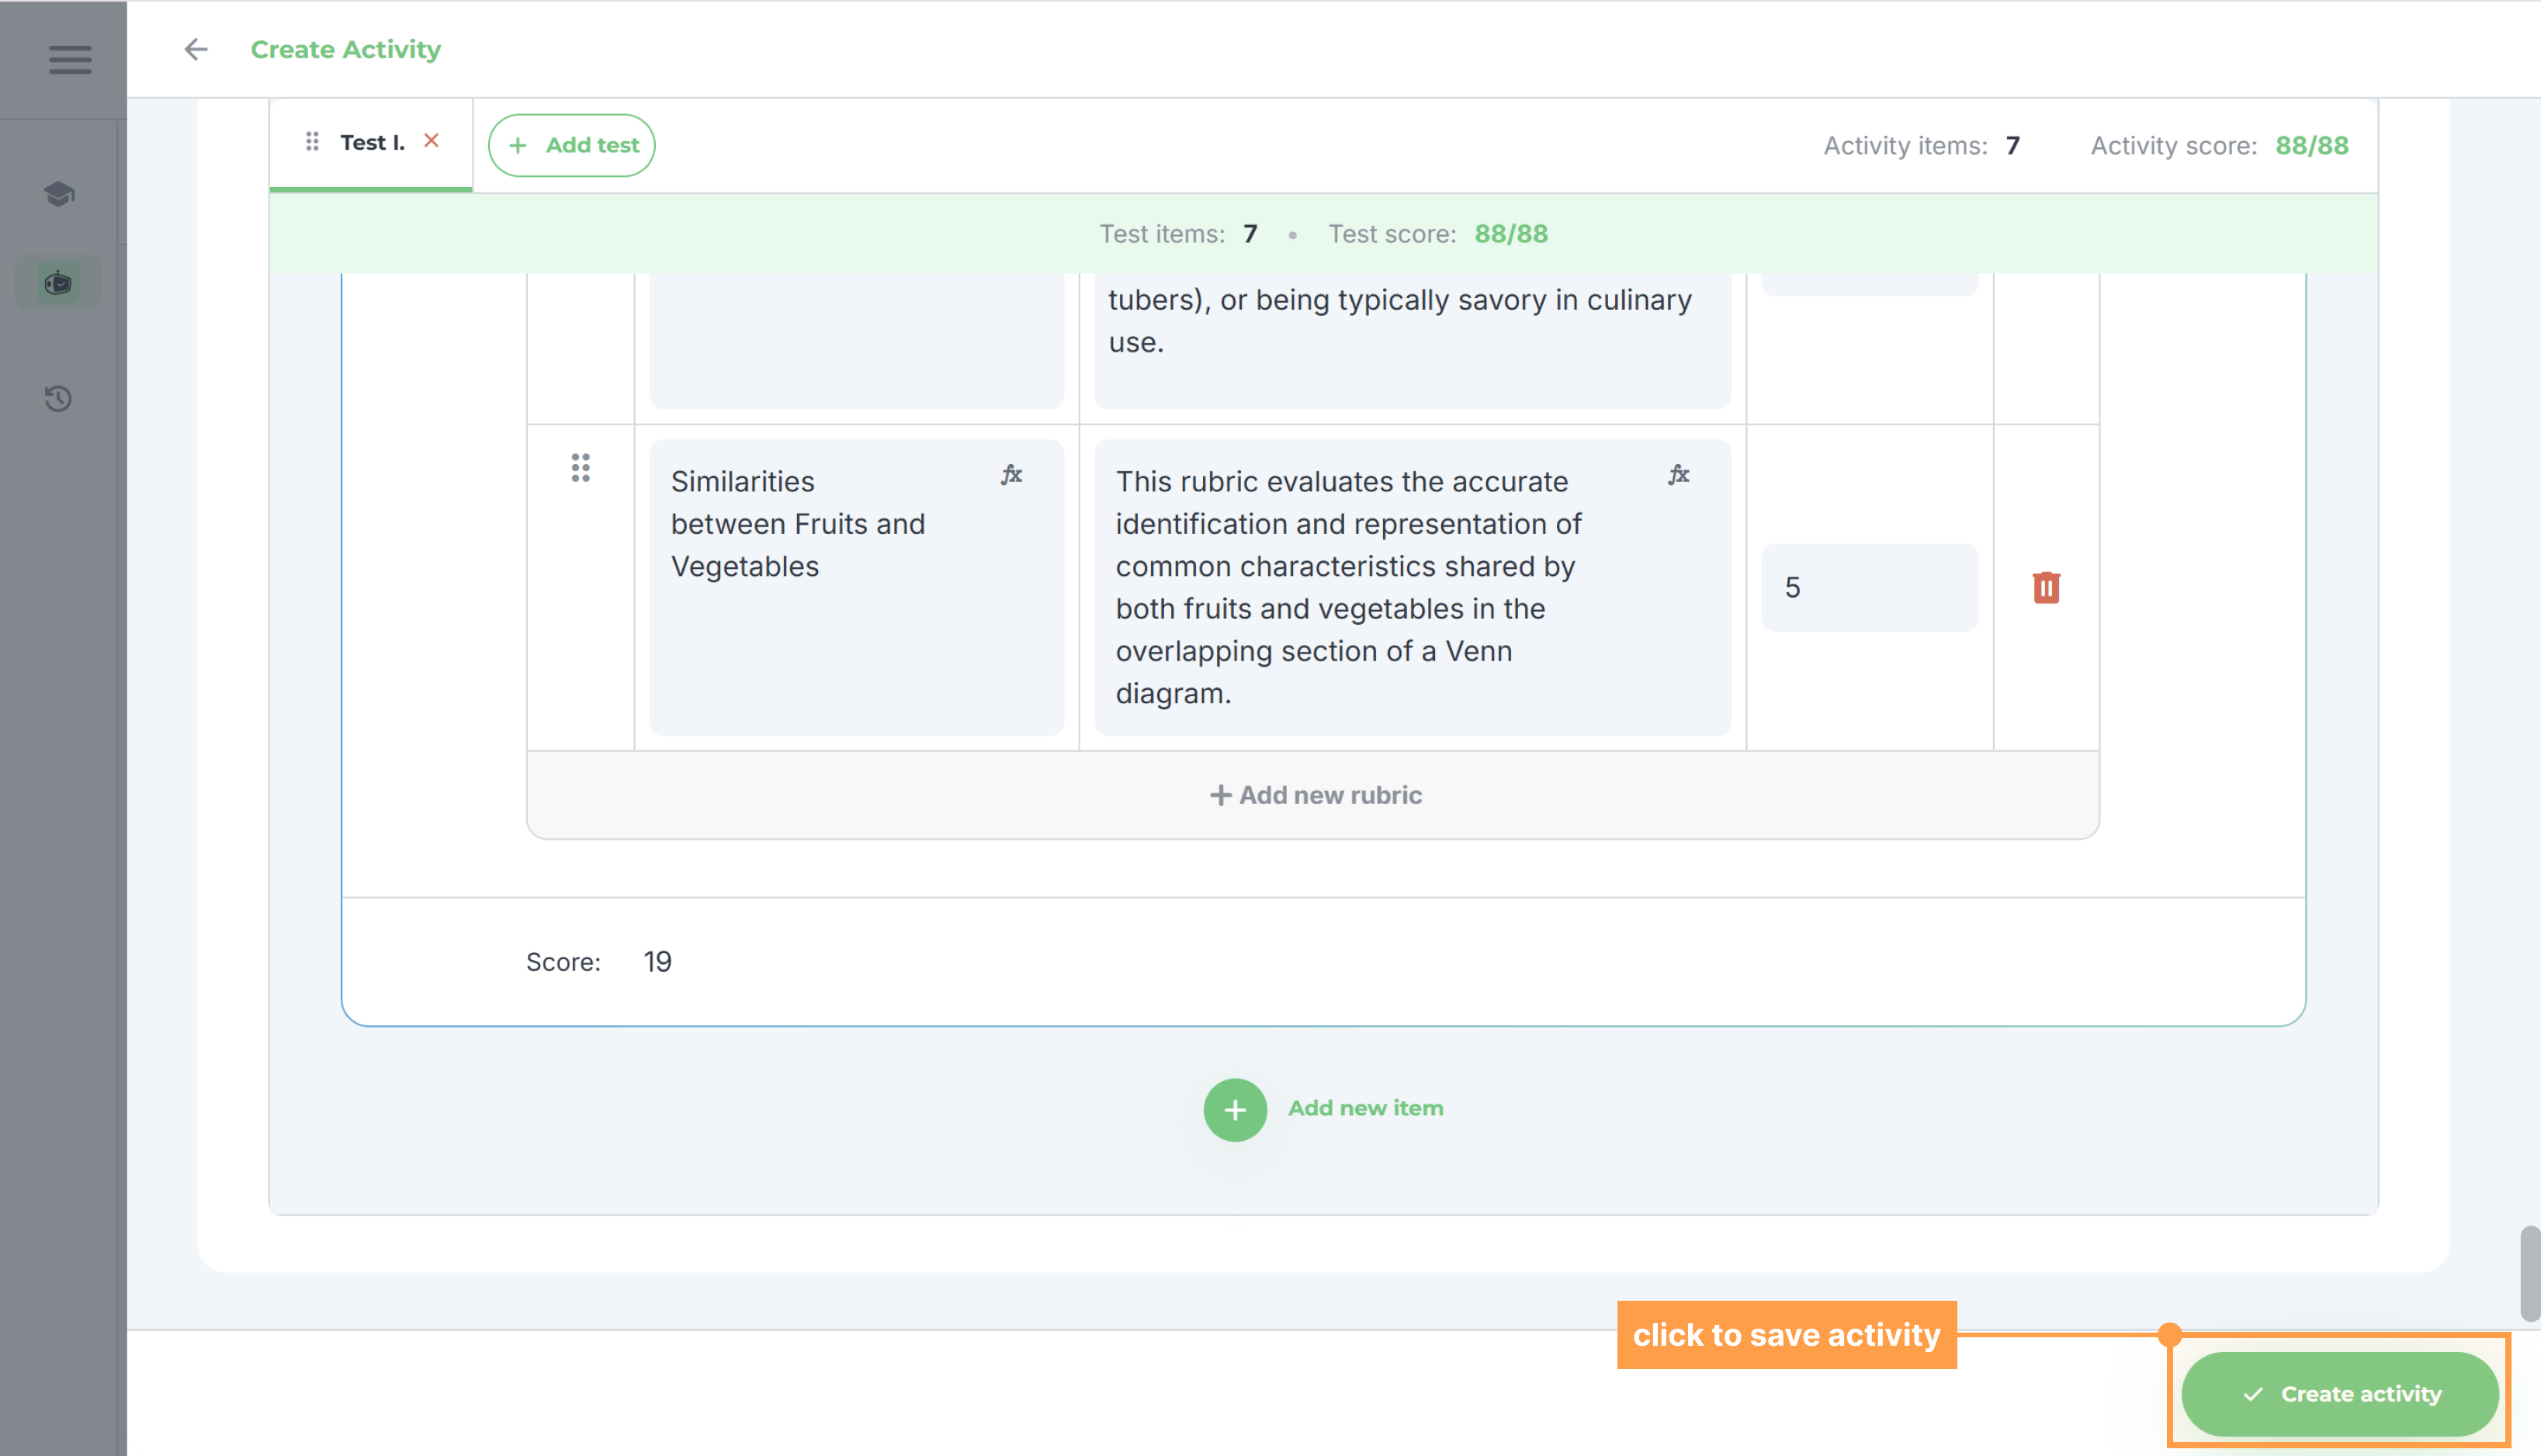
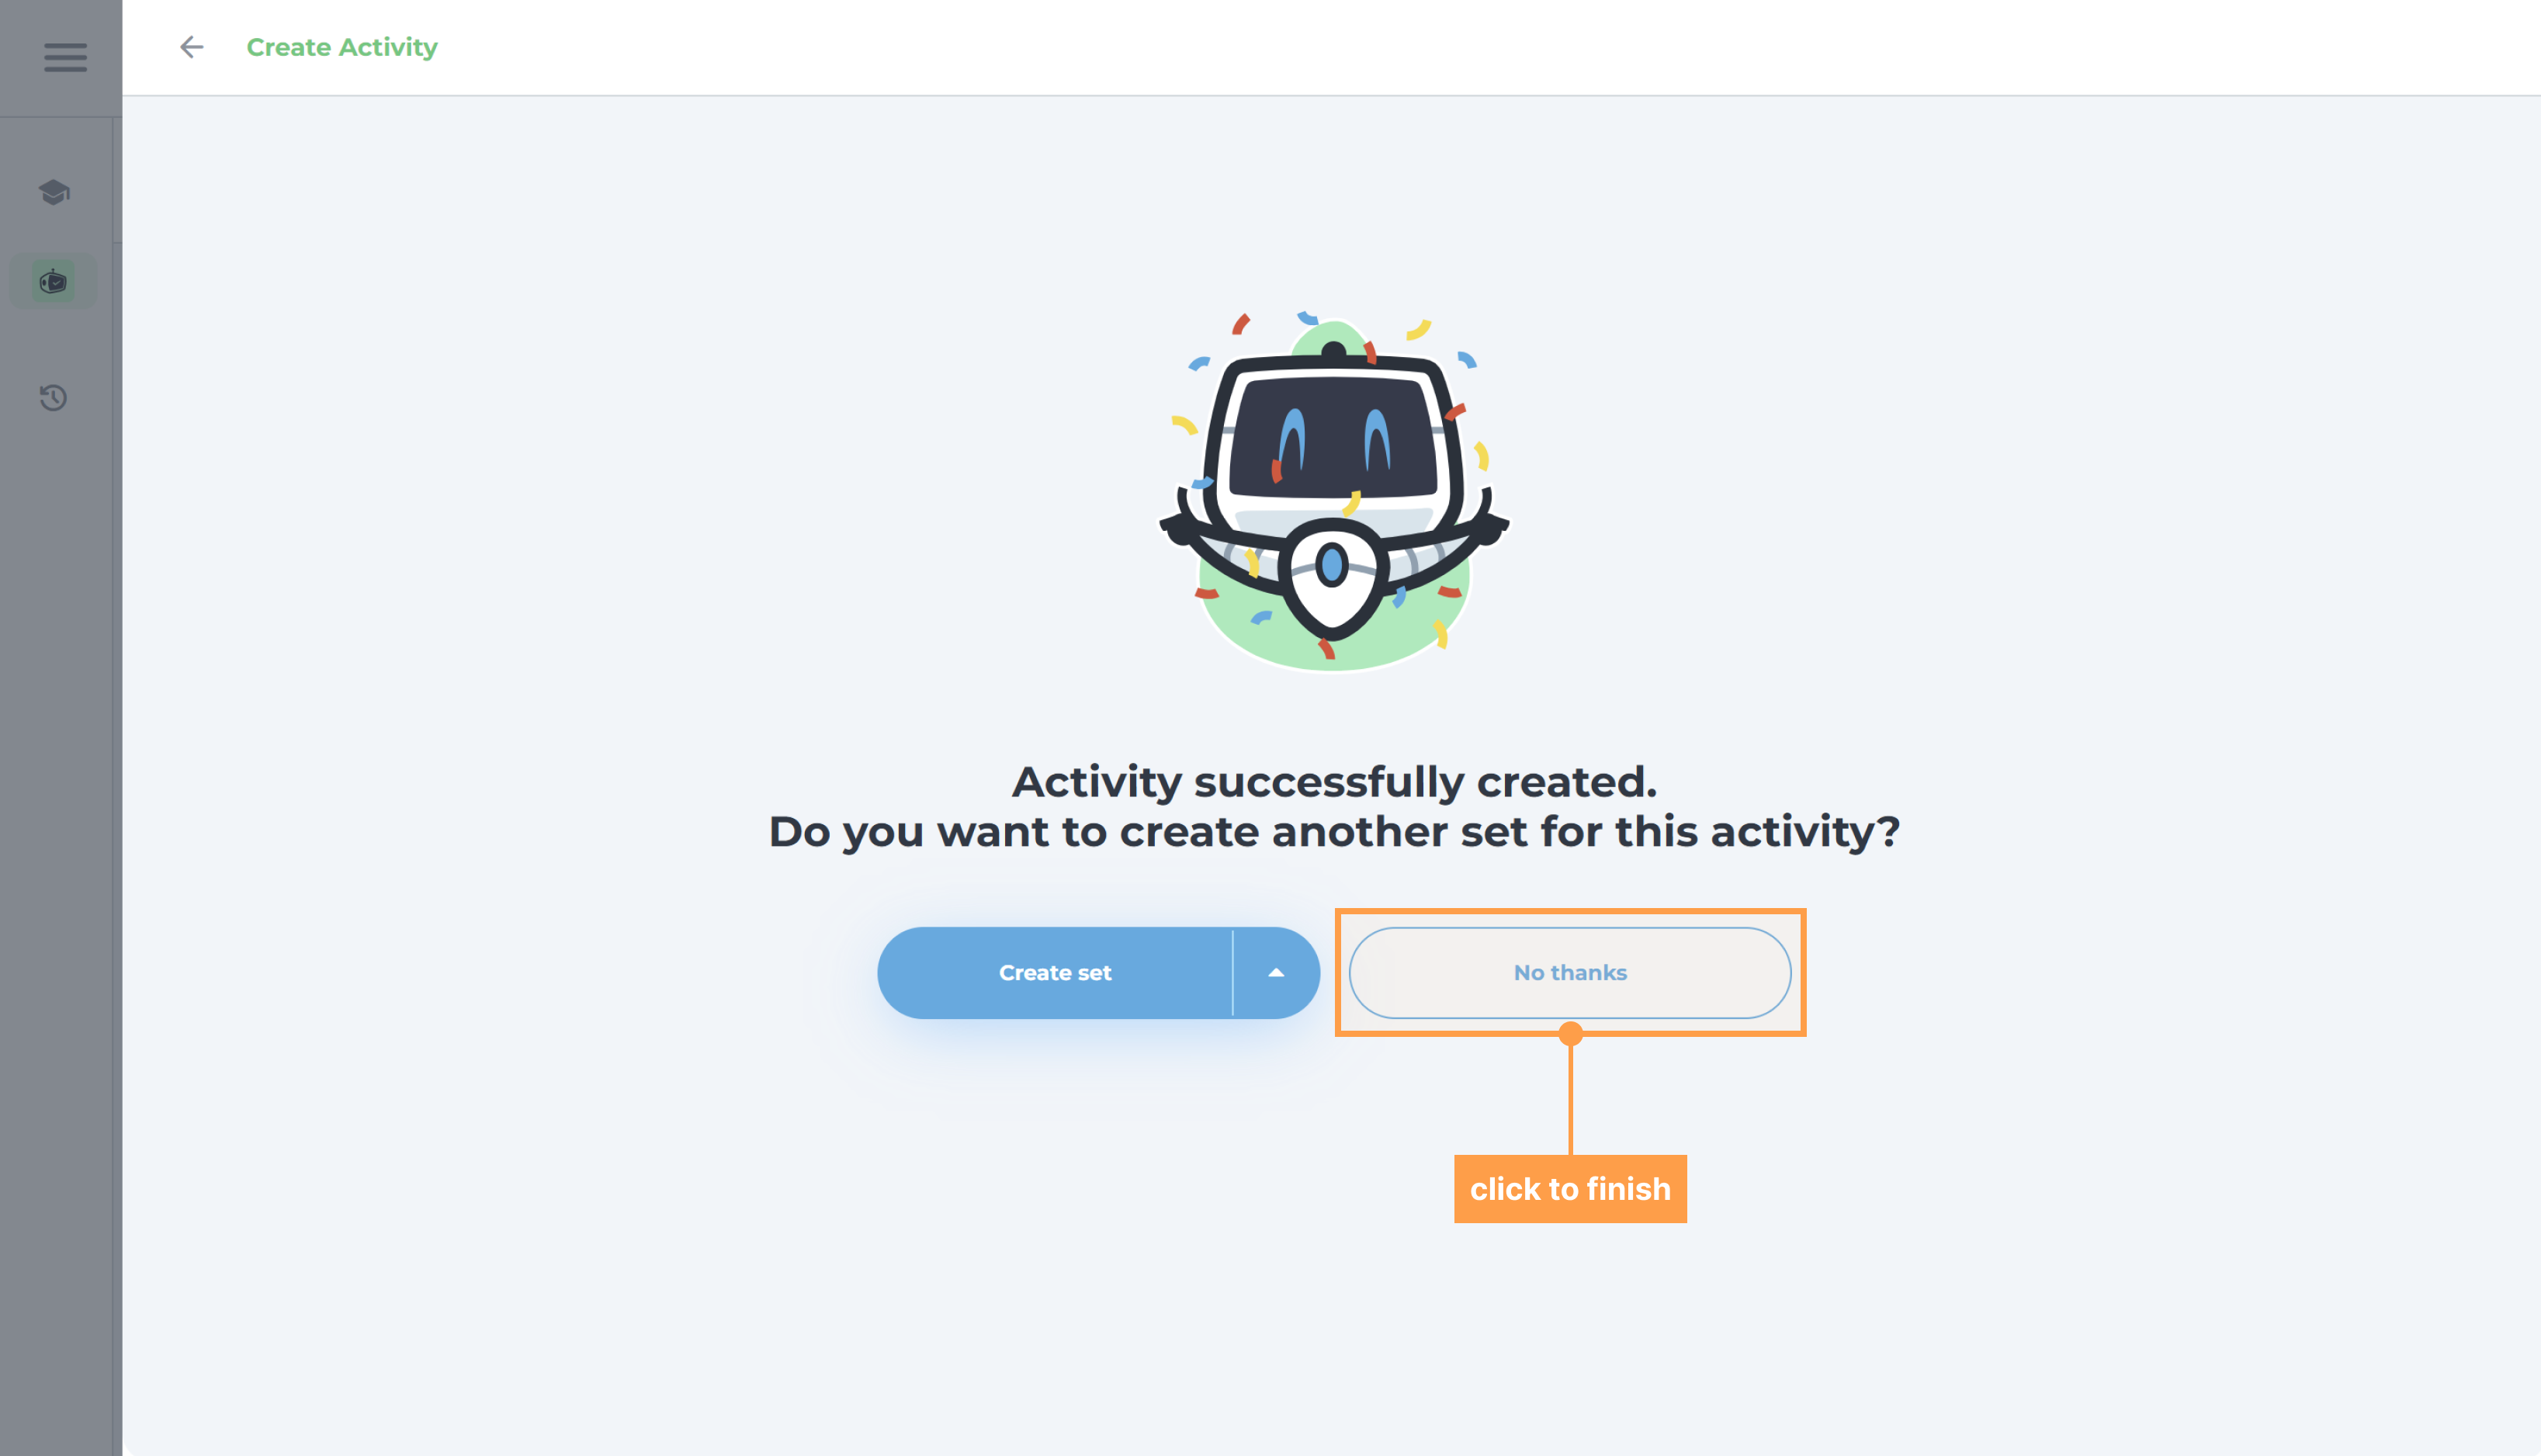
- If you wish to create sets, follow this documentation. Else, click "No thanks".
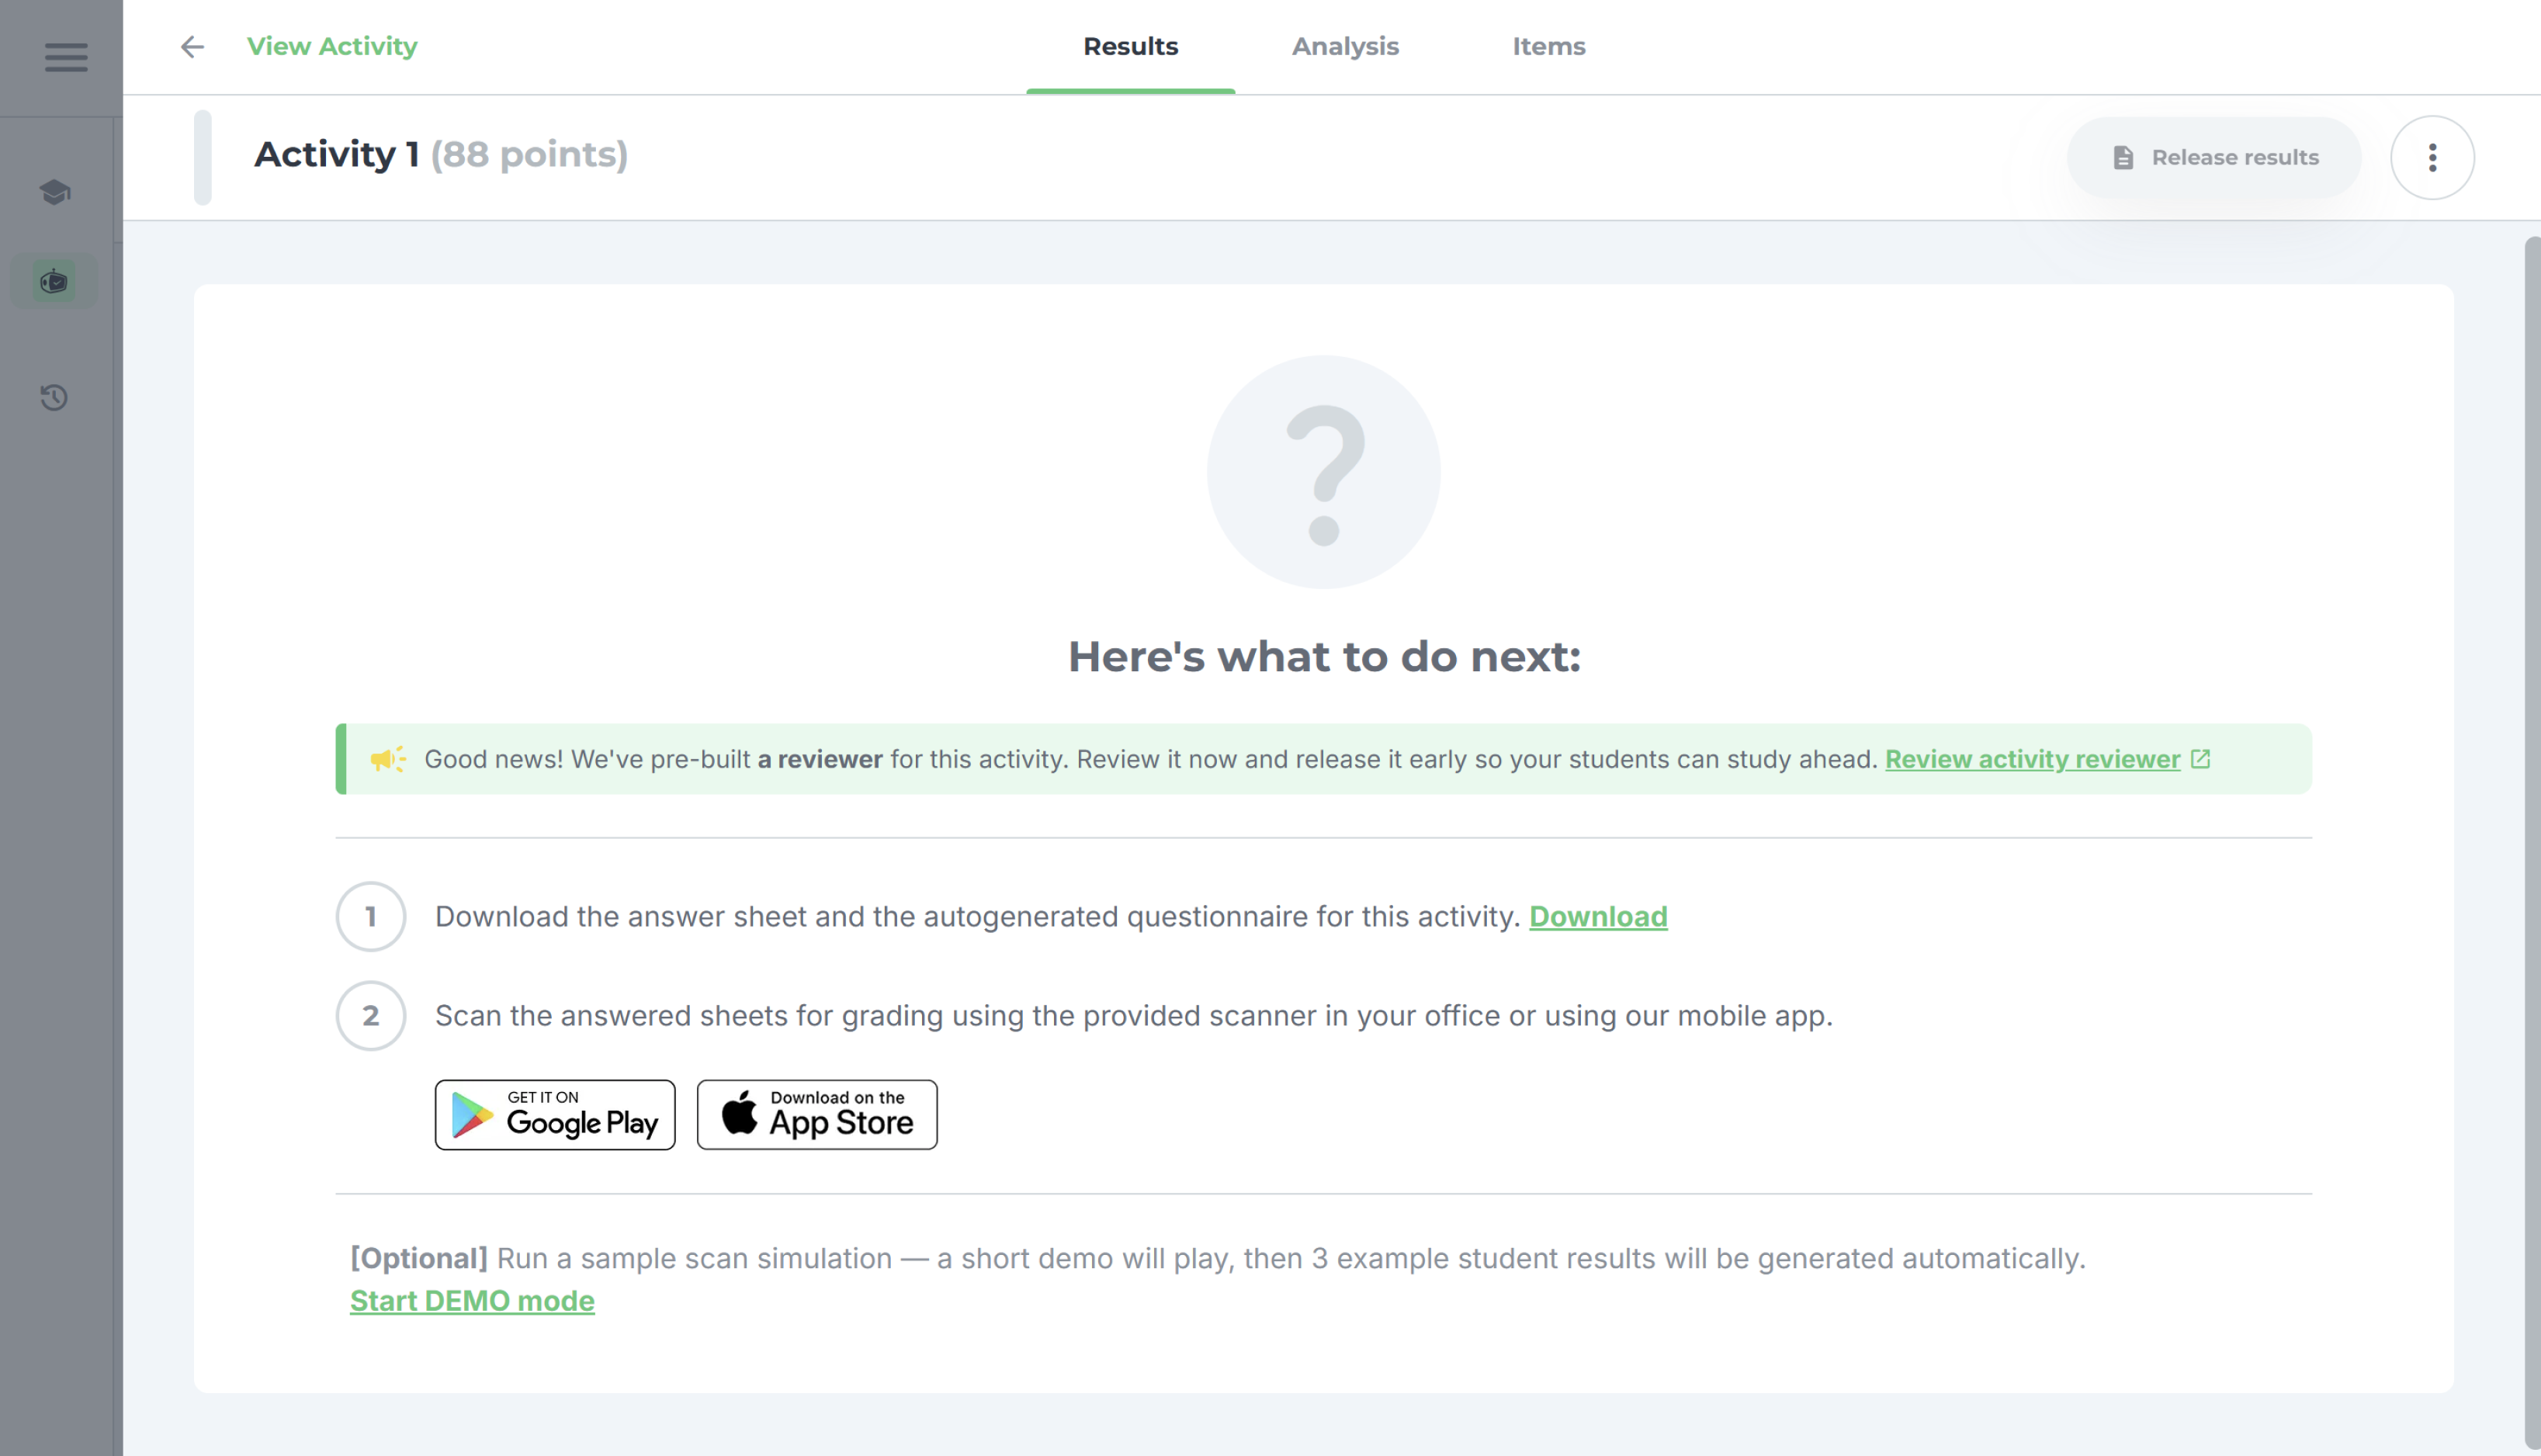
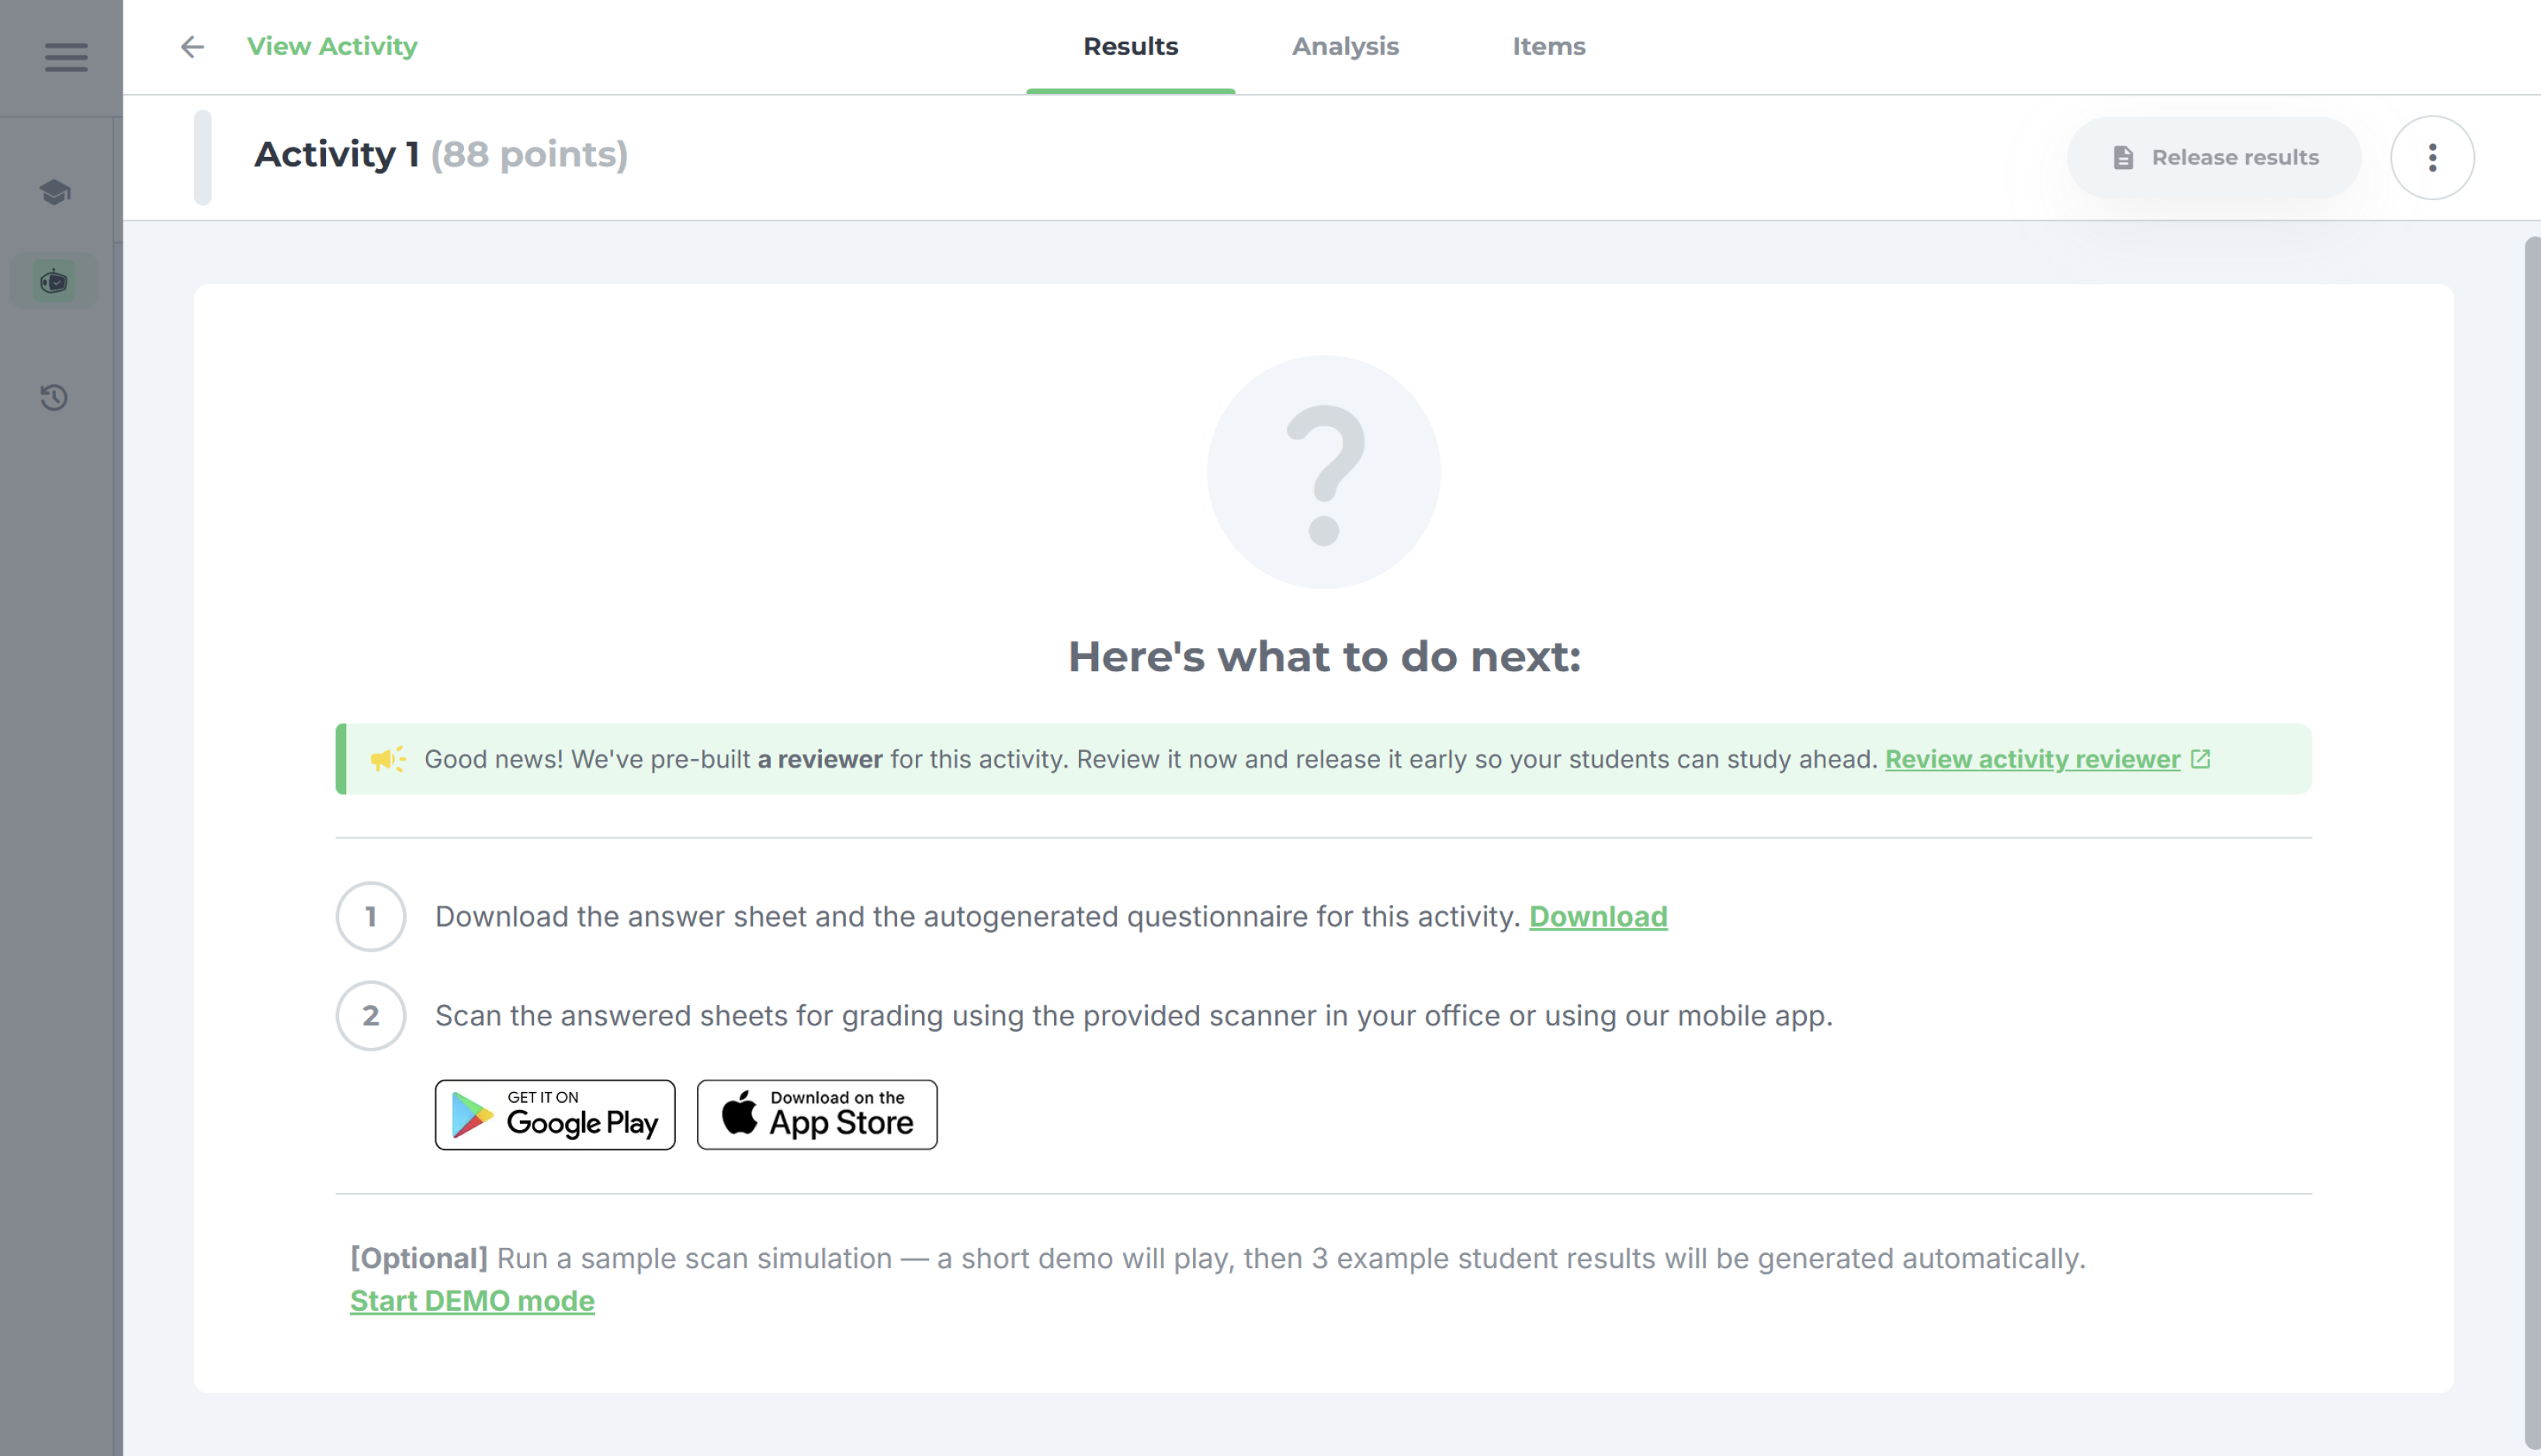
- Finally, you will be redirected to view the activity you just created.
b. Item Group option
- Add a test by clicking the + Add test text button, then select "Add new test".
- Under Test I, click on the + Add new item text button to add an item.
Note: You can add as many test in yor activity as you want by clicking on the + Add test text button.
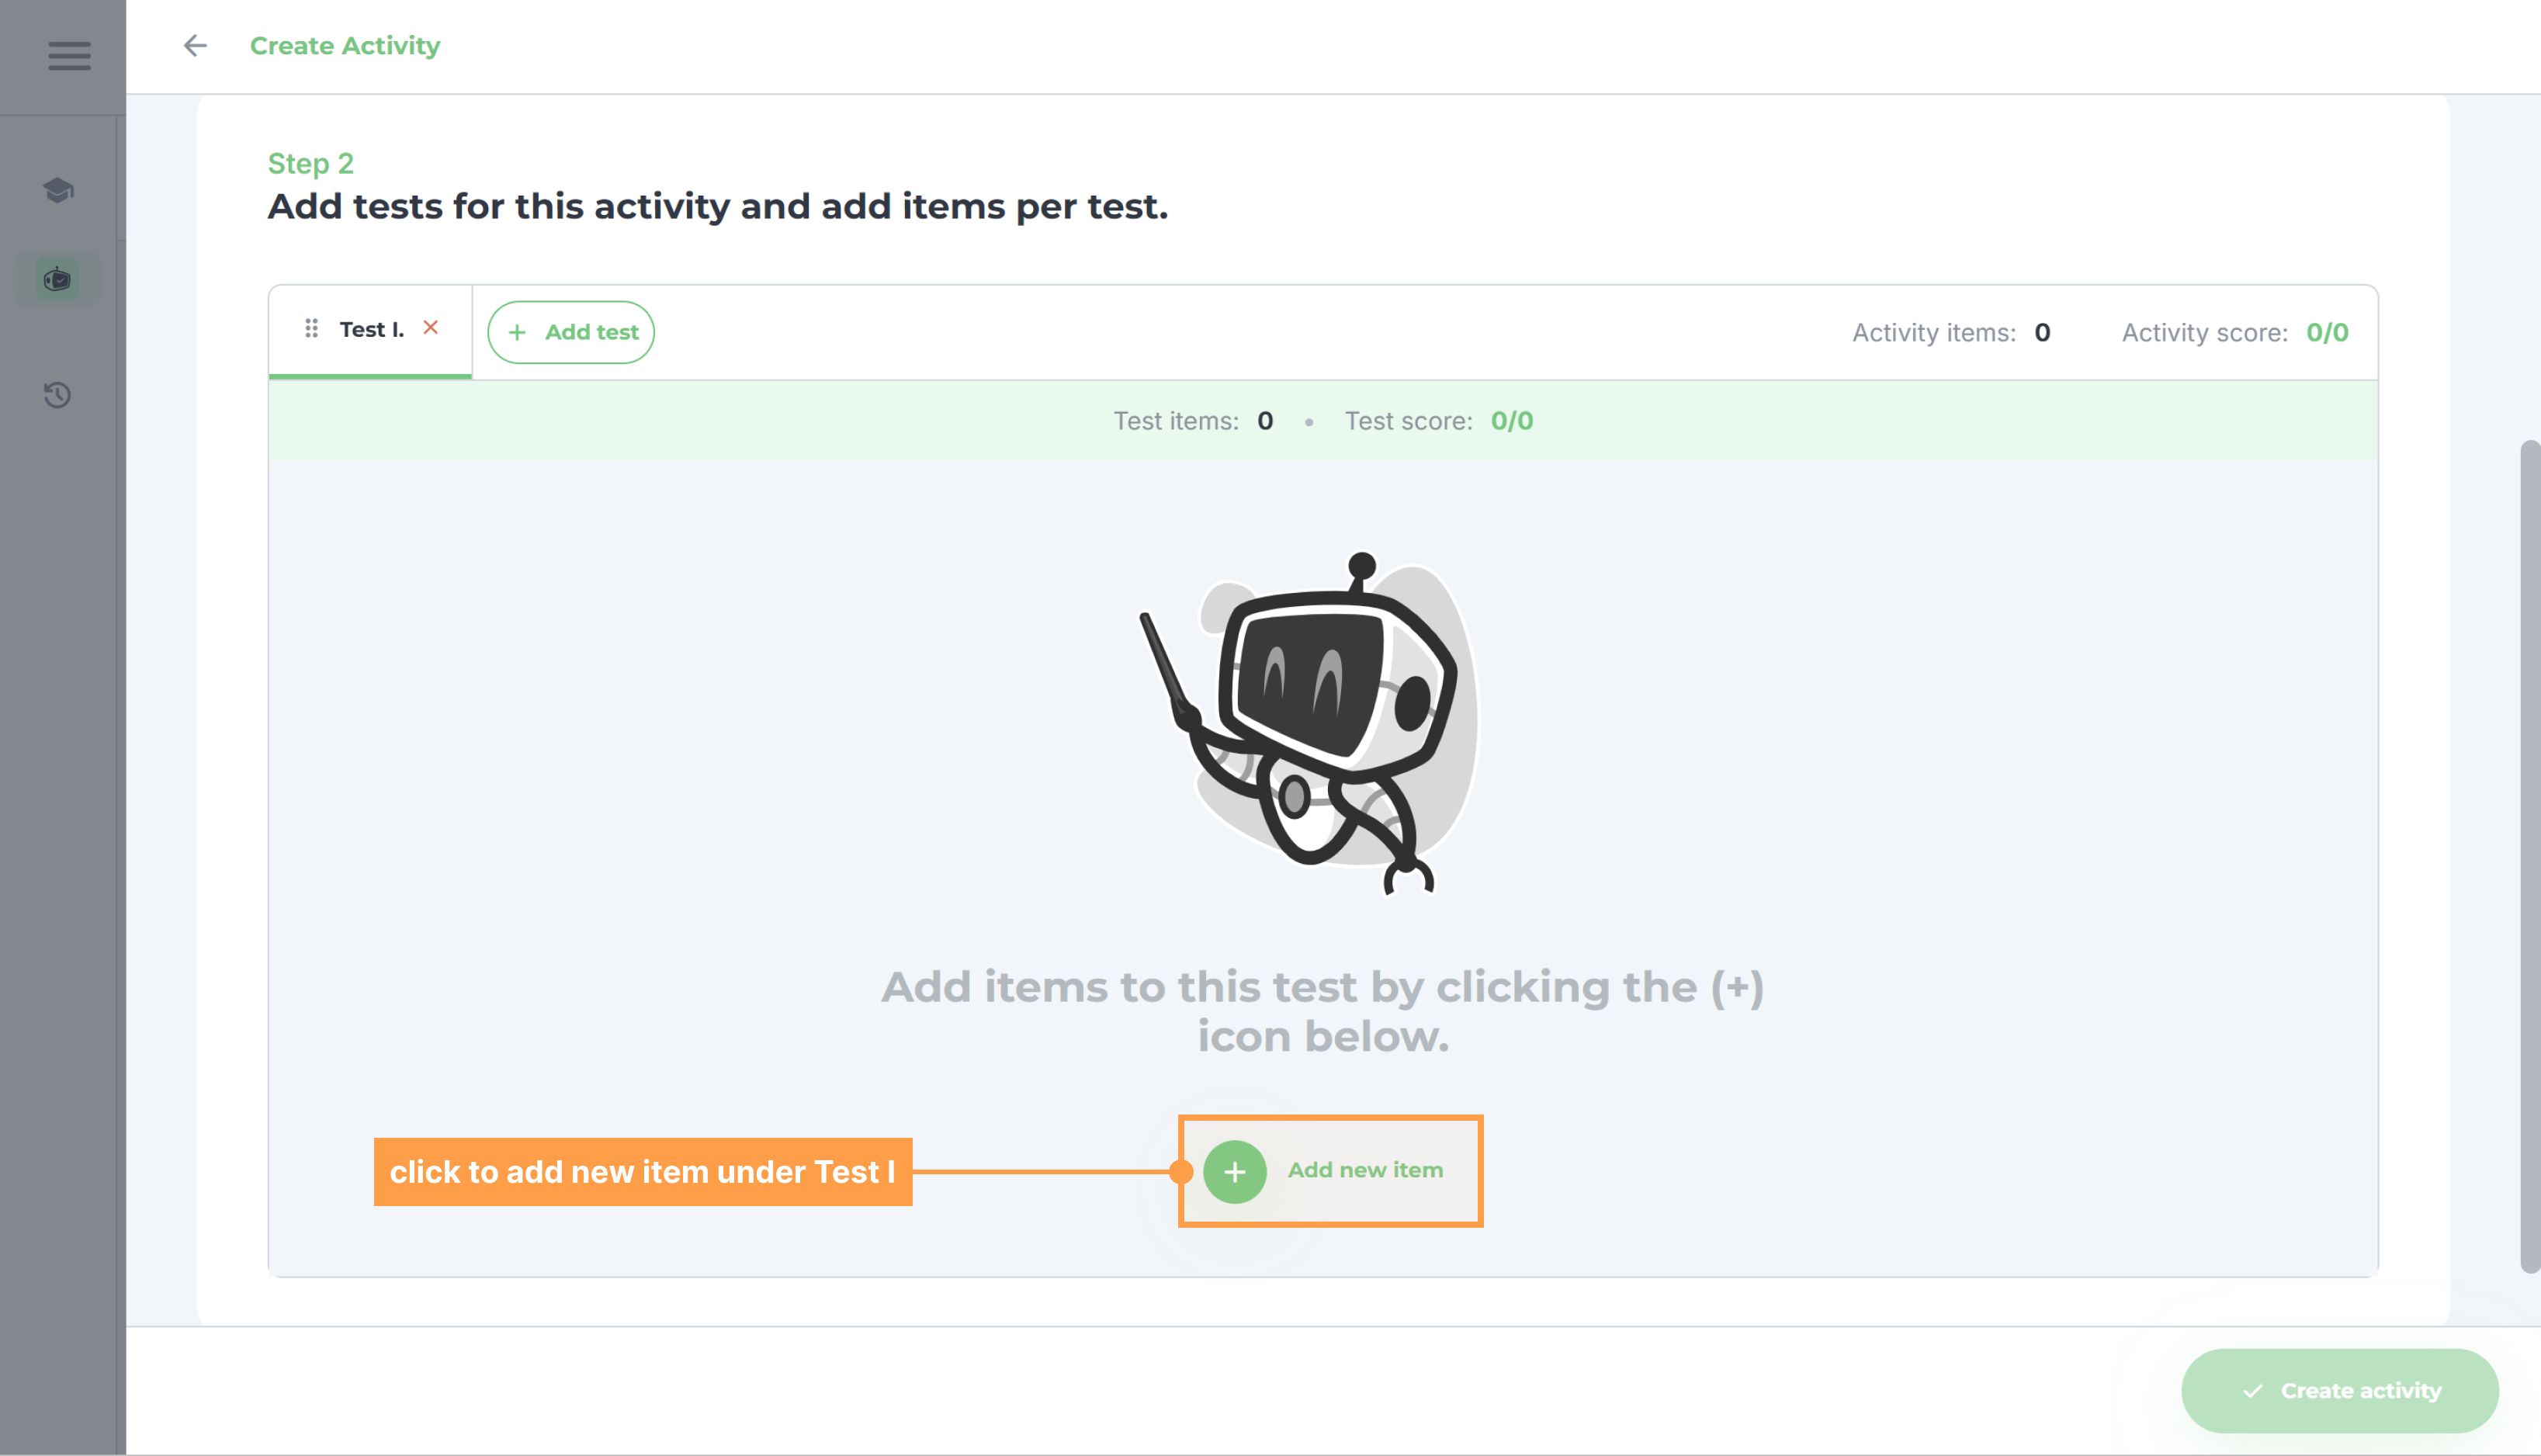
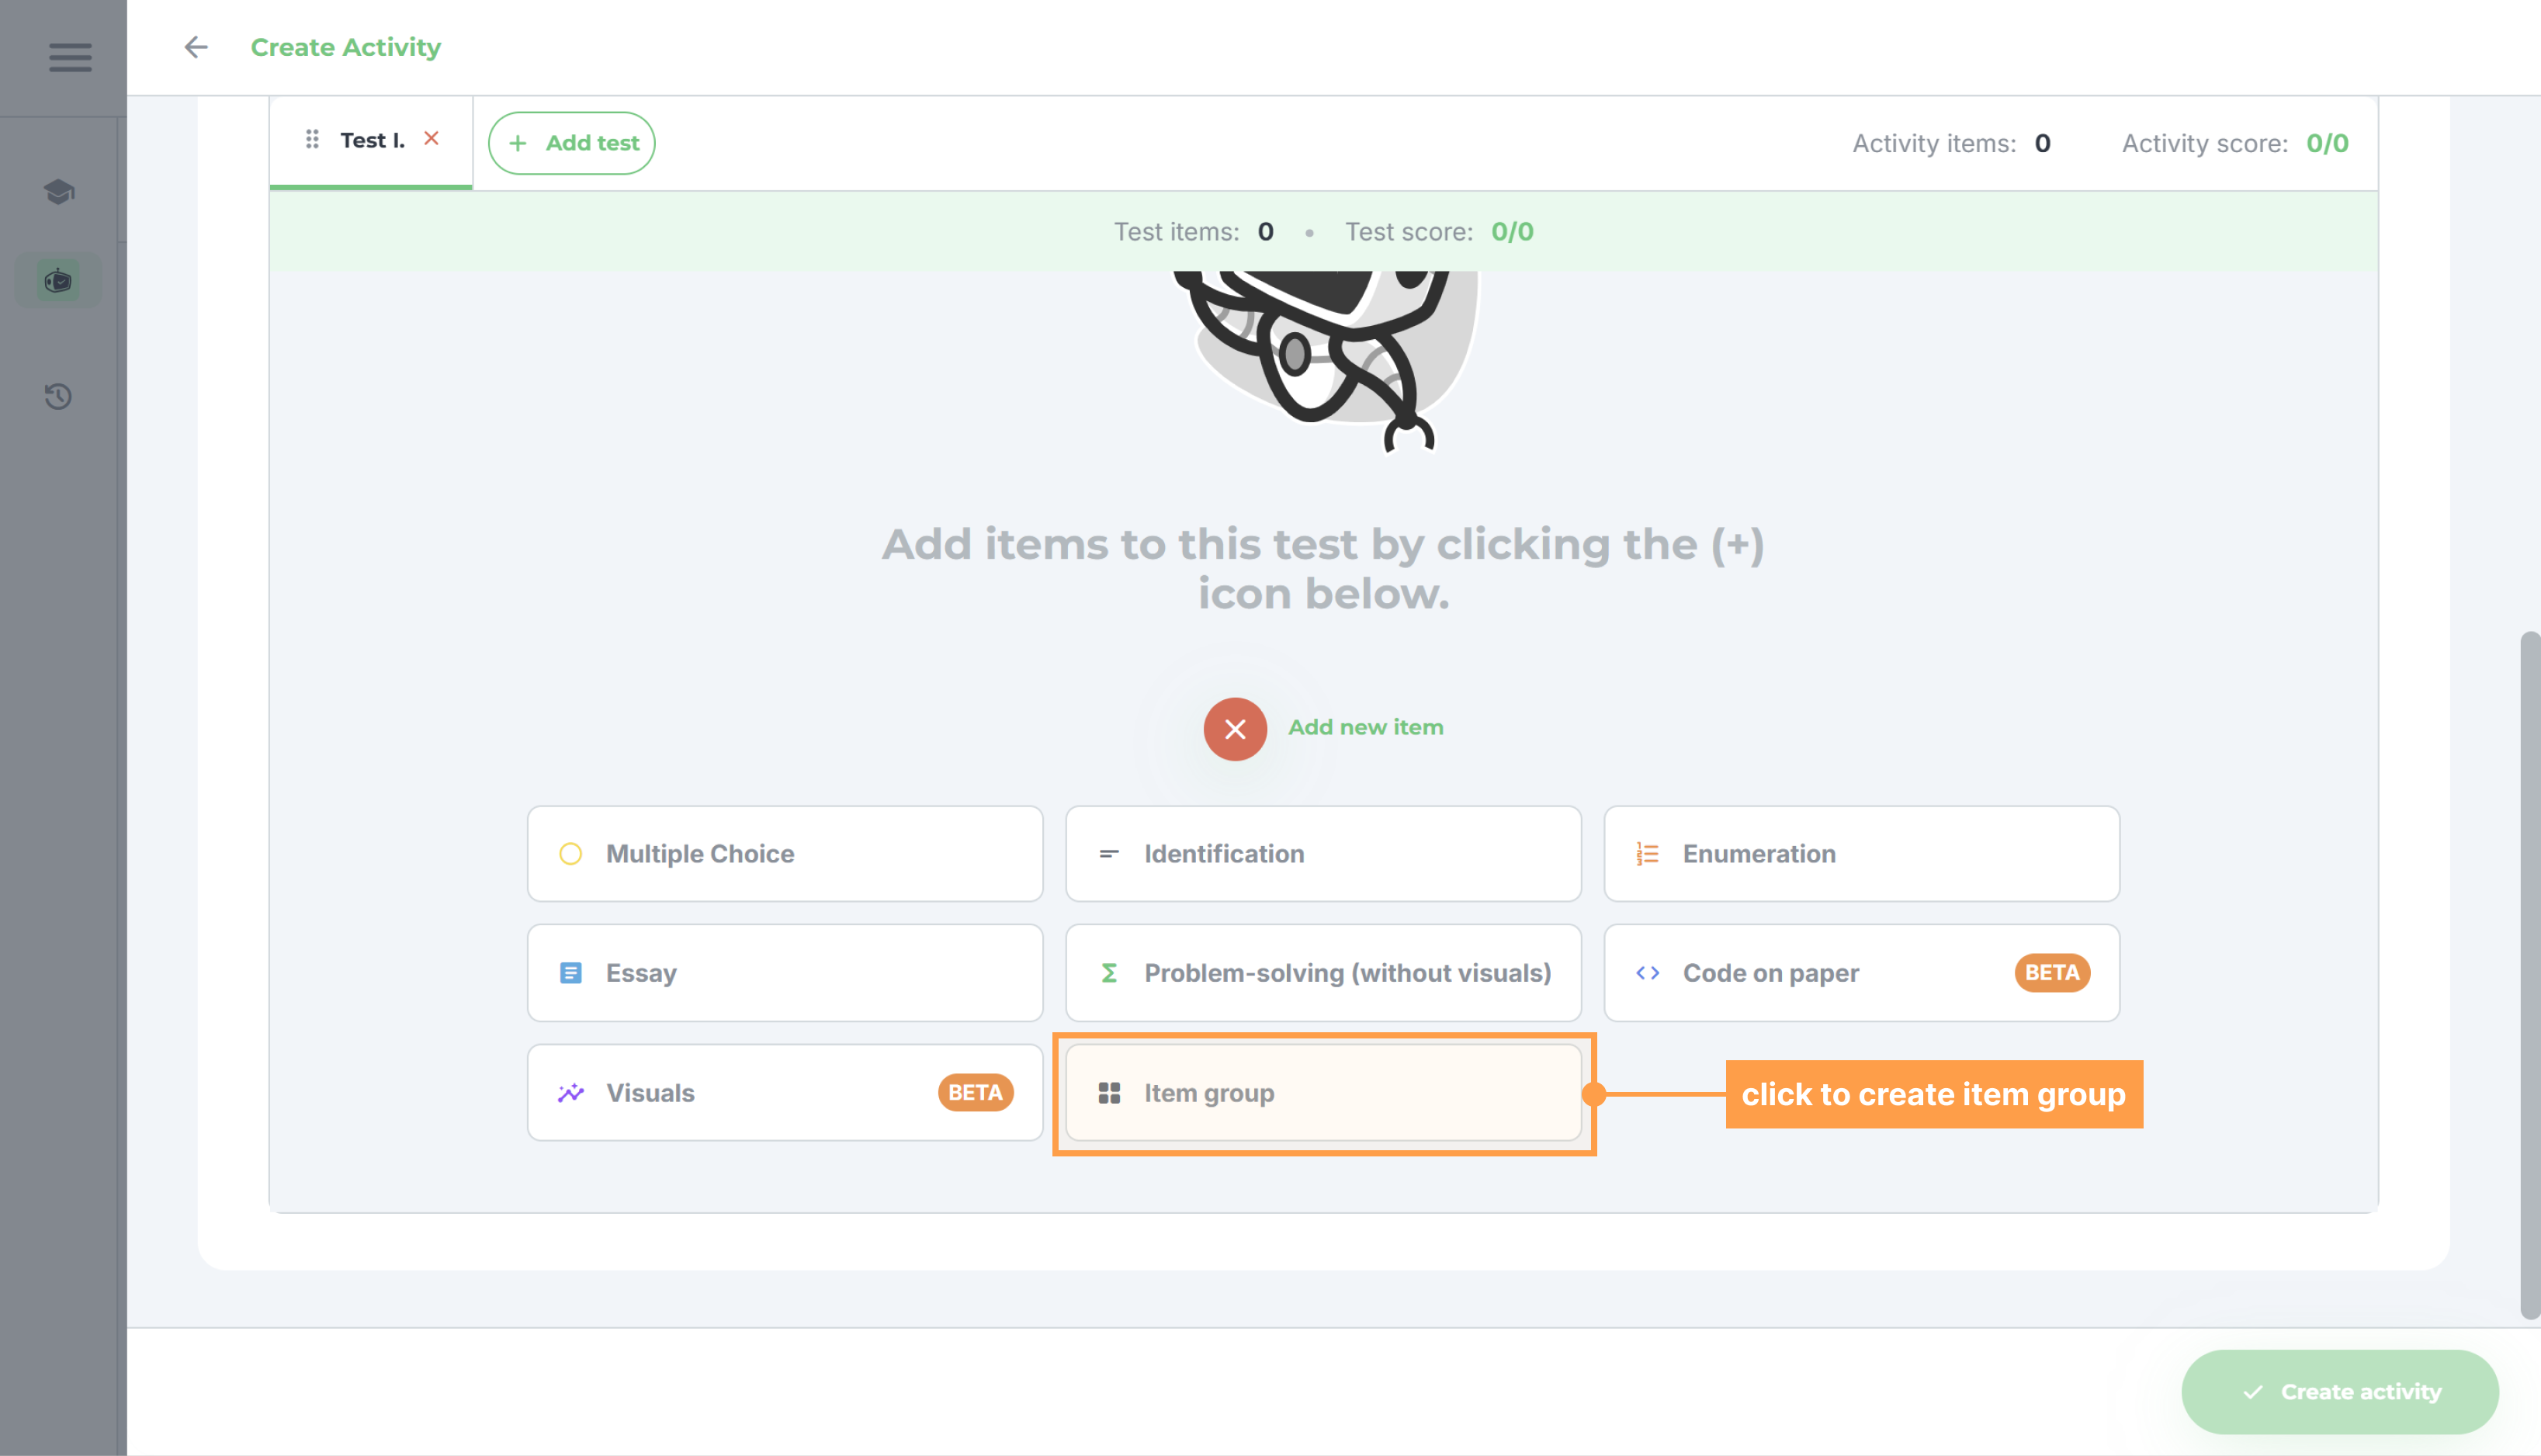
- Select the item group option.
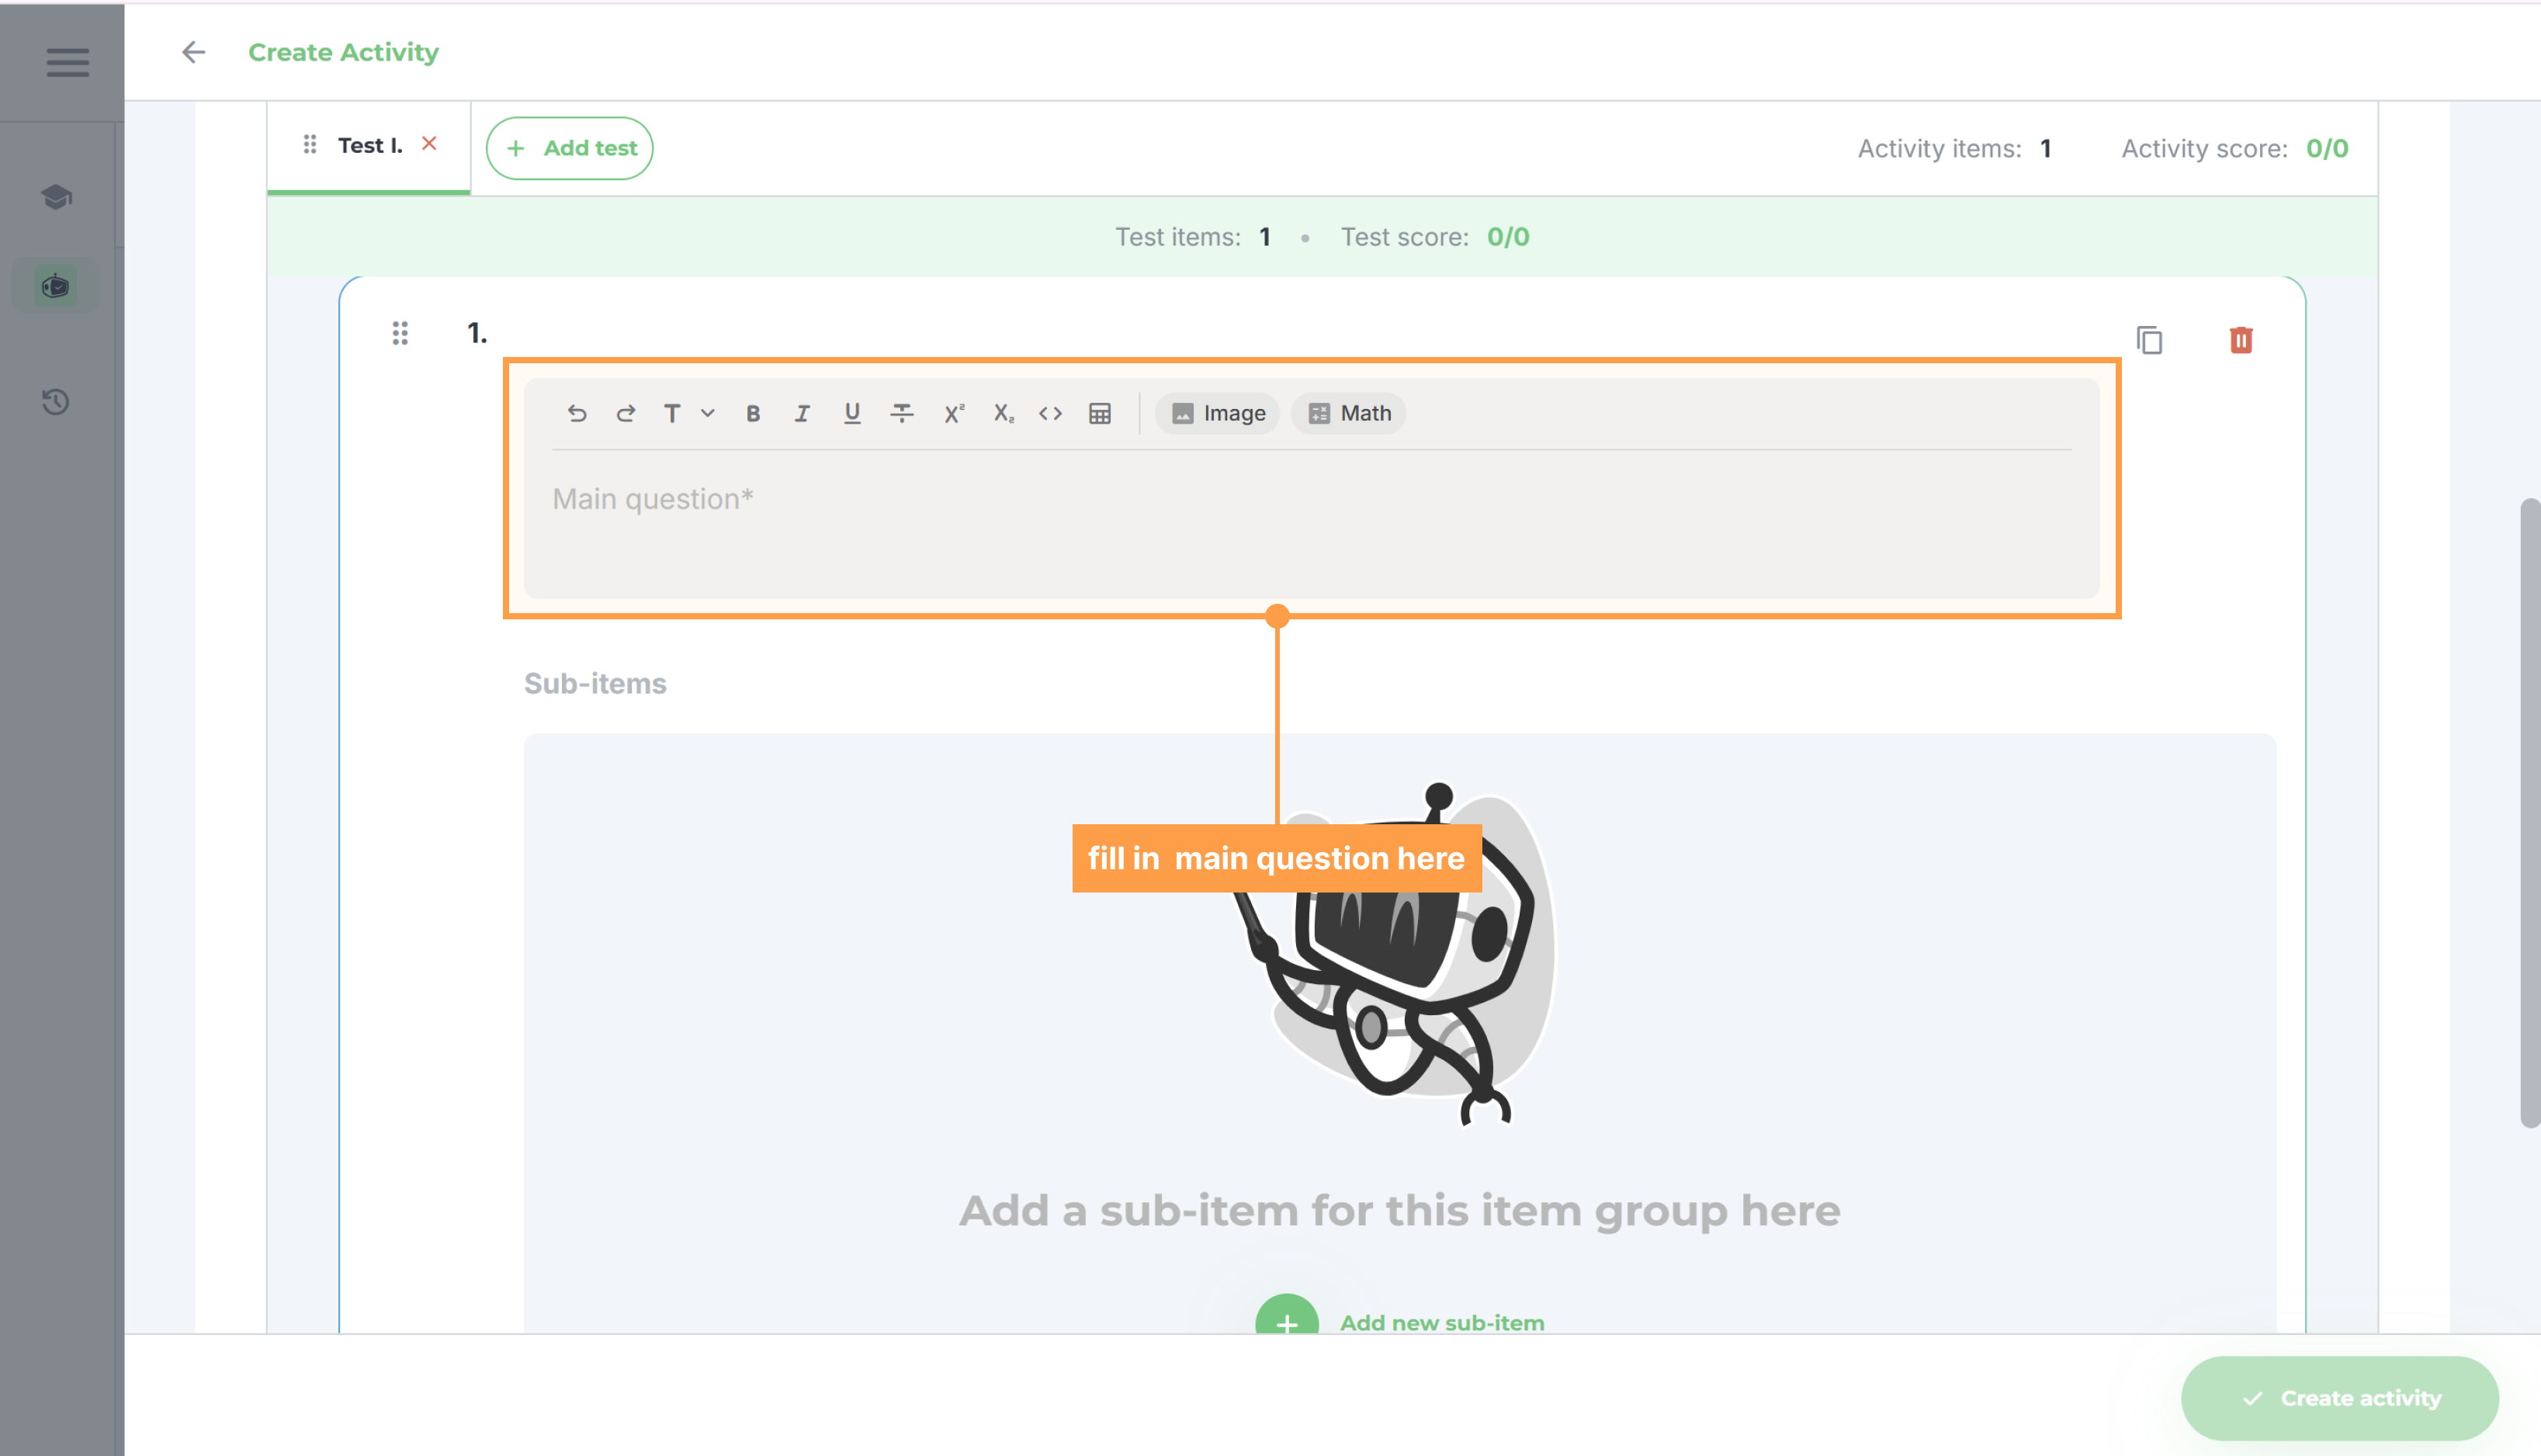
- Then, fill in the Main question of the group.
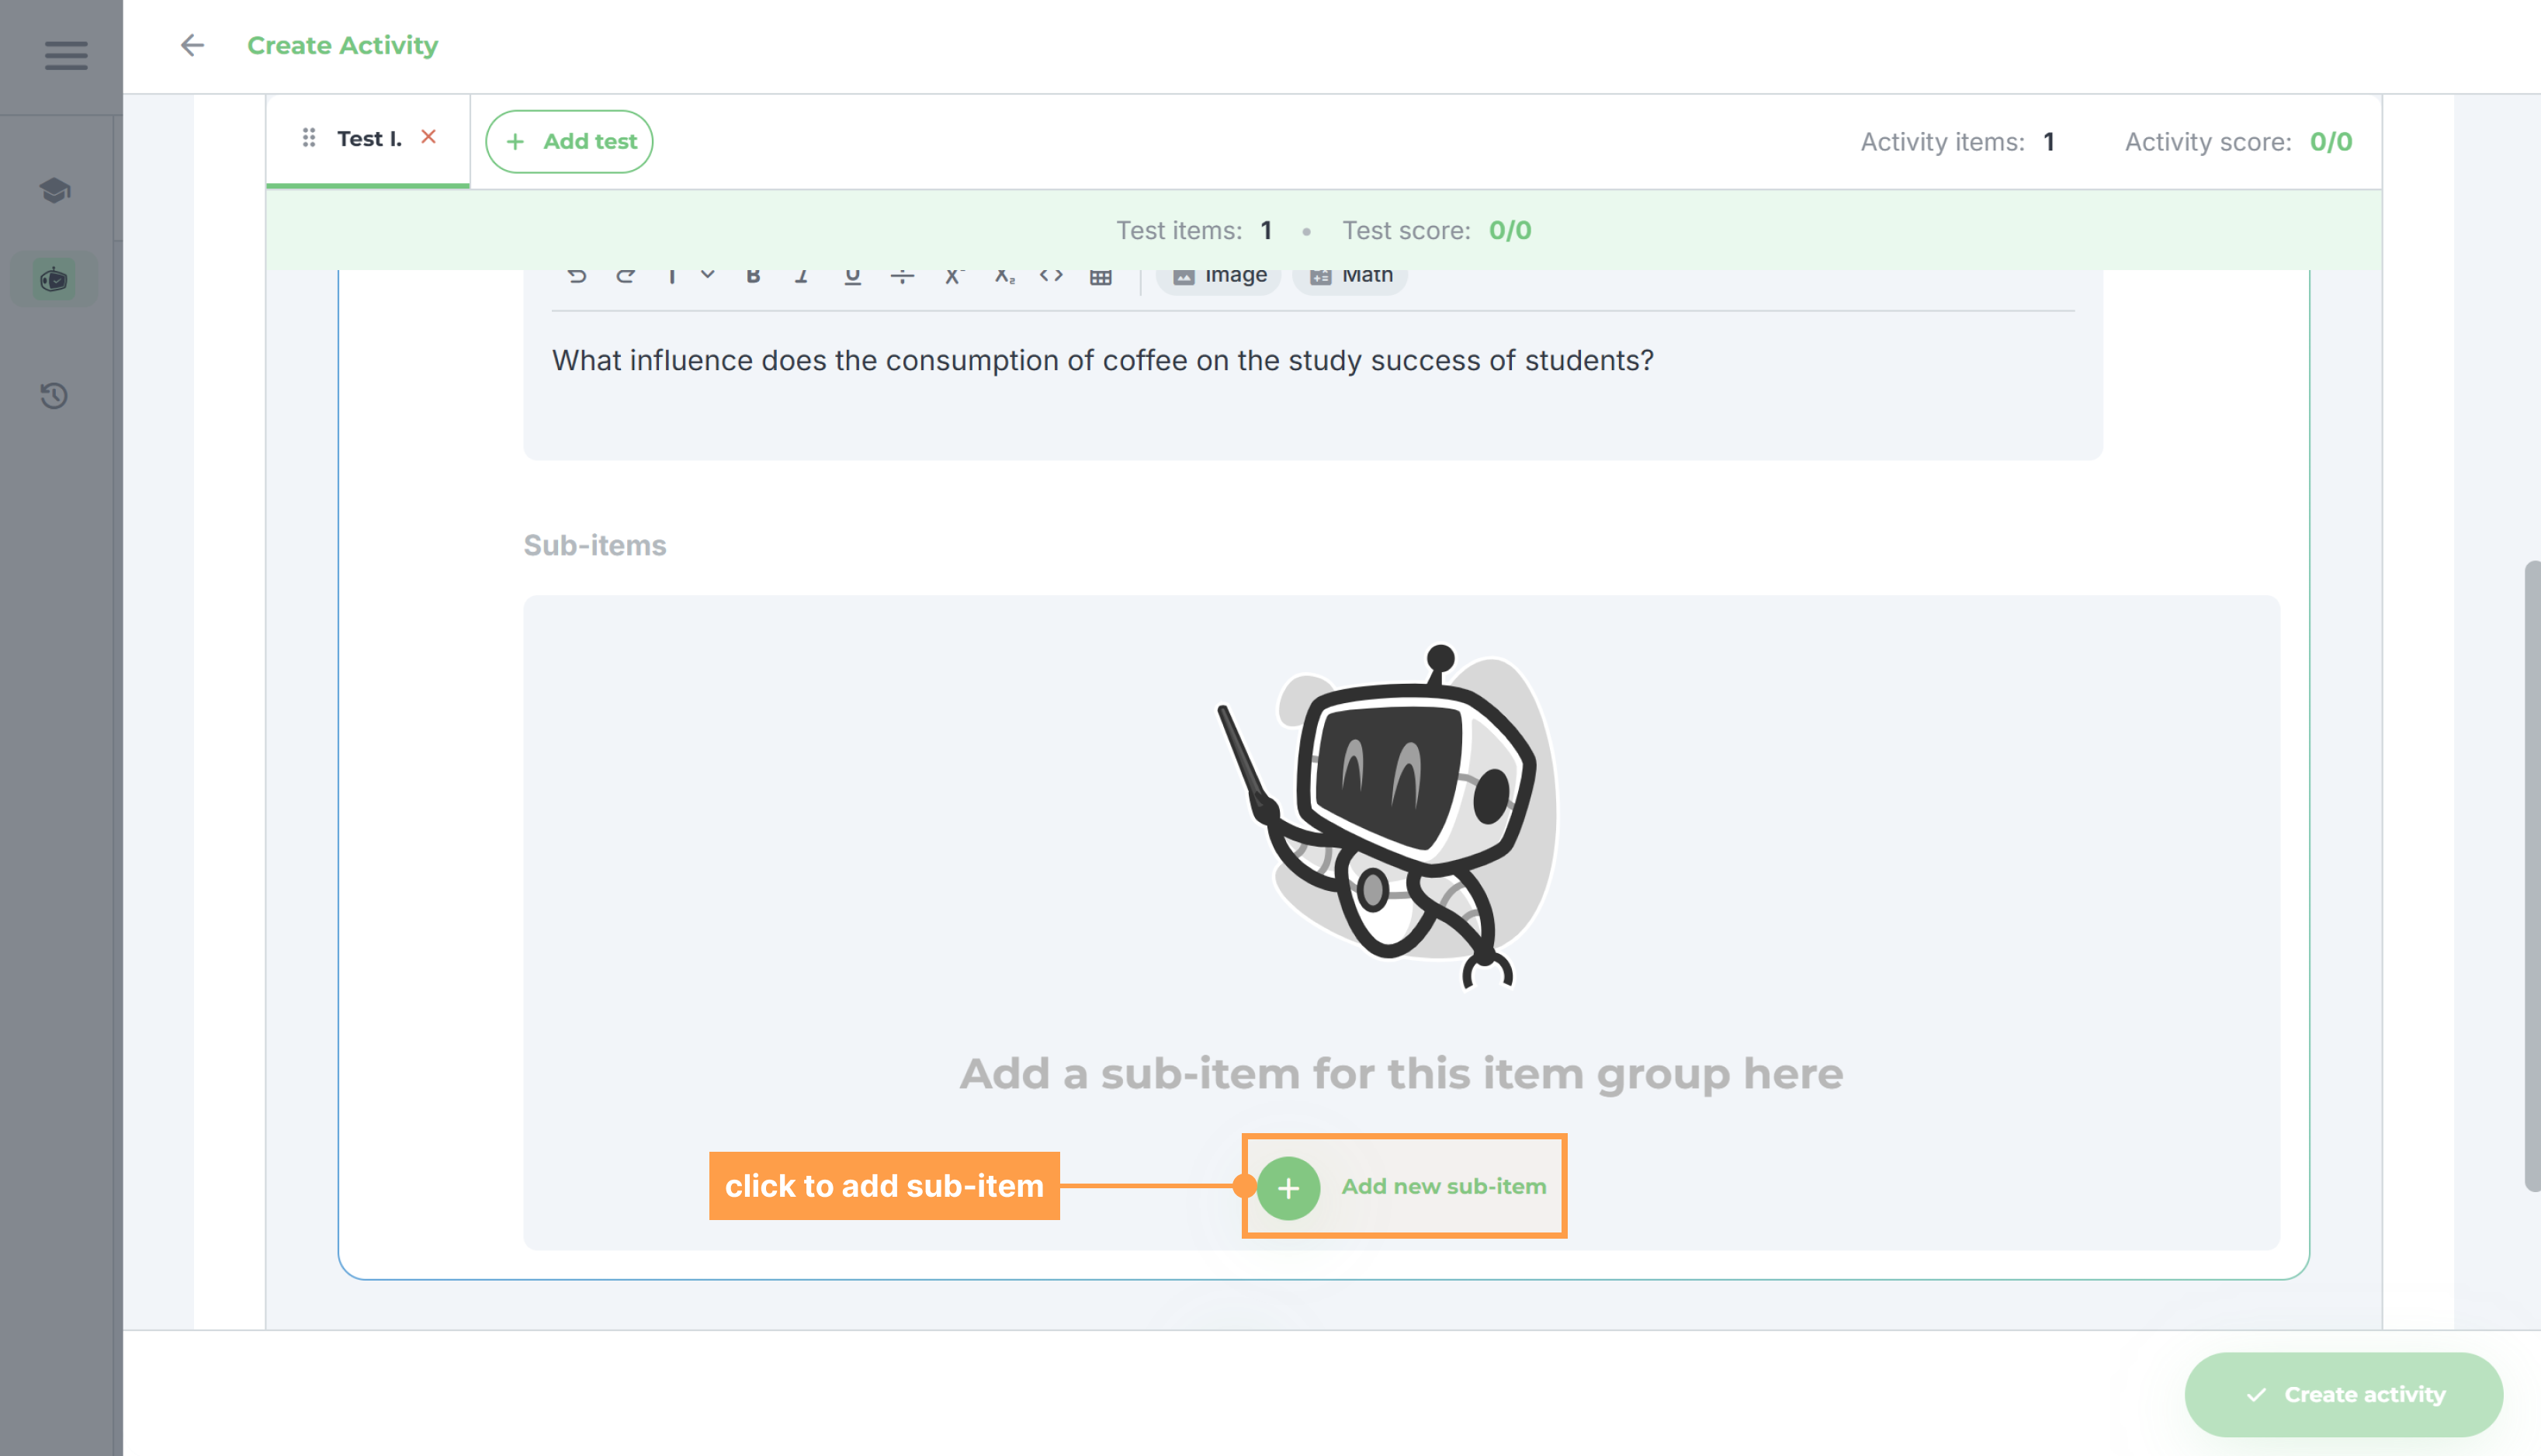
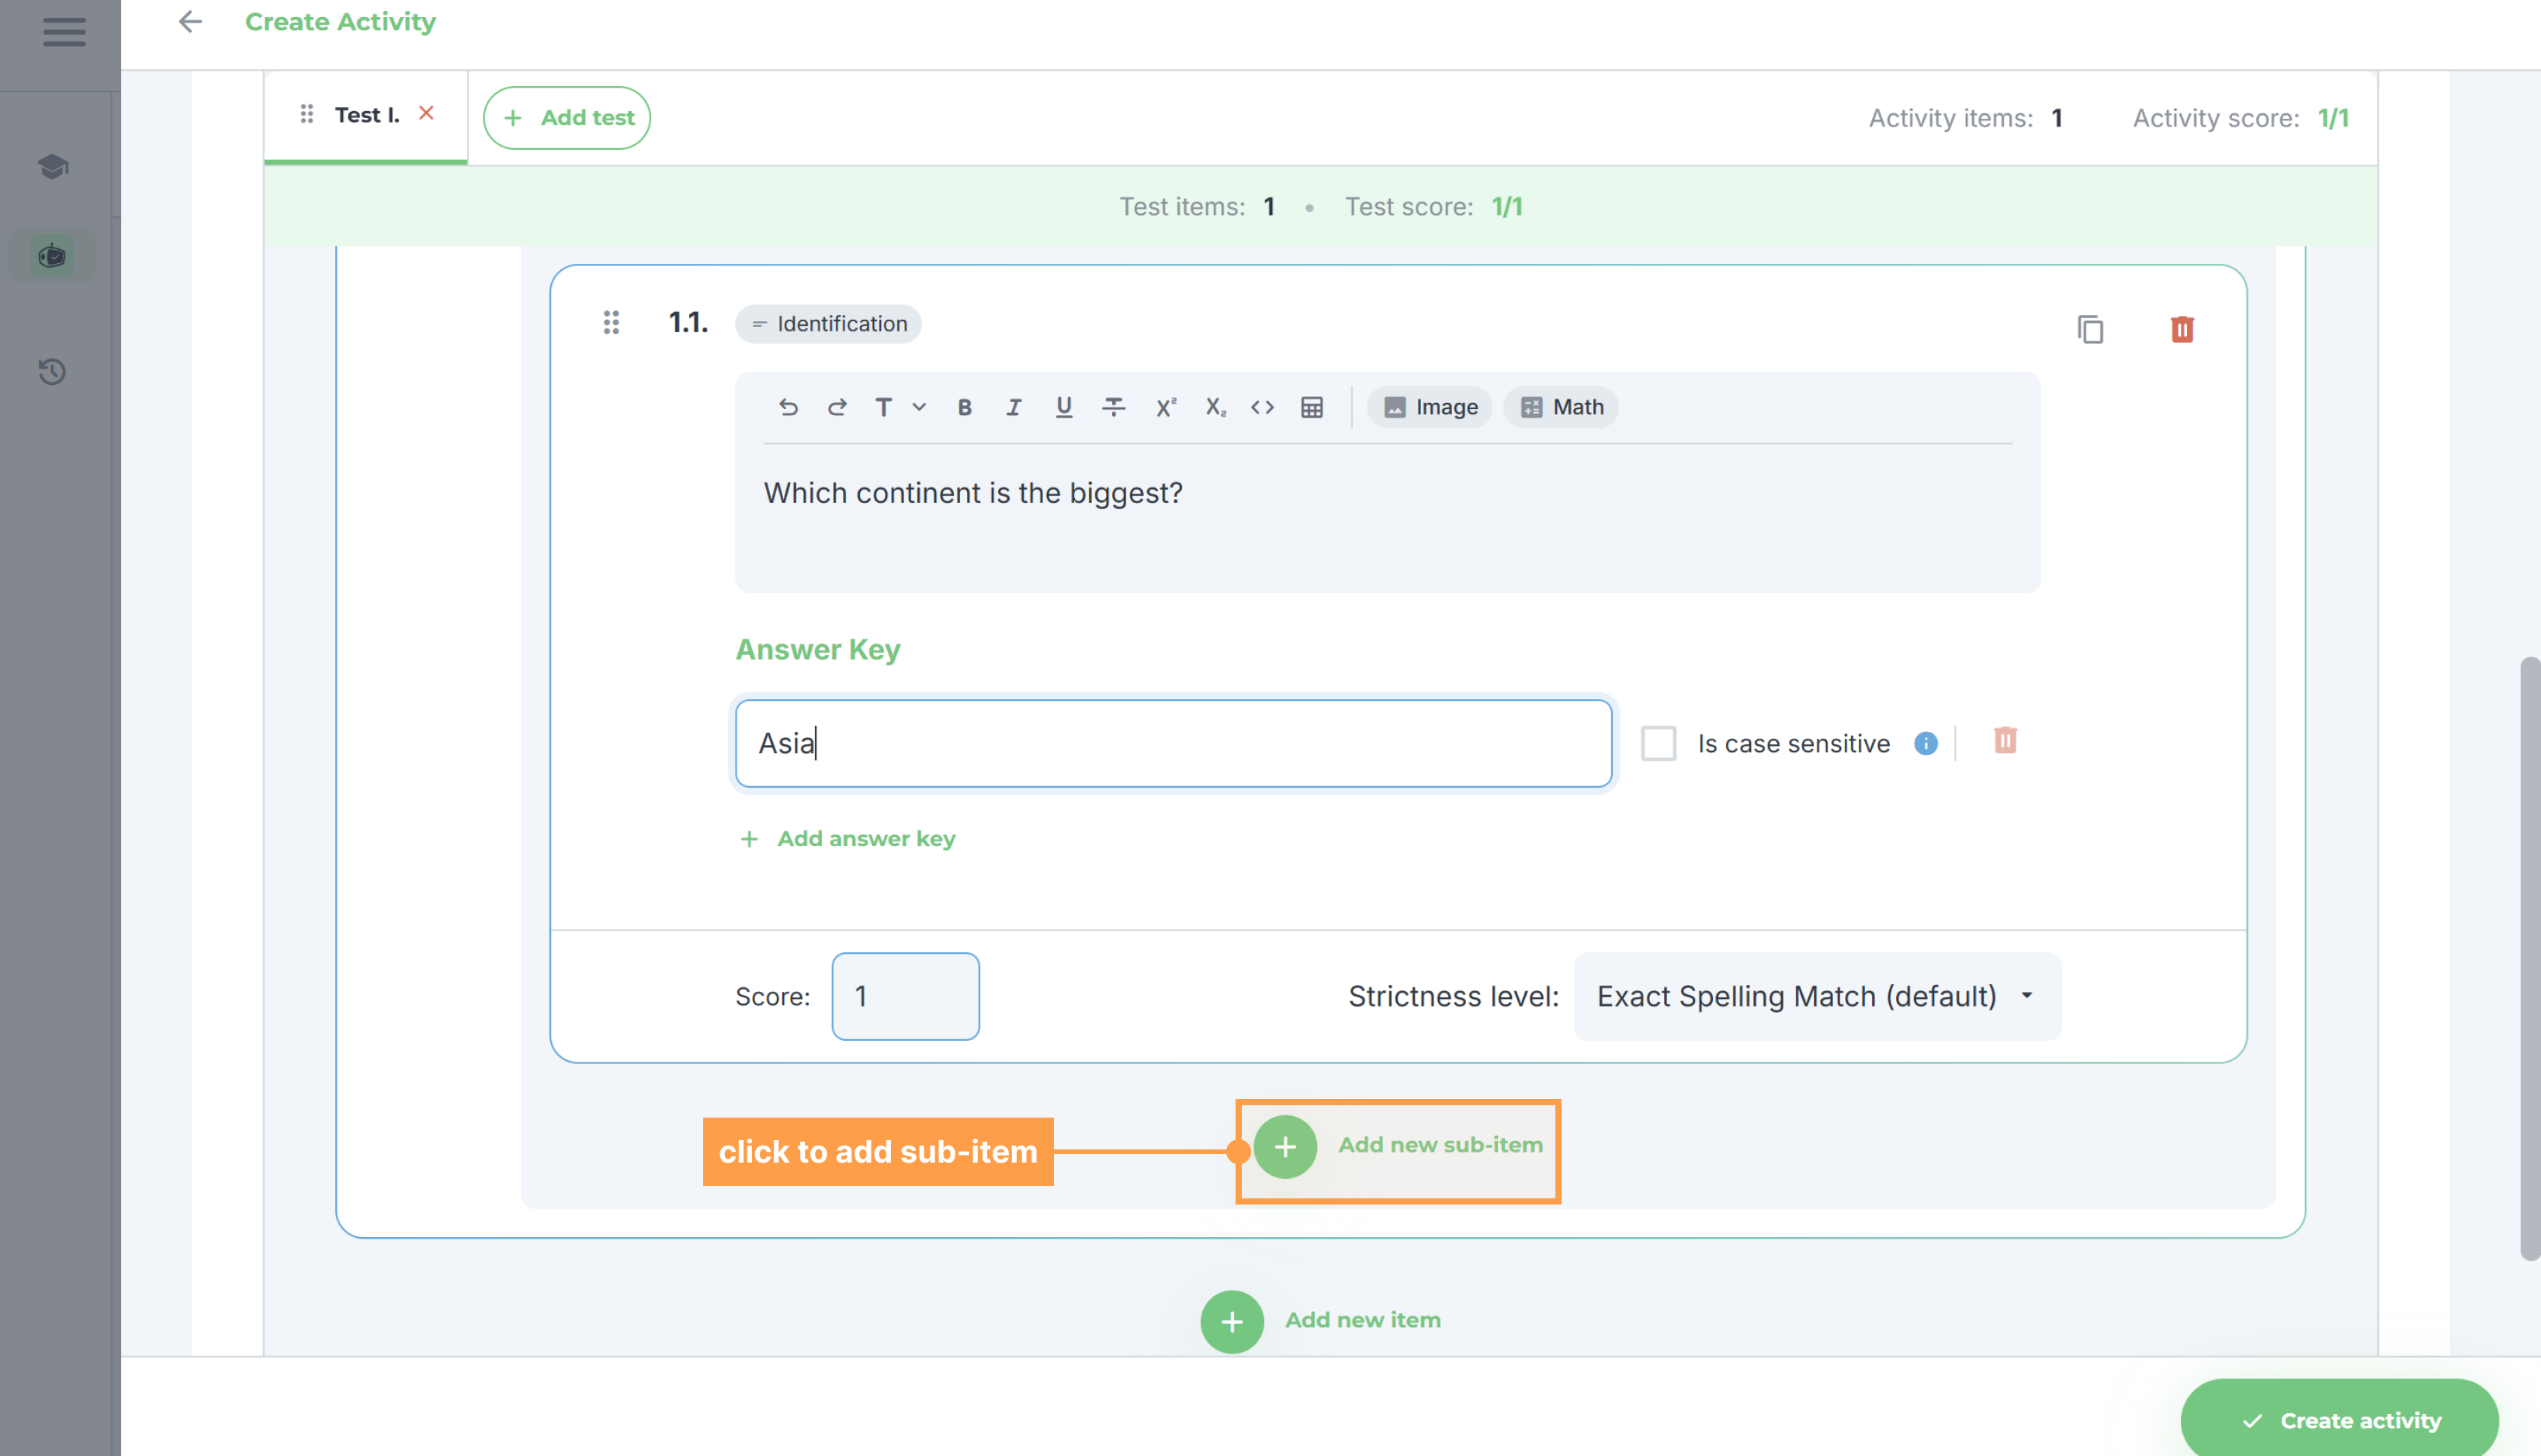
- After filling in the question, click the + Add new sub-item button to add a sub-item to the question.
- Then, select an item type for your sub-item. In GradeChum, we currently support 7 item types:
a. Mutliple Choice
For items with Multiple Choice as the item type:
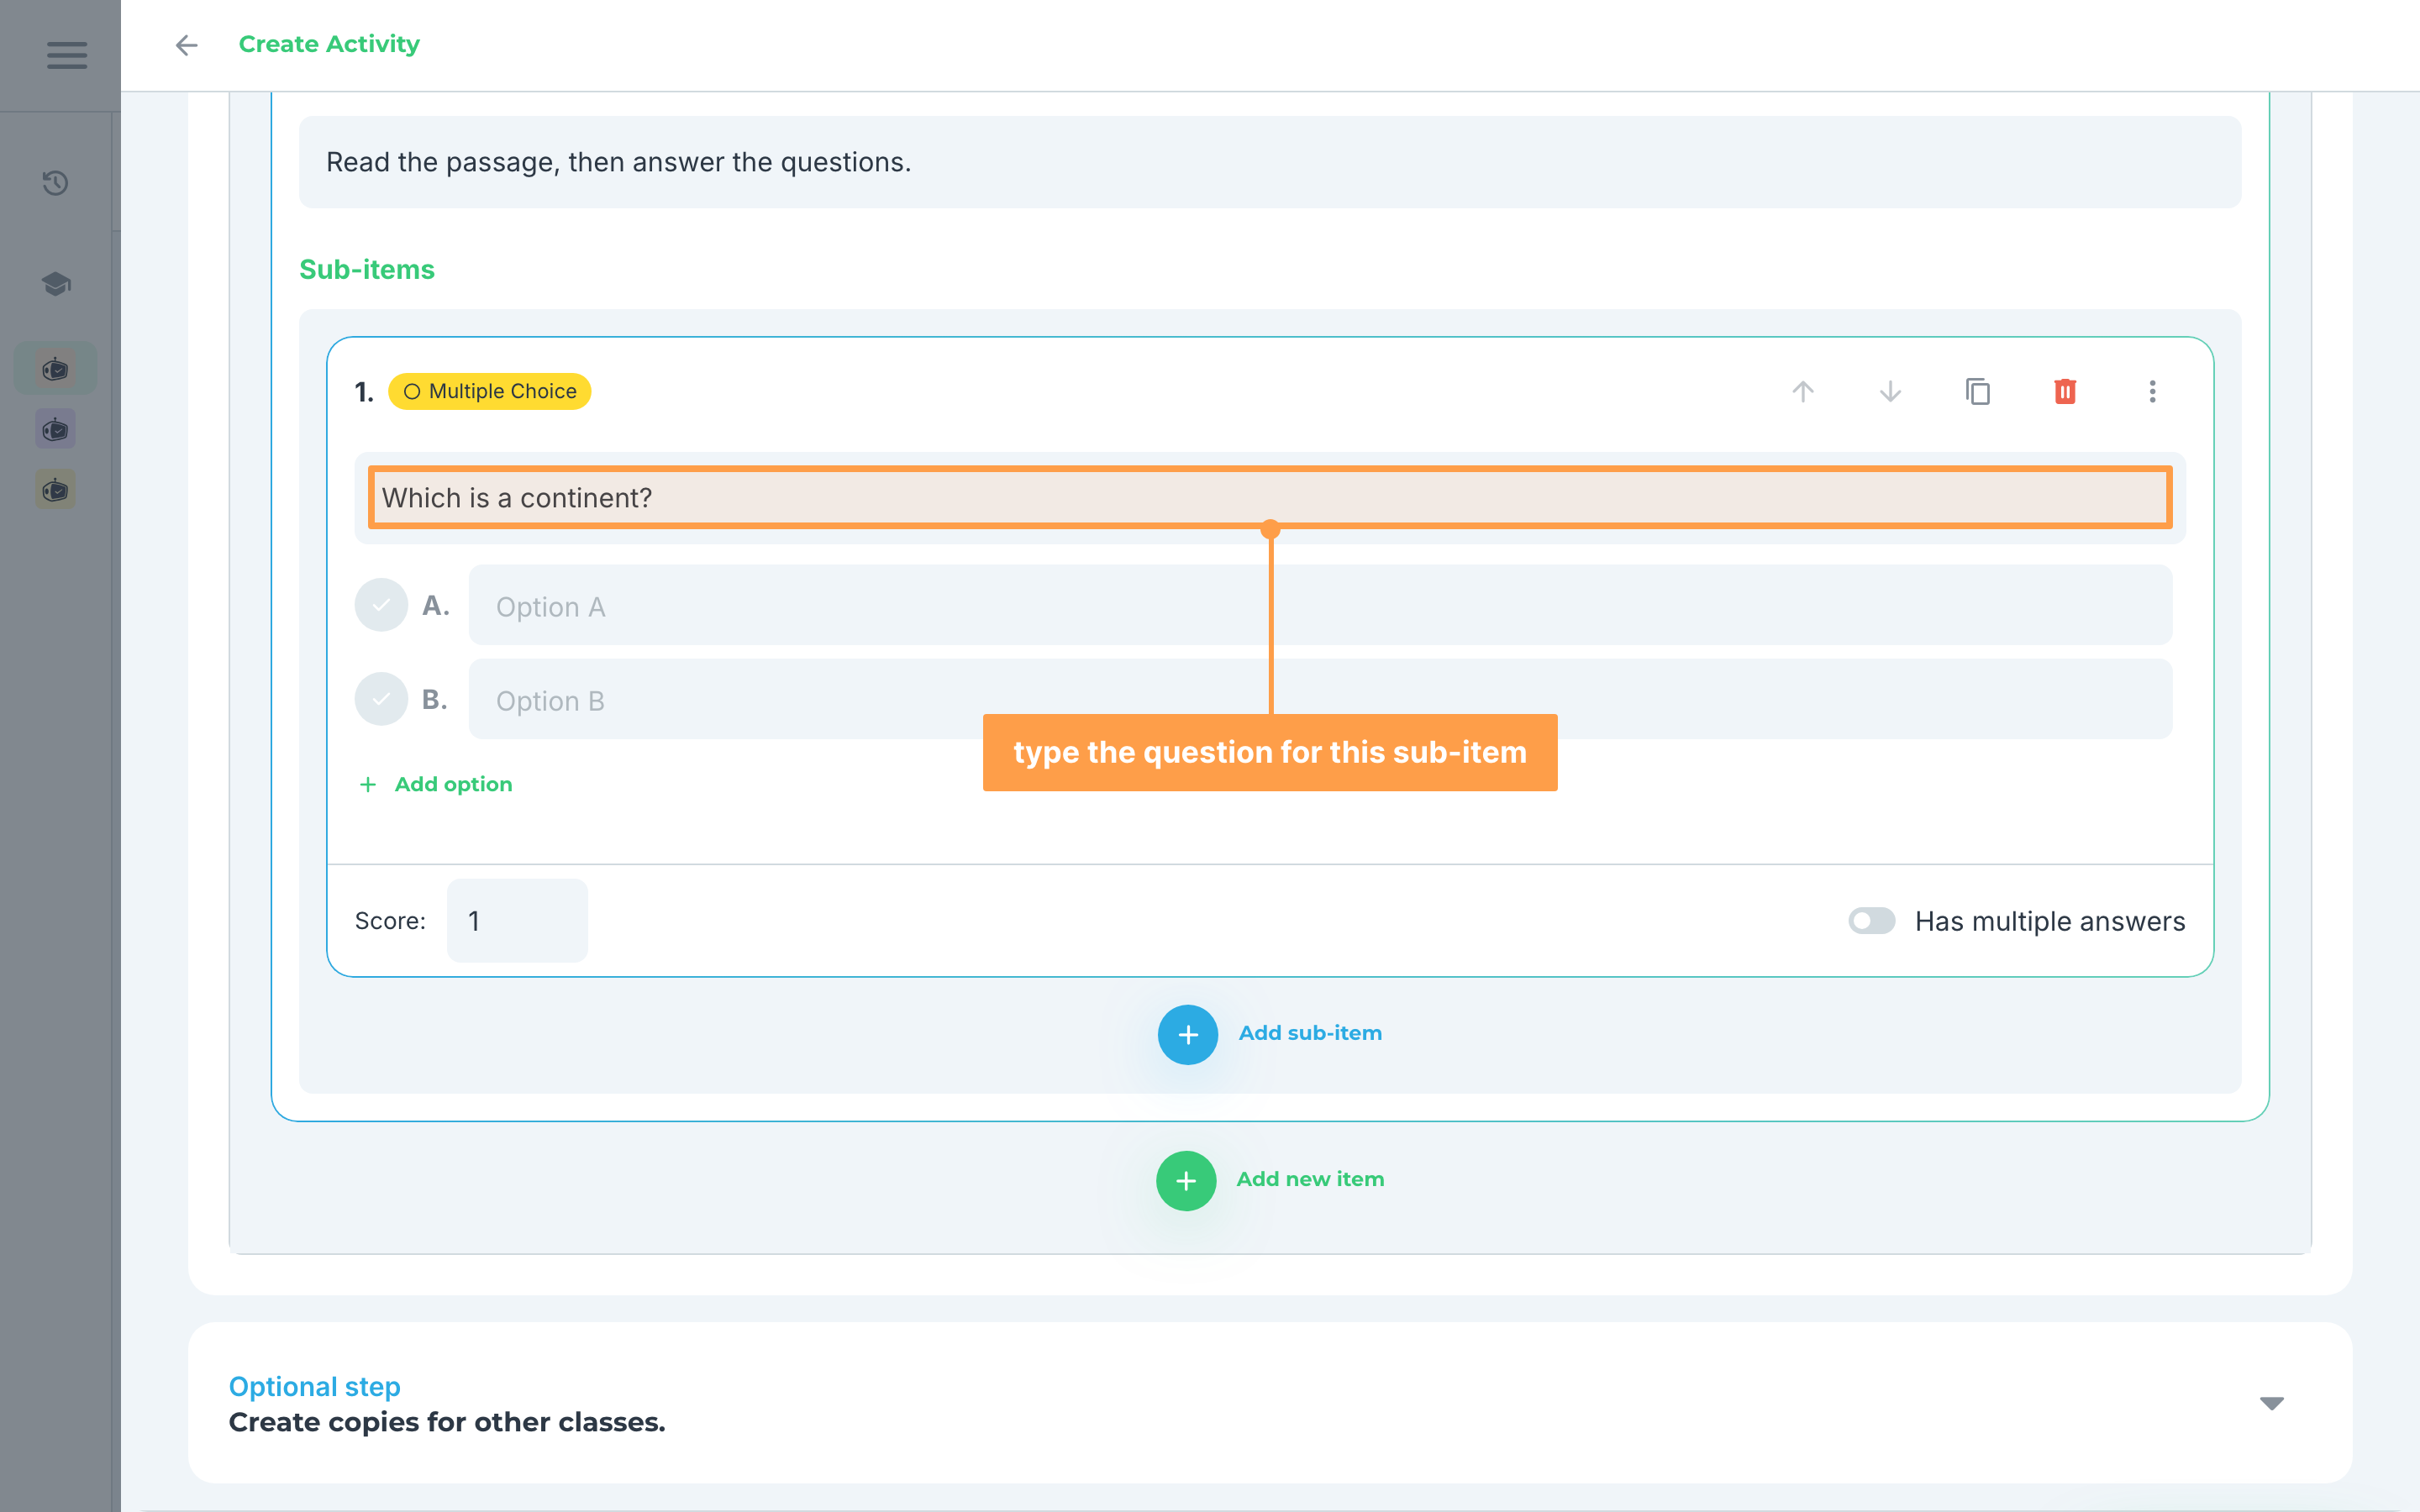
- Fill out the question for this sub-item.
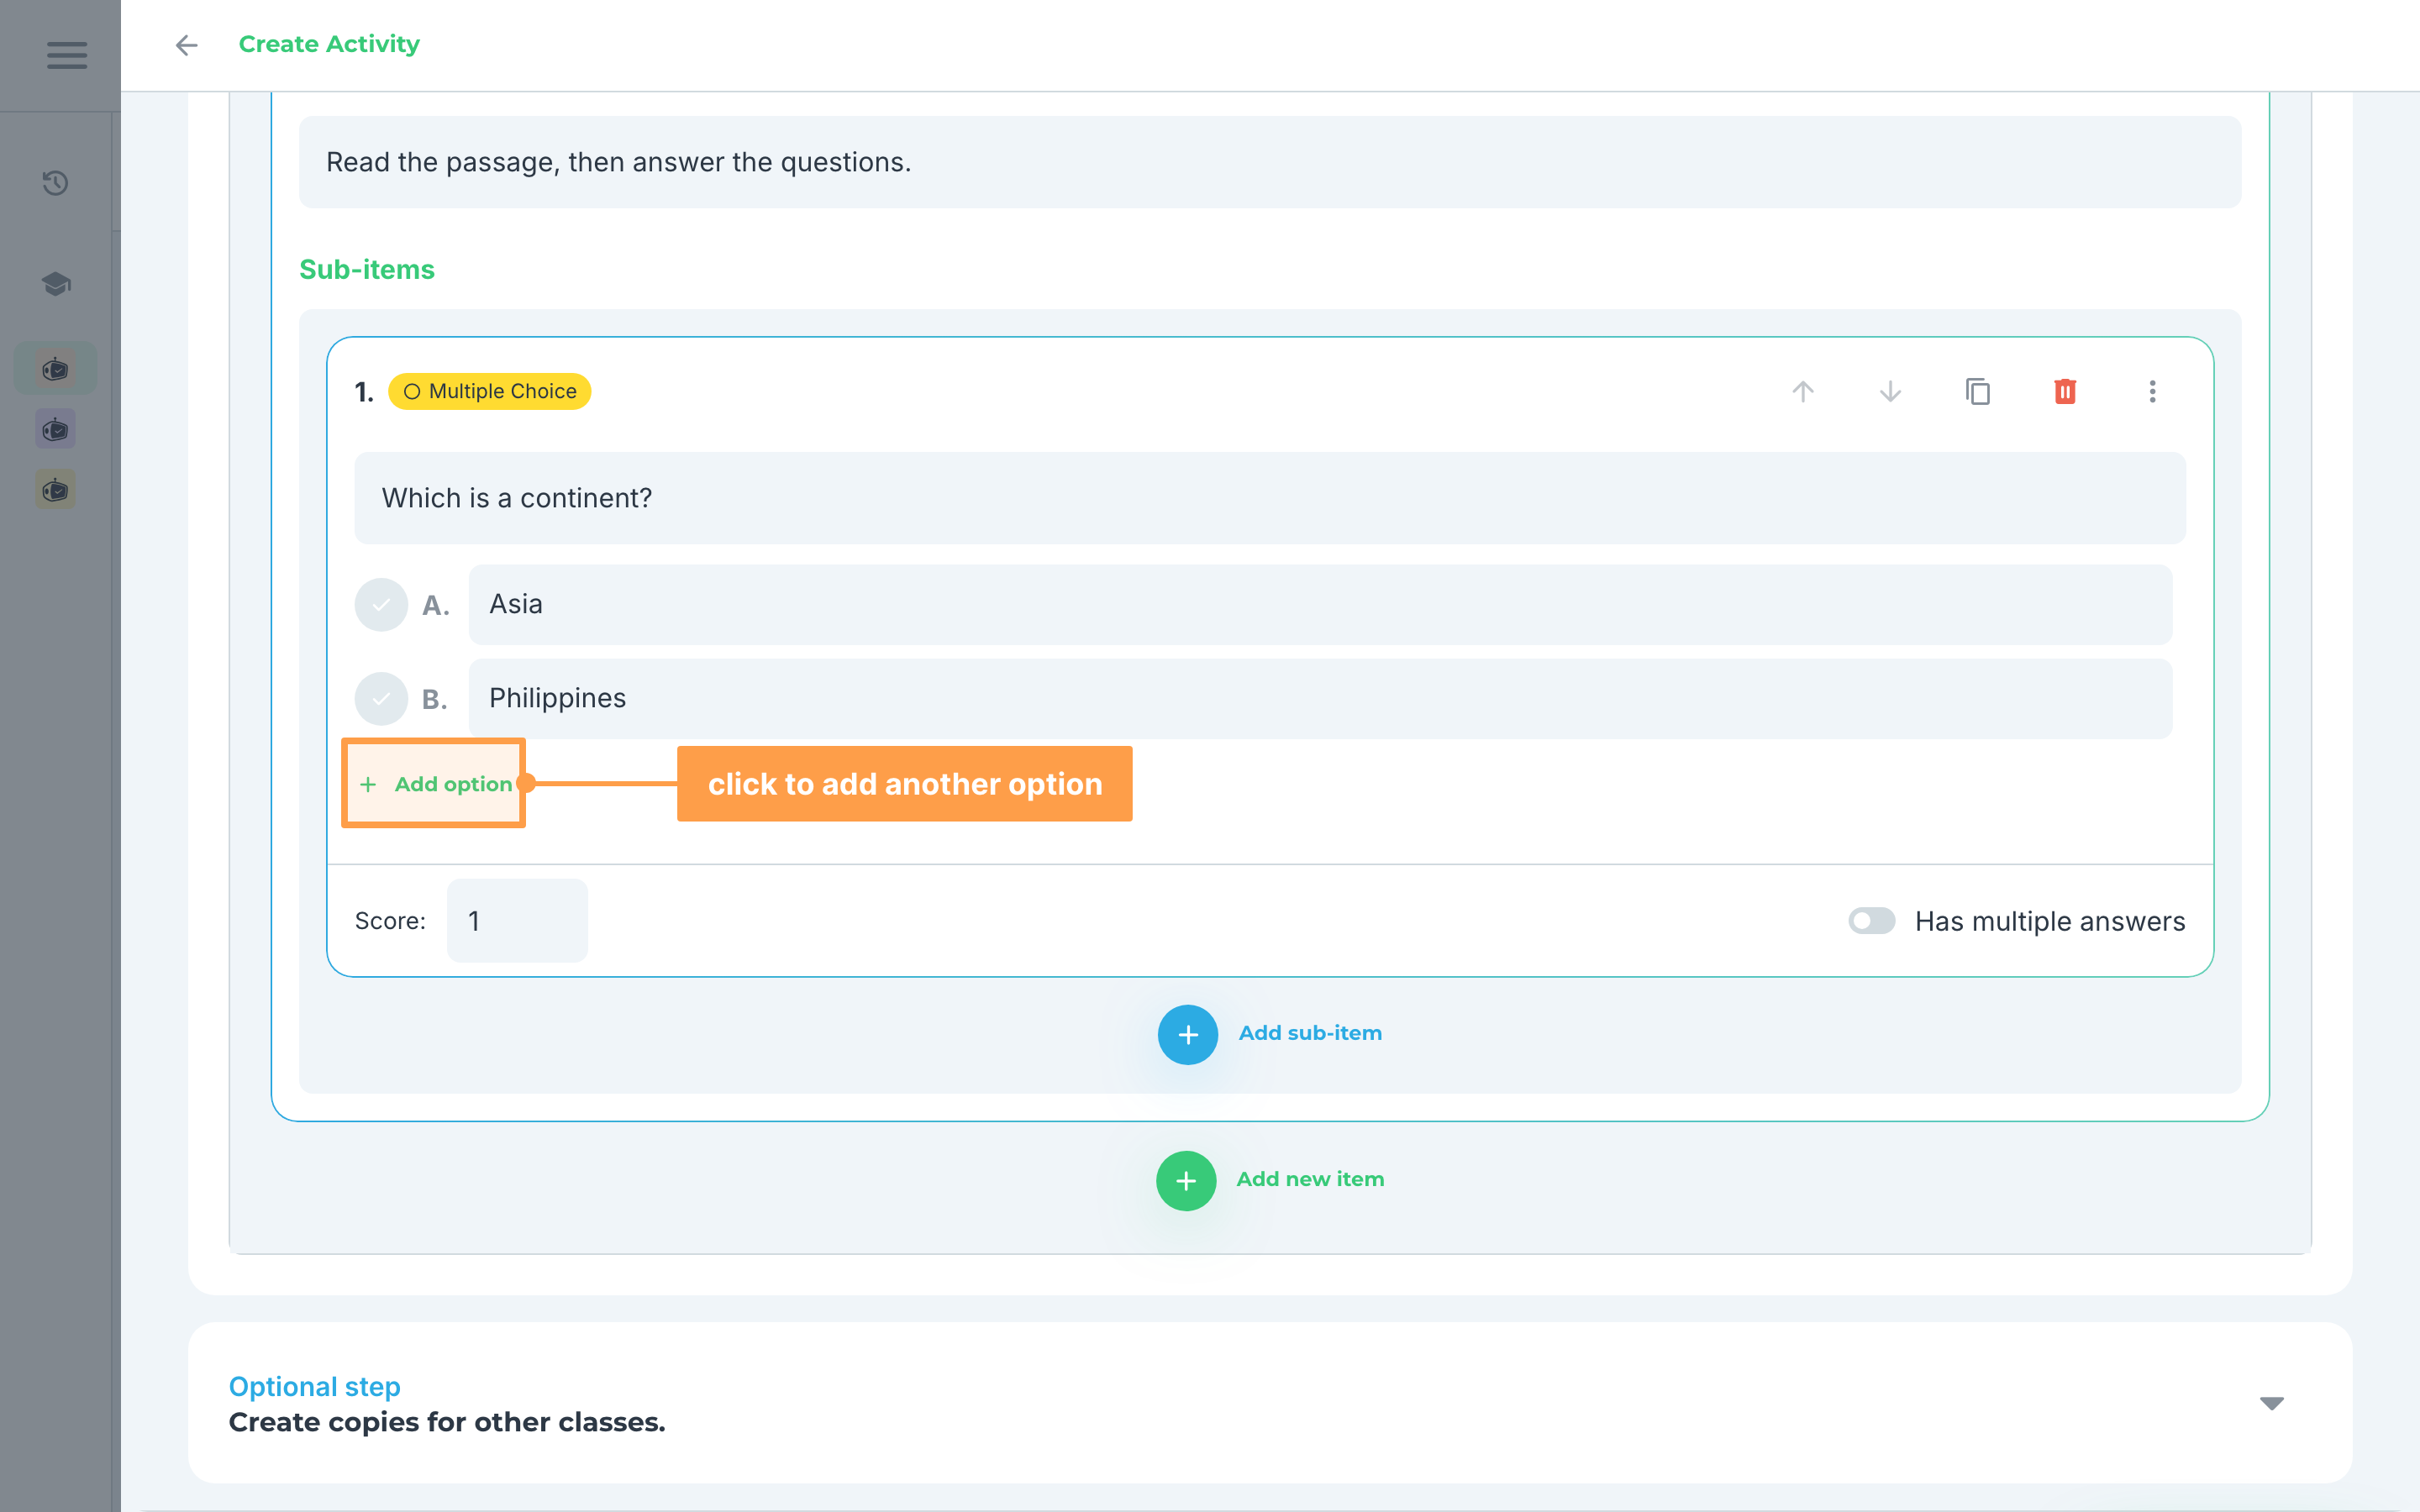
- Add options for this sub-item by clicking the + Add option button. You can add up to 5 options (a-e) for a single sub-item.
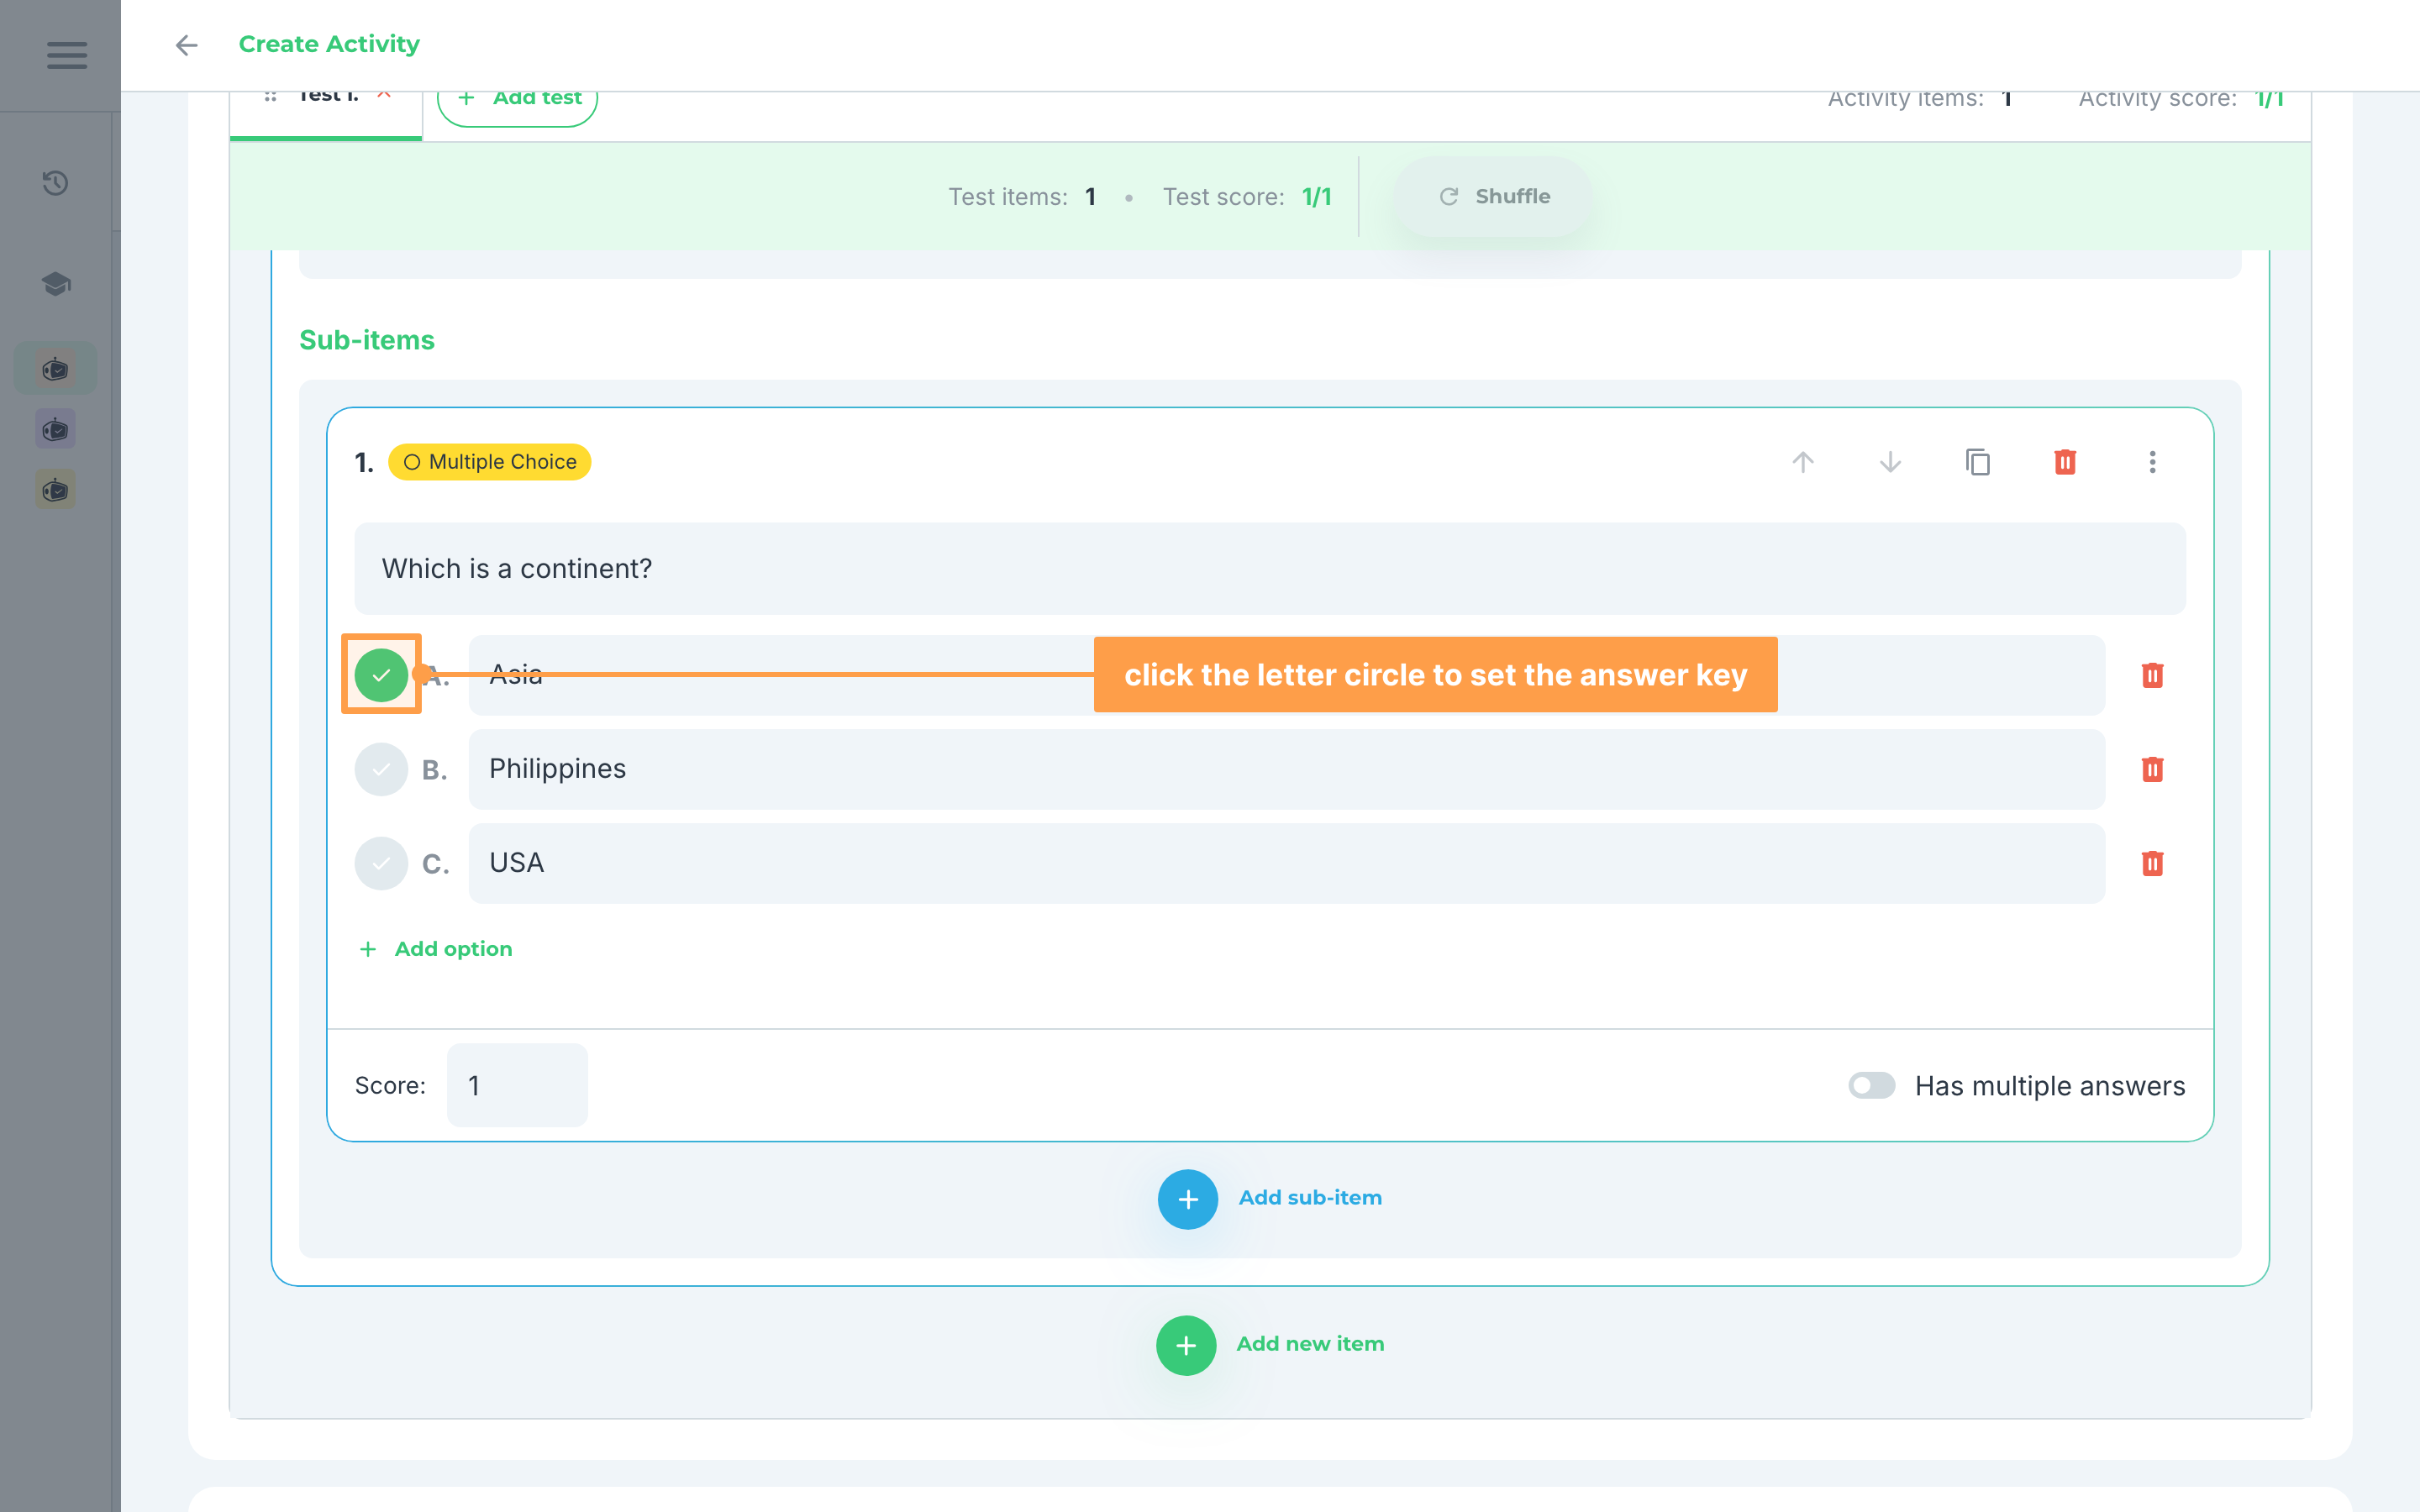
- Select the correct answer from your list of options by clicking on the letter circle, located beside the option text. You will know that the option has been set when the letter circle turns green.
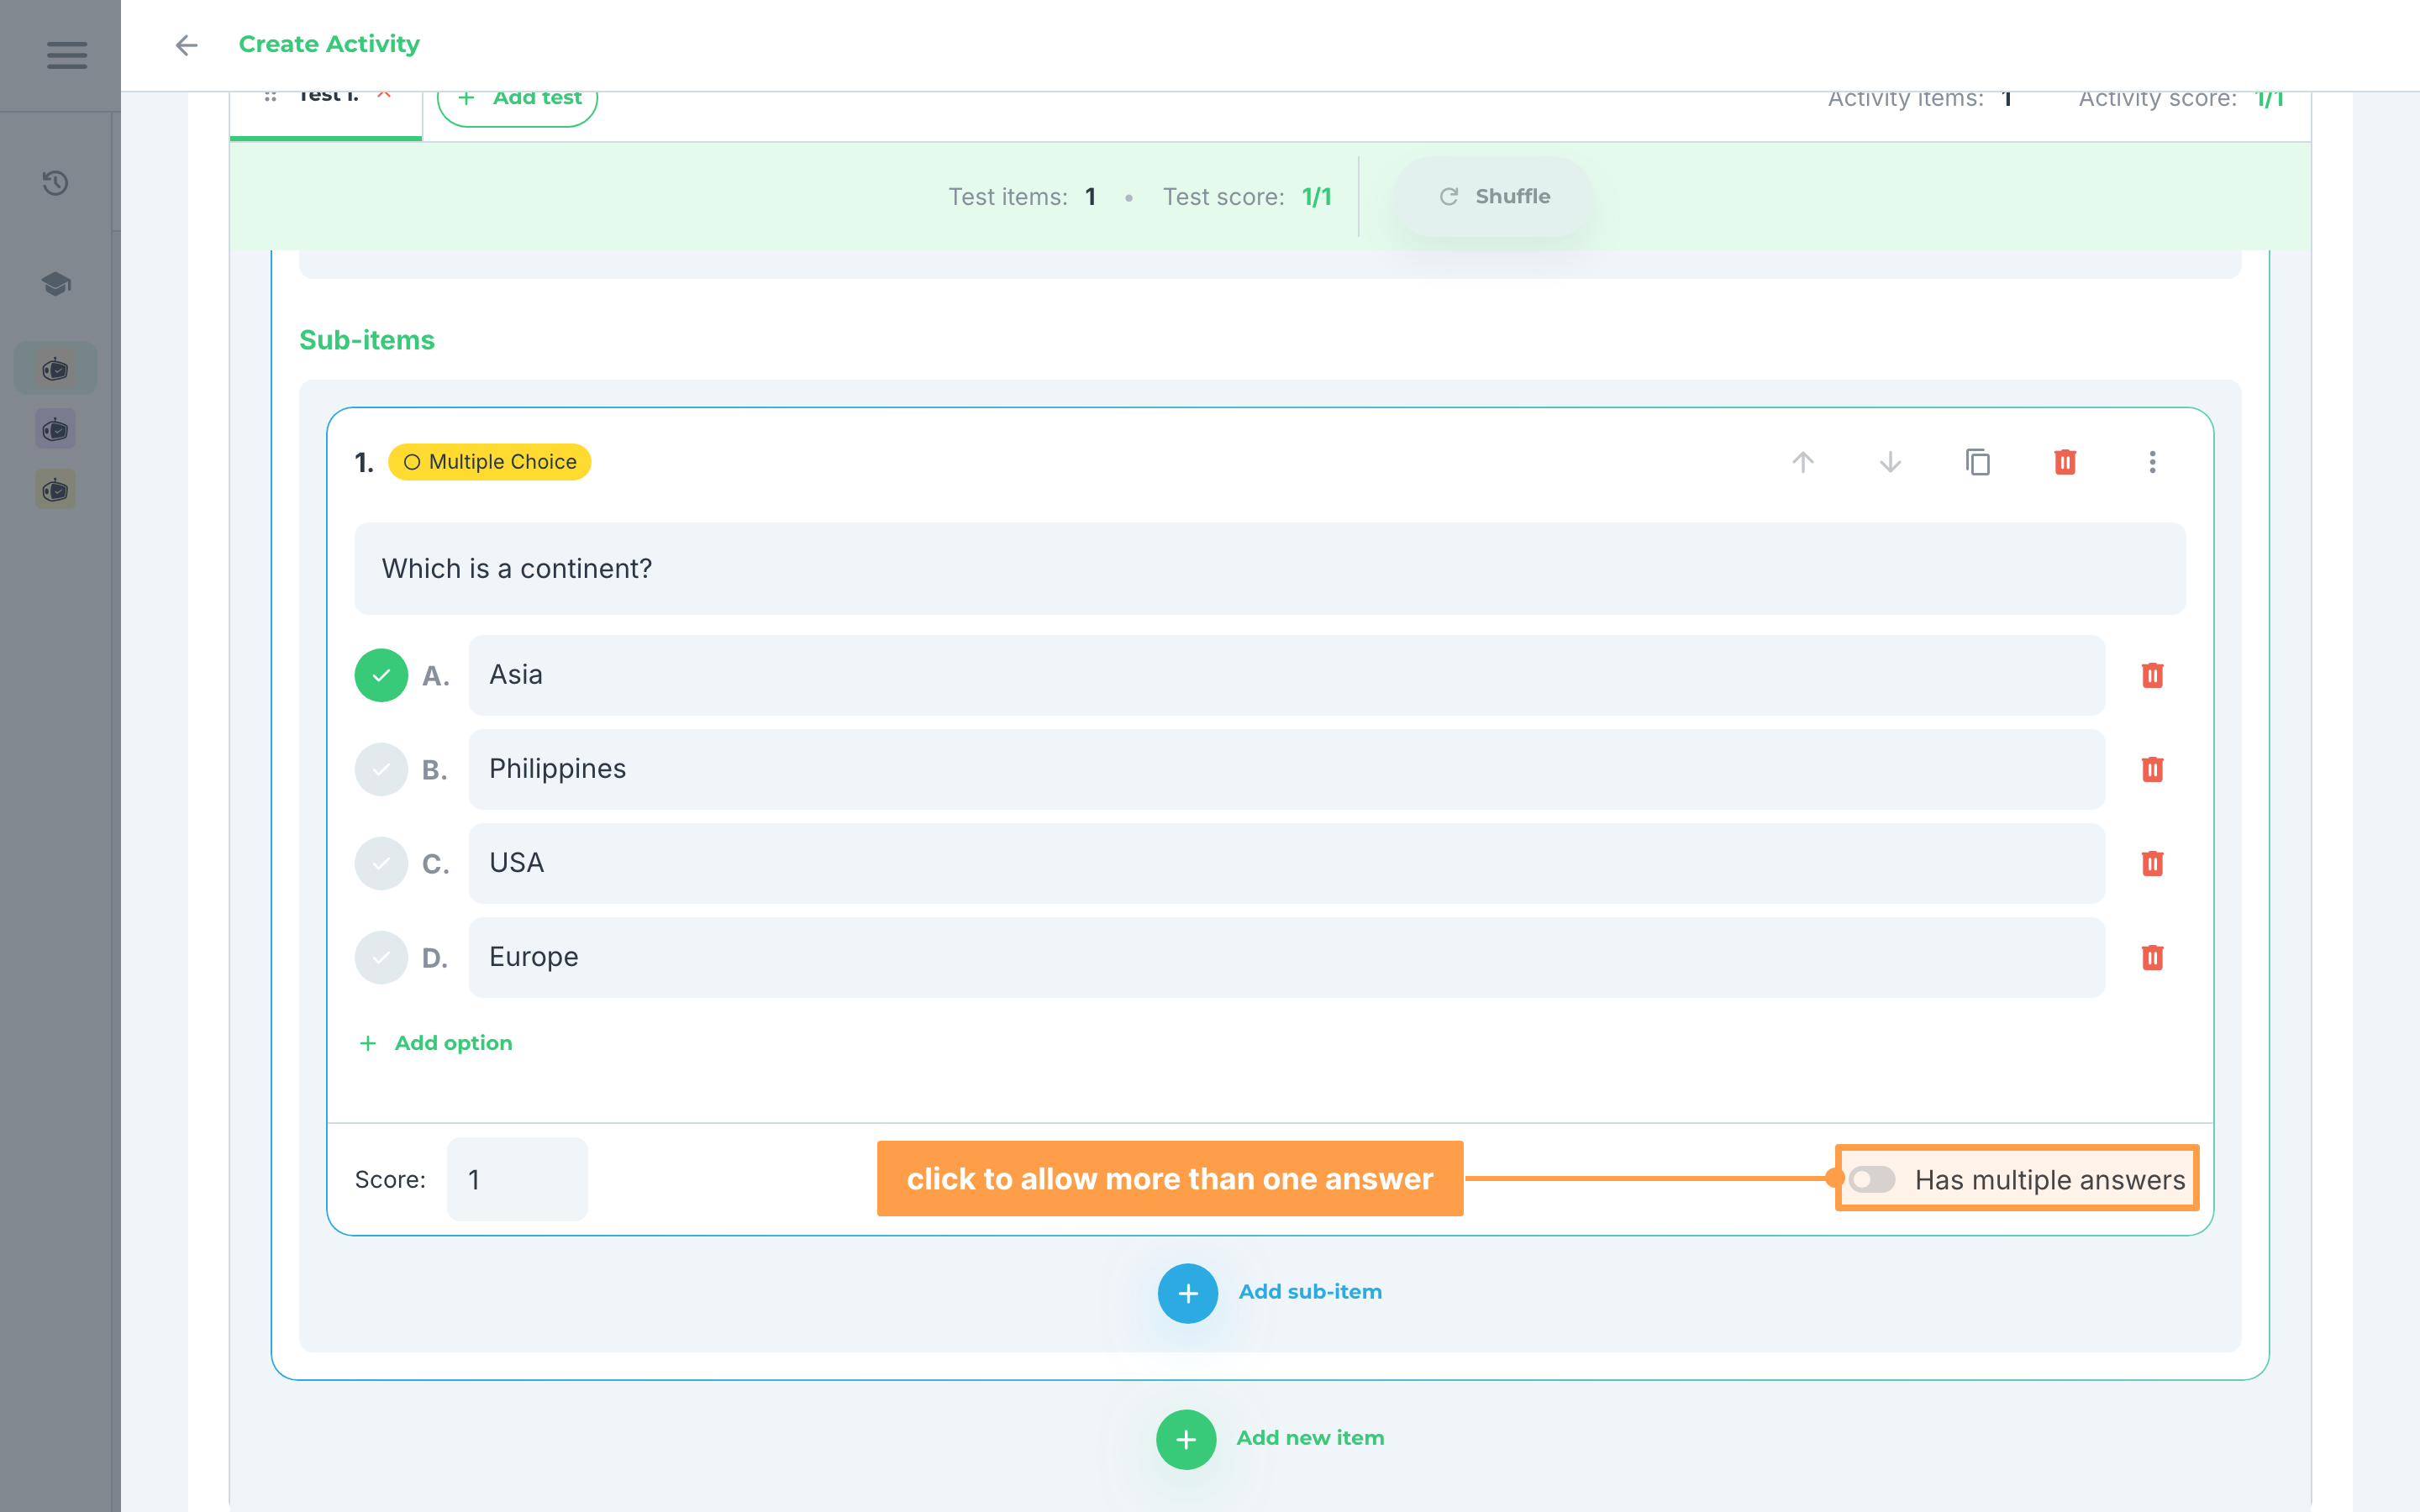
- If you have multiple answers in the Multiple Choice item, turn on the Has multiple answers switch at the bottom right of the sub-item. Its badge changes from Multiple Choice to Multiple Answers.
- Then, select the correct answers from your list of options by clicking on the letter squares, located beside the option text. Each square turns green when that option is set. A Scoring mode dropdown also appears in the footer, set to All correct answers required by default.
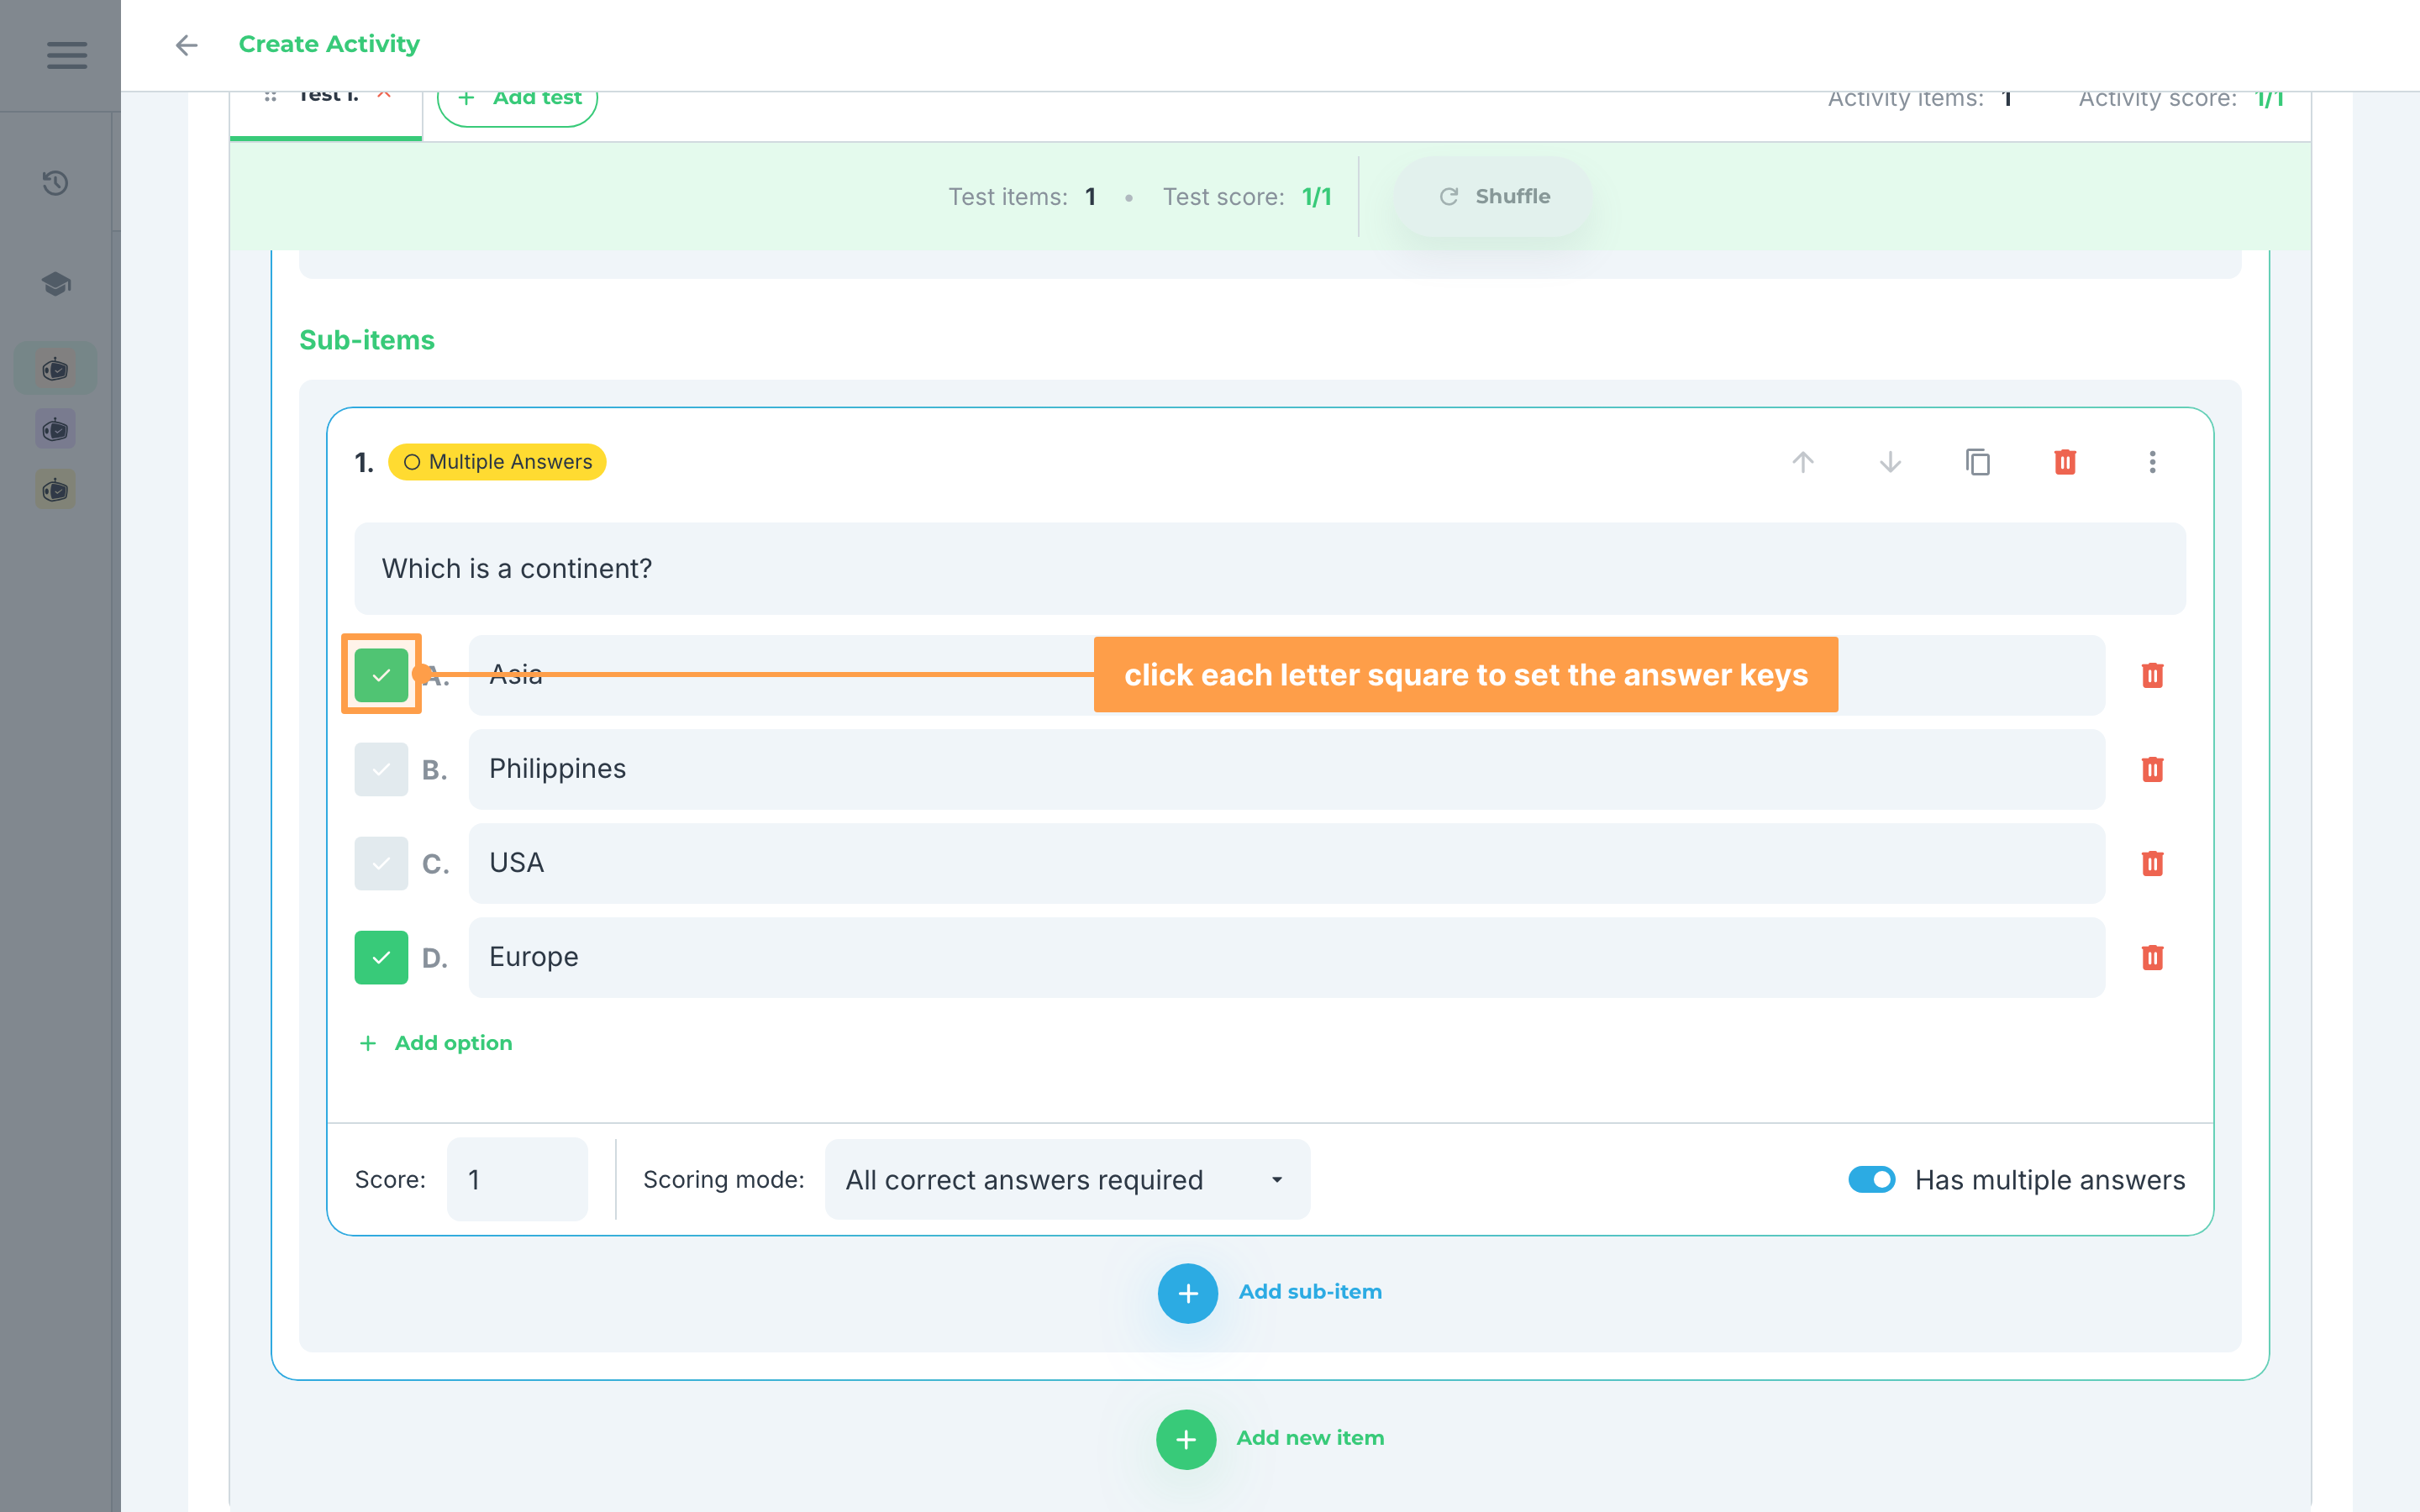
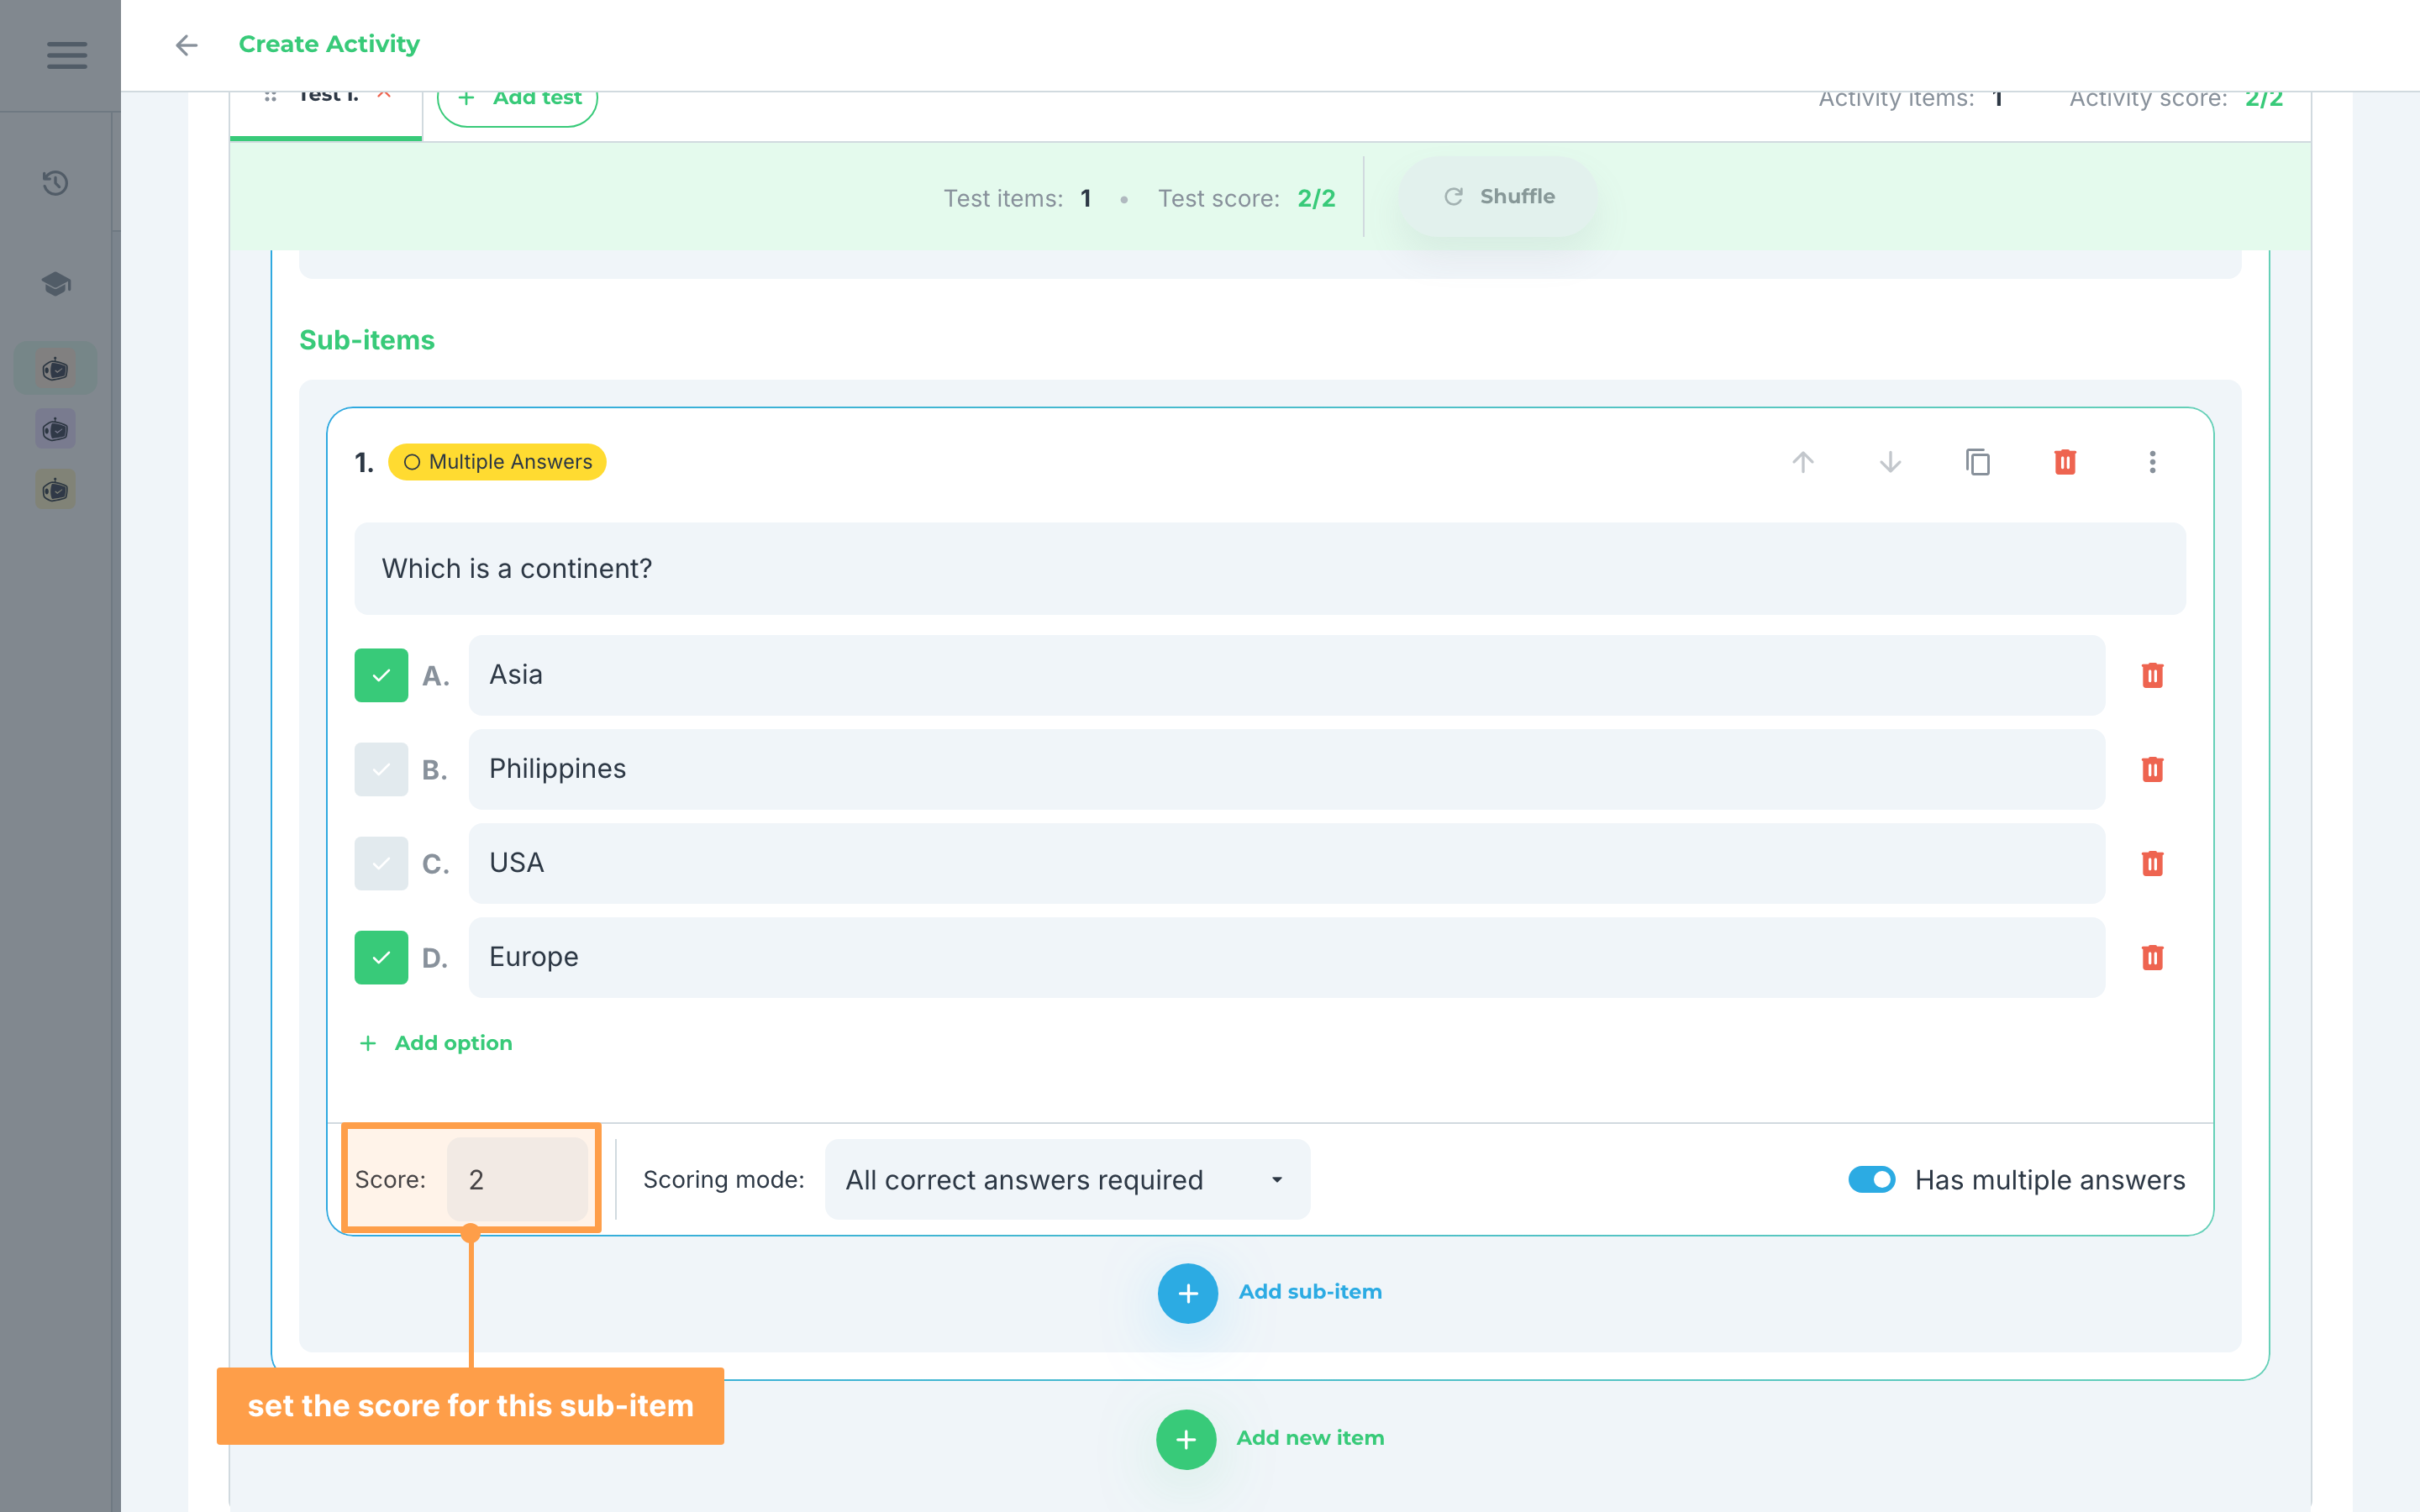
- Set the score on the bottom left of the sub-item. This should be a whole number and should be greater than 0. The group itself has no score of its own; the test and activity totals in the header add up the sub-item scores.
b. Identification
For sub-items with Identification as the item type:
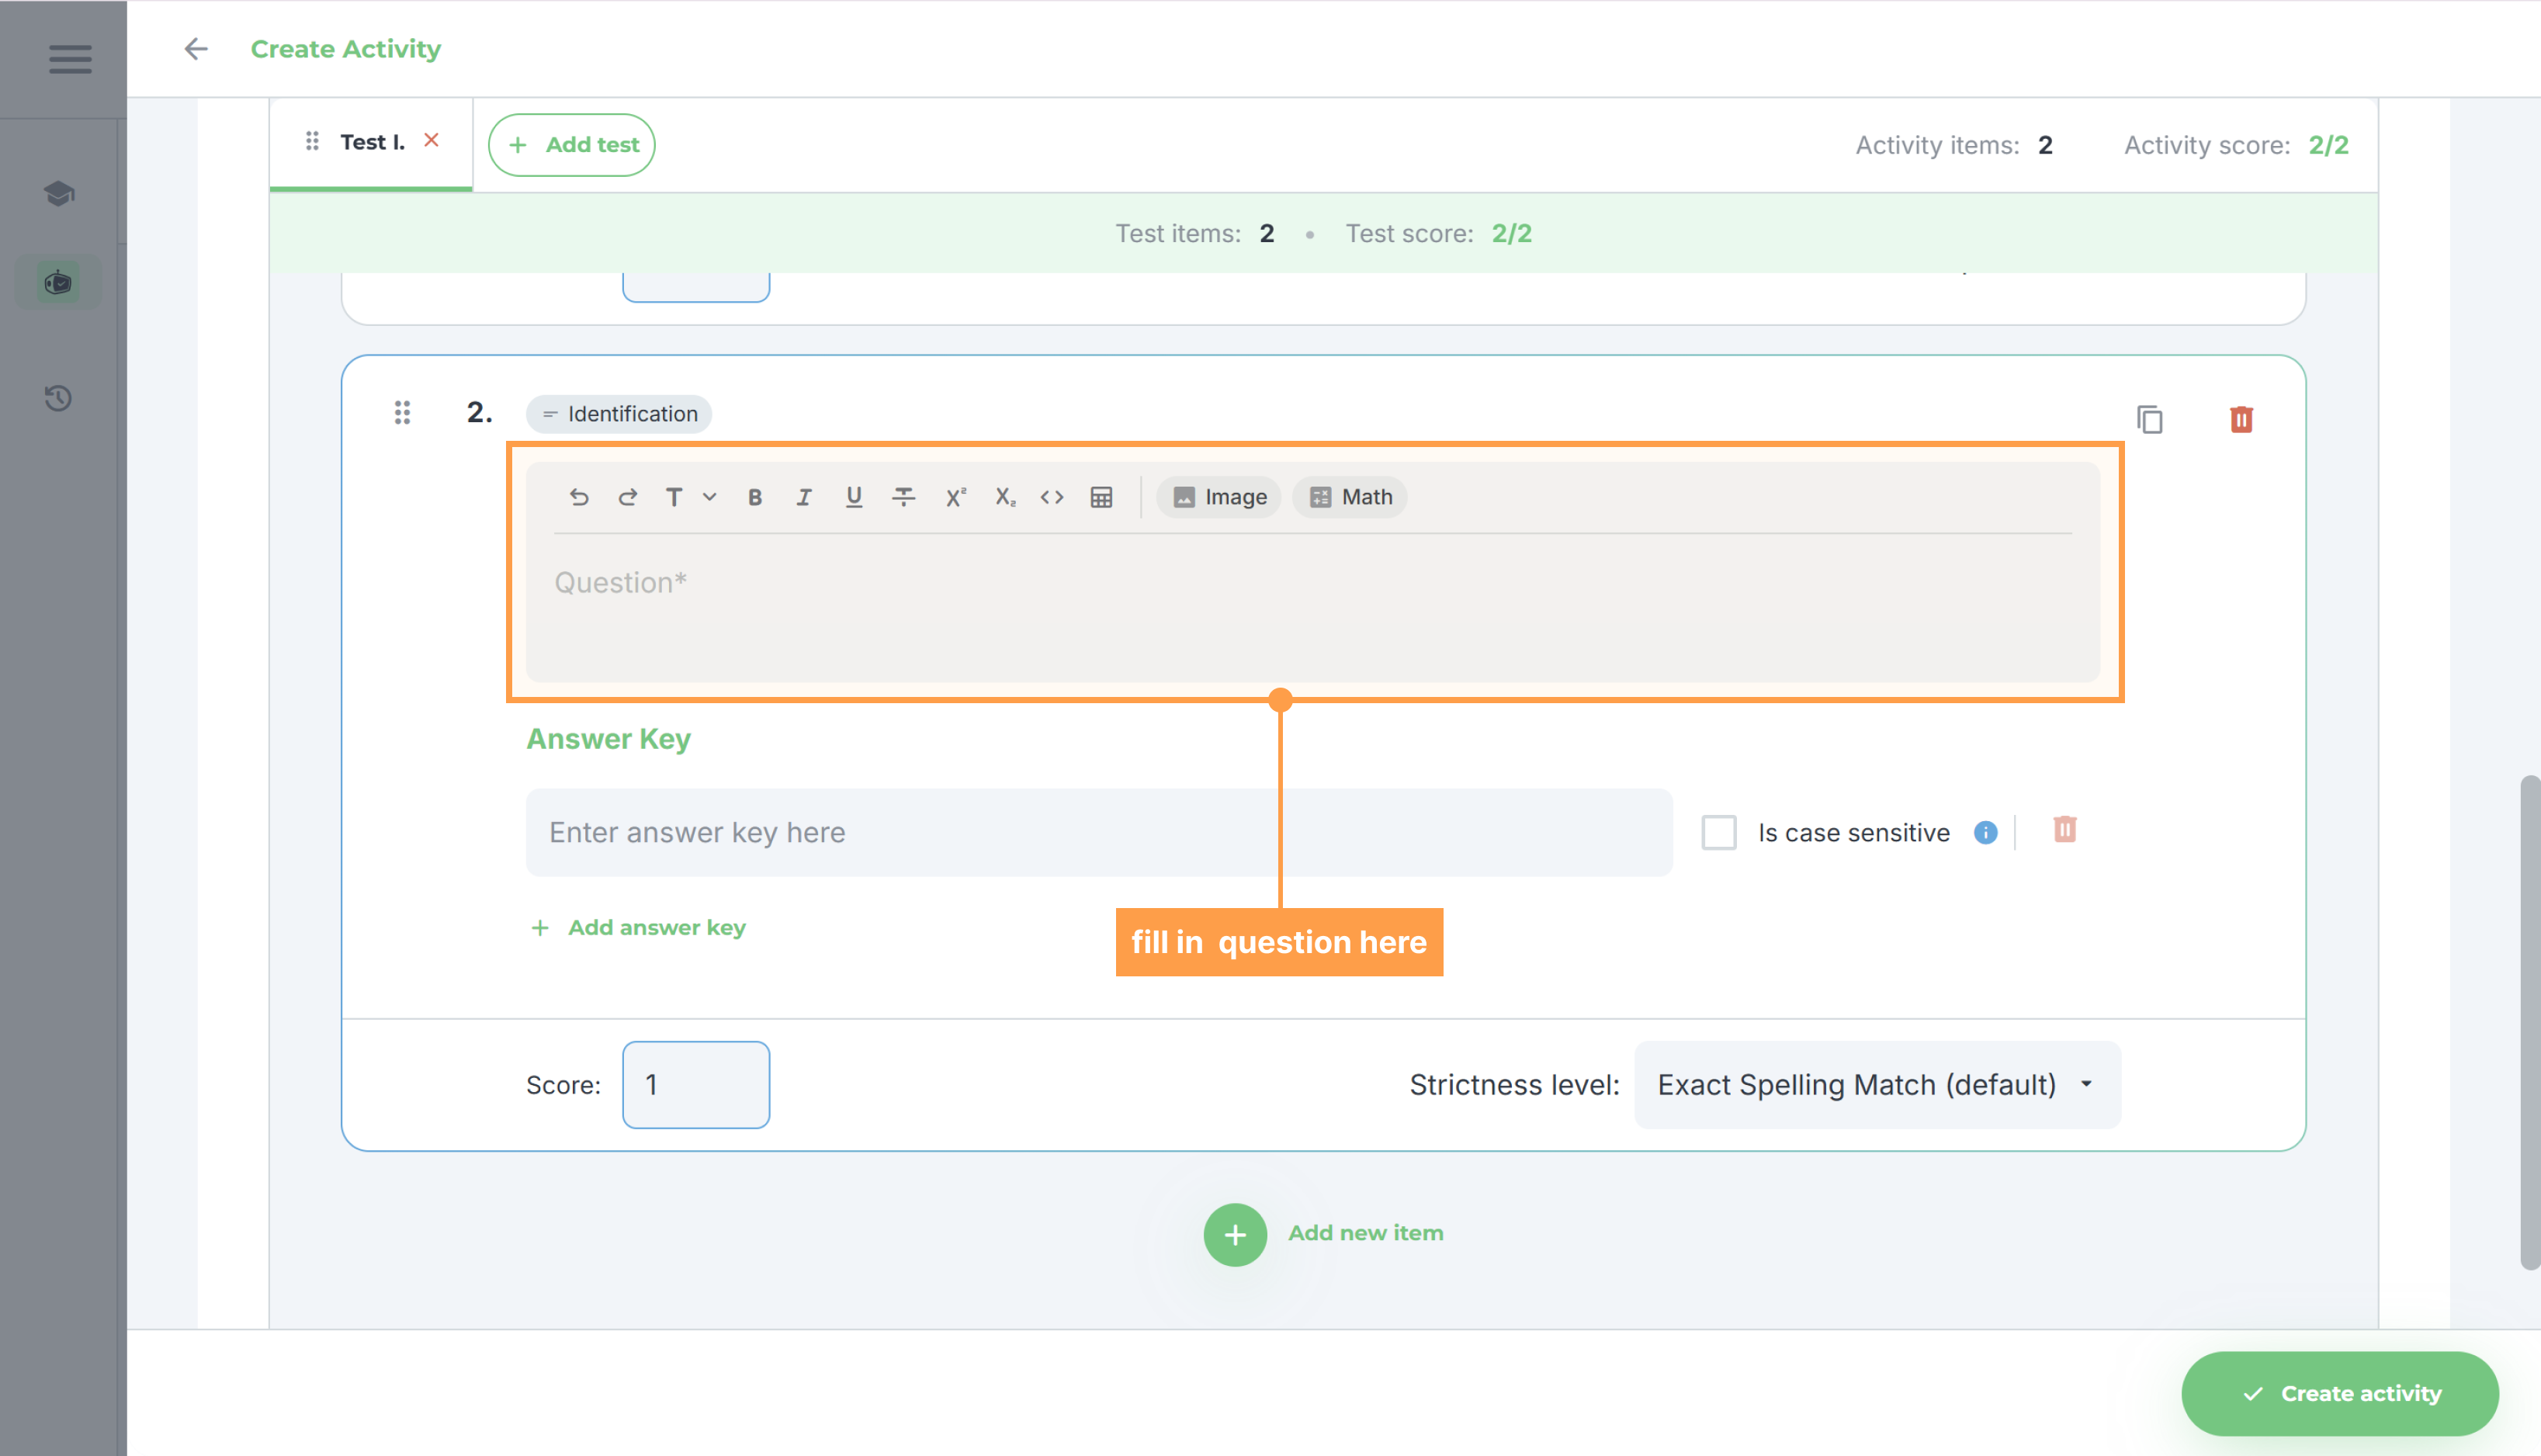
- Fill out the question for this sub-item.
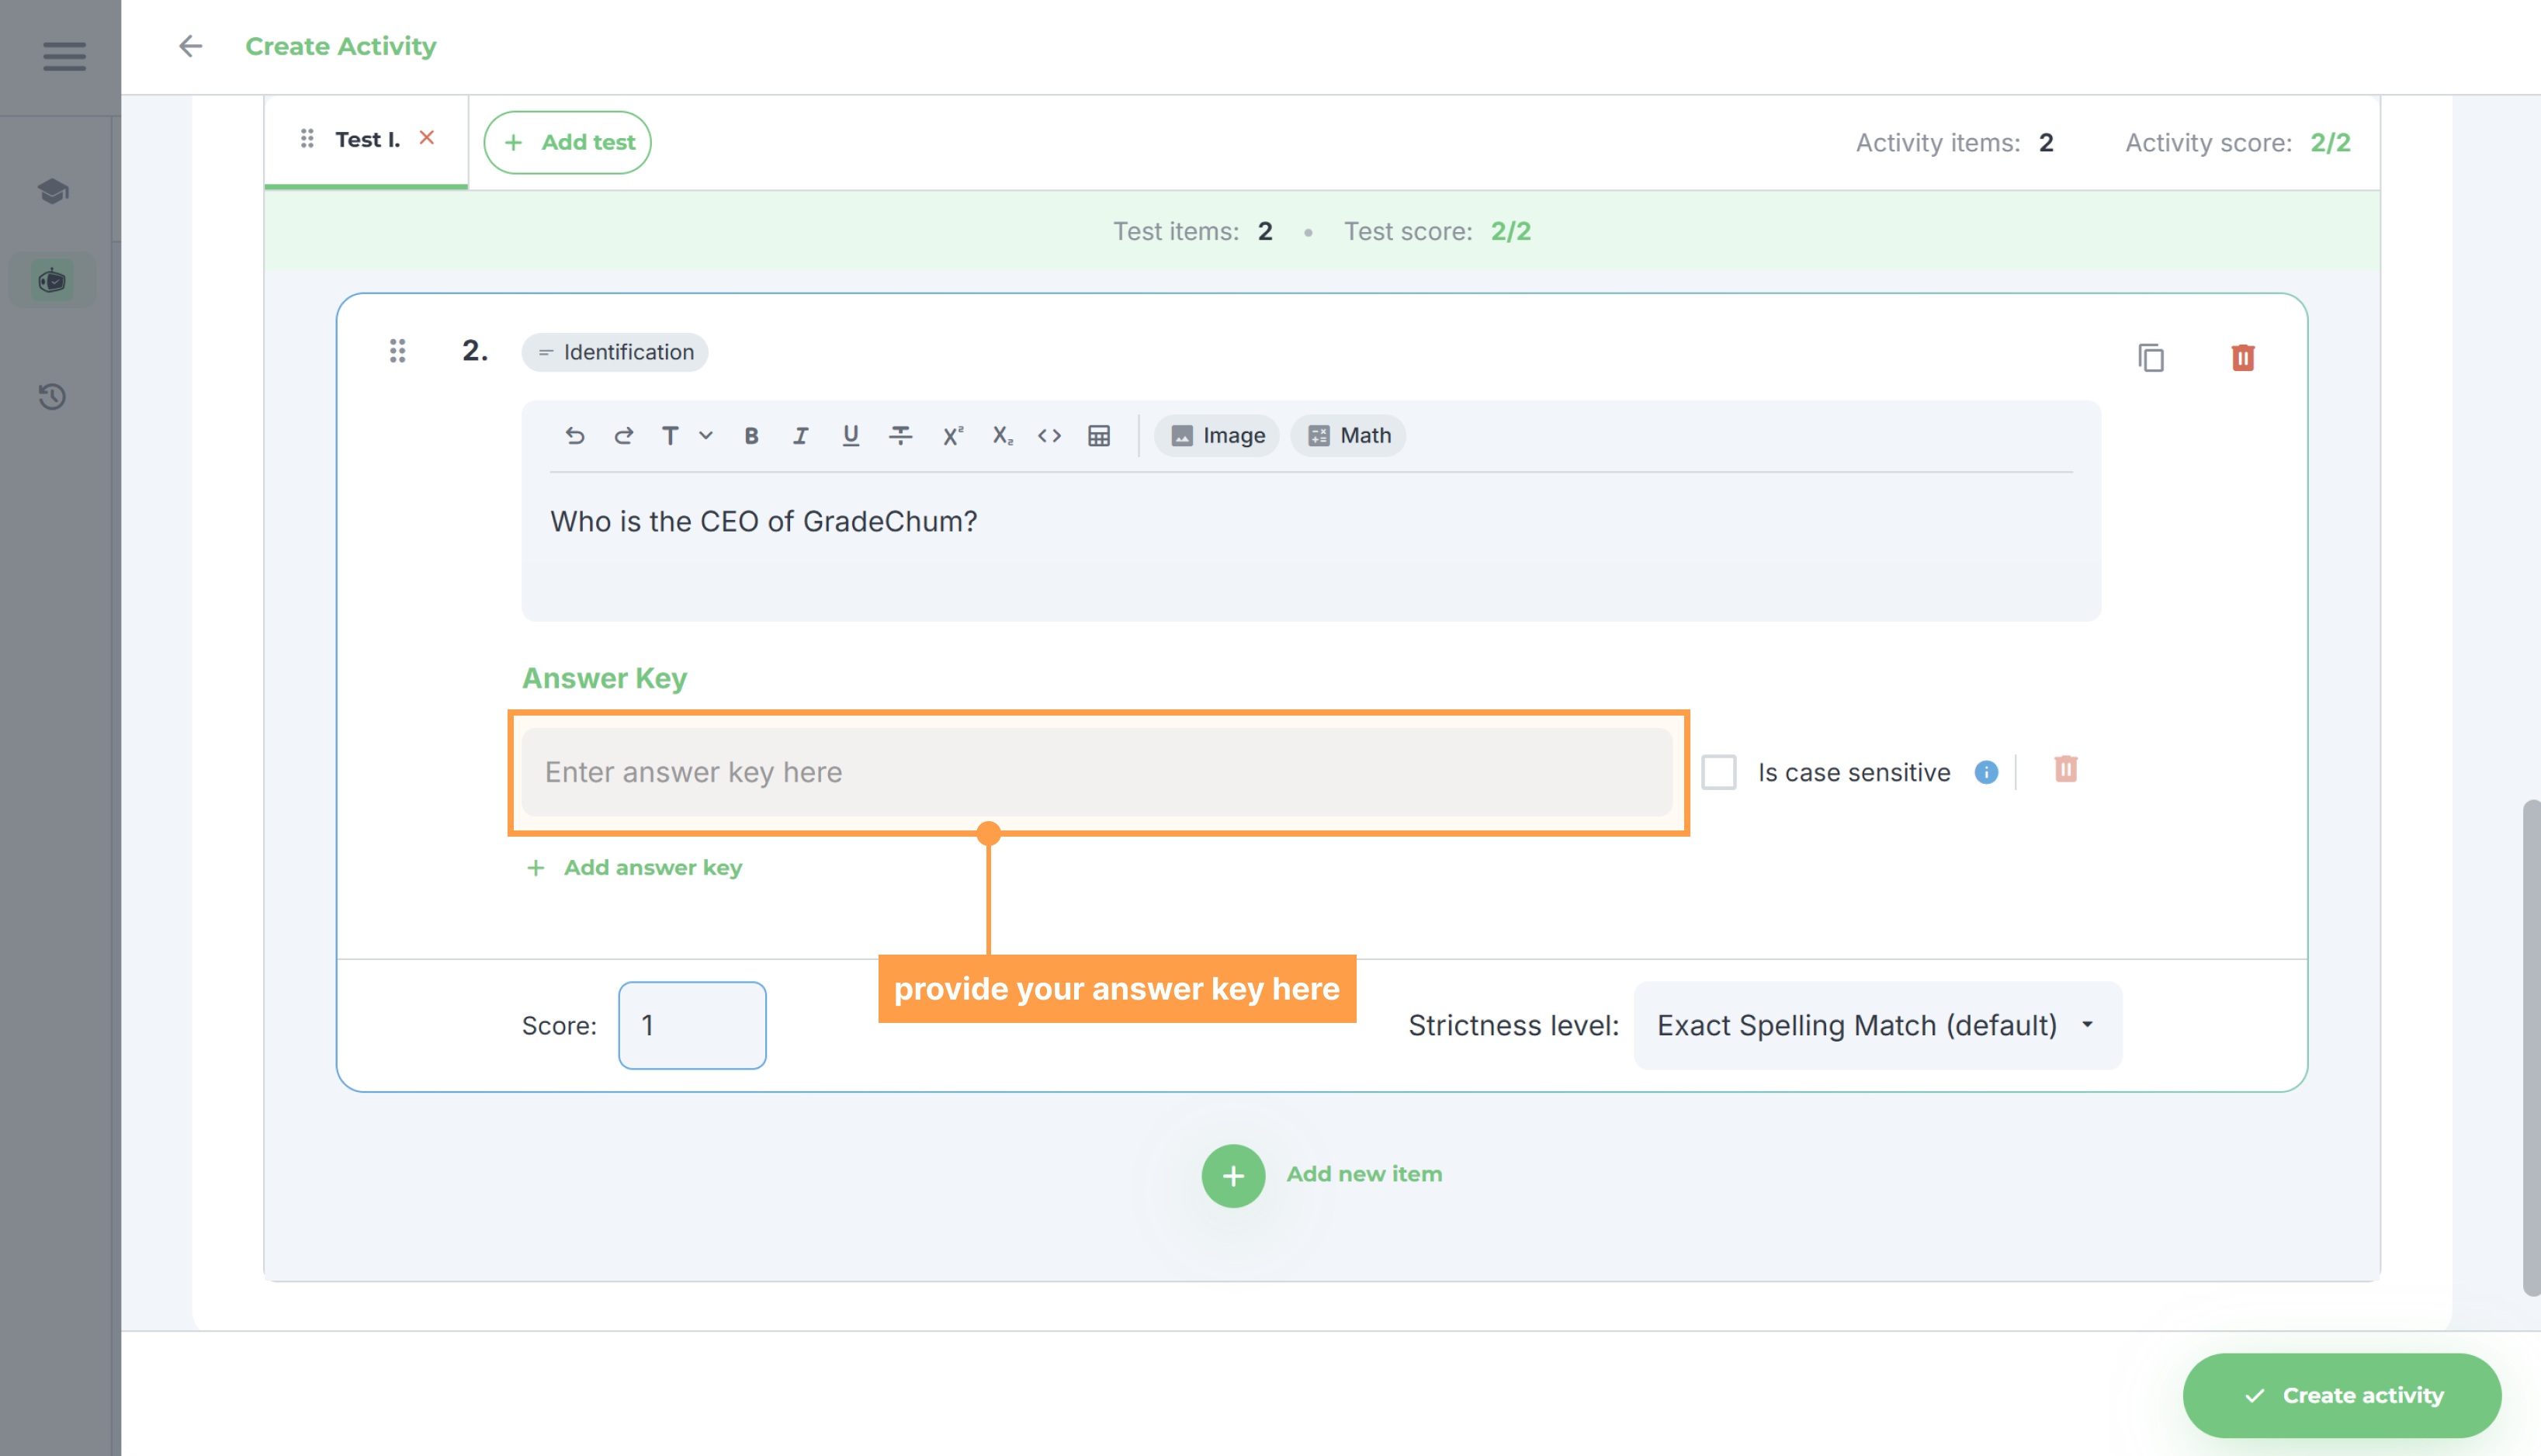
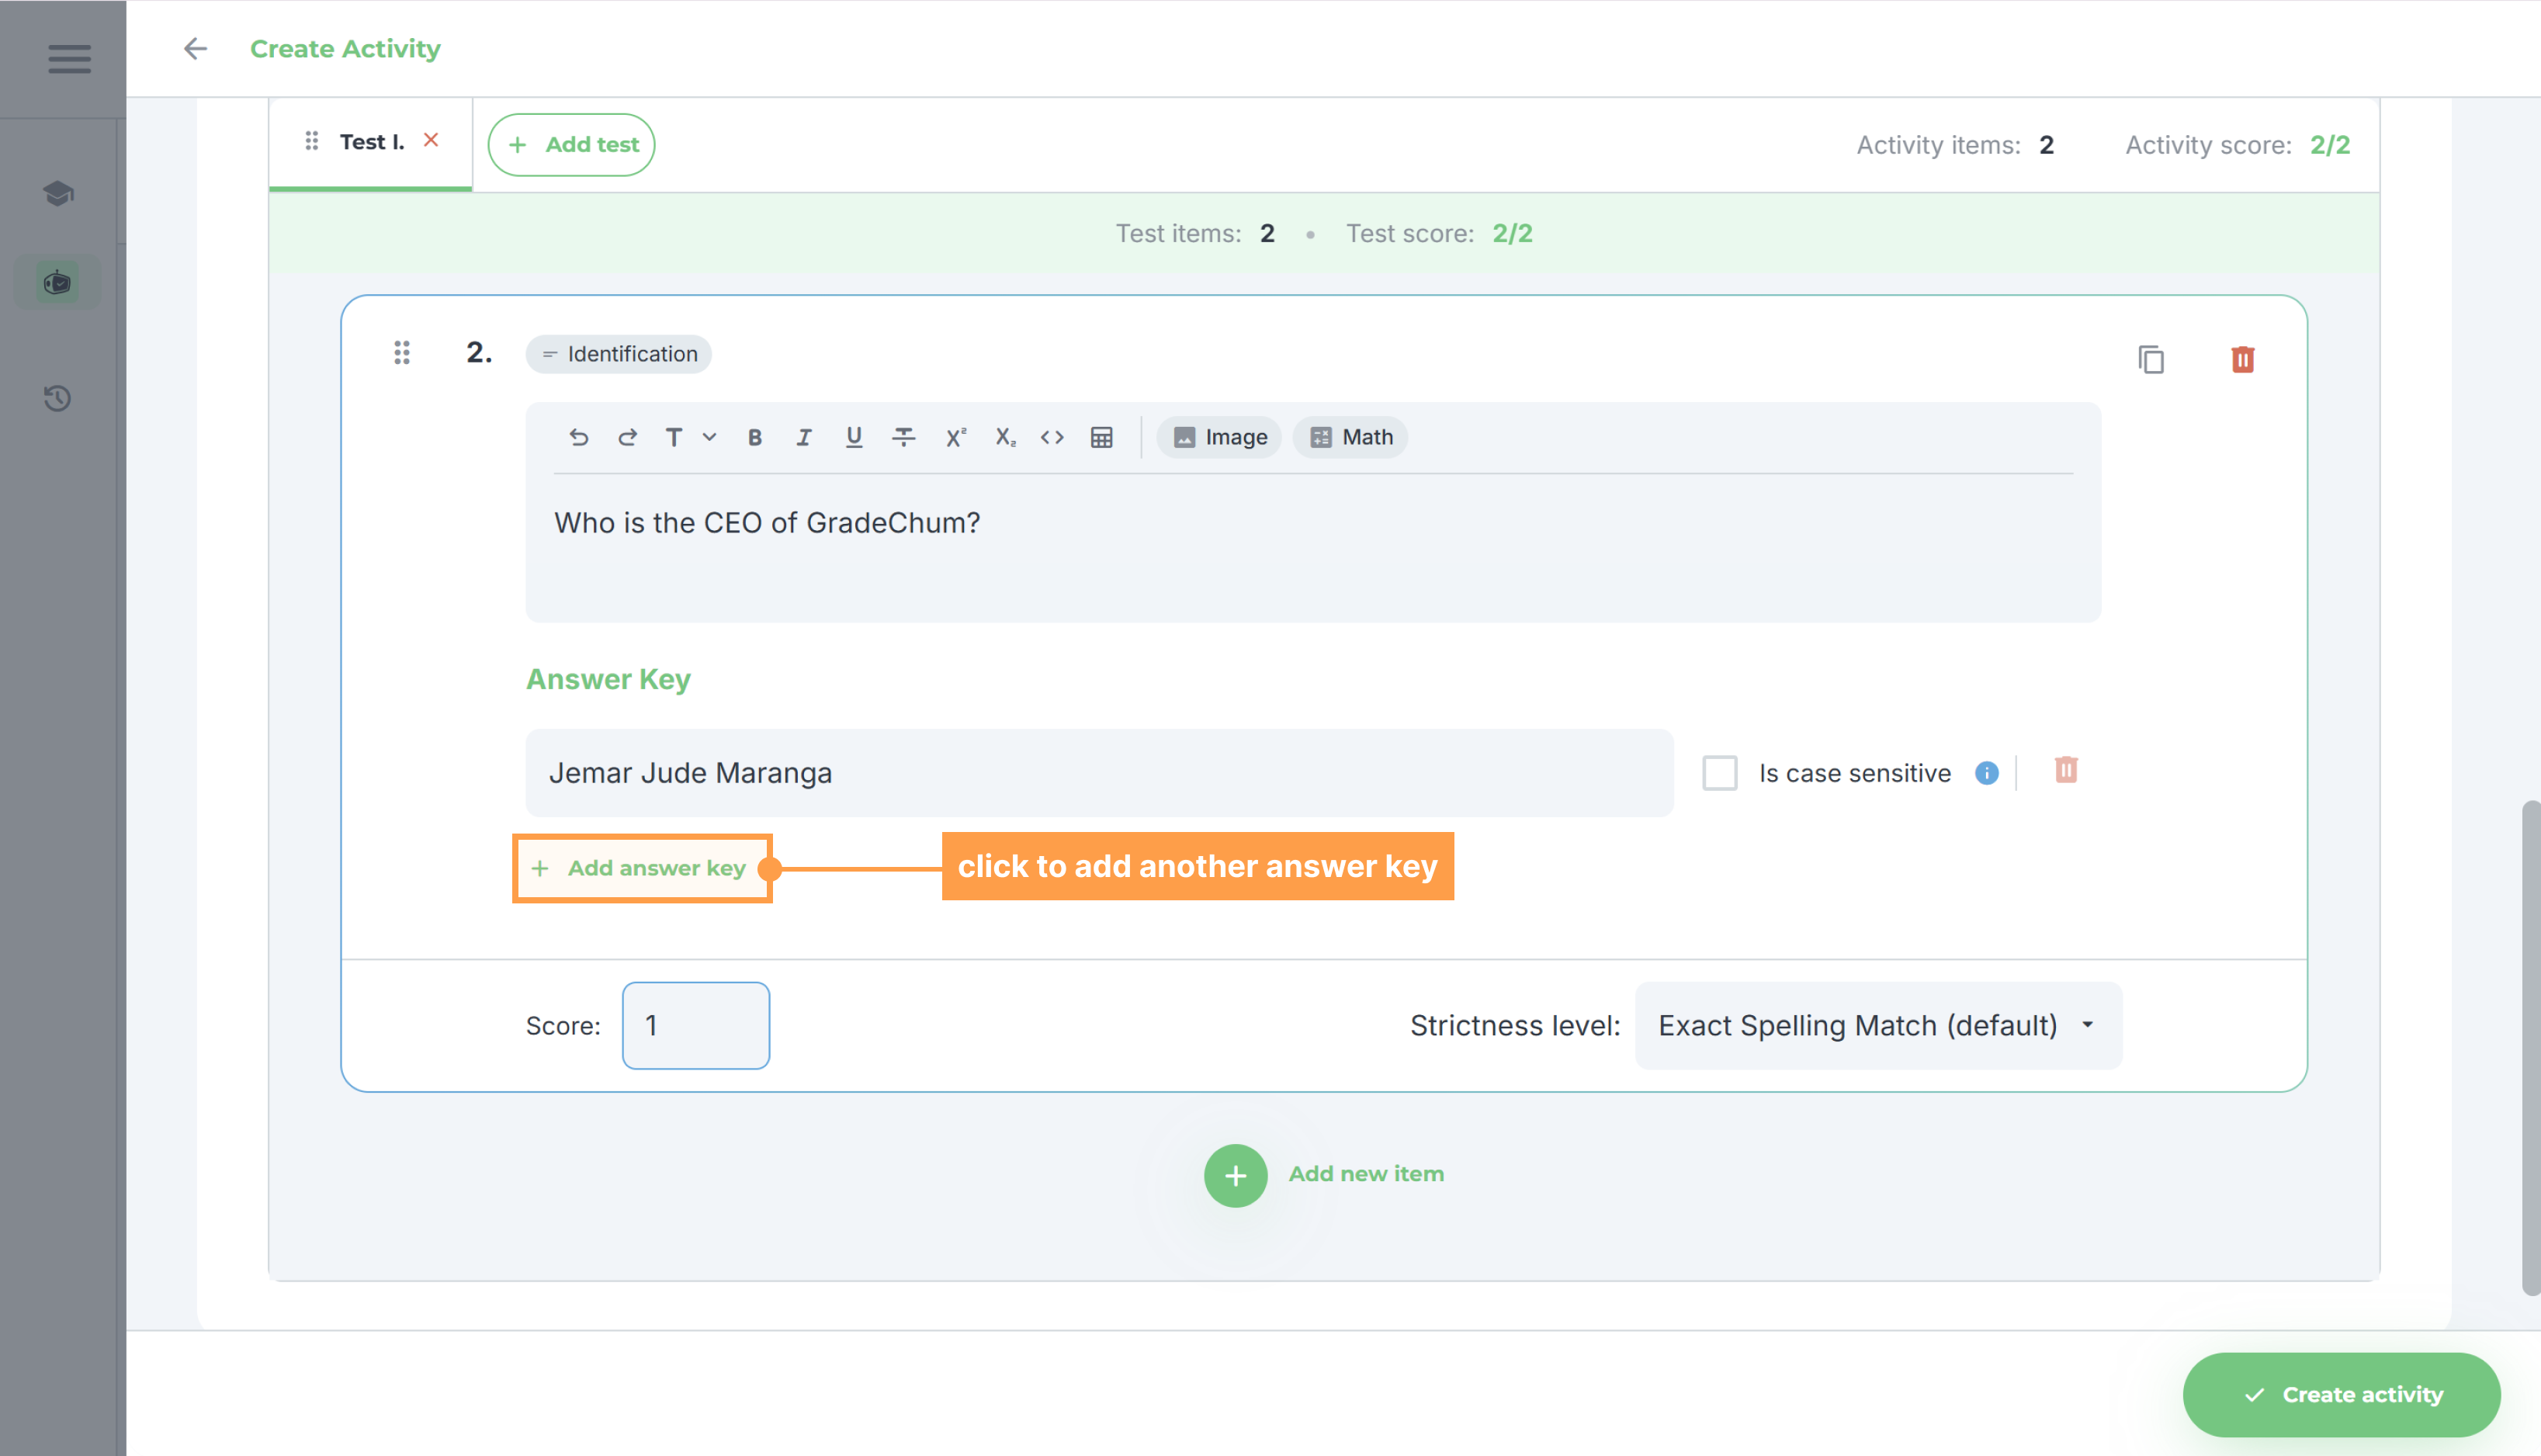
- Provide at least one (1) answer key for the sub-item by typing it on the provided field. Tick Is case sensitive beside the field if the student's answer must match the upper and lower case of your key exactly.
- If the sub-item has two or more possible answers, you can add them by clicking + Add answer key under the last answer key field.
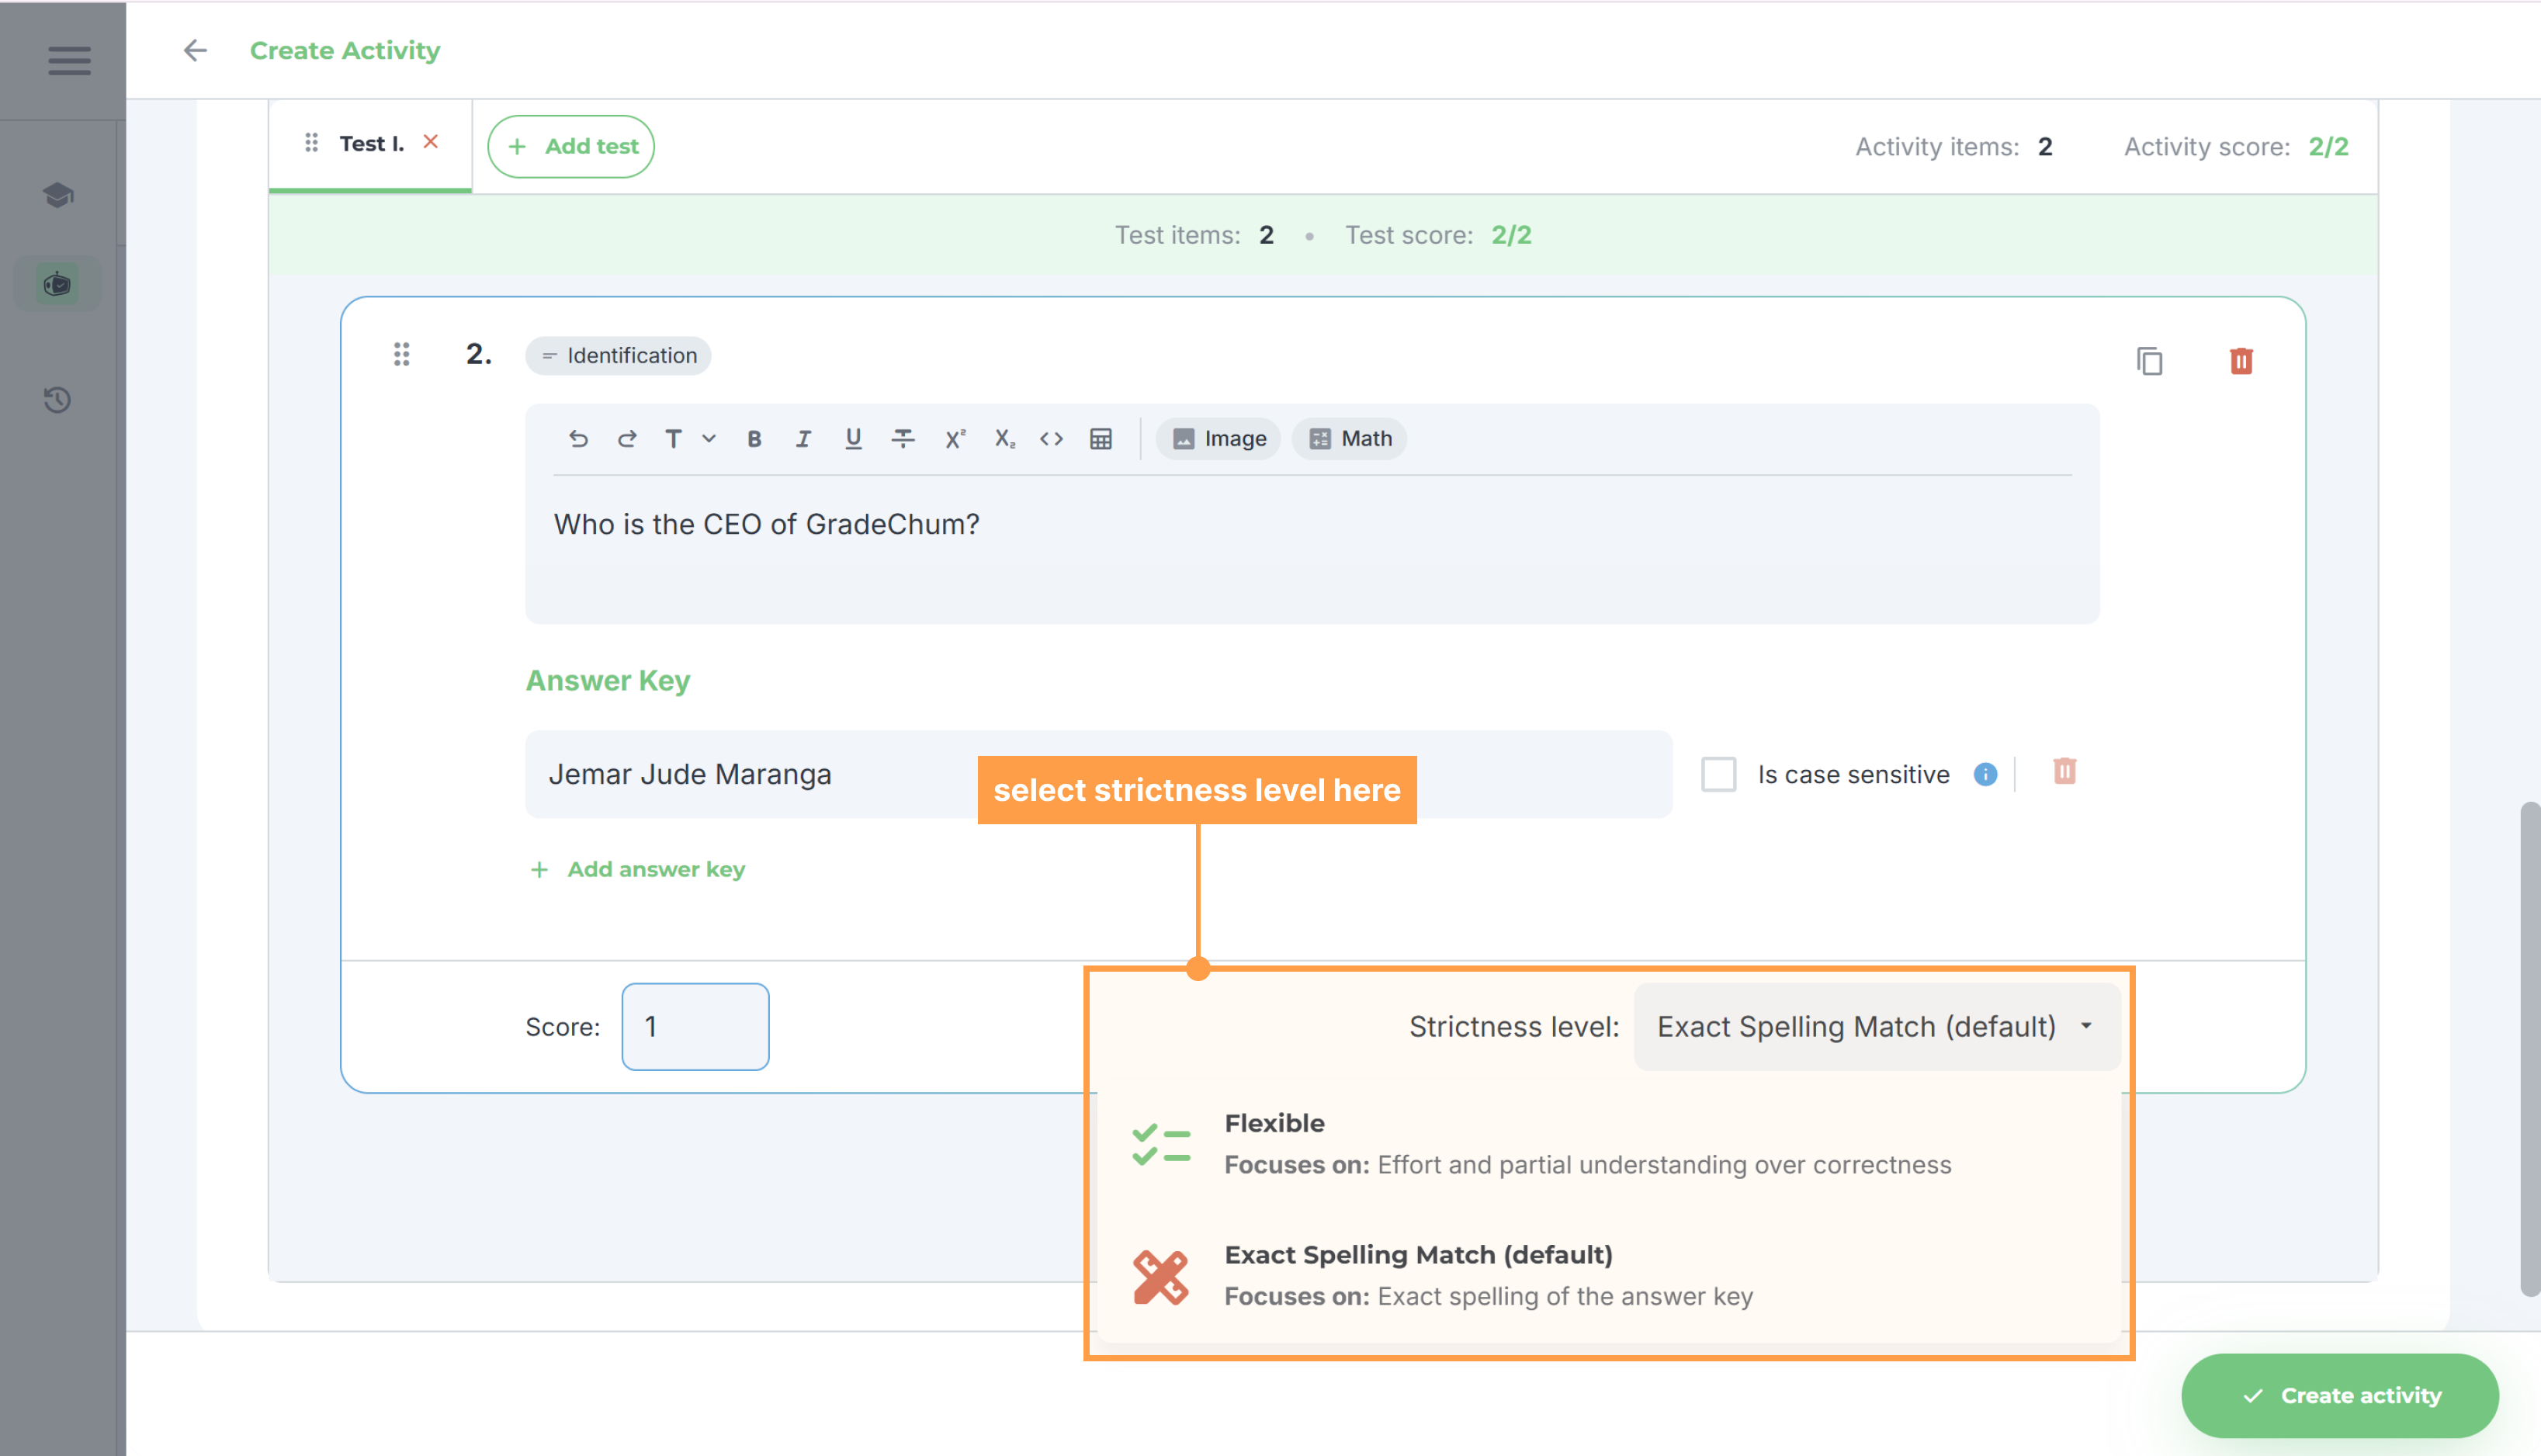
- Select a Strictness level at the bottom right of the sub-item. Strictness levels determine how strict our system will be in checking the students' answers. Identification sub-items offer two: Flexible, which focuses on effort and partial understanding over correctness, and Exact Spelling Match (default), which focuses on the exact spelling of your answer key.
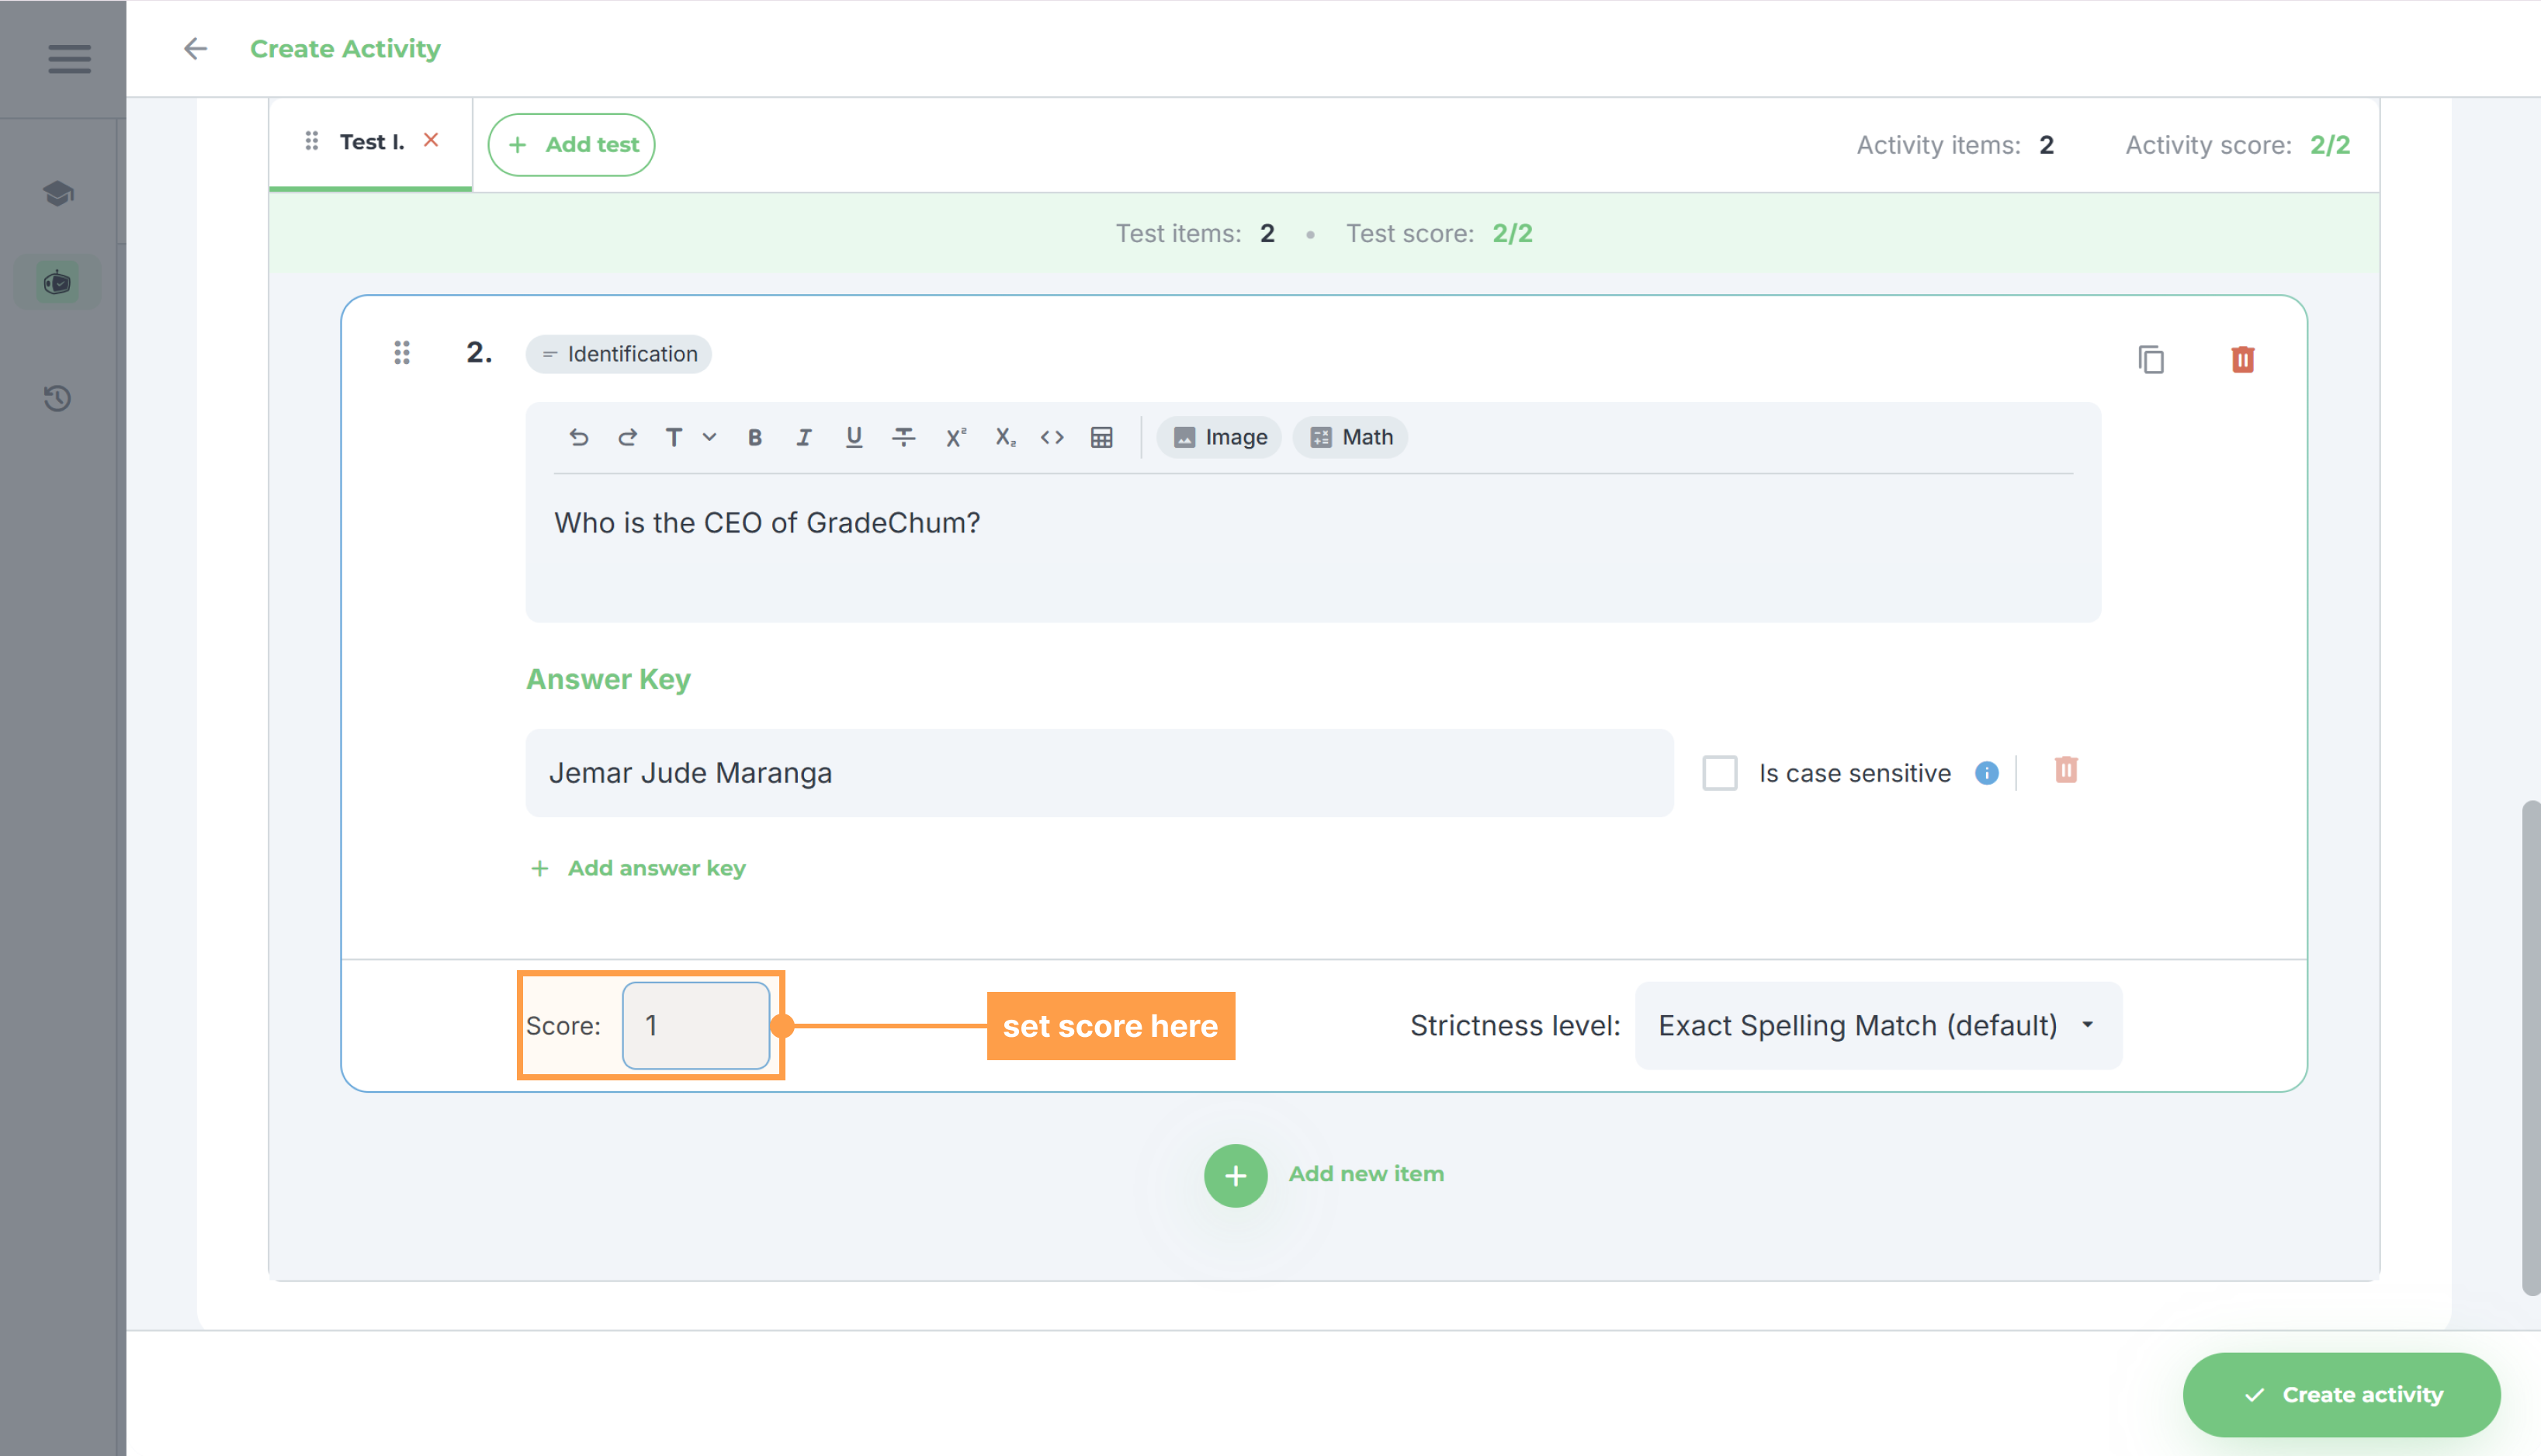
- Set a score for this sub-item in the Score box at the bottom left of the card. By default, this is set to 1 point.
c. Enumeration
For items with Enumeration as the item type:
- Fill out the question for this item.
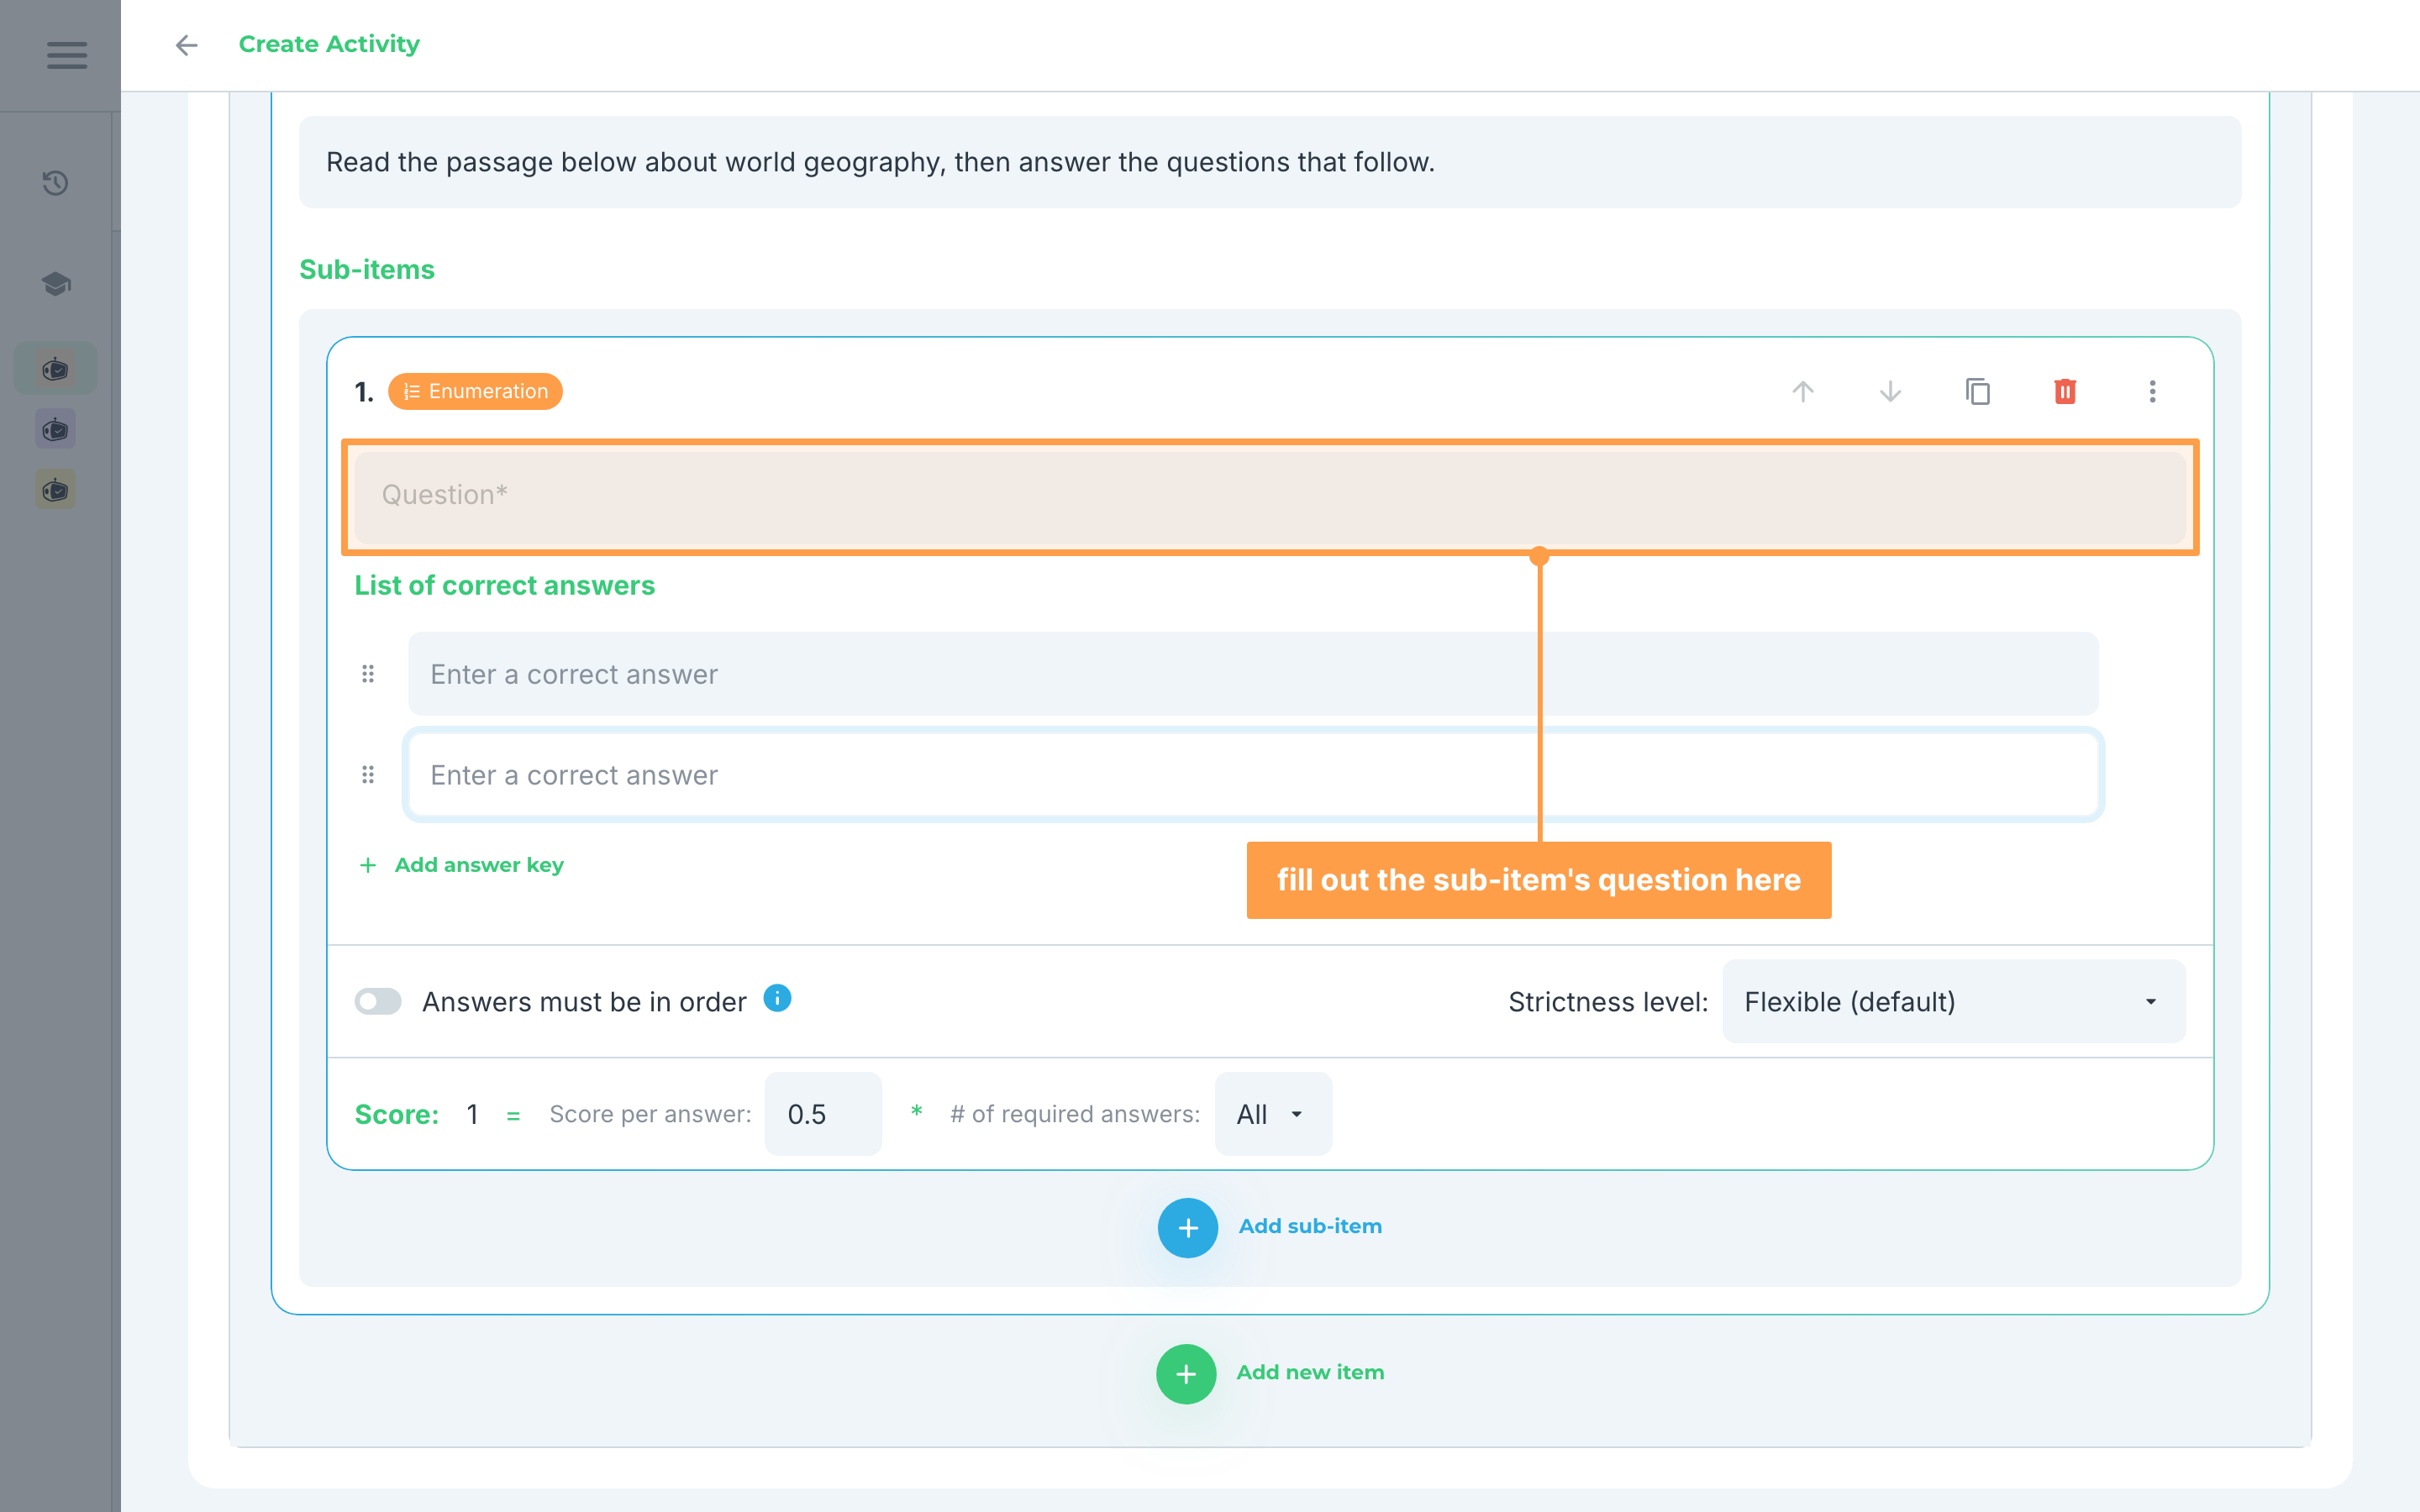
- Provide the answer keys for the item by typing them in the provided fields. A new item starts with two, and both have to be filled in.
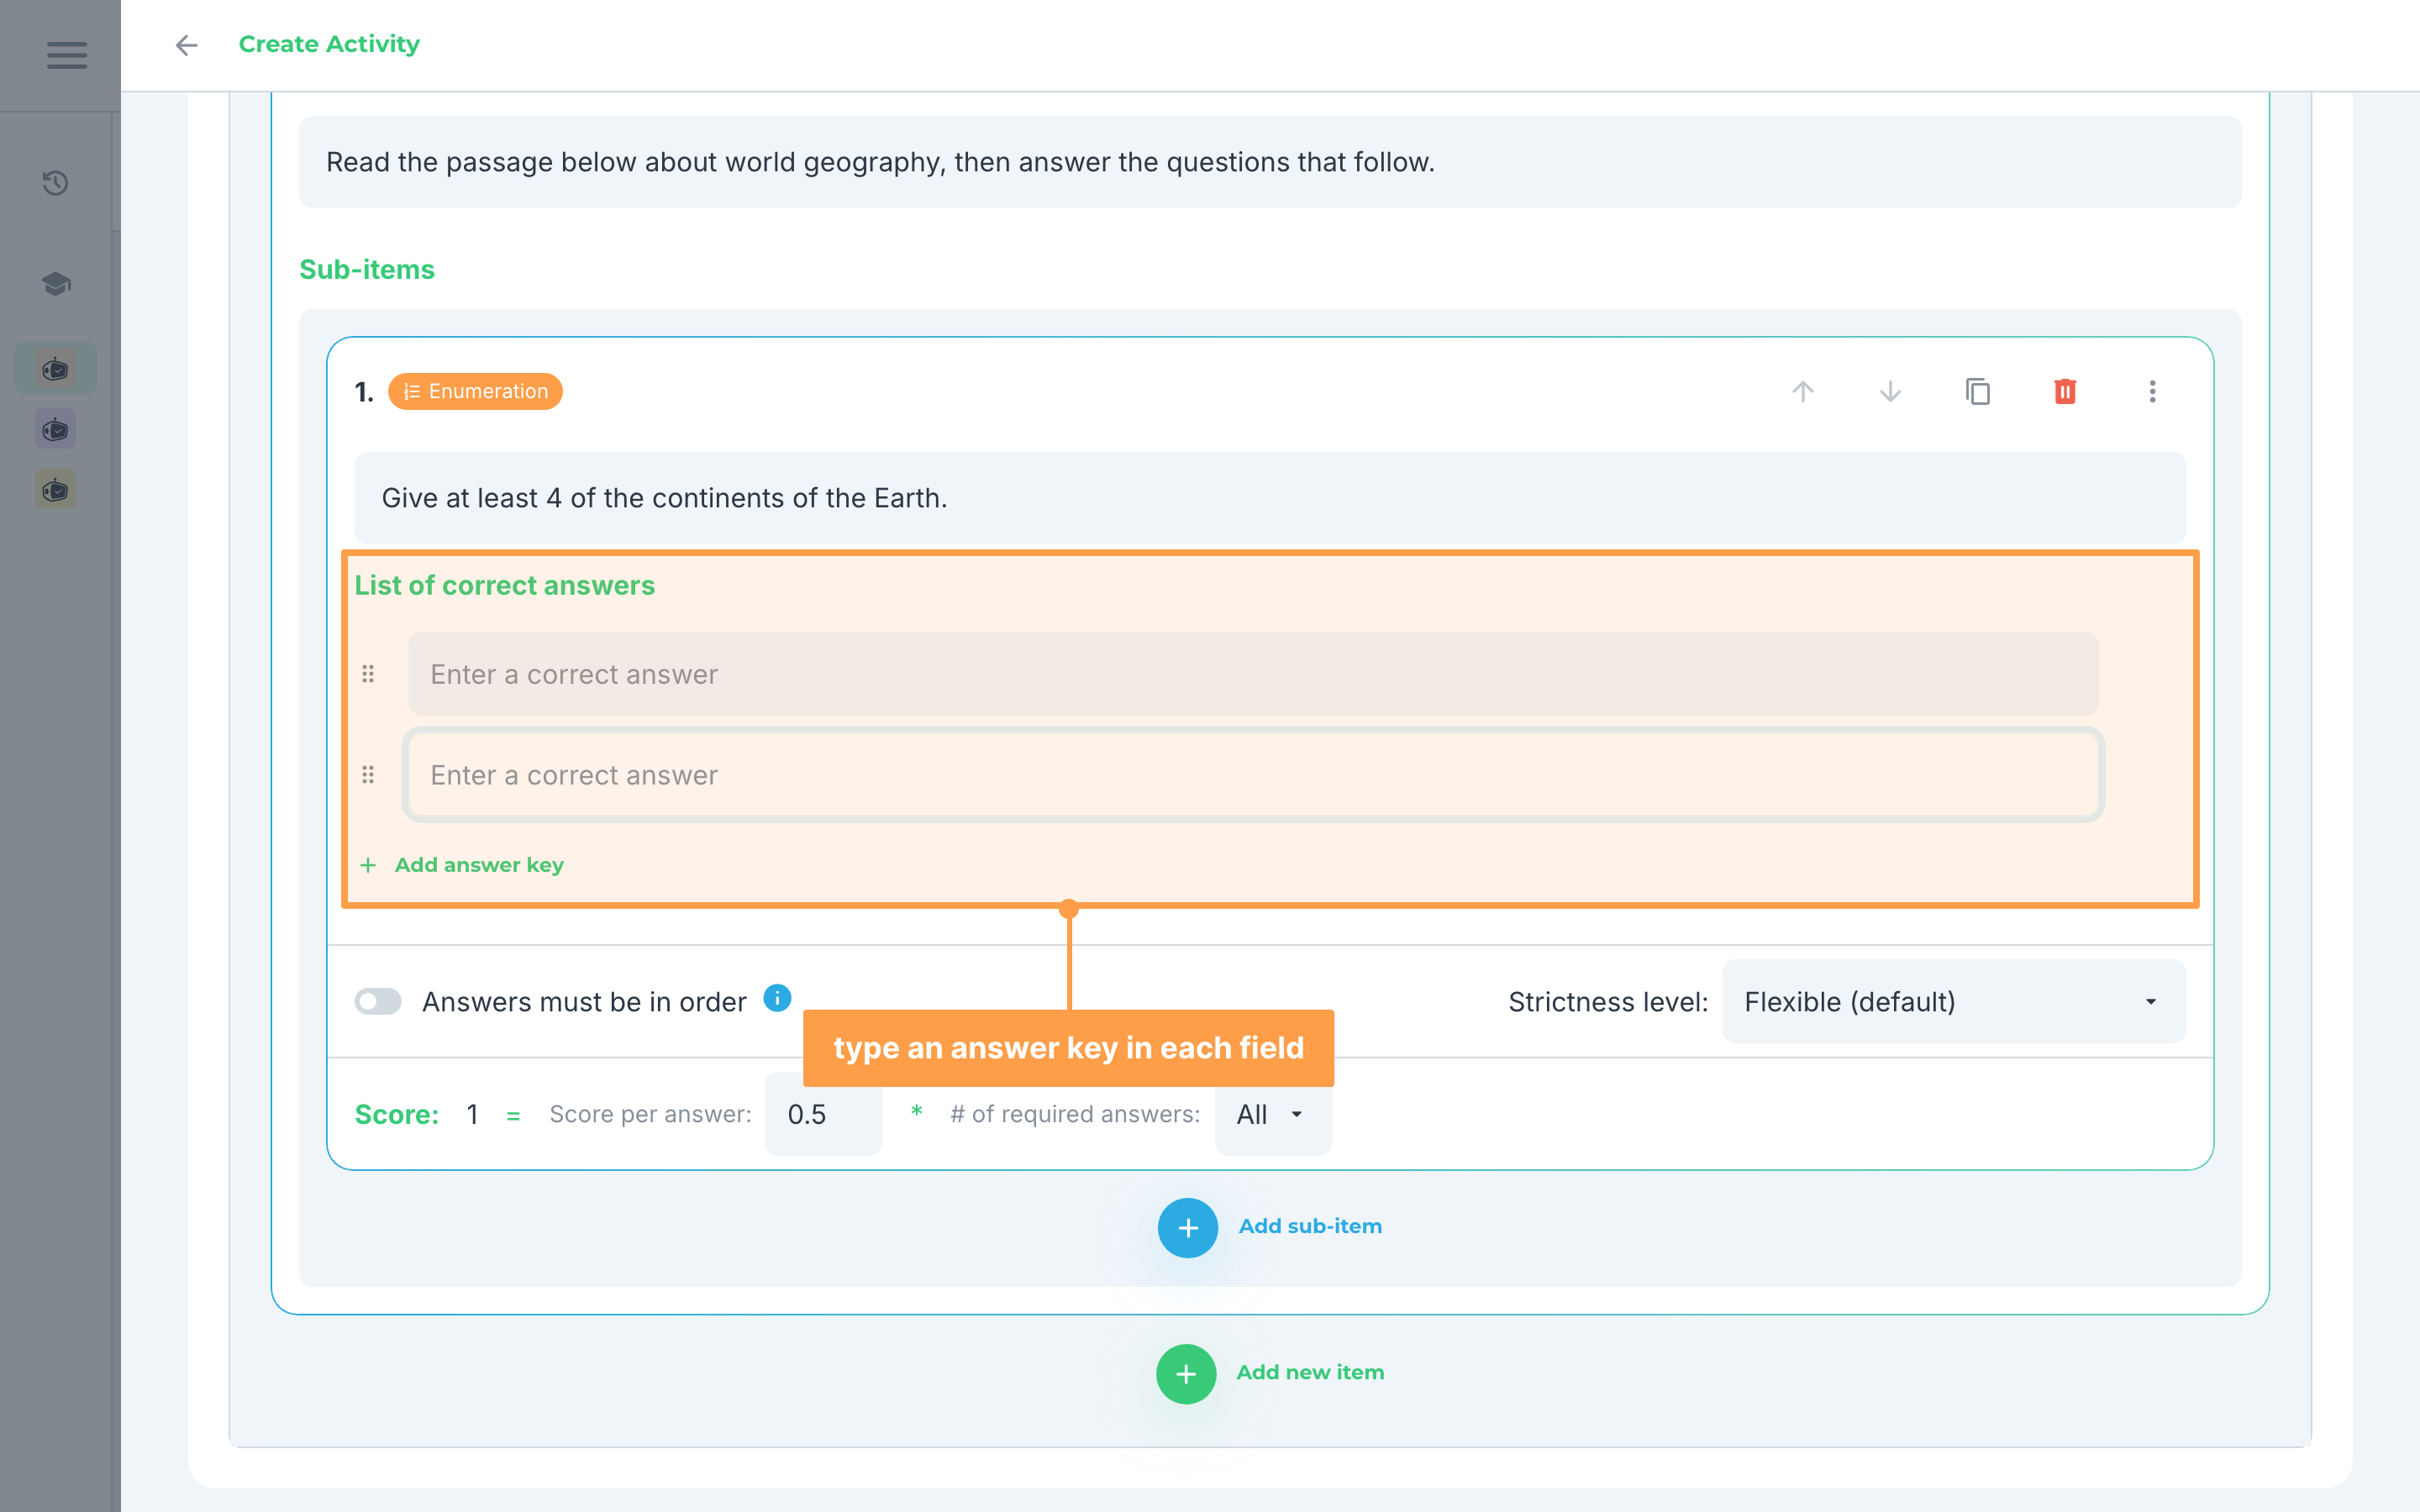
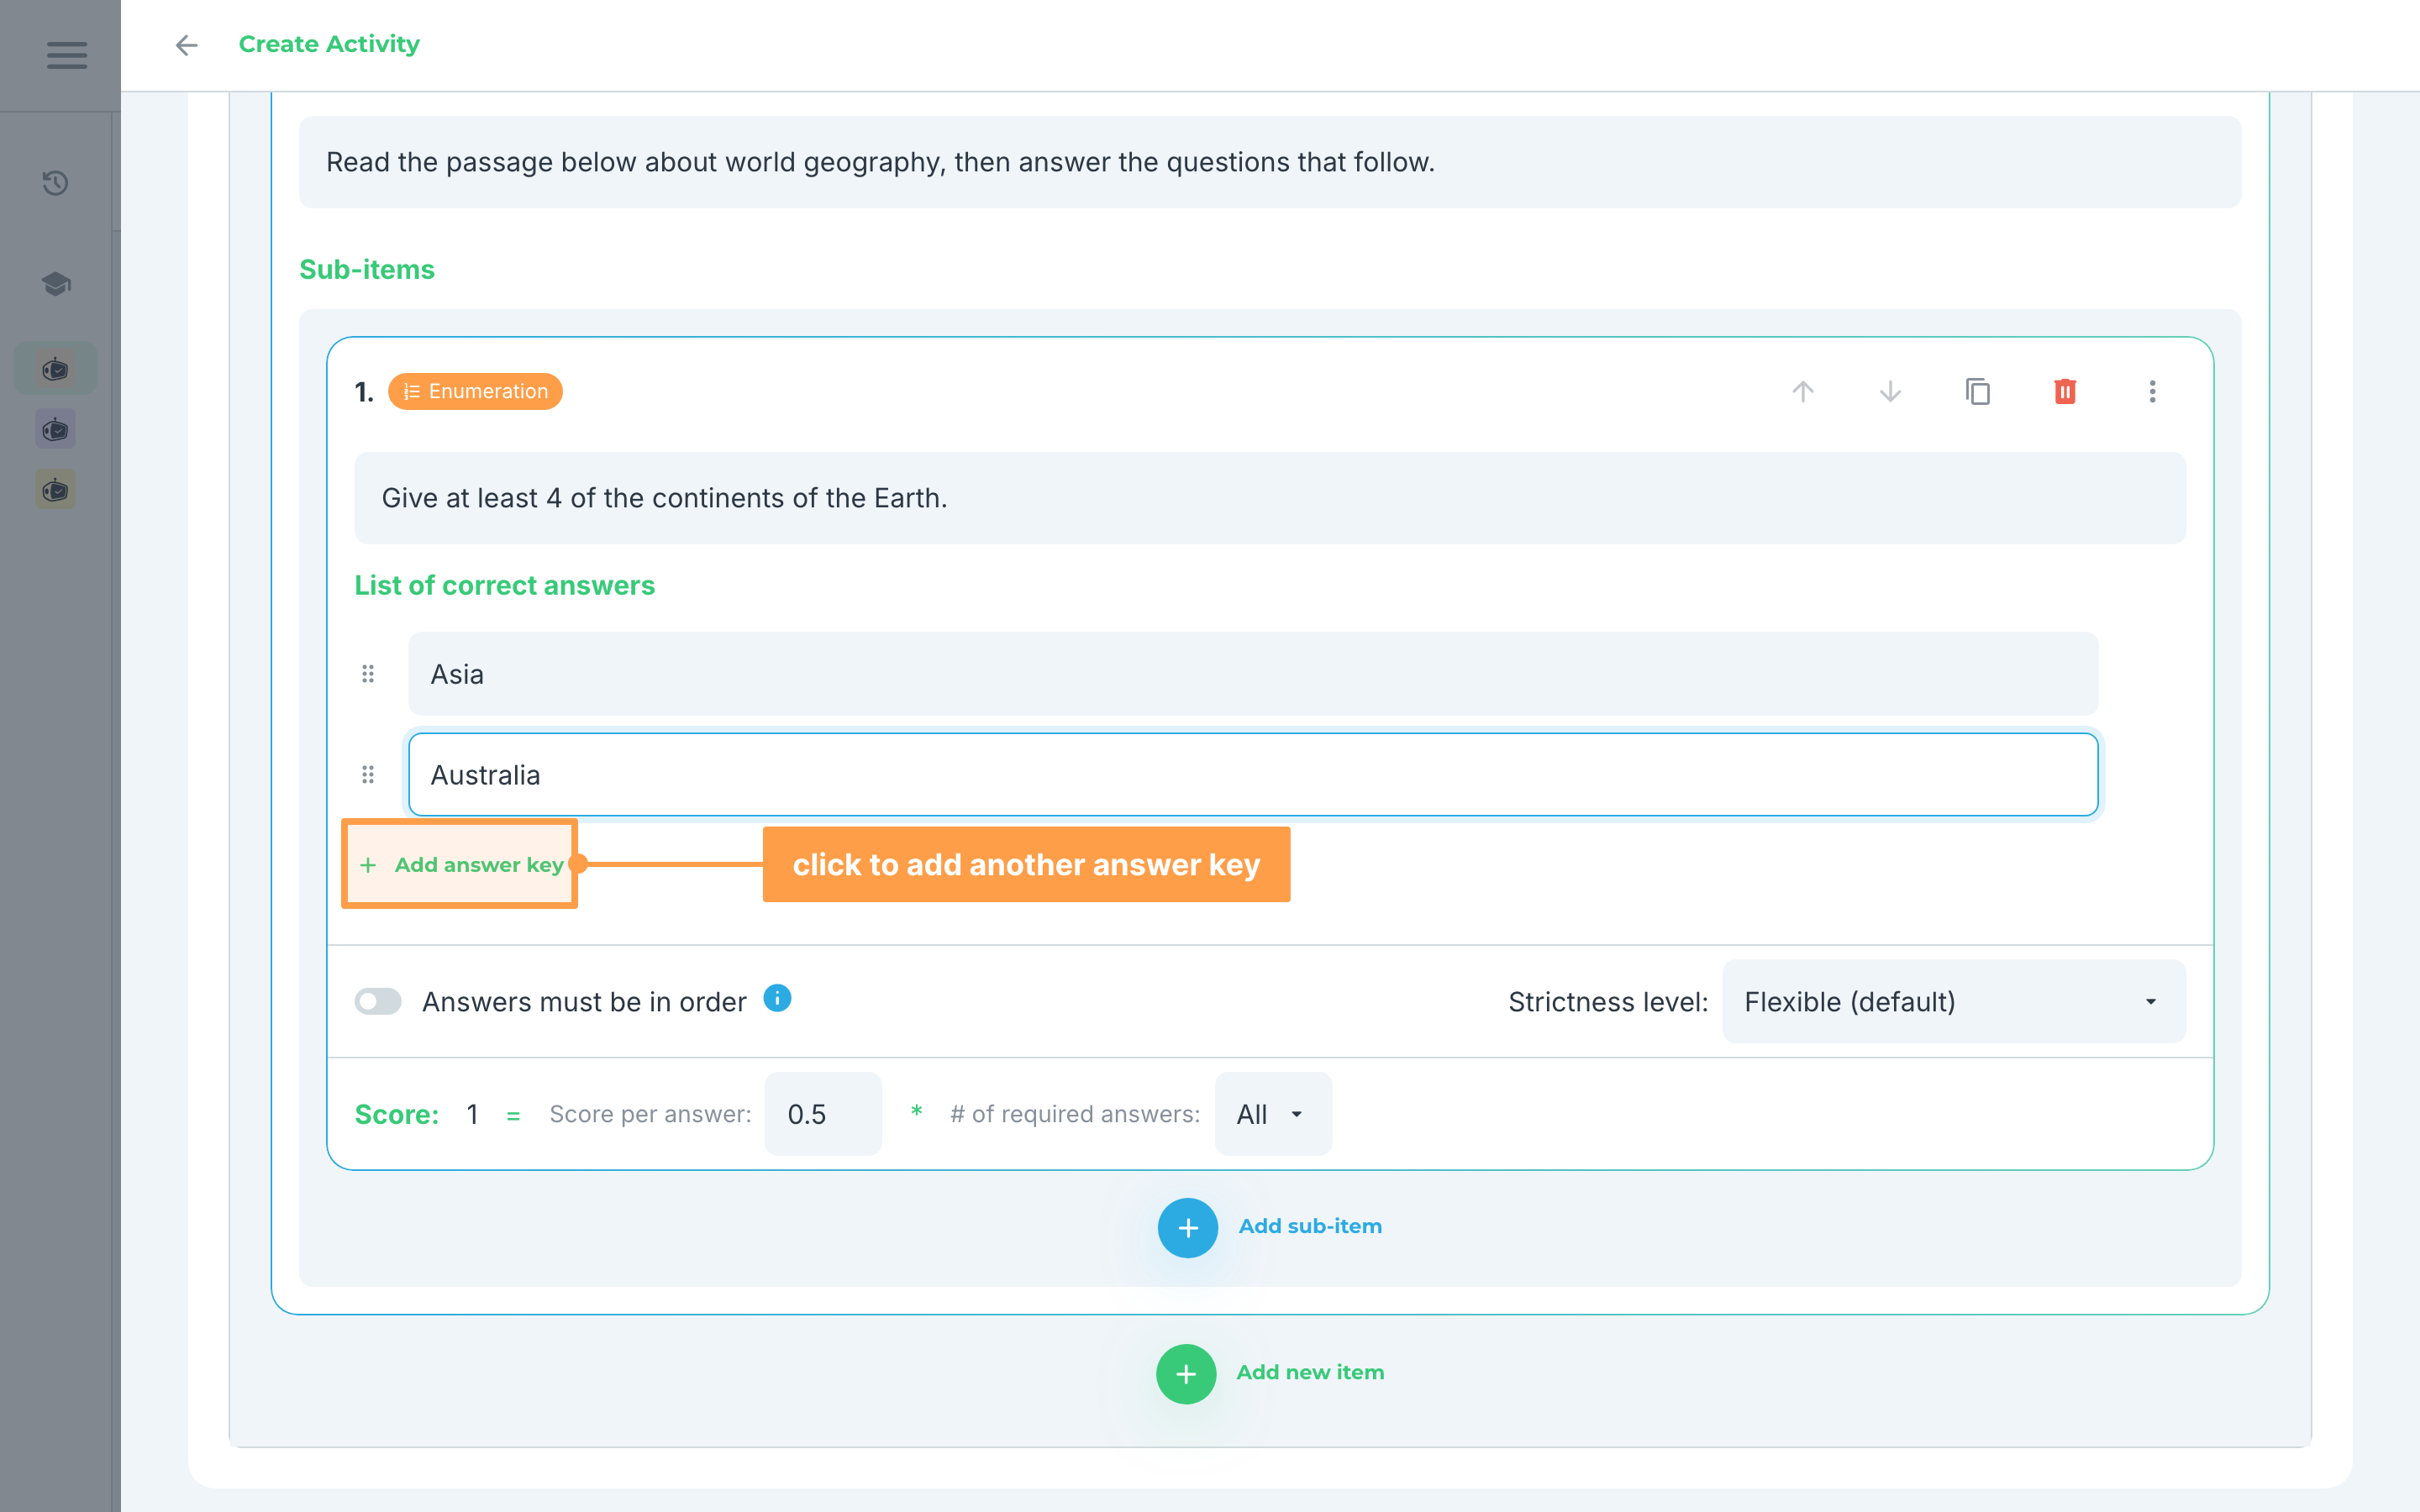
- To add an answer key, click the + Add answer key button below the List of correct answers.
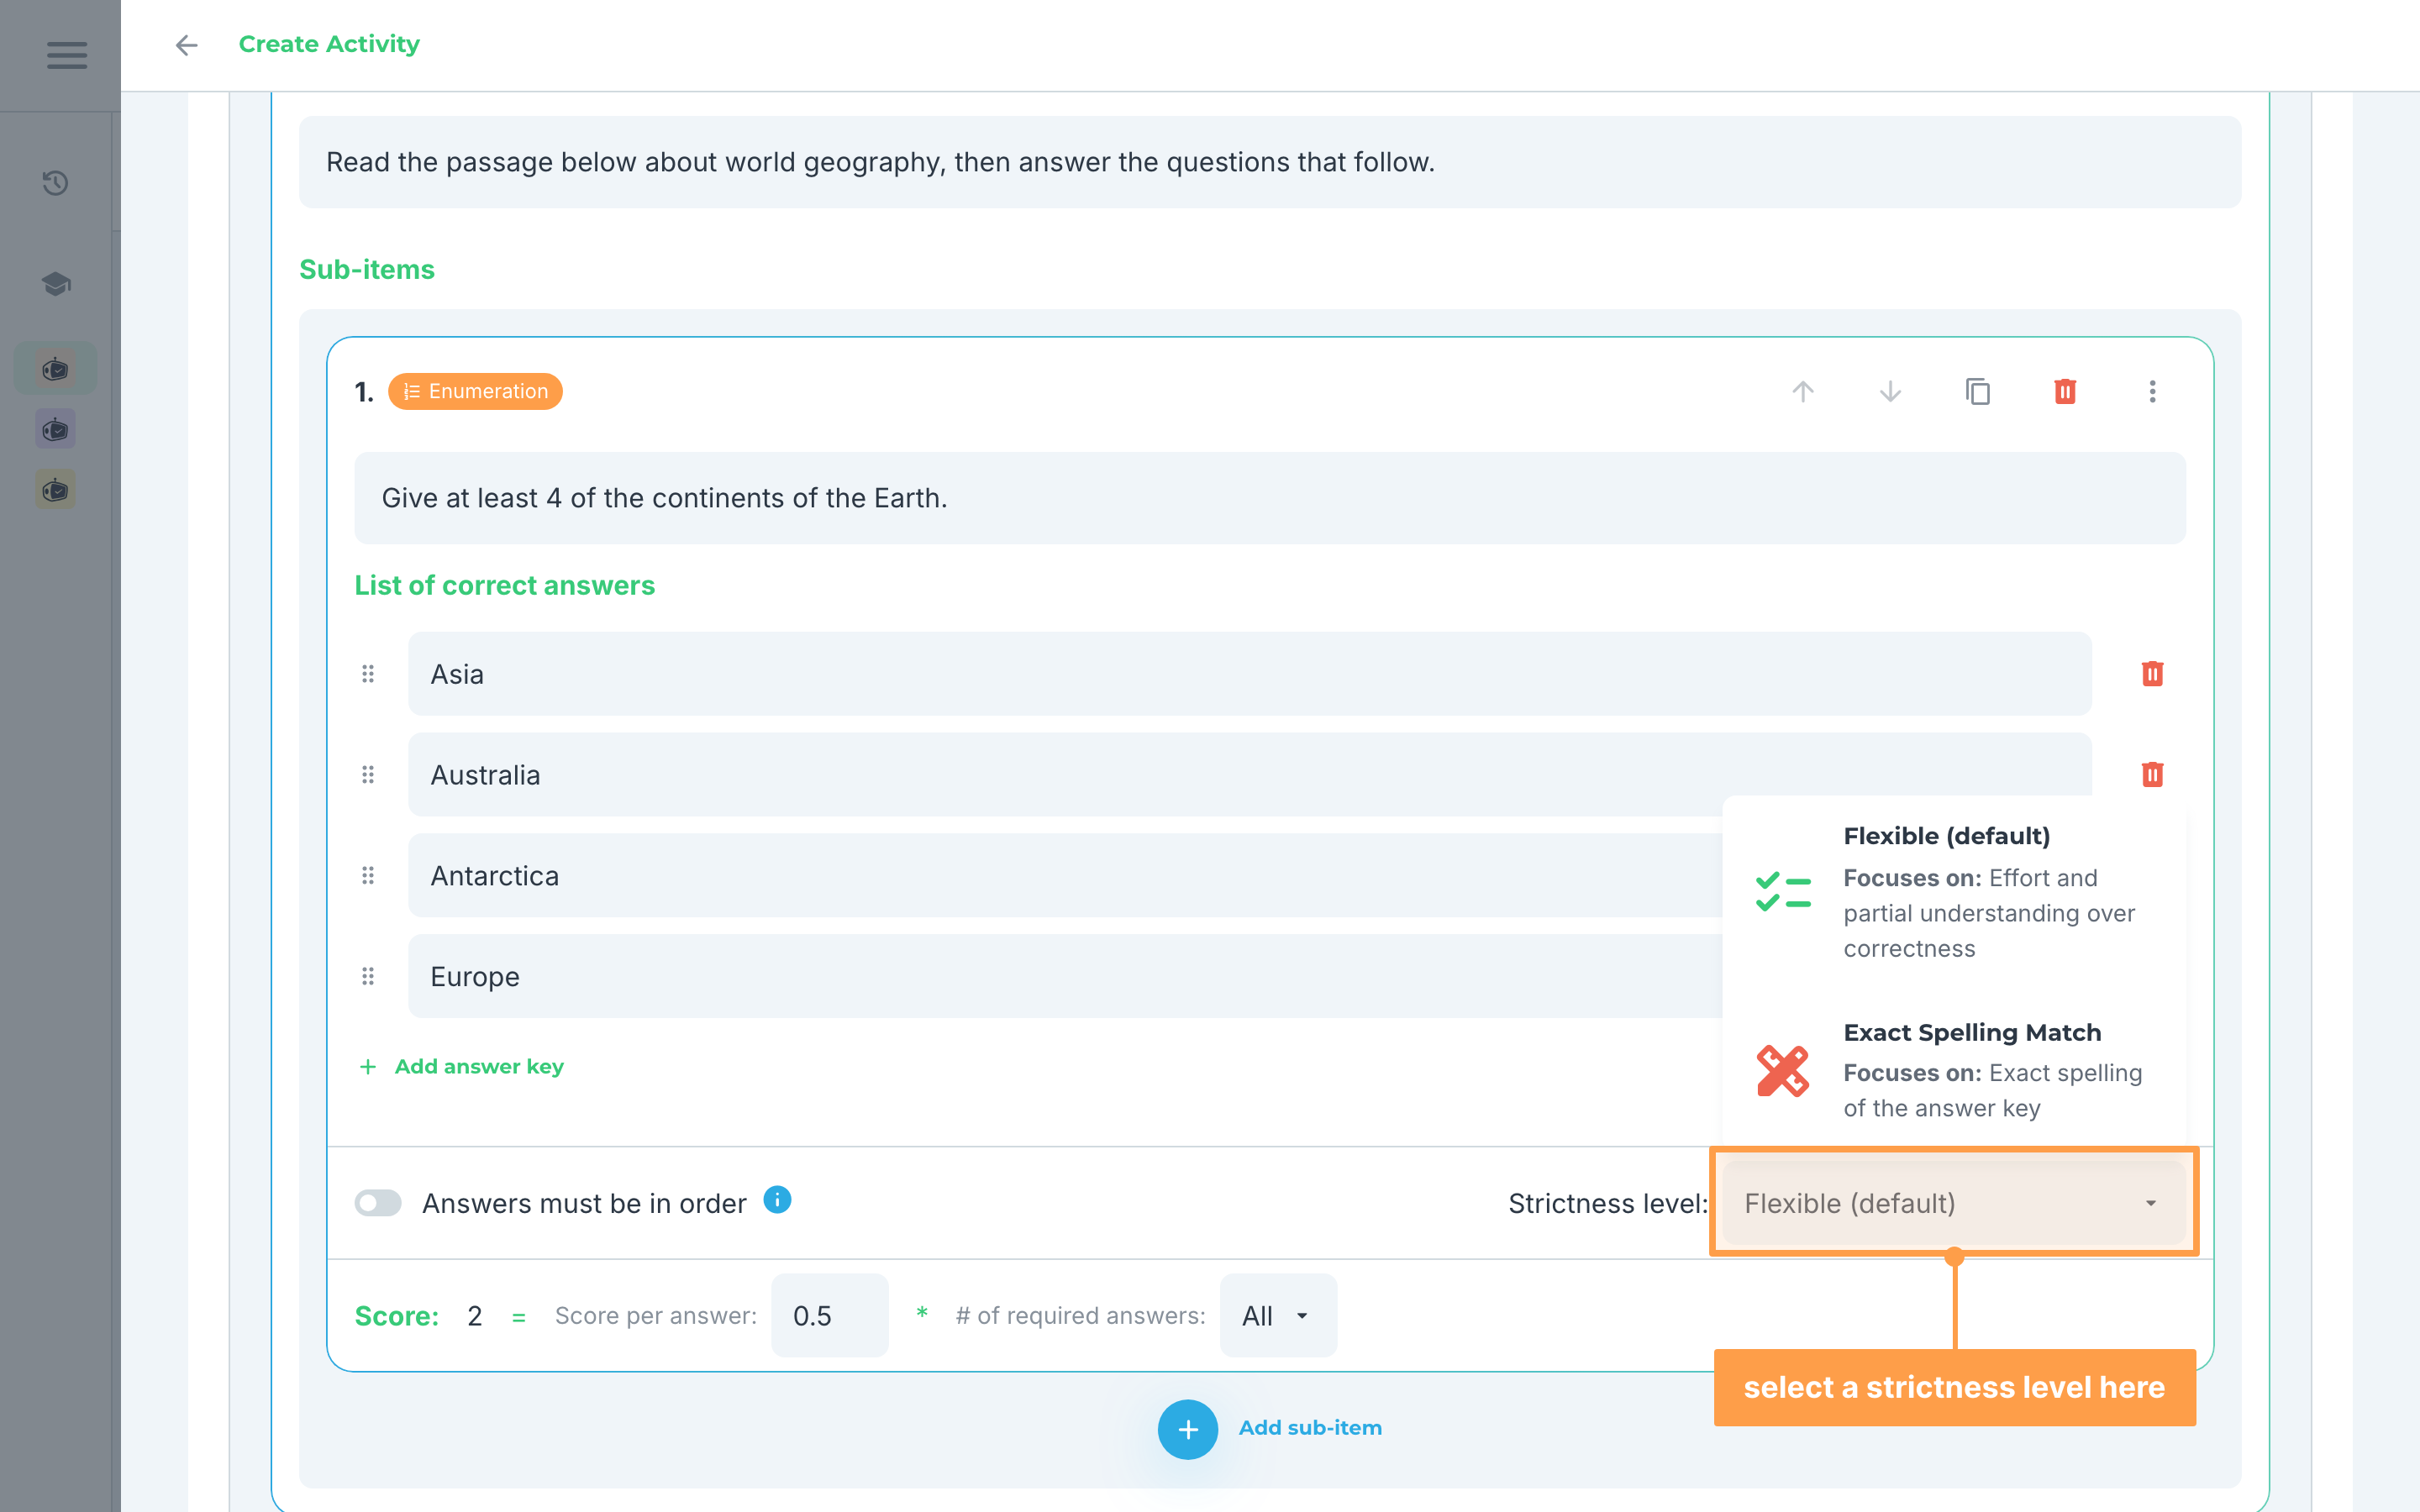
- Select a strictness level for this item. Strictness levels determine how strict our system will be in checking the students' answers, and choosing Exact Spelling Match adds an Is case sensitive checkbox to every answer. Beside the selector, switch on Answers must be in order if the answers have to be given in the same order as the list above.
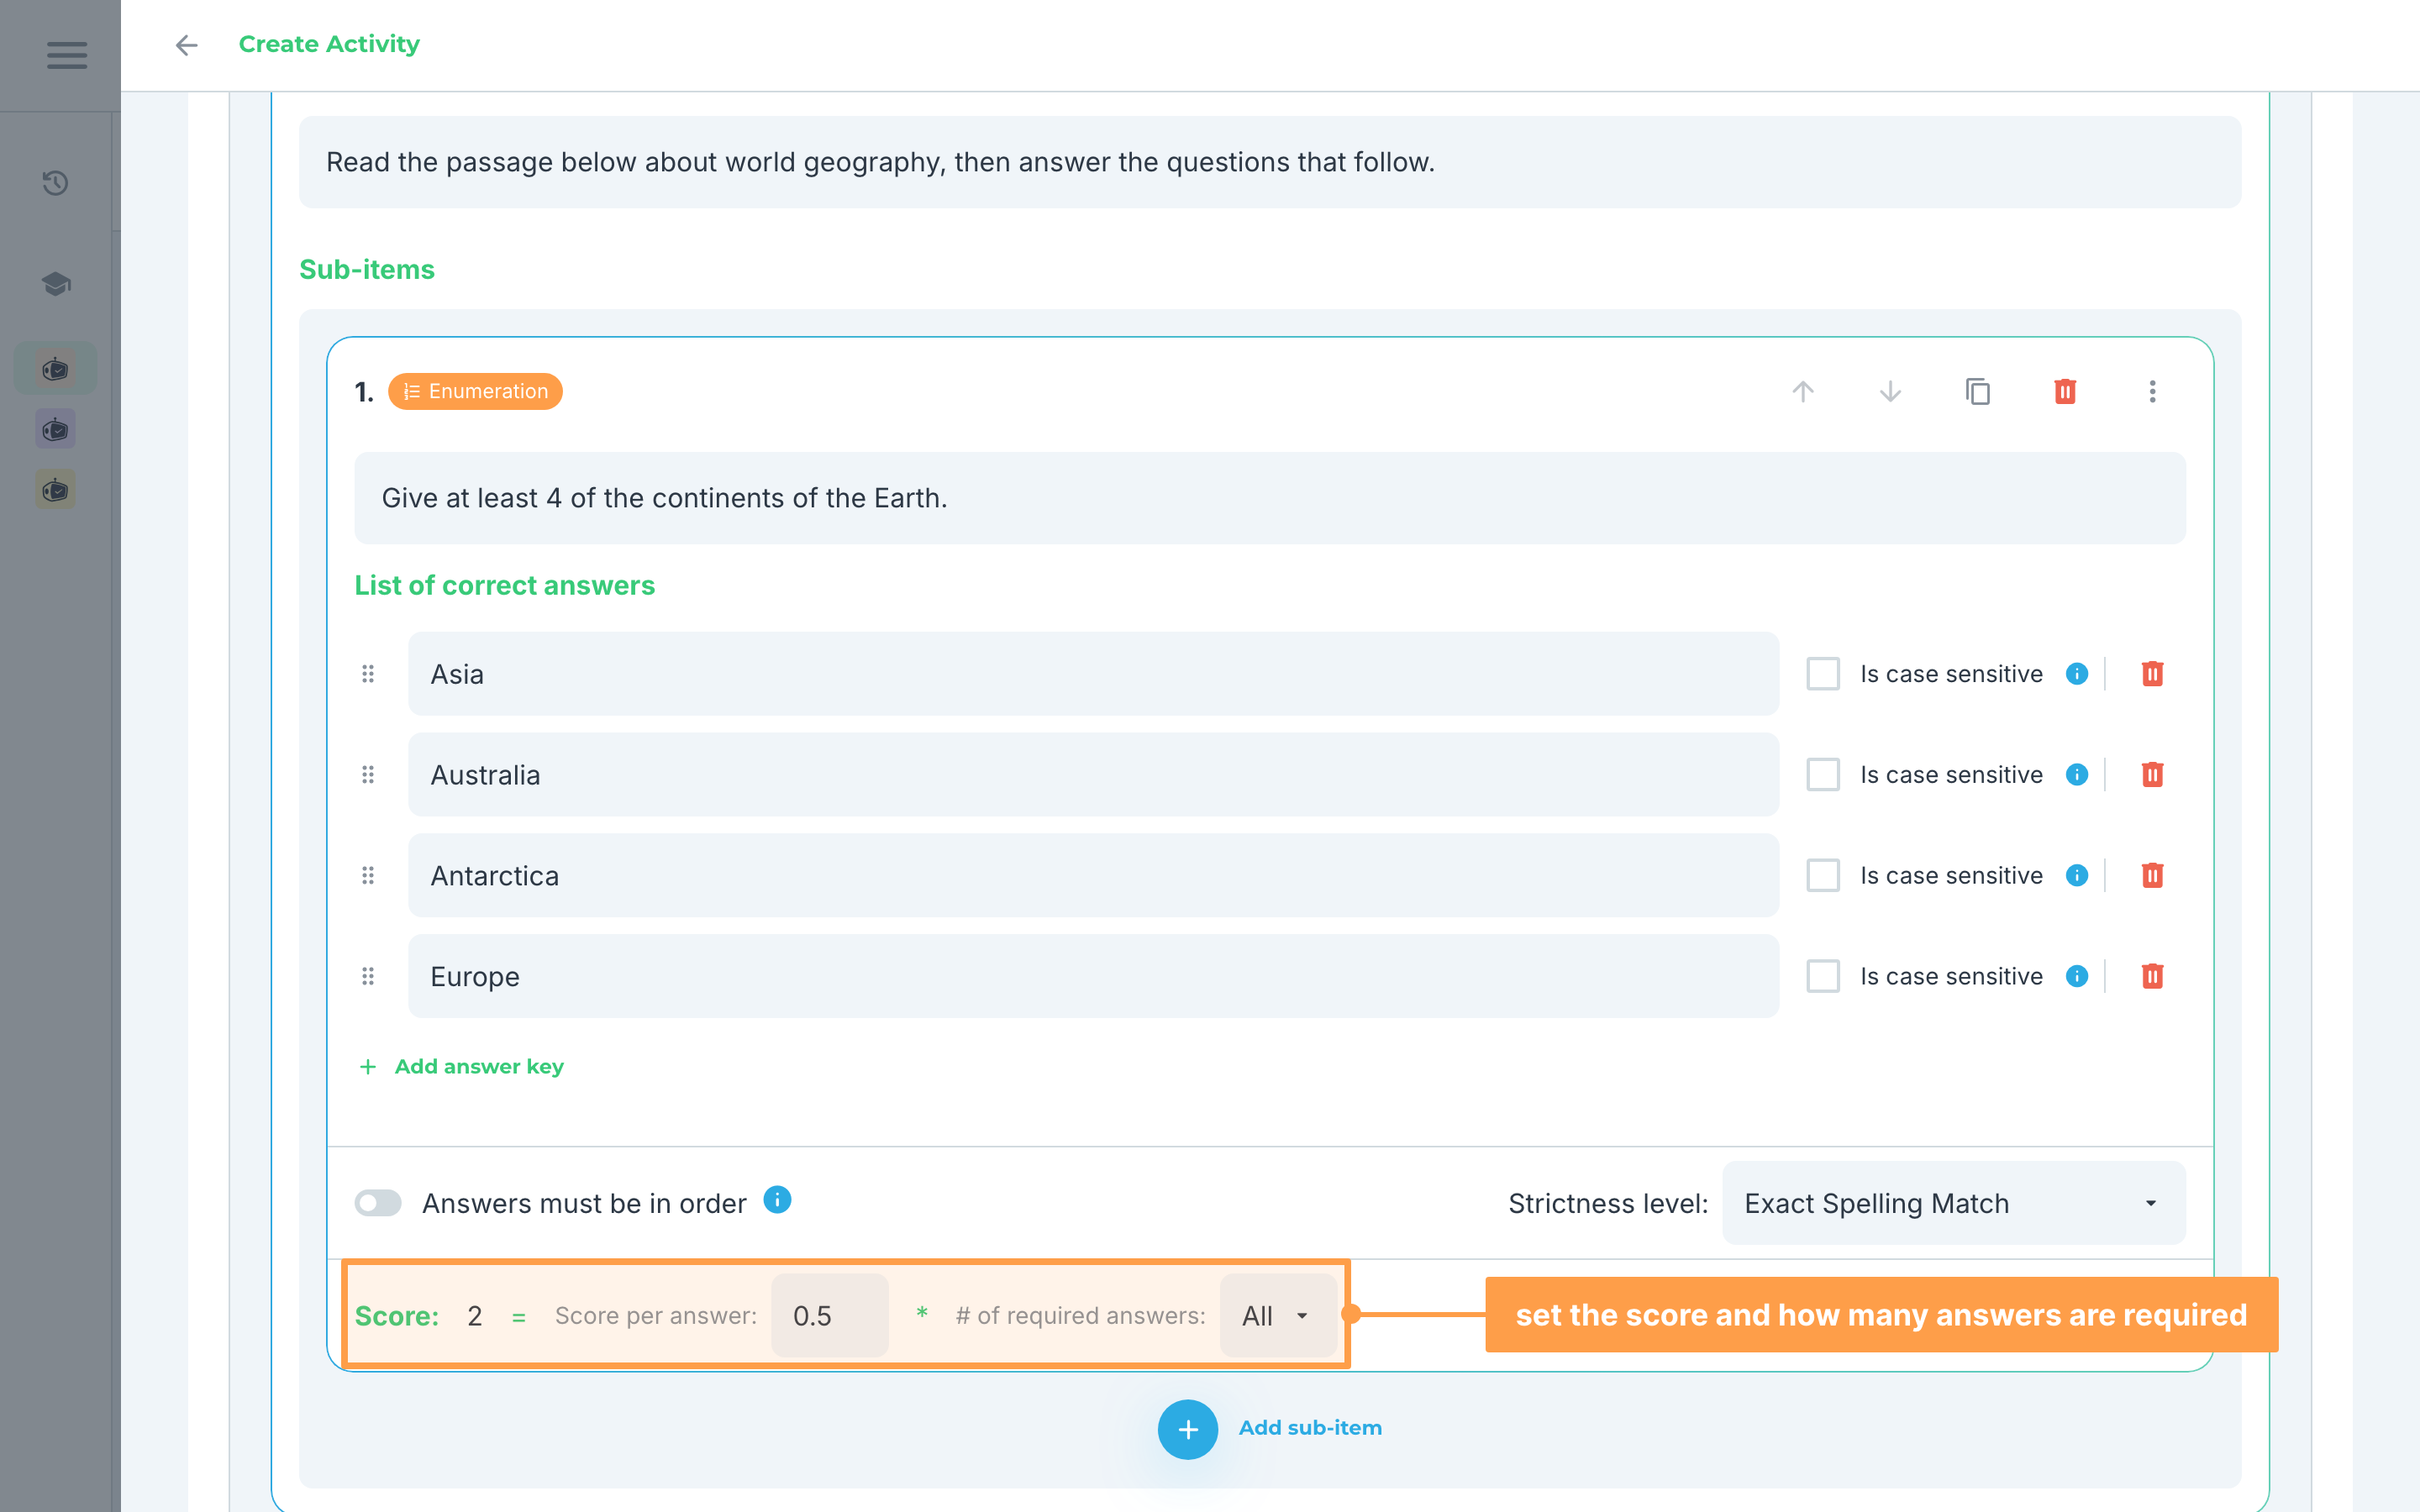
- Finally, set the score and the number of required answers for this item. By default, Score per answer is 0.5 and all of the answer keys are required answers, so a new item with its two starting answer keys is worth 1 point.
d. Essay
For items with Essay as the item type:
- Fill out the question for this sub-item.
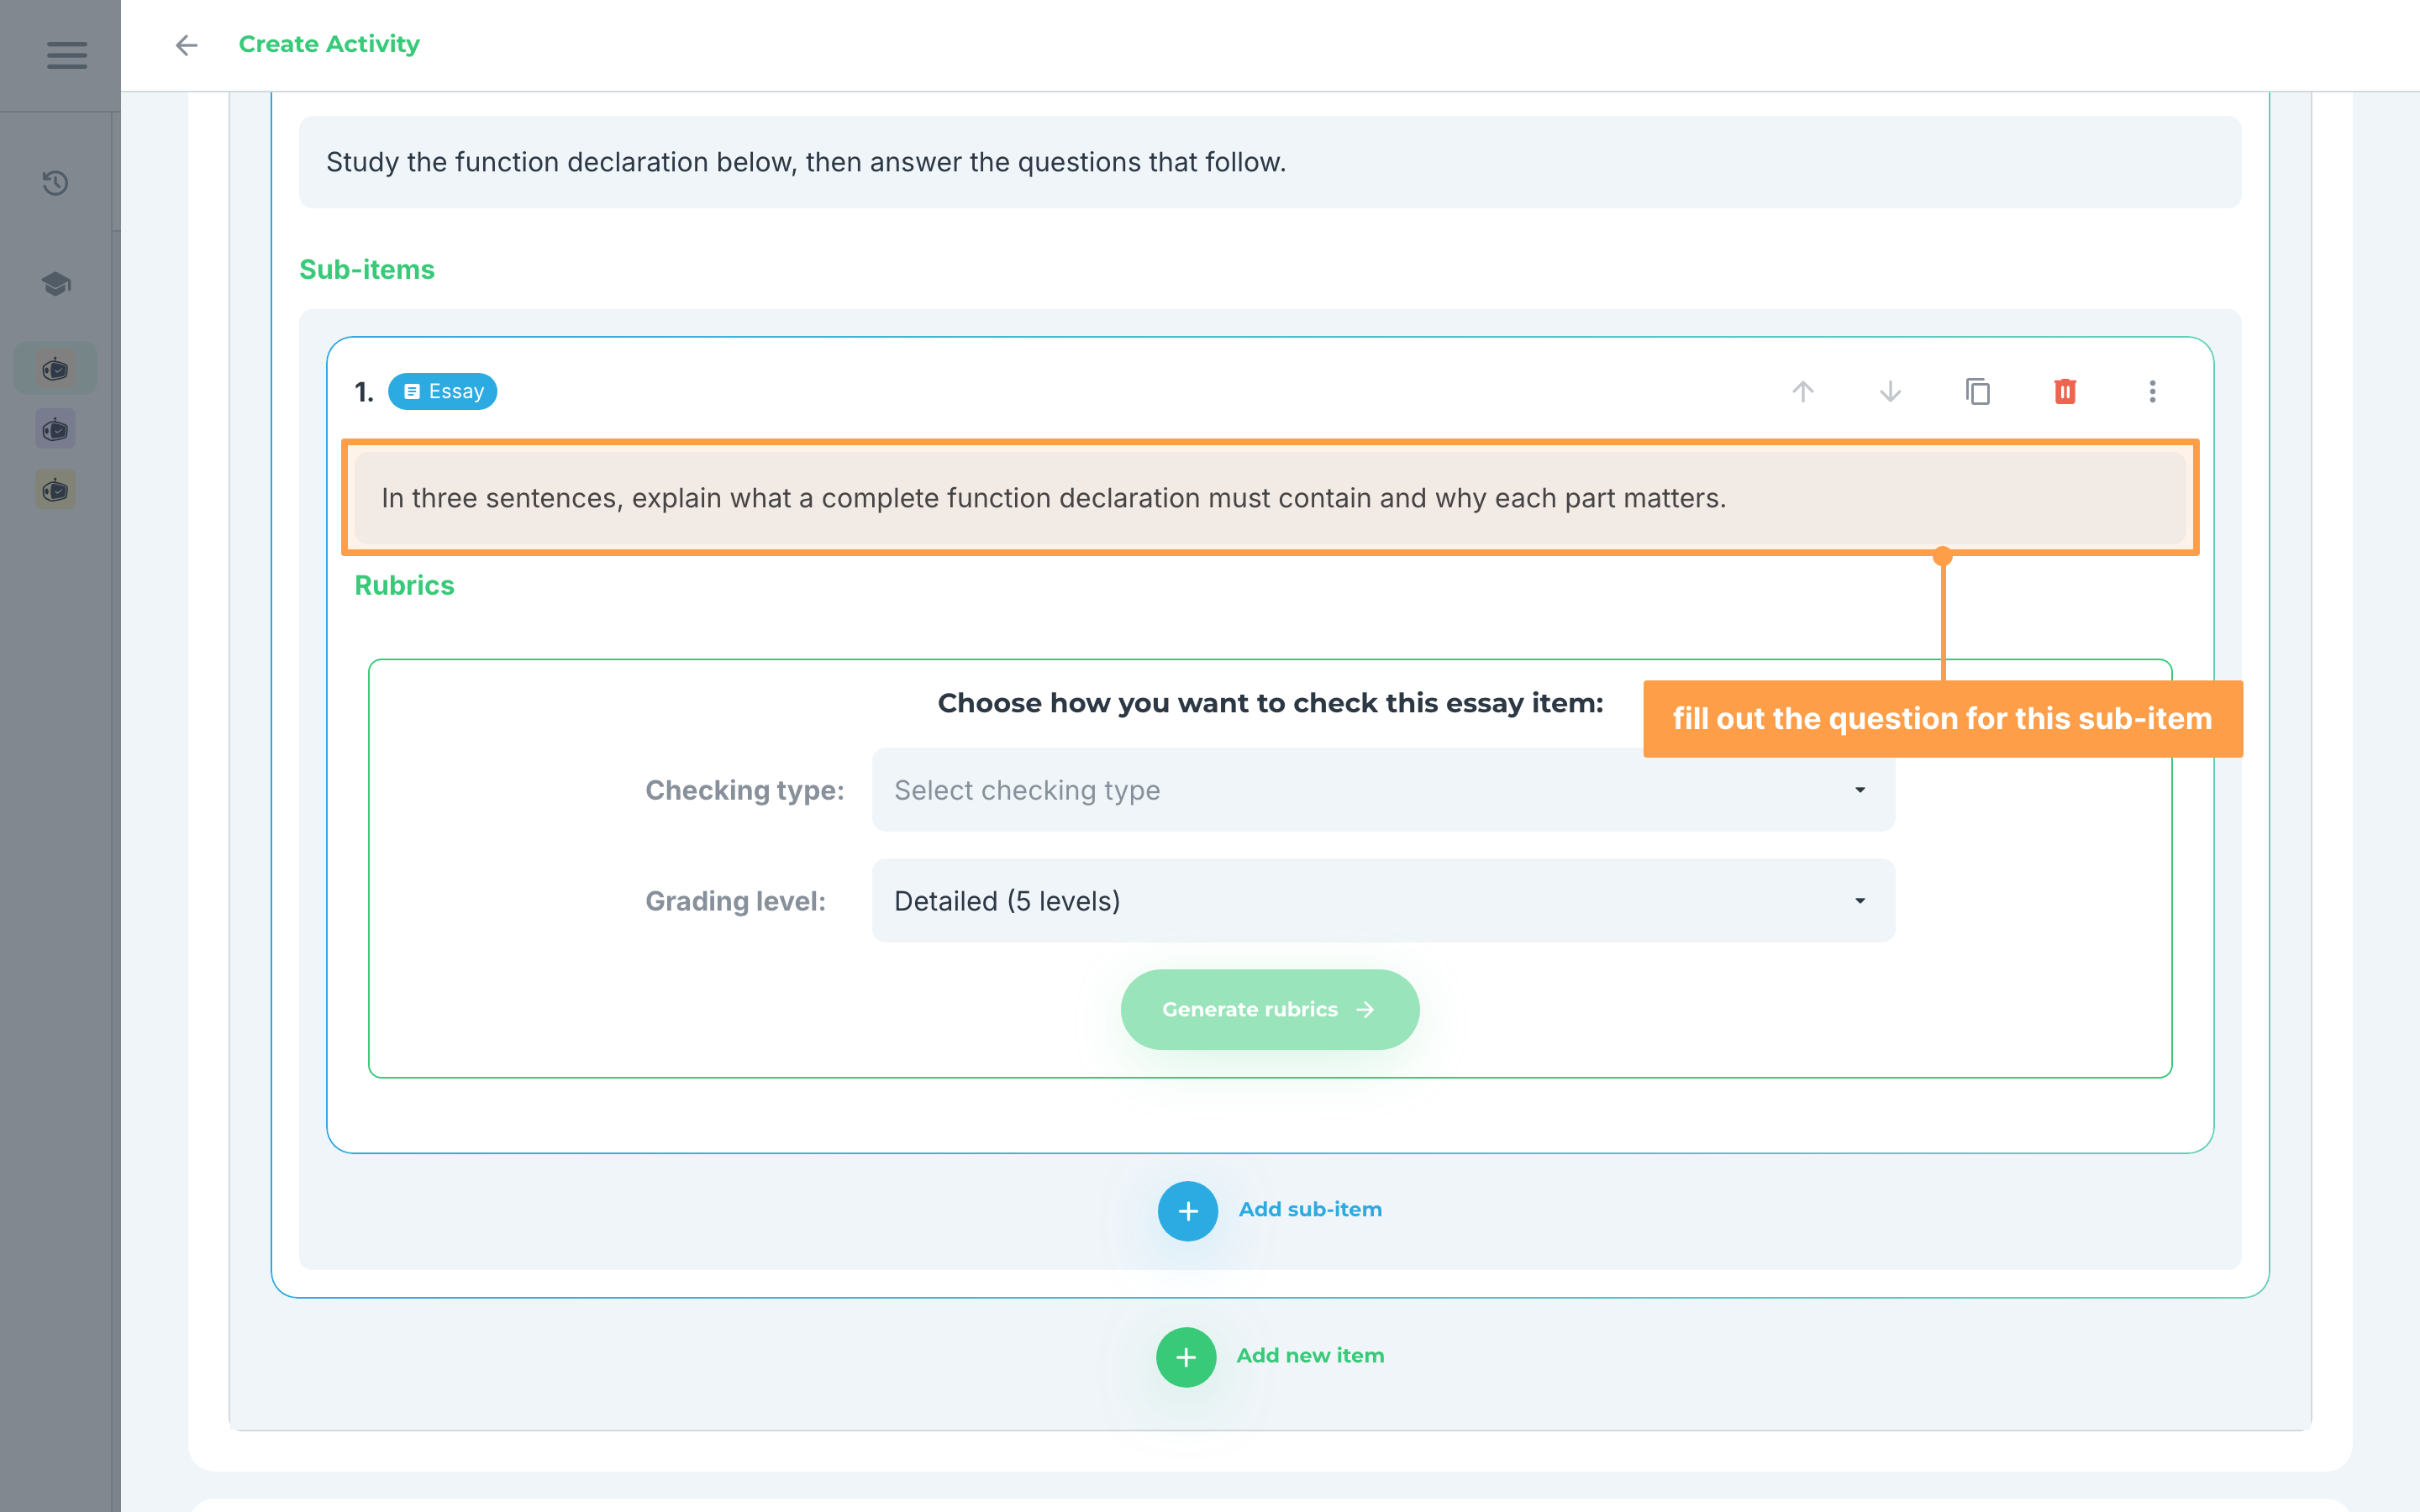
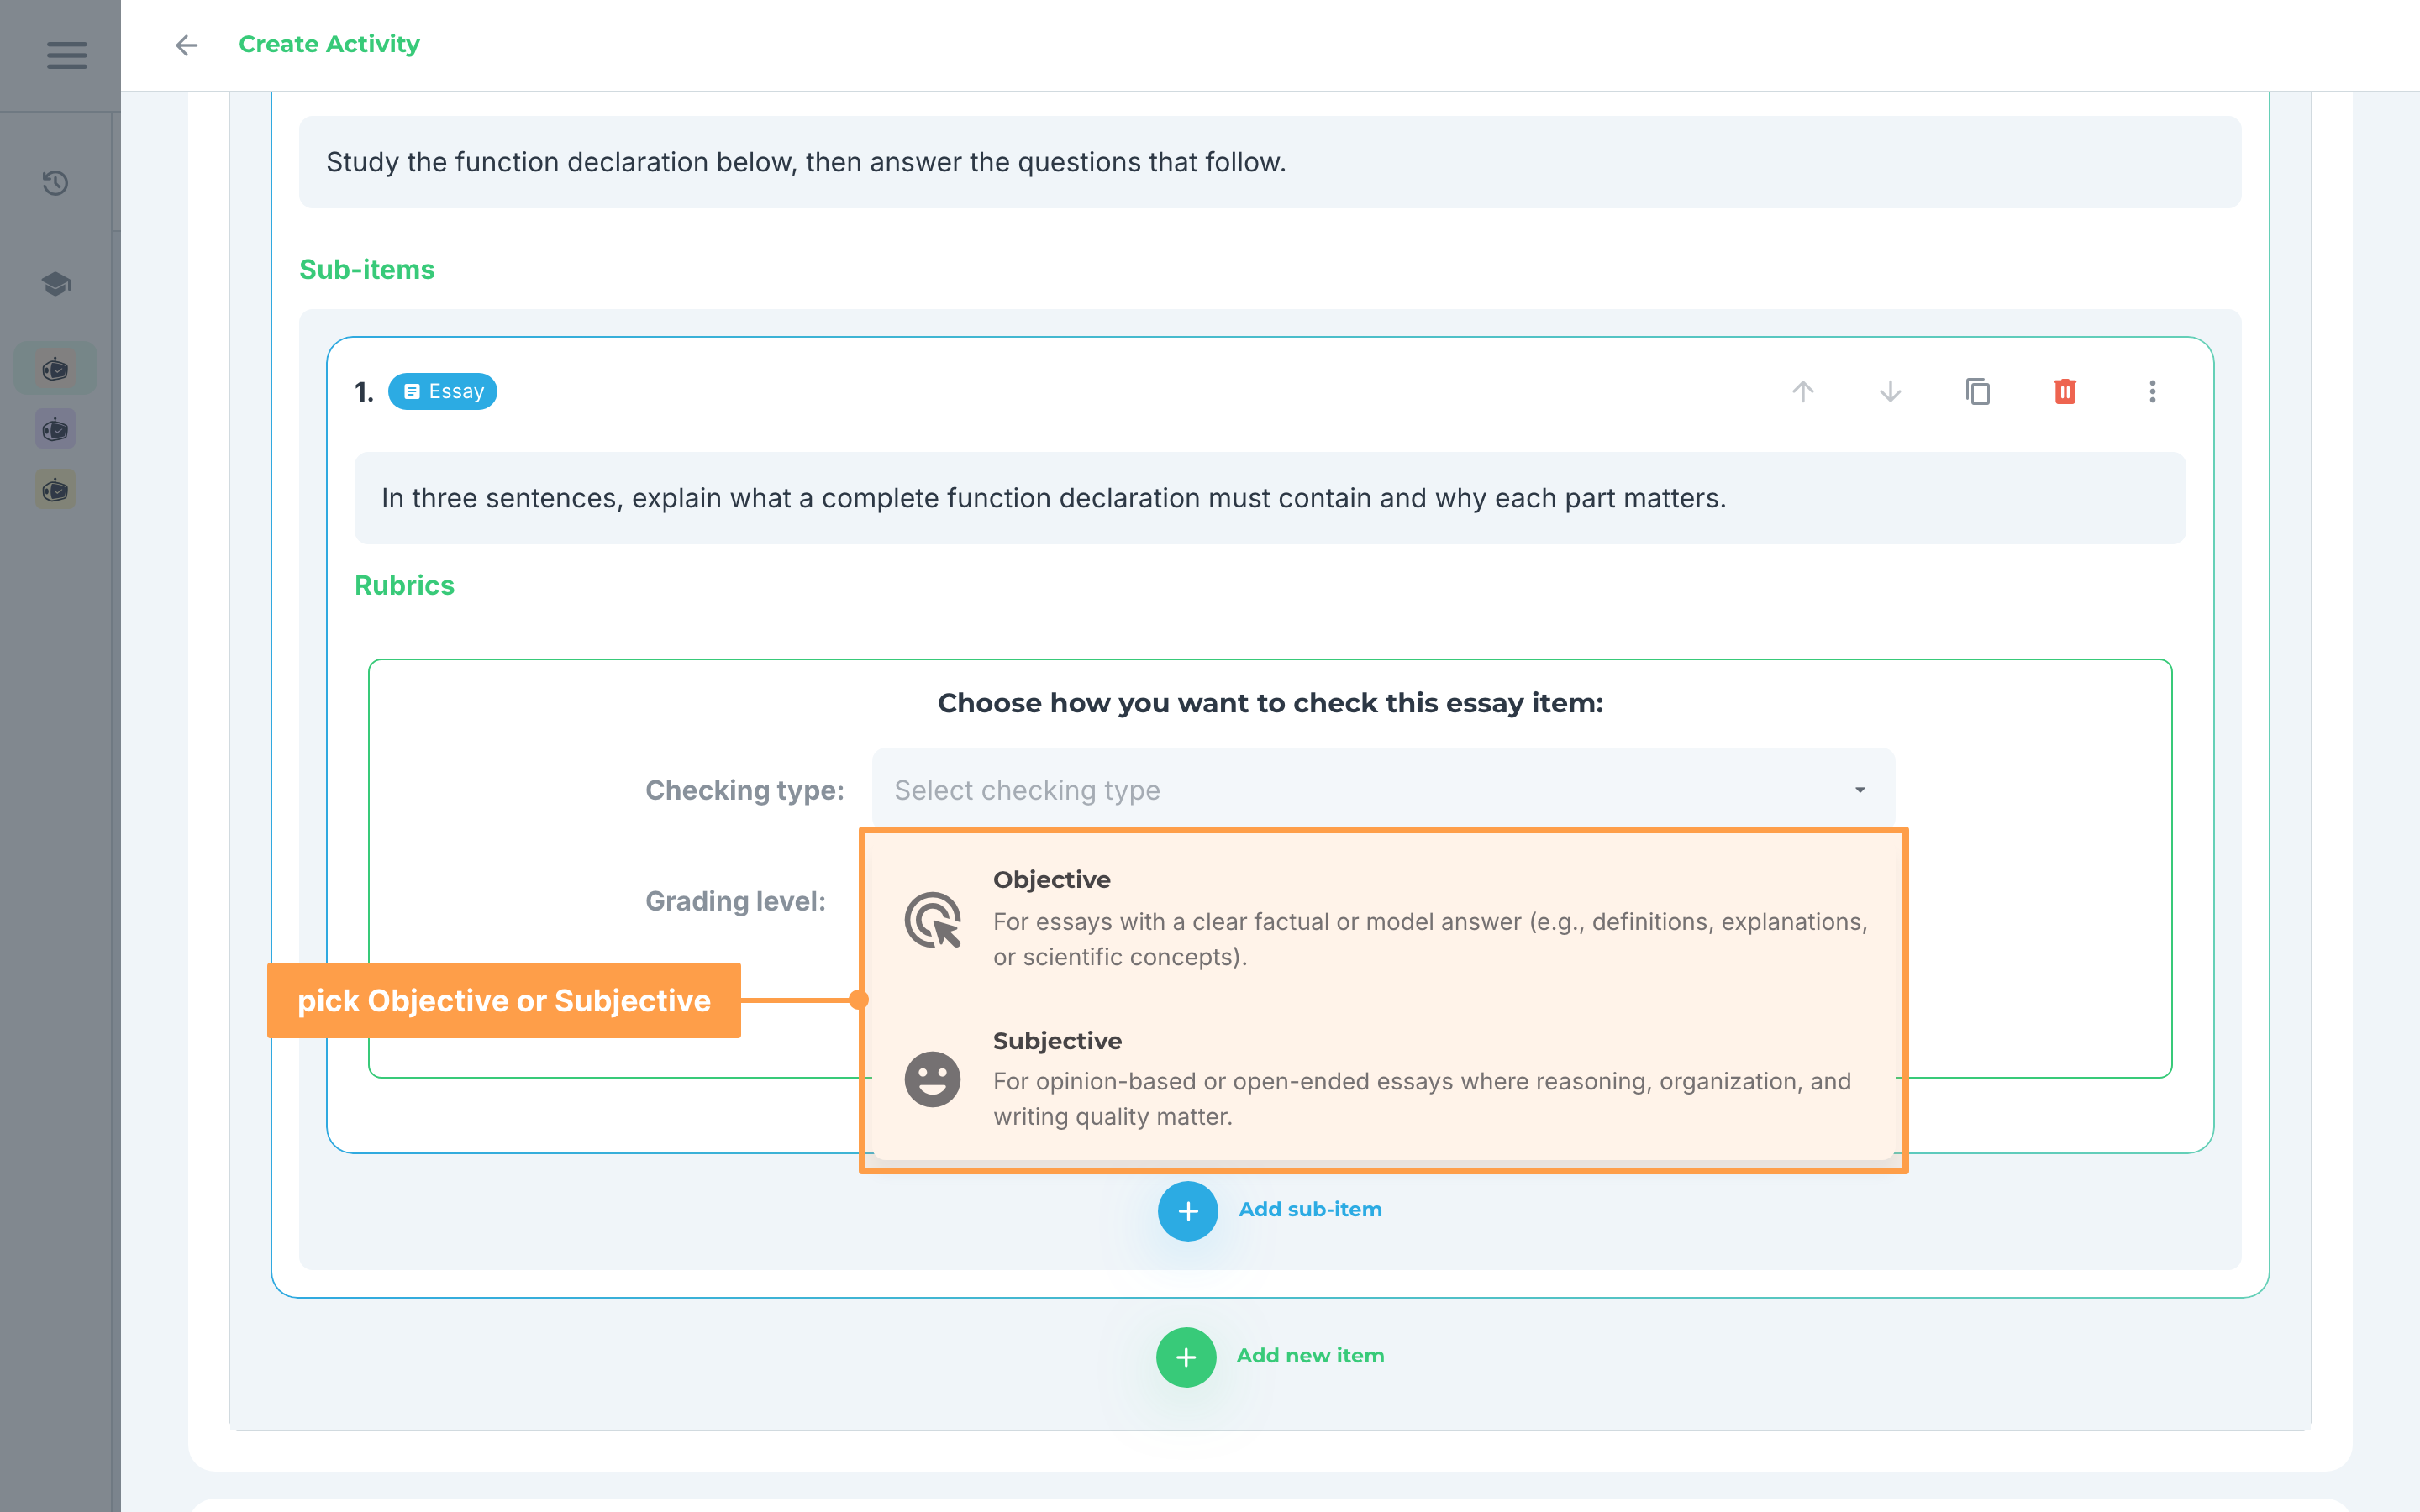
- Then, open the Checking type dropdown and select how you wish the item to be checked. There are two ways to do so:
a. Objective - for essays with a clear factual or model answer, such as a definition, an explanation or a scientific concept. Picking this adds an Expected key idea (optional) box where you can type or upload an image of the key idea the answer should contain; the rubrics are then written against it.
b. Subjective - for opinion-based or open-ended essays where reasoning, organization and writing quality matters
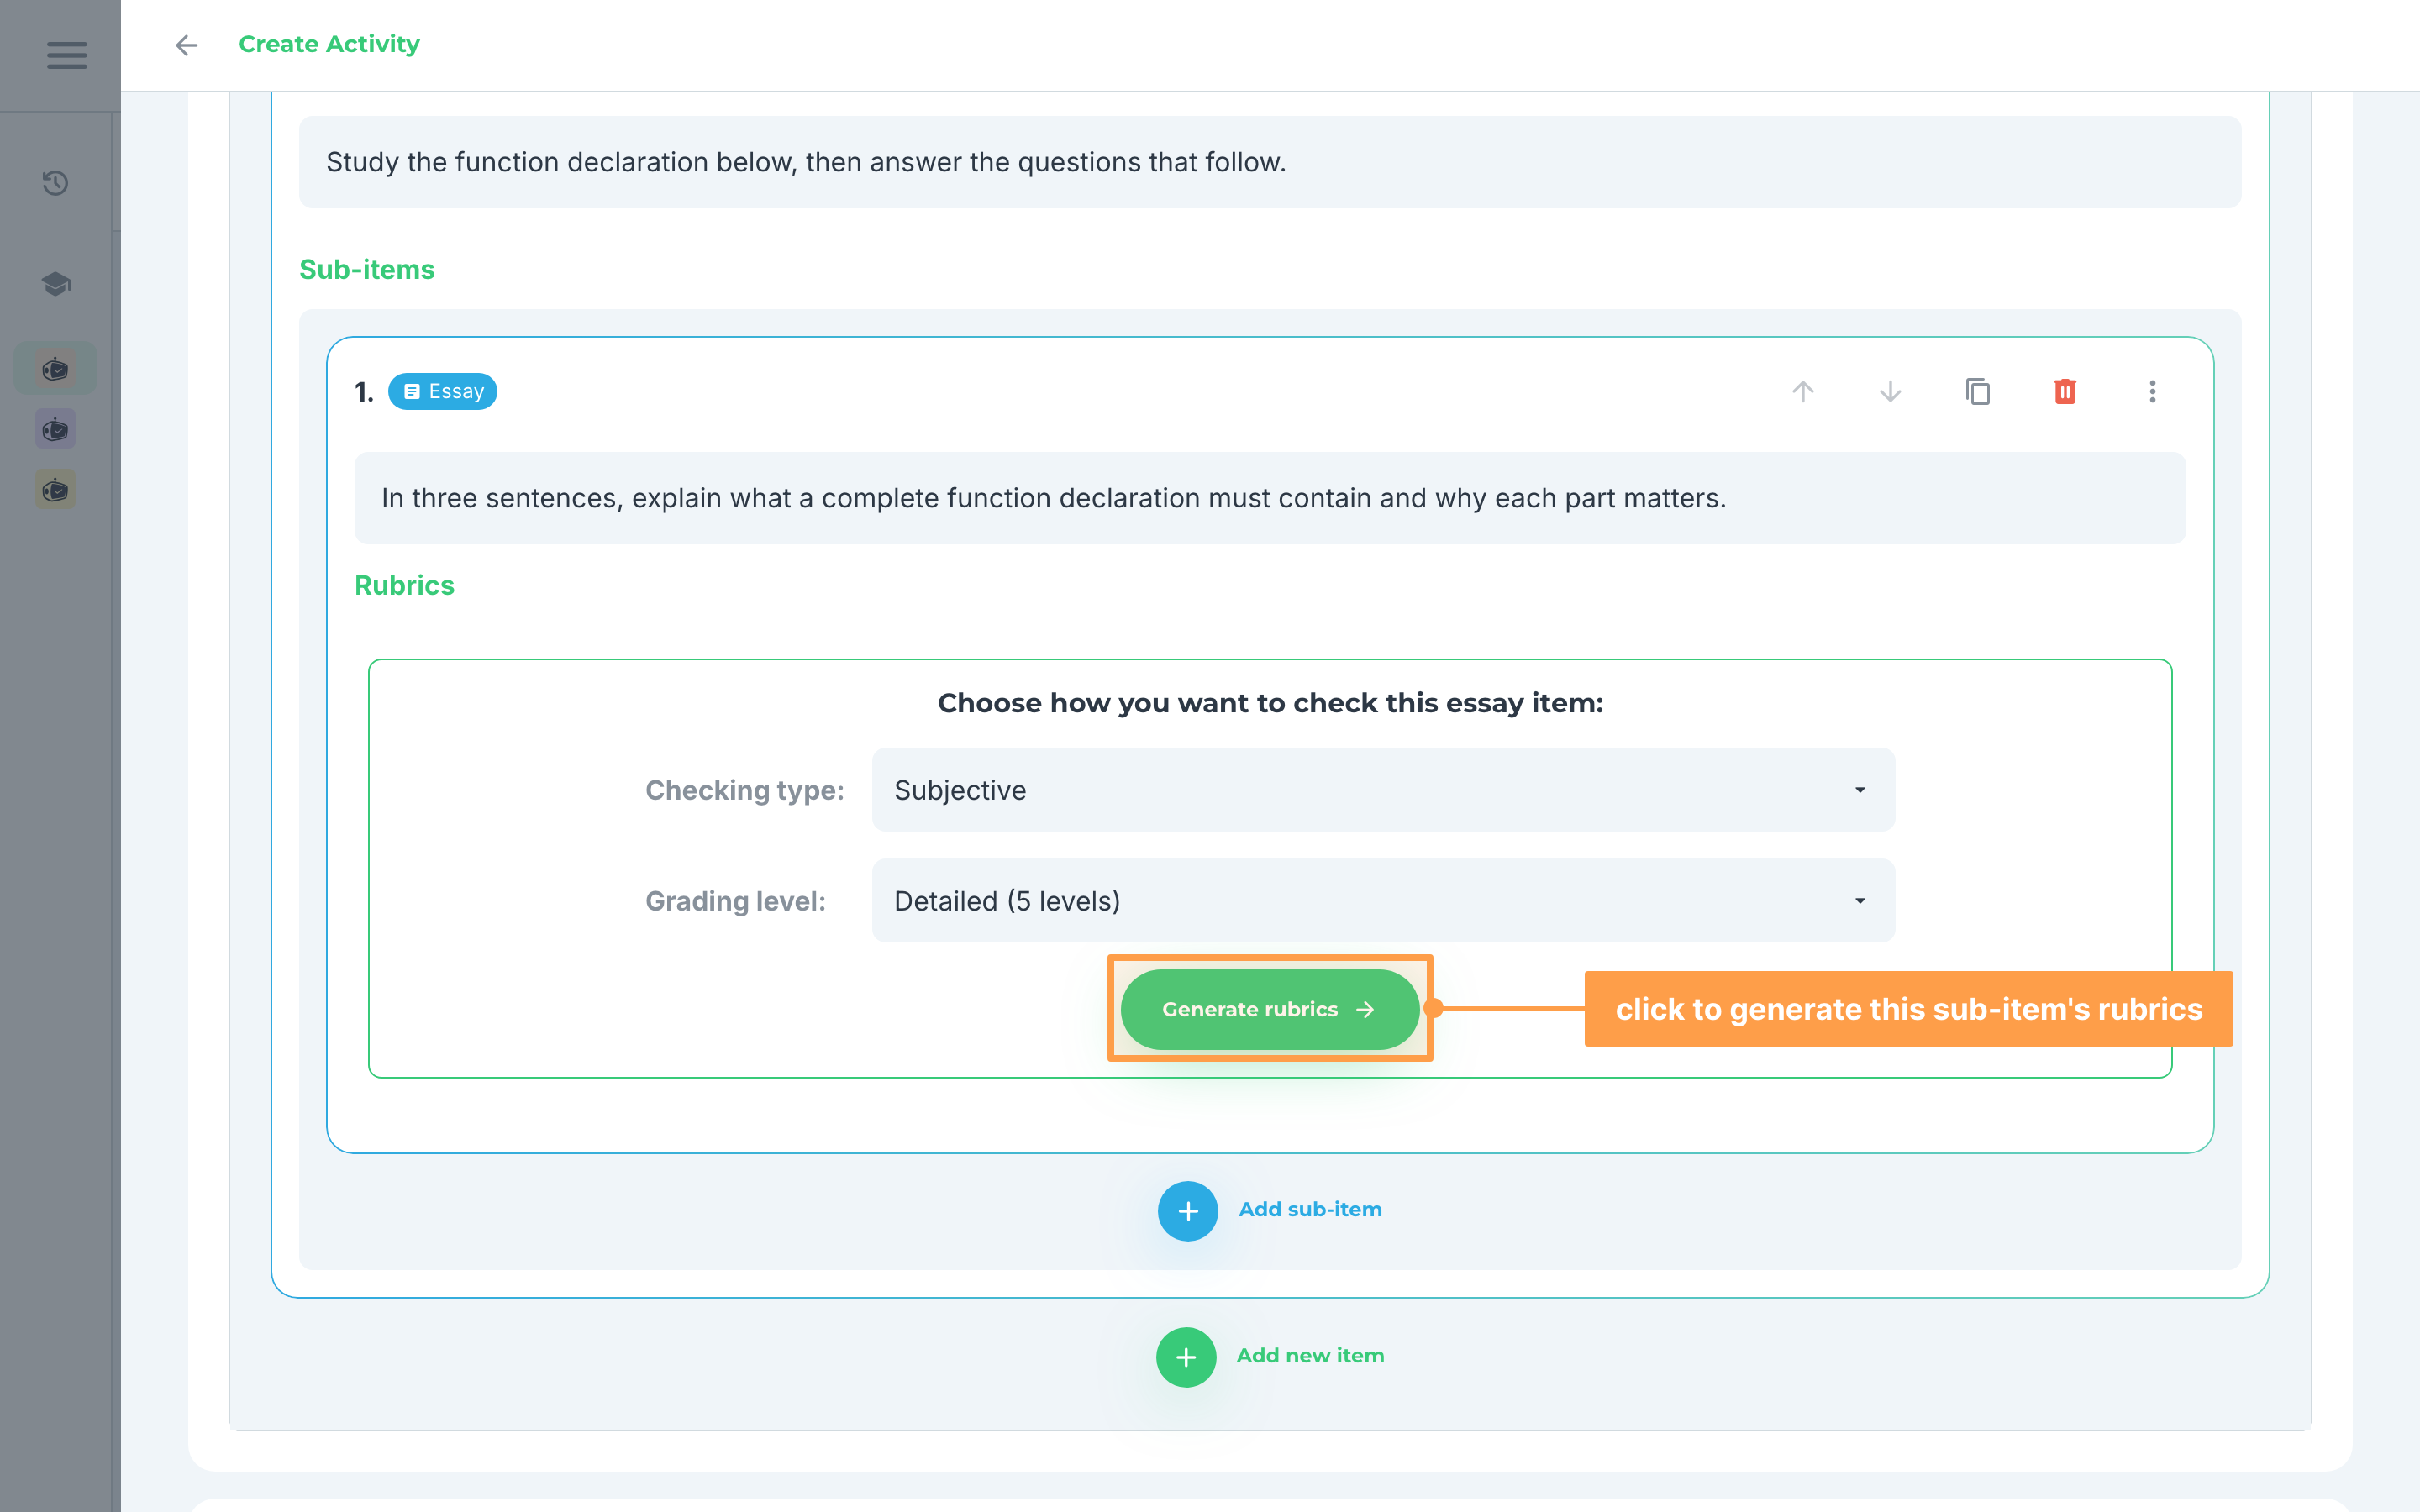
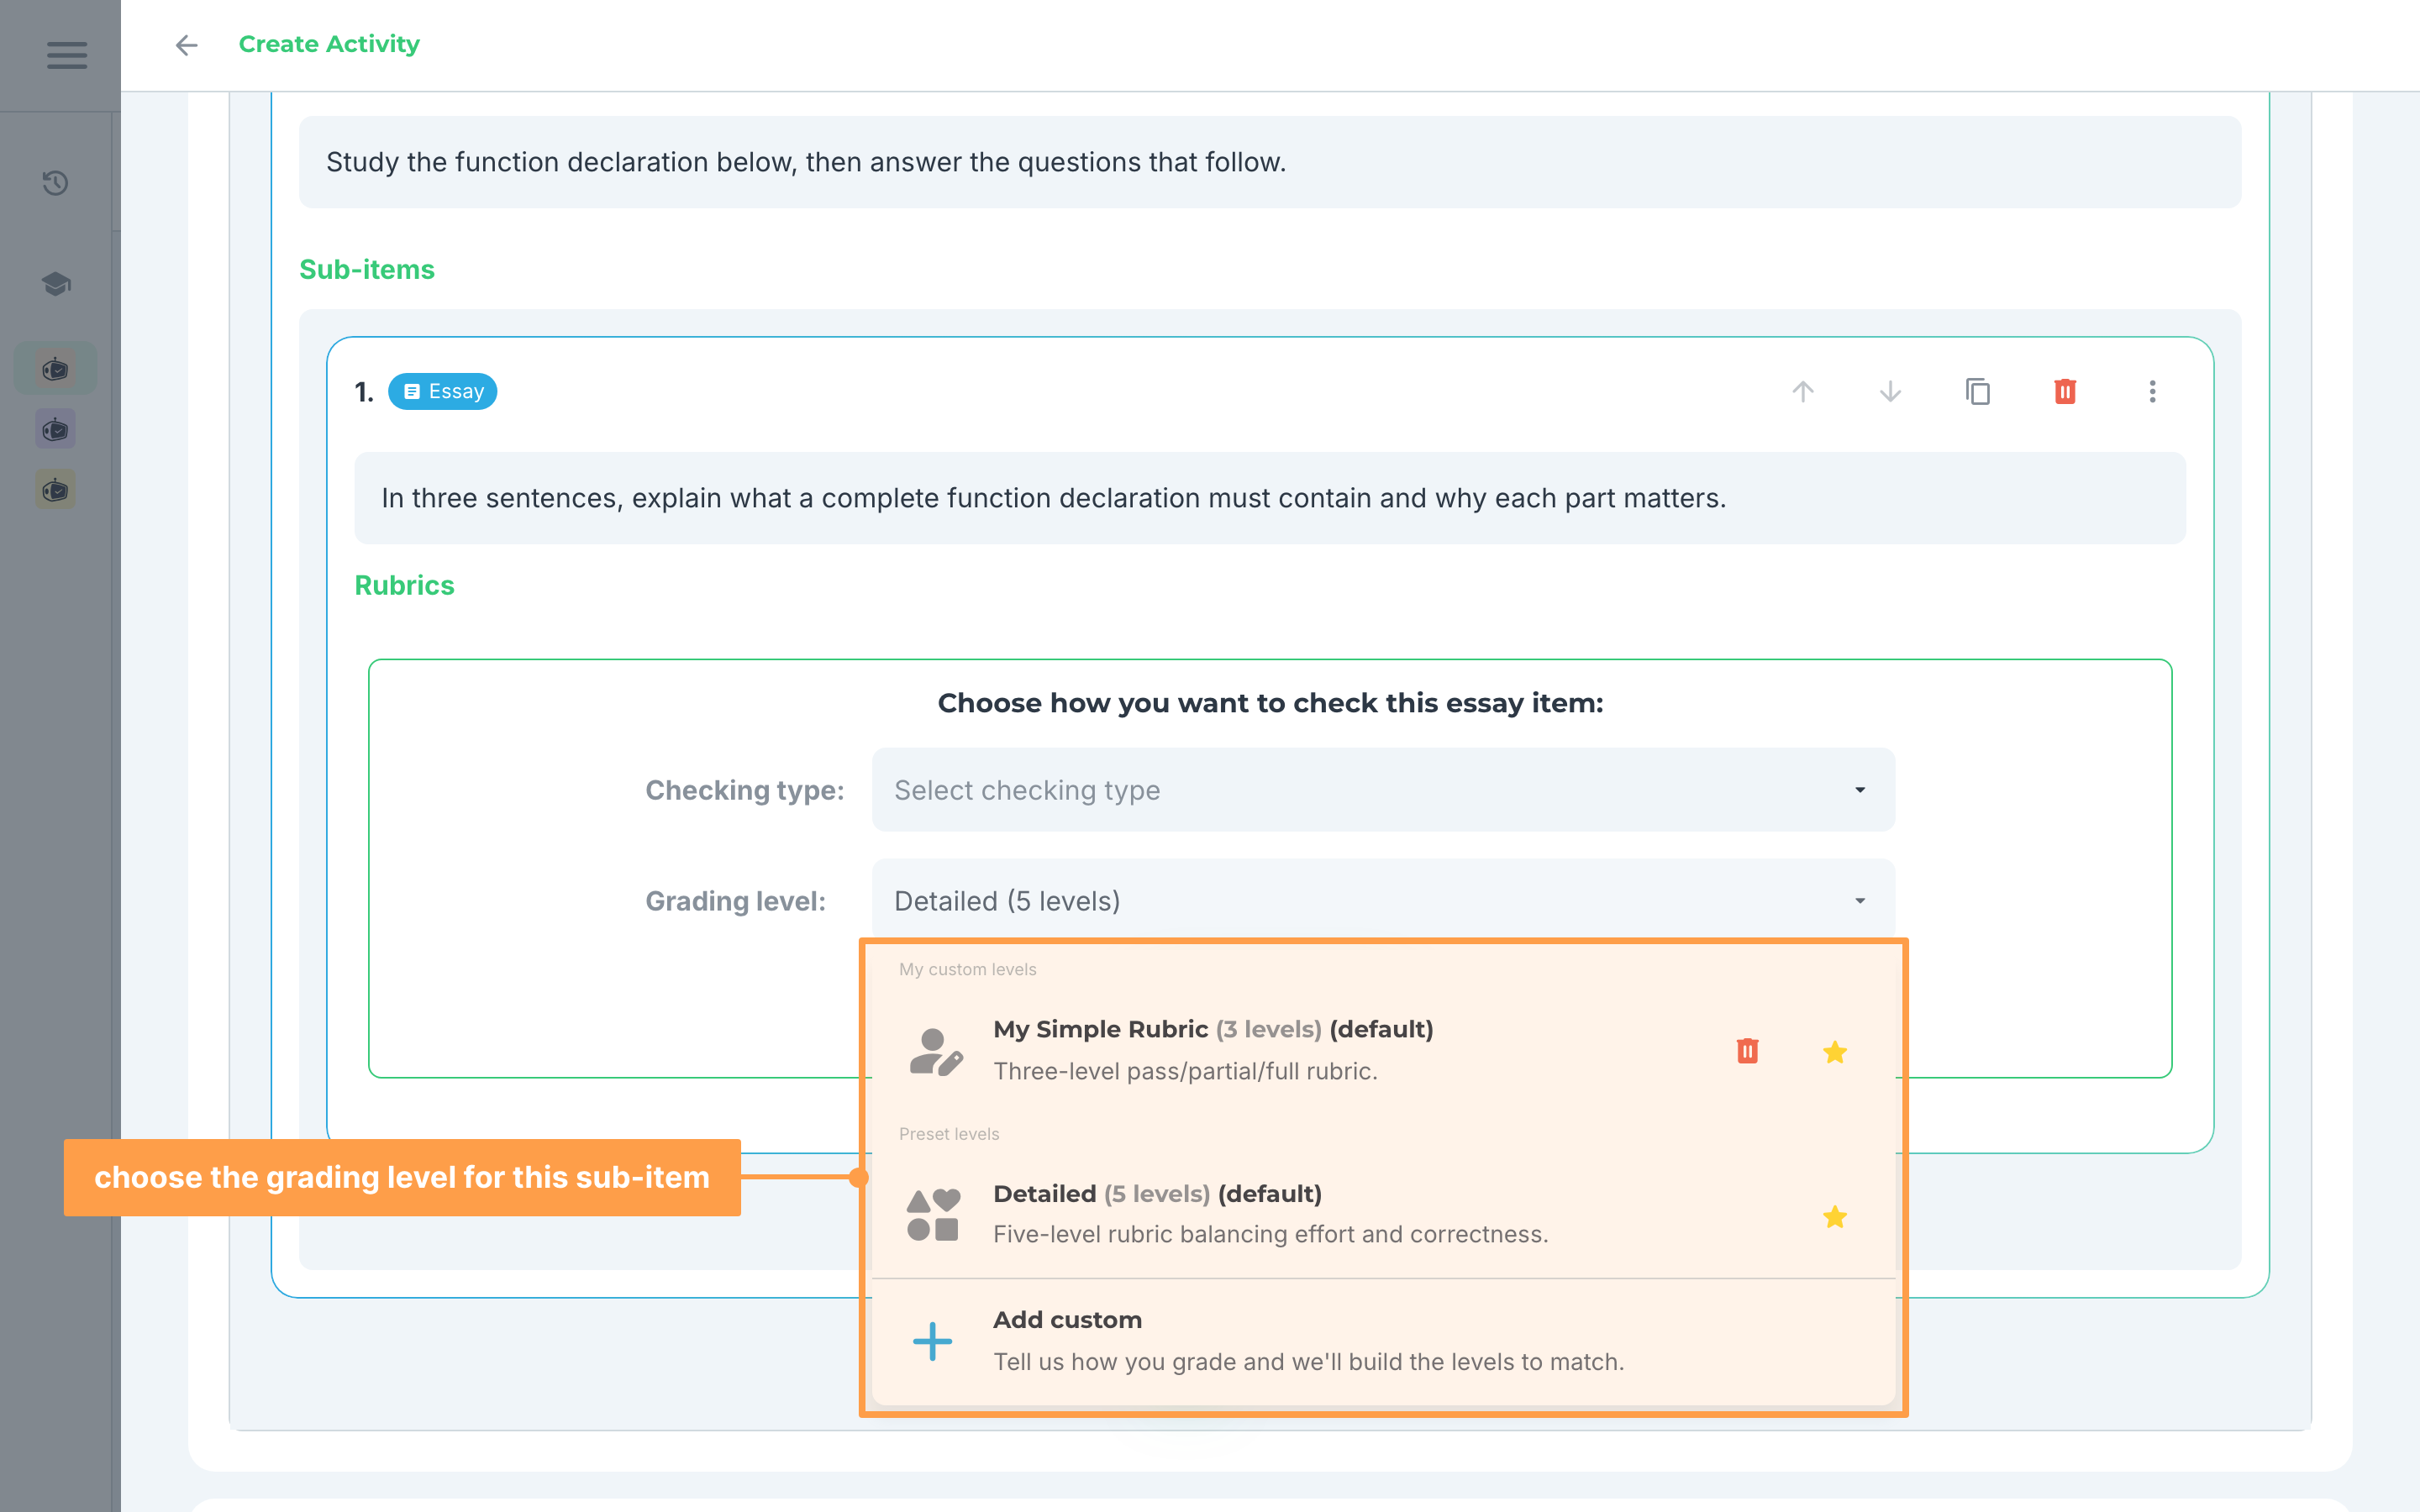
- Next, pick a Grading level: this decides how many performance levels your rubrics are written against, and defaults to Detailed (5 levels). Then click Generate rubrics and wait for our system to finish creating your rubrics. The button stays greyed out until you have chosen a checking type.
- Review the rubrics to see if they are to your liking. Each rubric has one description per performance level (use Prev and Next in the table header to page through them) plus a Max Score. The running Total score for the sub-item is shown above the table, next to Regenerate rubrics.
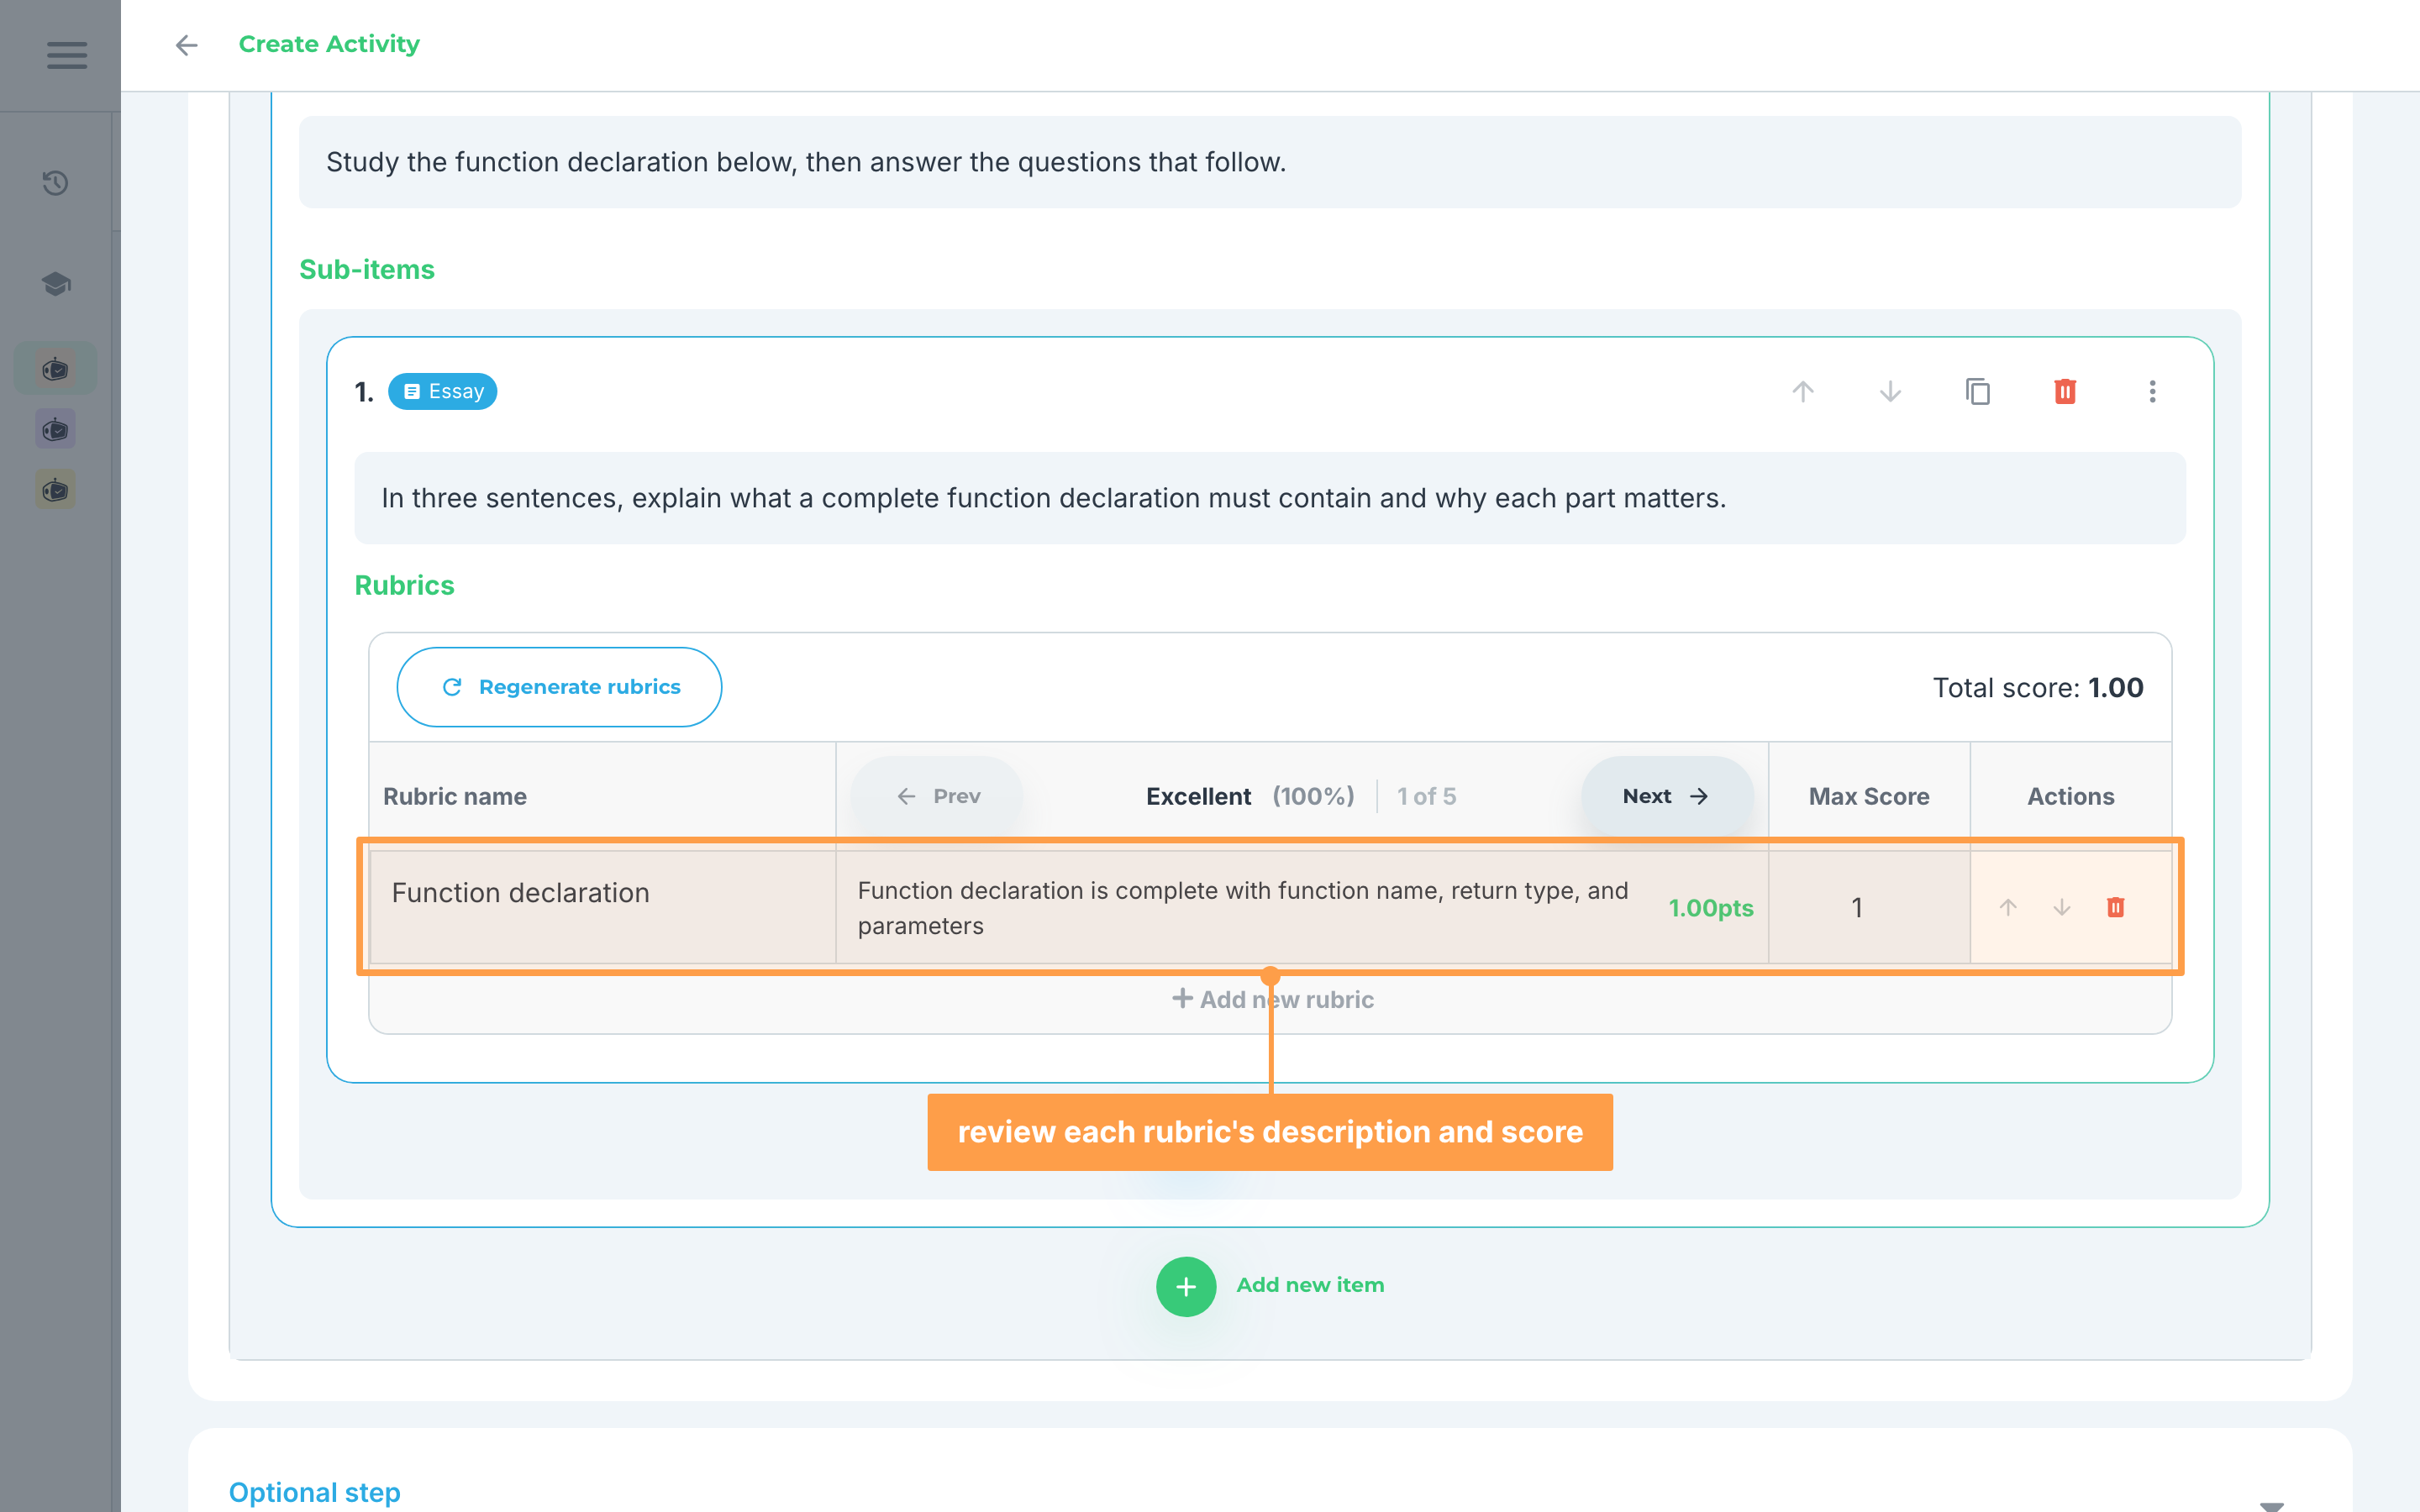
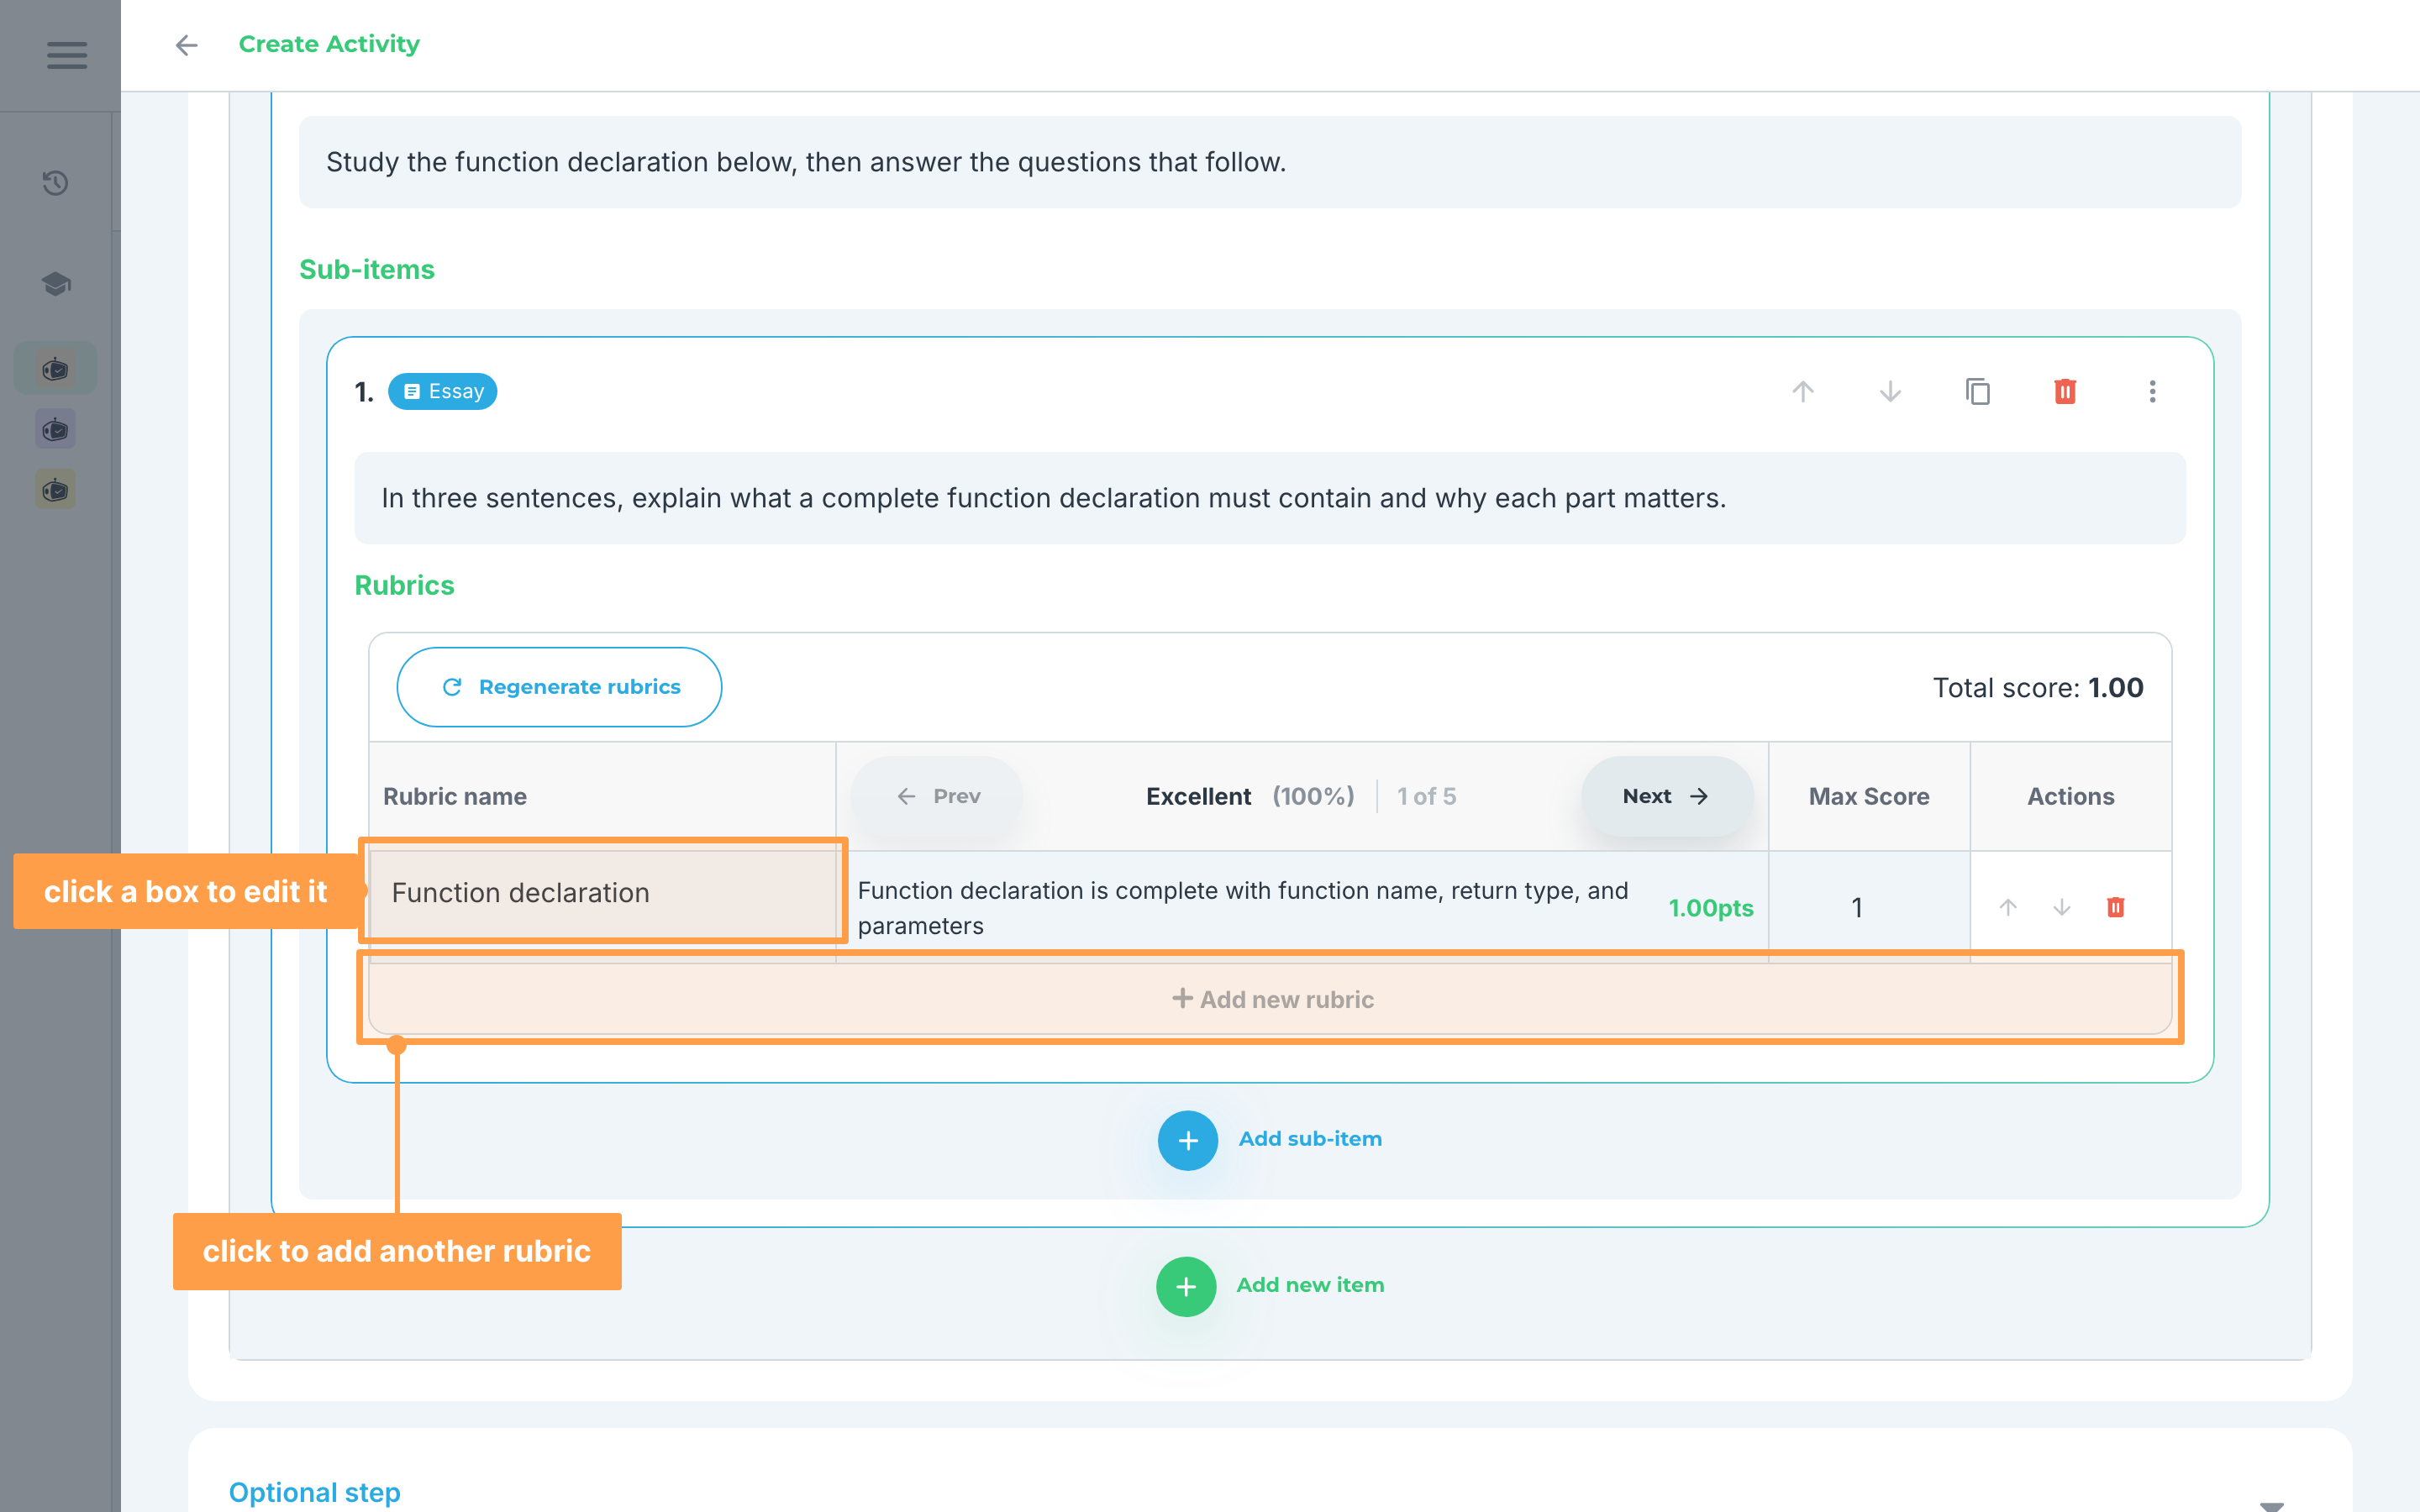
- If you wish to edit any detail to the rubrics, you can make your changes in the table by clicking the boxes and adding your modification. Remember to page through every performance level with Prev and Next: you are only editing the one on screen. Each row's Actions column lets you move a rubric up or down or delete it, you can add another rubric by clicking + Add new rubric after the last one, and Regenerate rubrics above the table starts over.
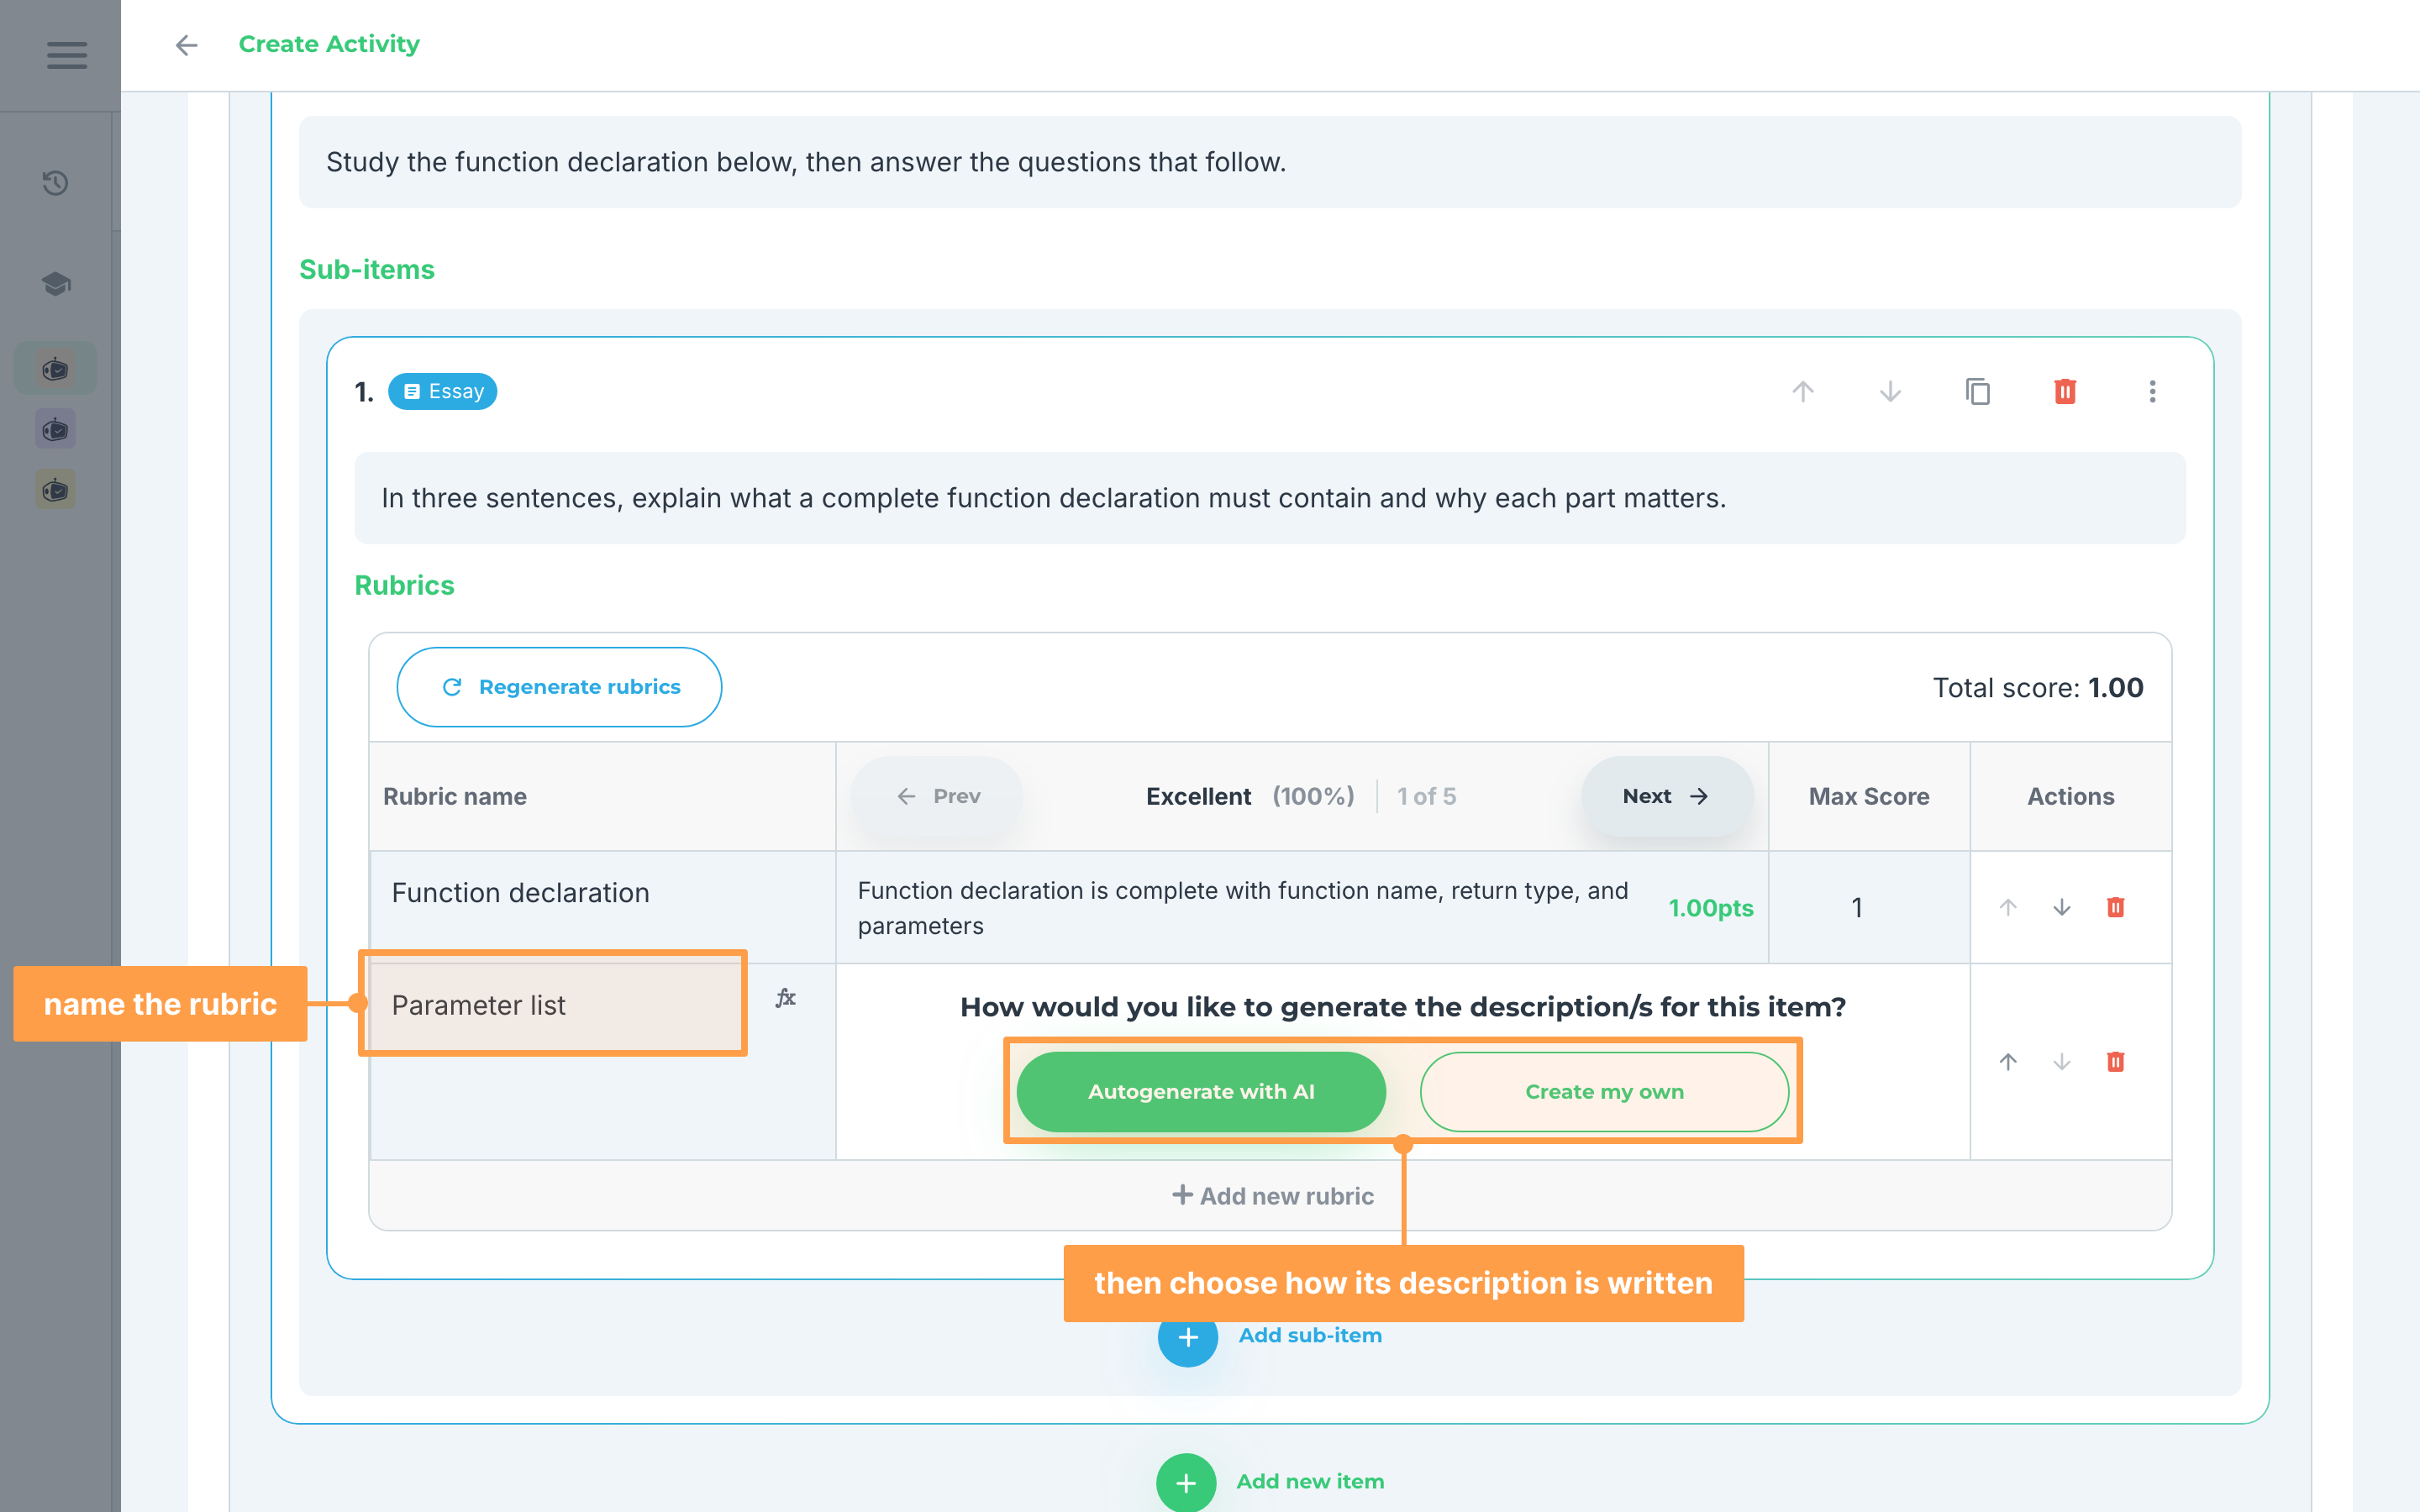
- Provide a rubric name, then choose Autogenerate with AI or Create my own for the descriptions, and set the rubric's Max Score in the column on the right.
(delete this step and its figure; the grading-level choice moves into step 3 above, and the remaining steps renumber 1-6)
e. Problem-solving (without visuals)
For items with Problem-solving as the item type:
- Fill out the question for this item.
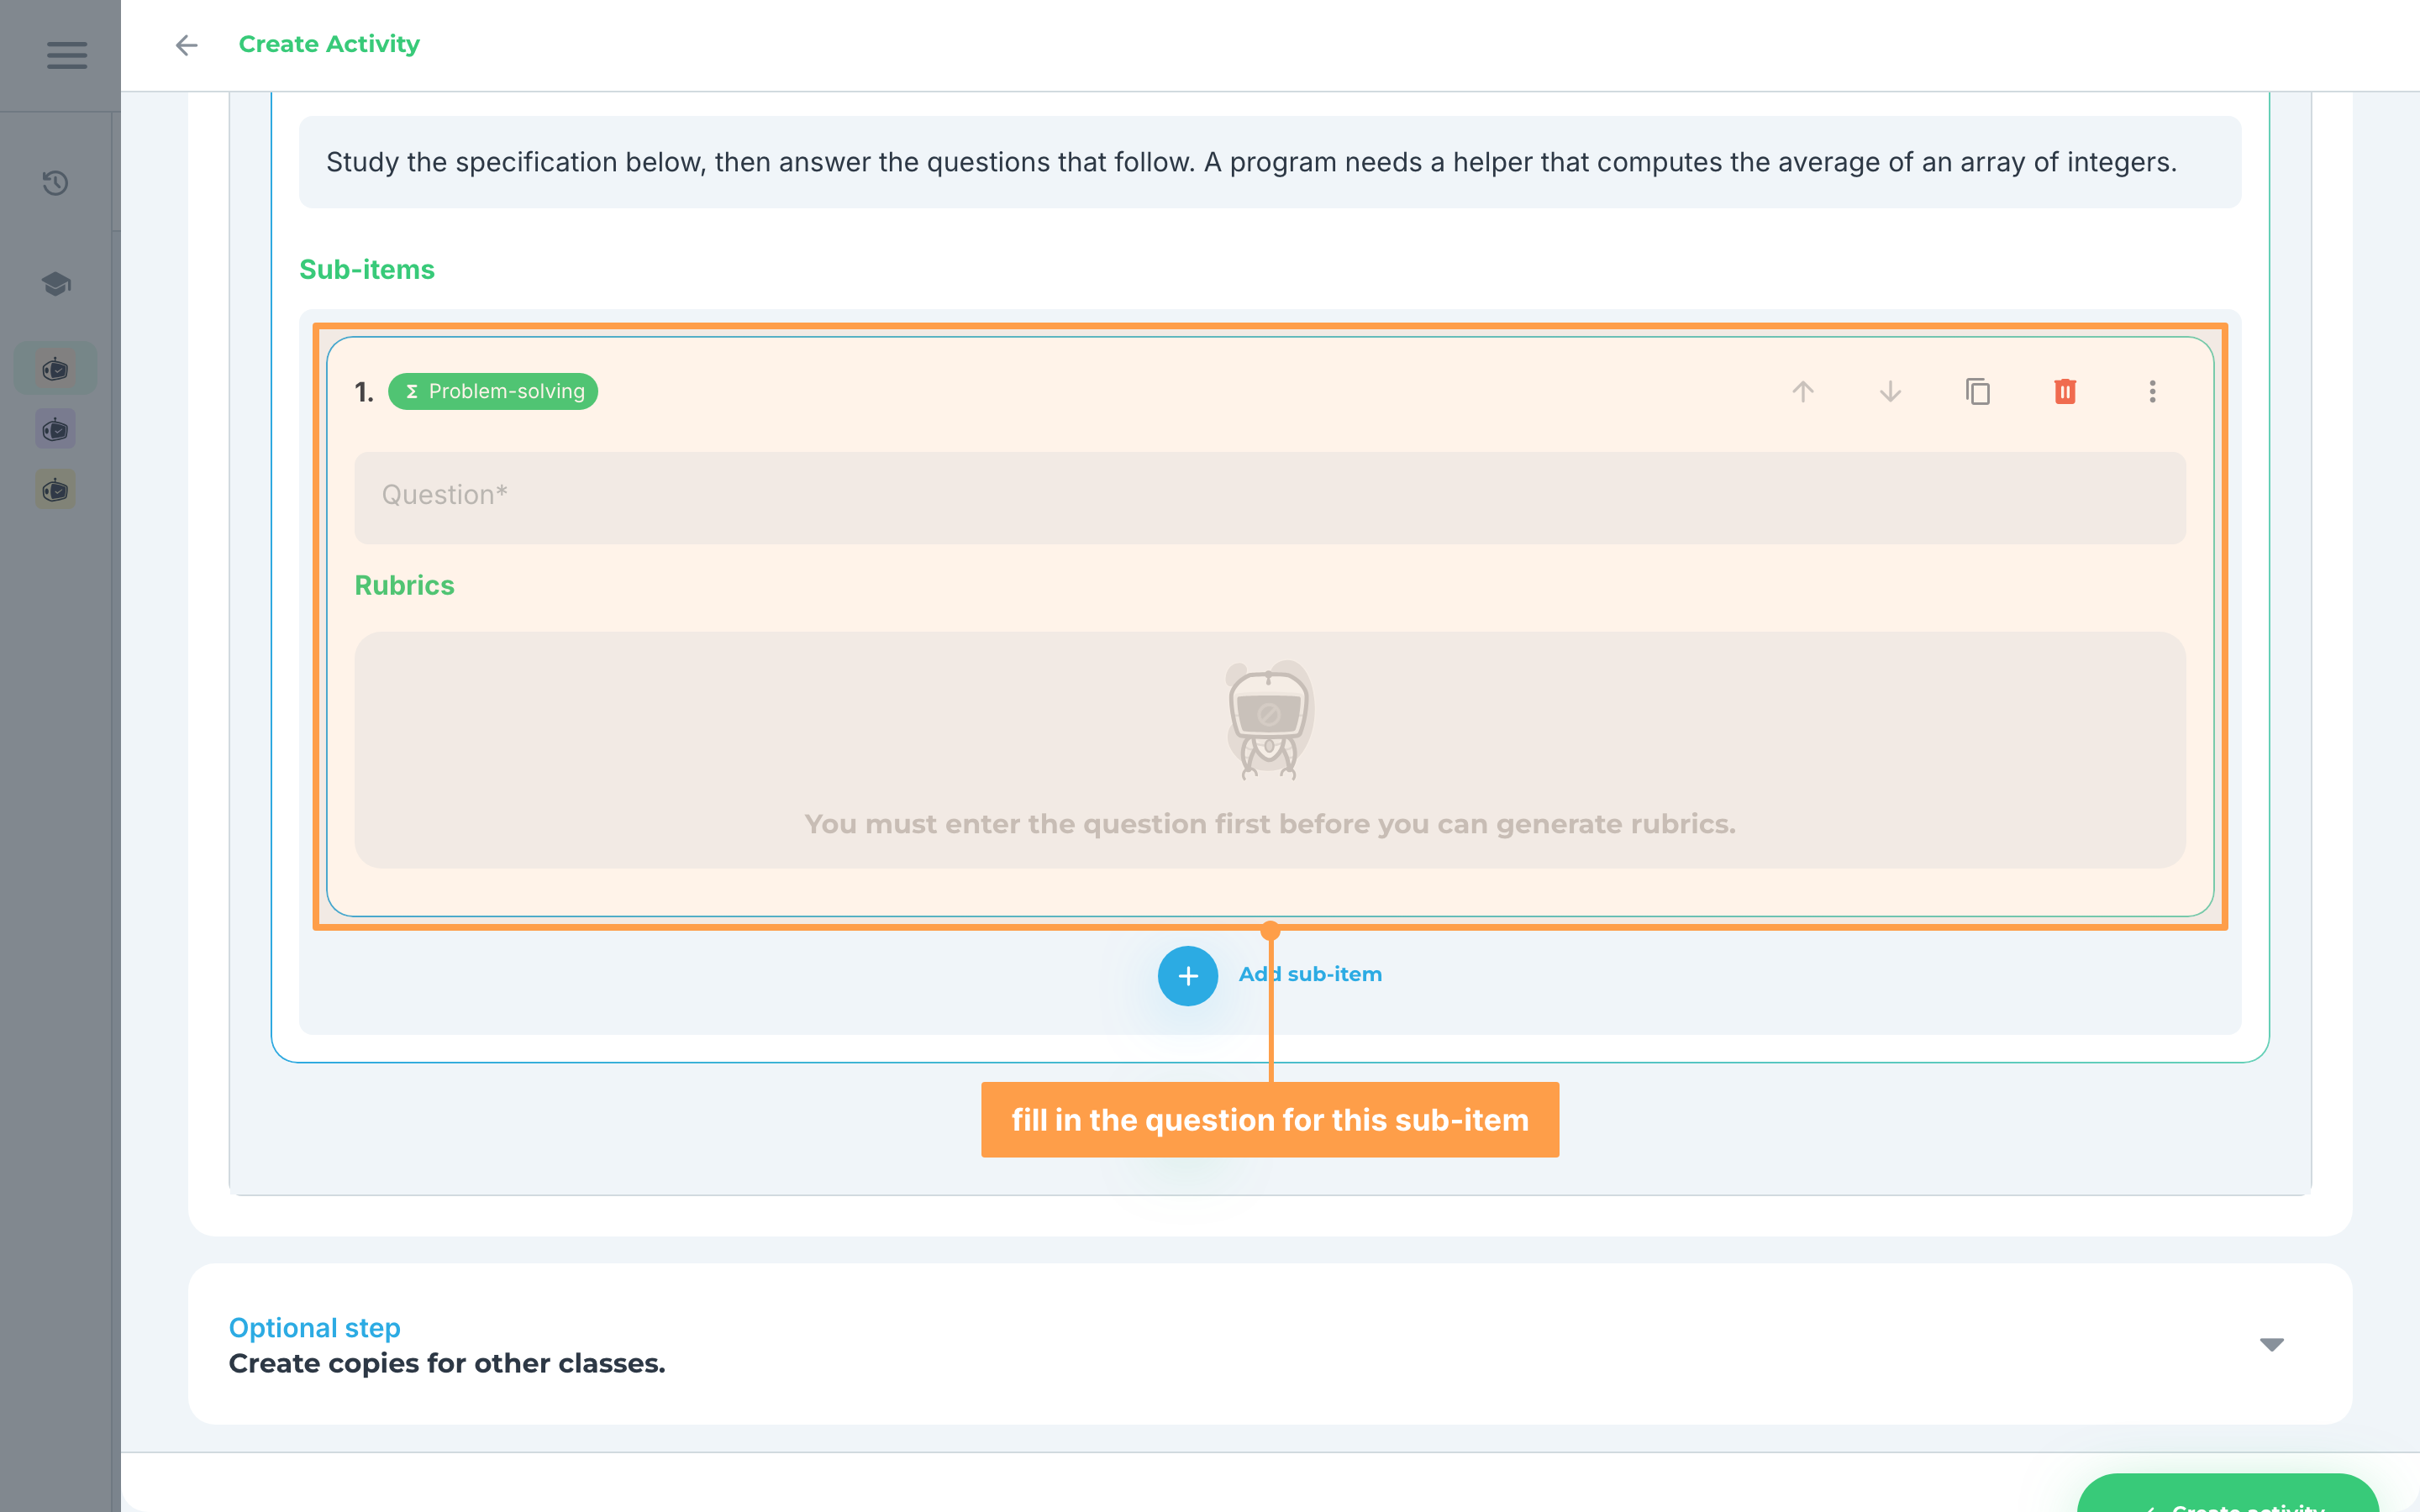
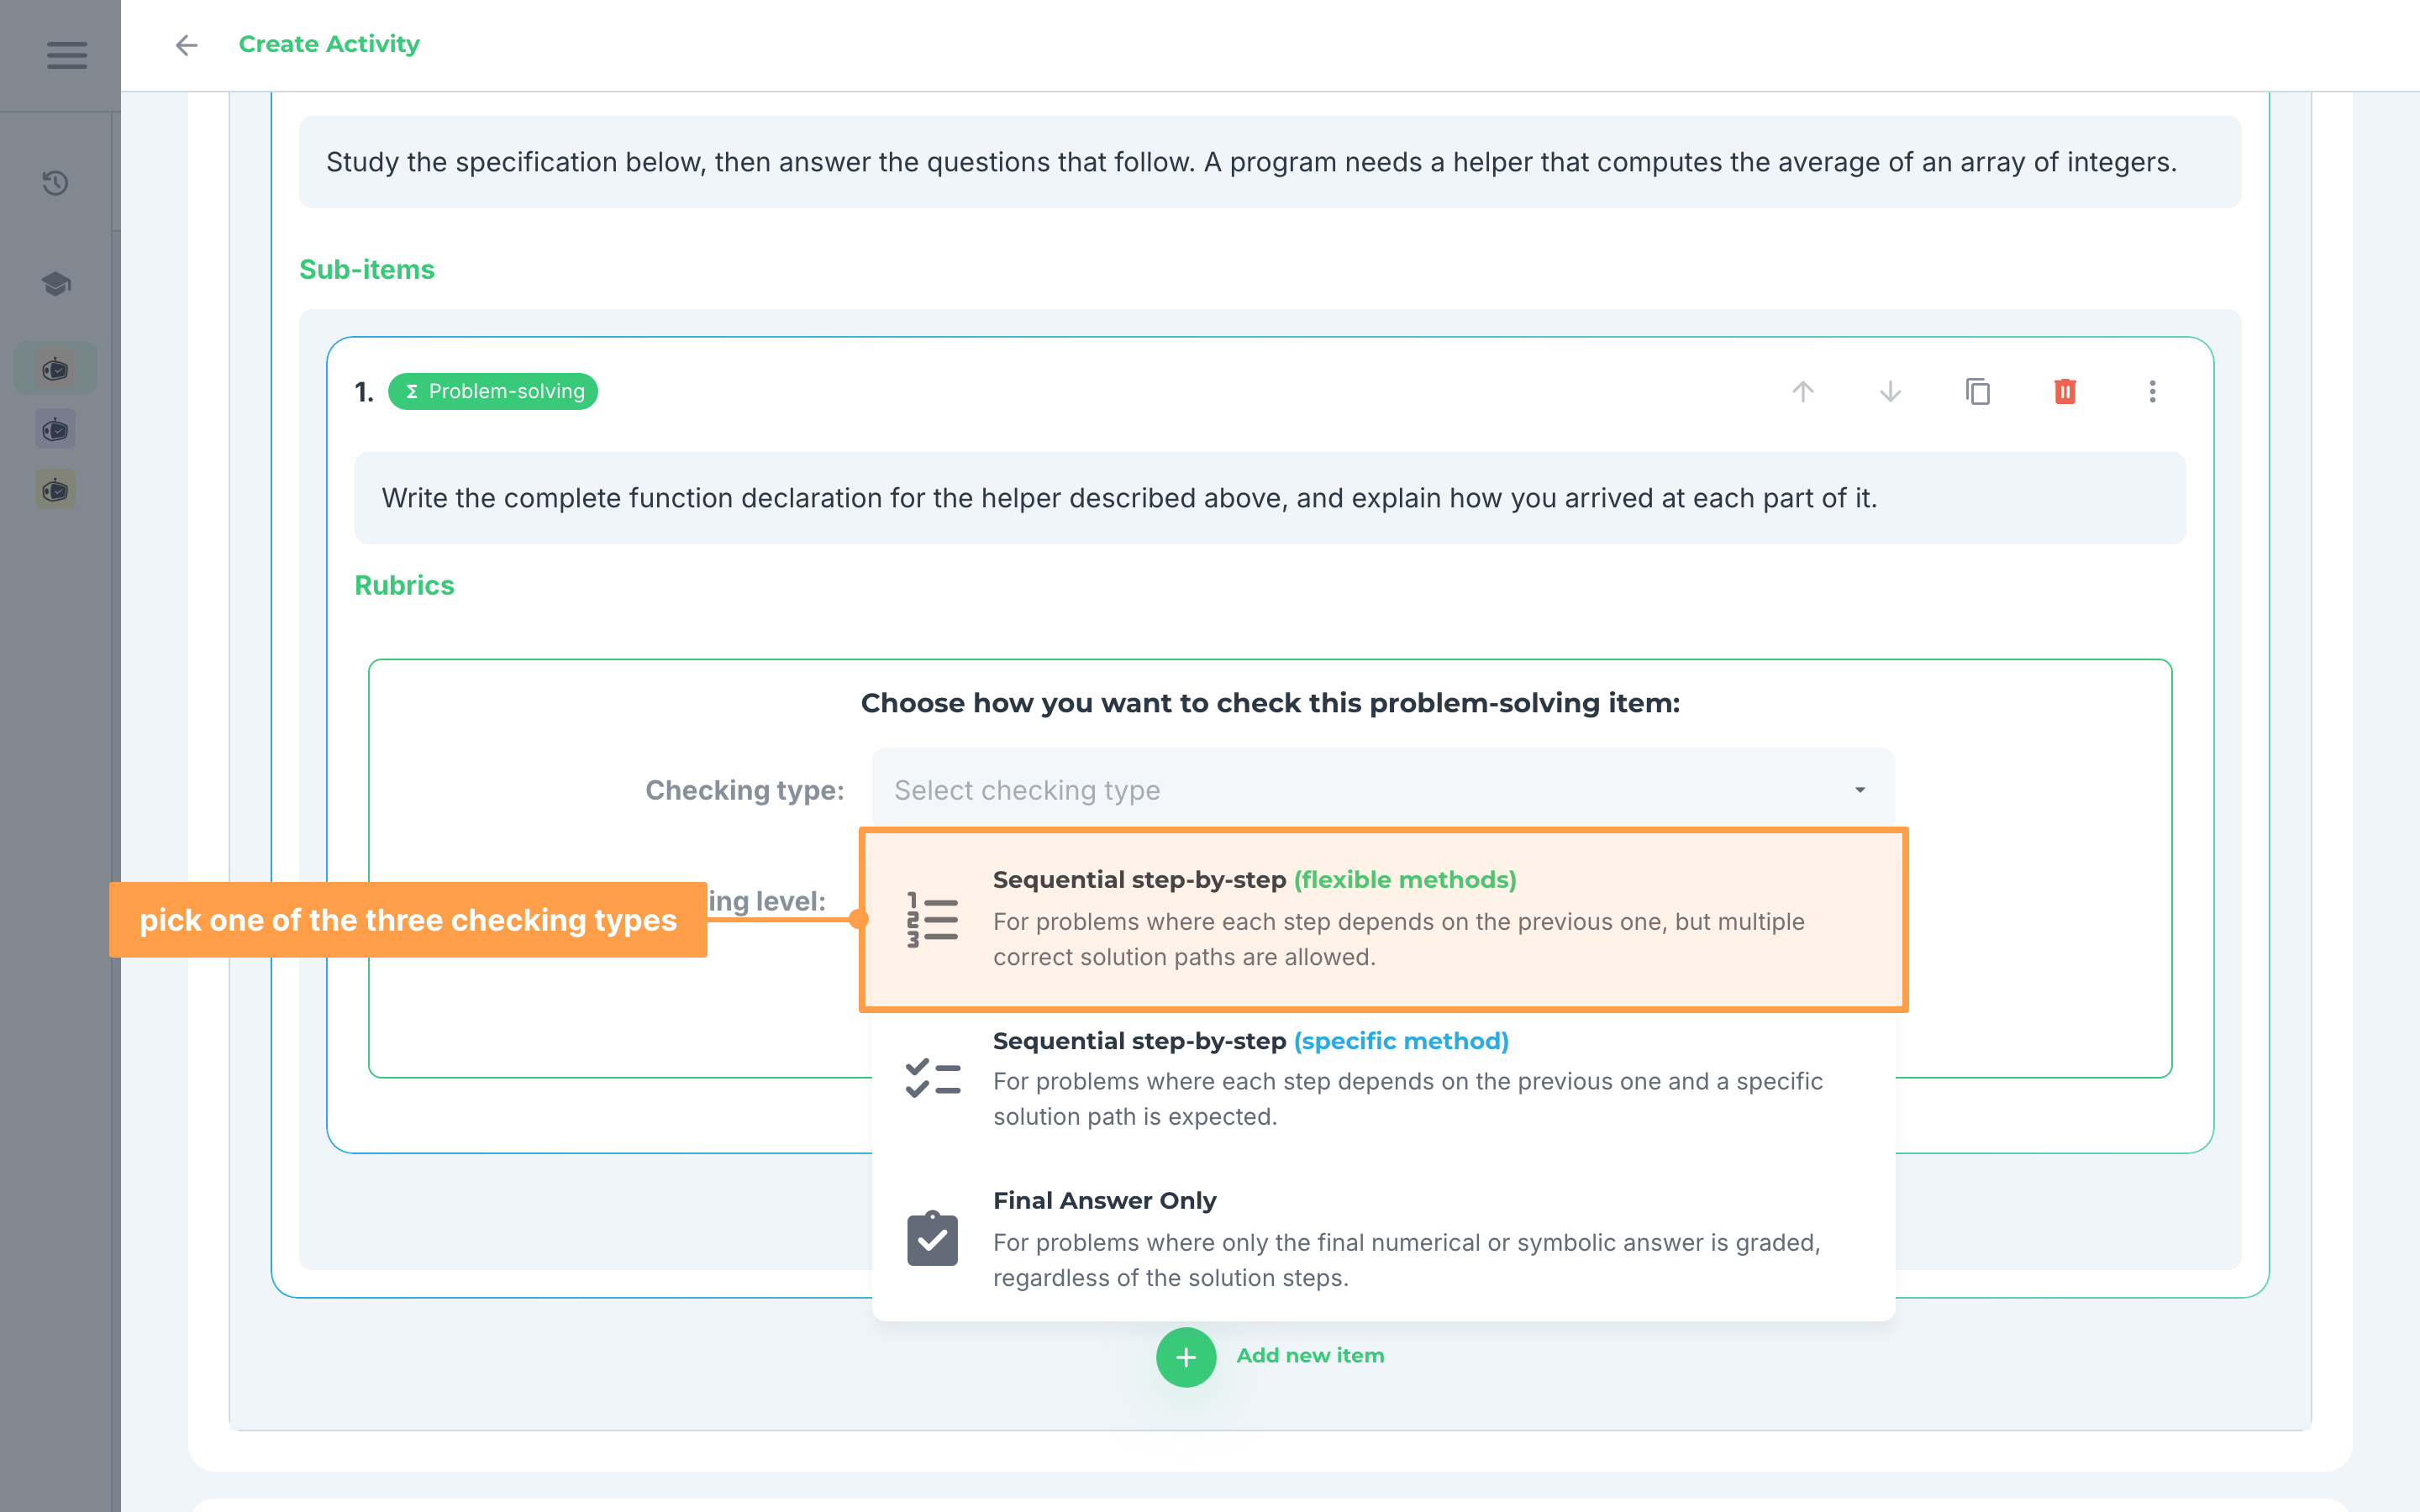
- Then, select how you wish the item to be checked from the Checking type: dropdown. There are three ways to do so:
a. Sequential step-by-step (flexible) - for problems where each step depends on the previous one, but multiple correct solution paths are allowed.
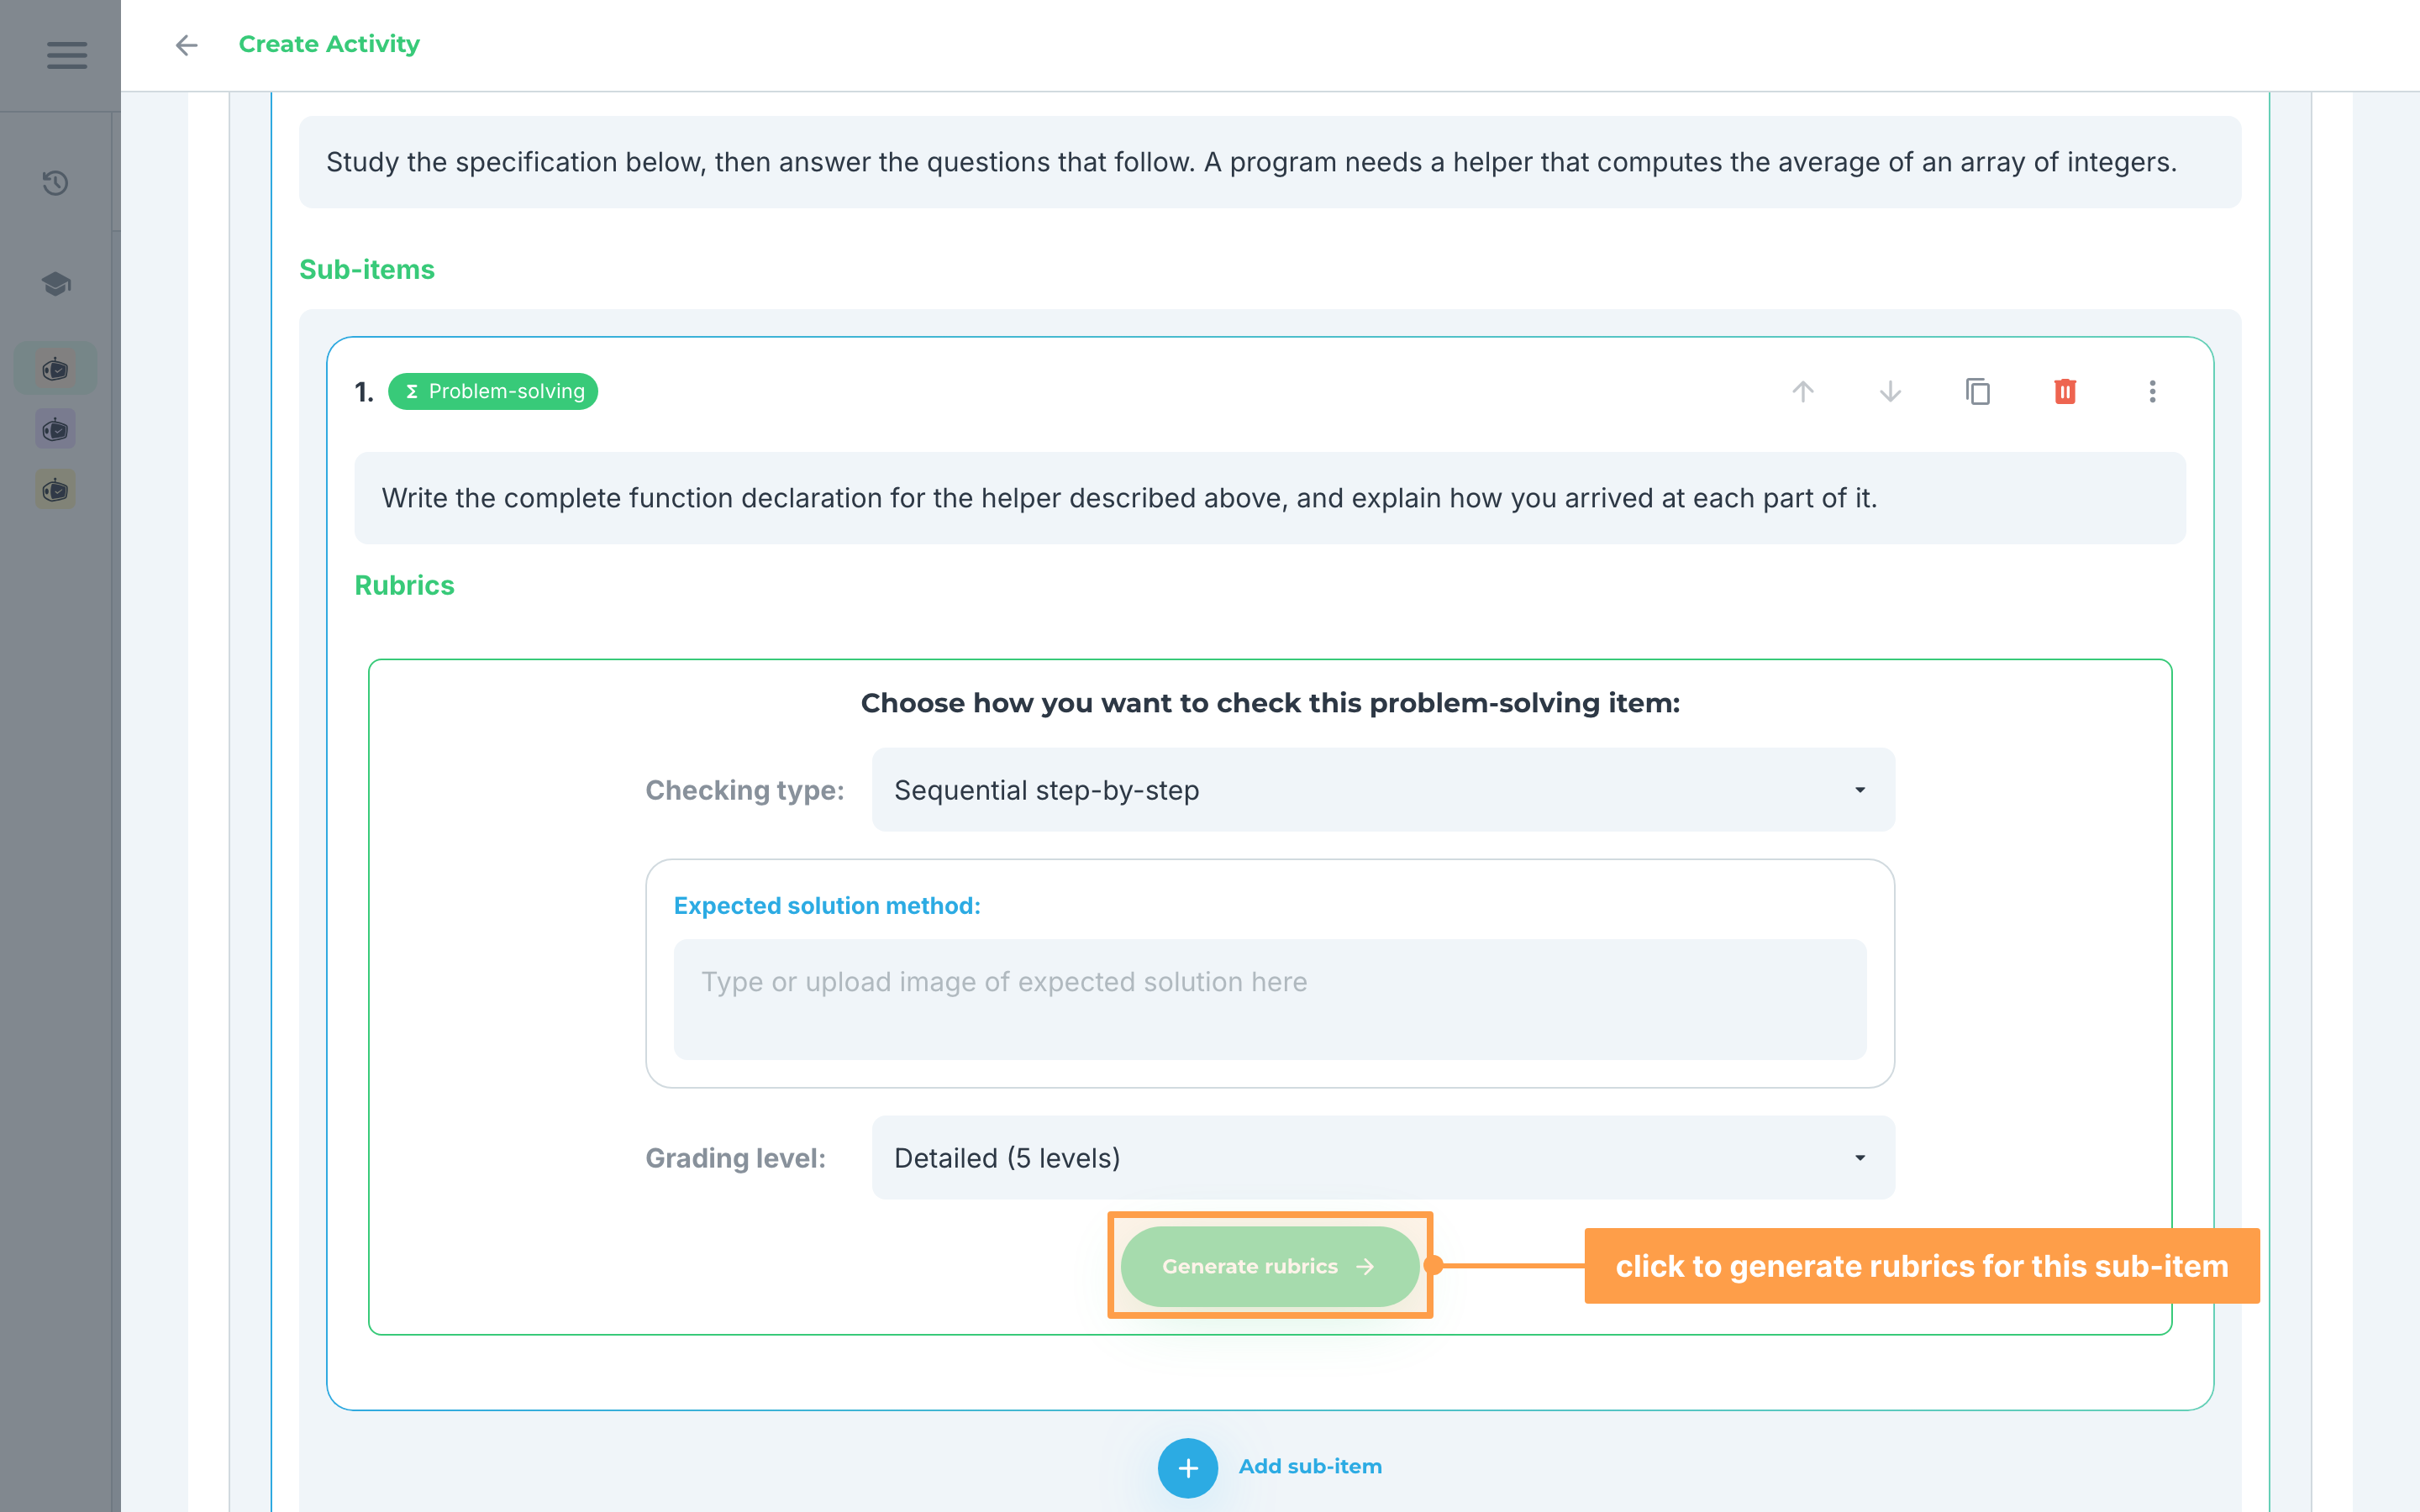
b. Sequential step-by-step (specific method) - for problems where each step depends on the previous one and a specific solution path is expected. Choosing this adds an Expected solution method box, where you type or upload the solution you expect.
c. Final Answer Only - for problems where only the final numerical or symbolic answer is graded, regardless of the solution steps
- Afterwards, click Generate rubrics and wait for our system to finish creating your rubrics.
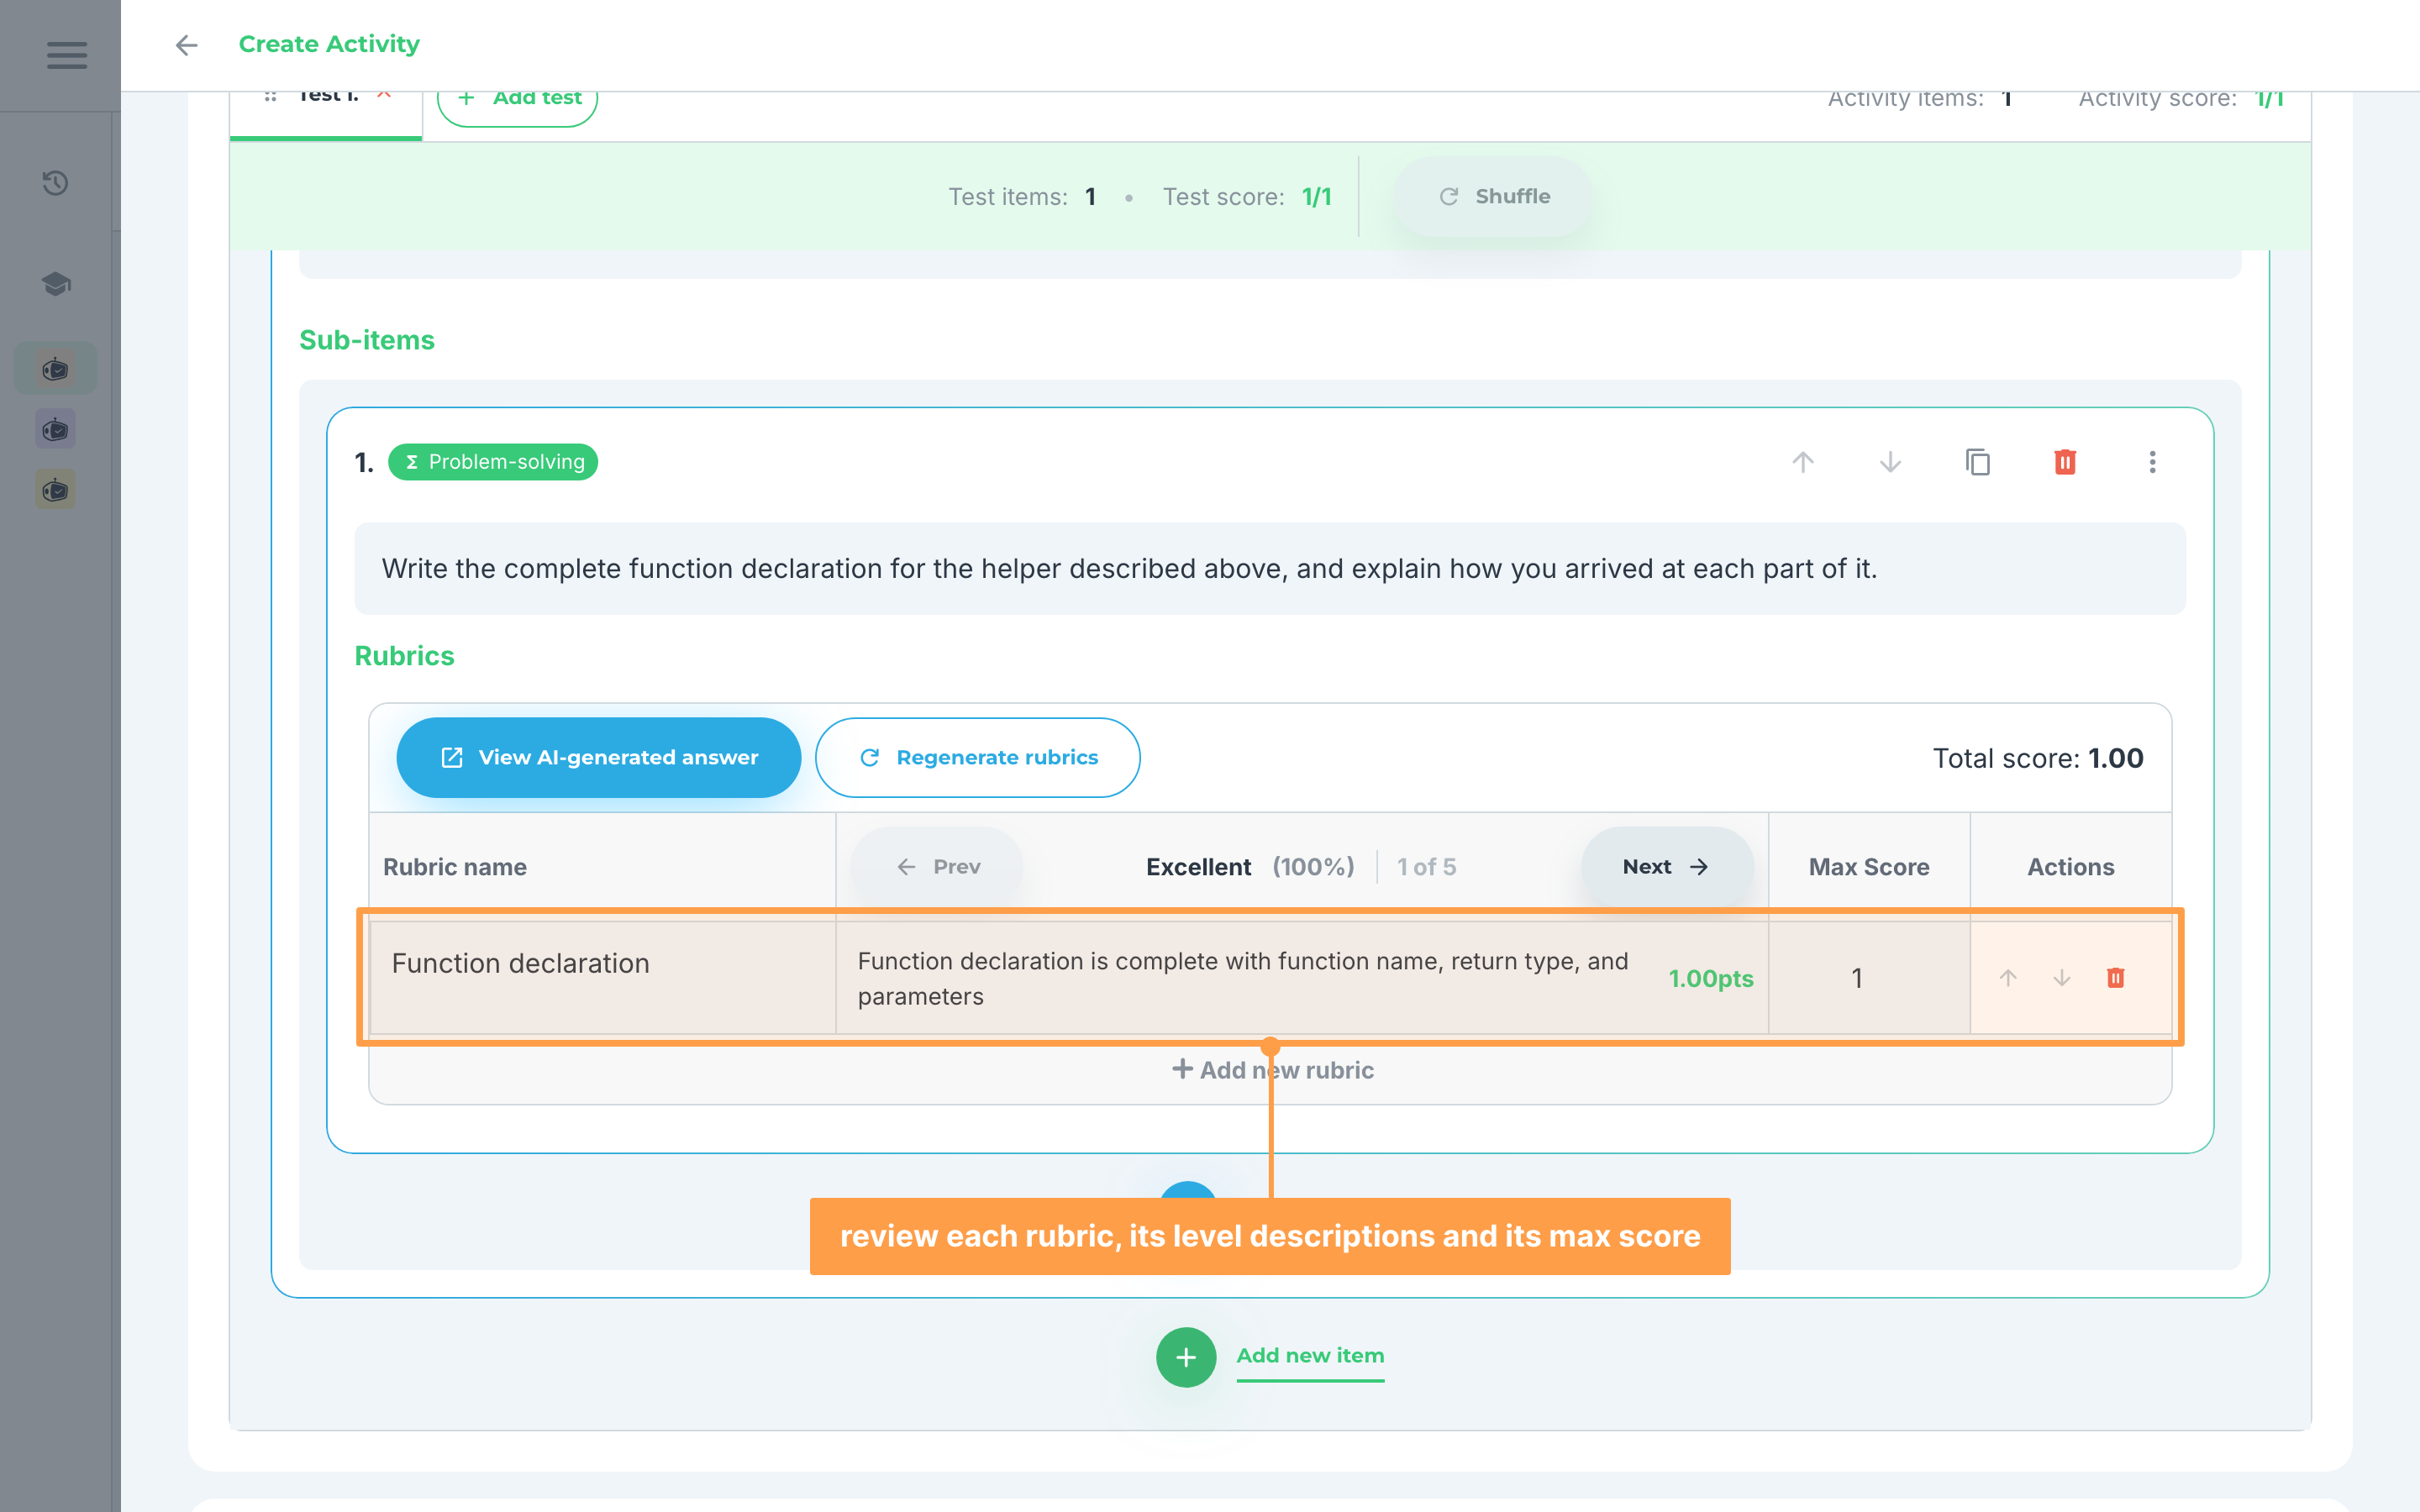
- Review the rubrics to see if they are to your liking. Each rubric carries one description per grading level, so use Prev and Next in the table header to page through them (Excellent (100%), Satisfactory (80%), and so on), and check the Max Score of each rubric.
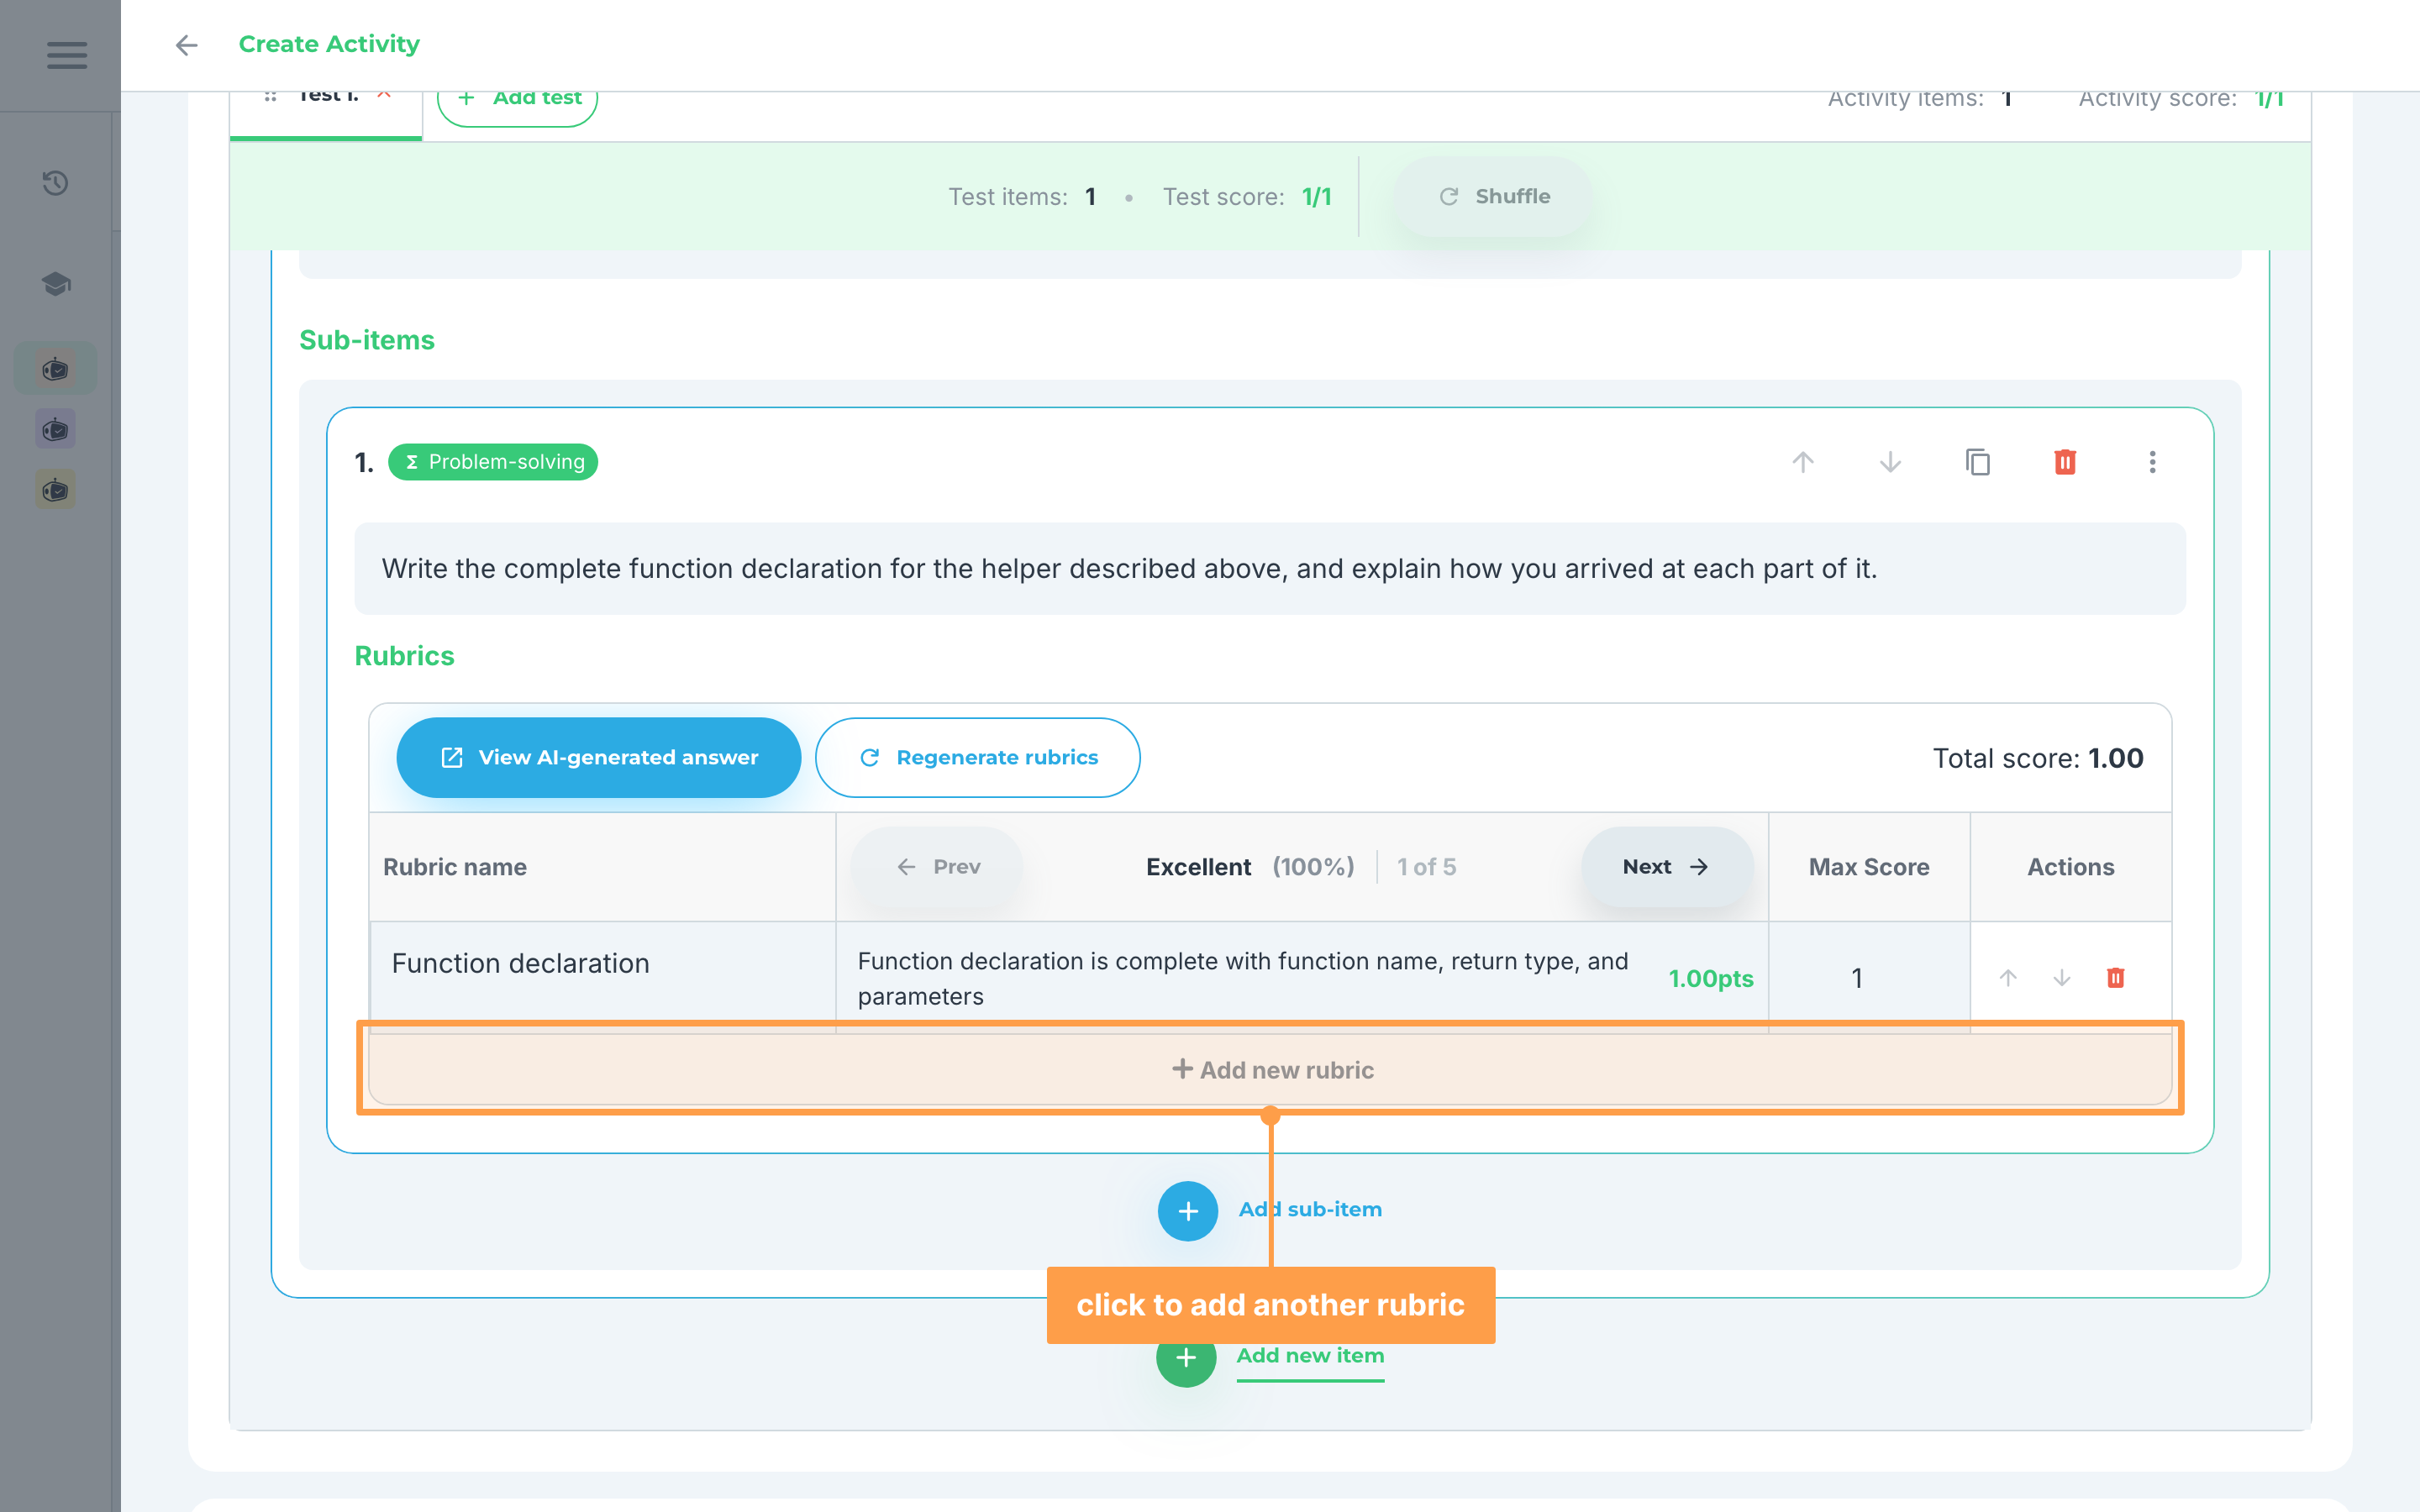
- If you wish to edit any detail to the rubrics, you can make your changes in the table by clicking the boxes and adding your modification. You can also add another rubric by clicking + Add new rubric after the last rubric.
- Provide a rubric name, then choose Autogenerate with AI or Create my own for the description/s of the rubric, and set the score. One description is written for each grading level.
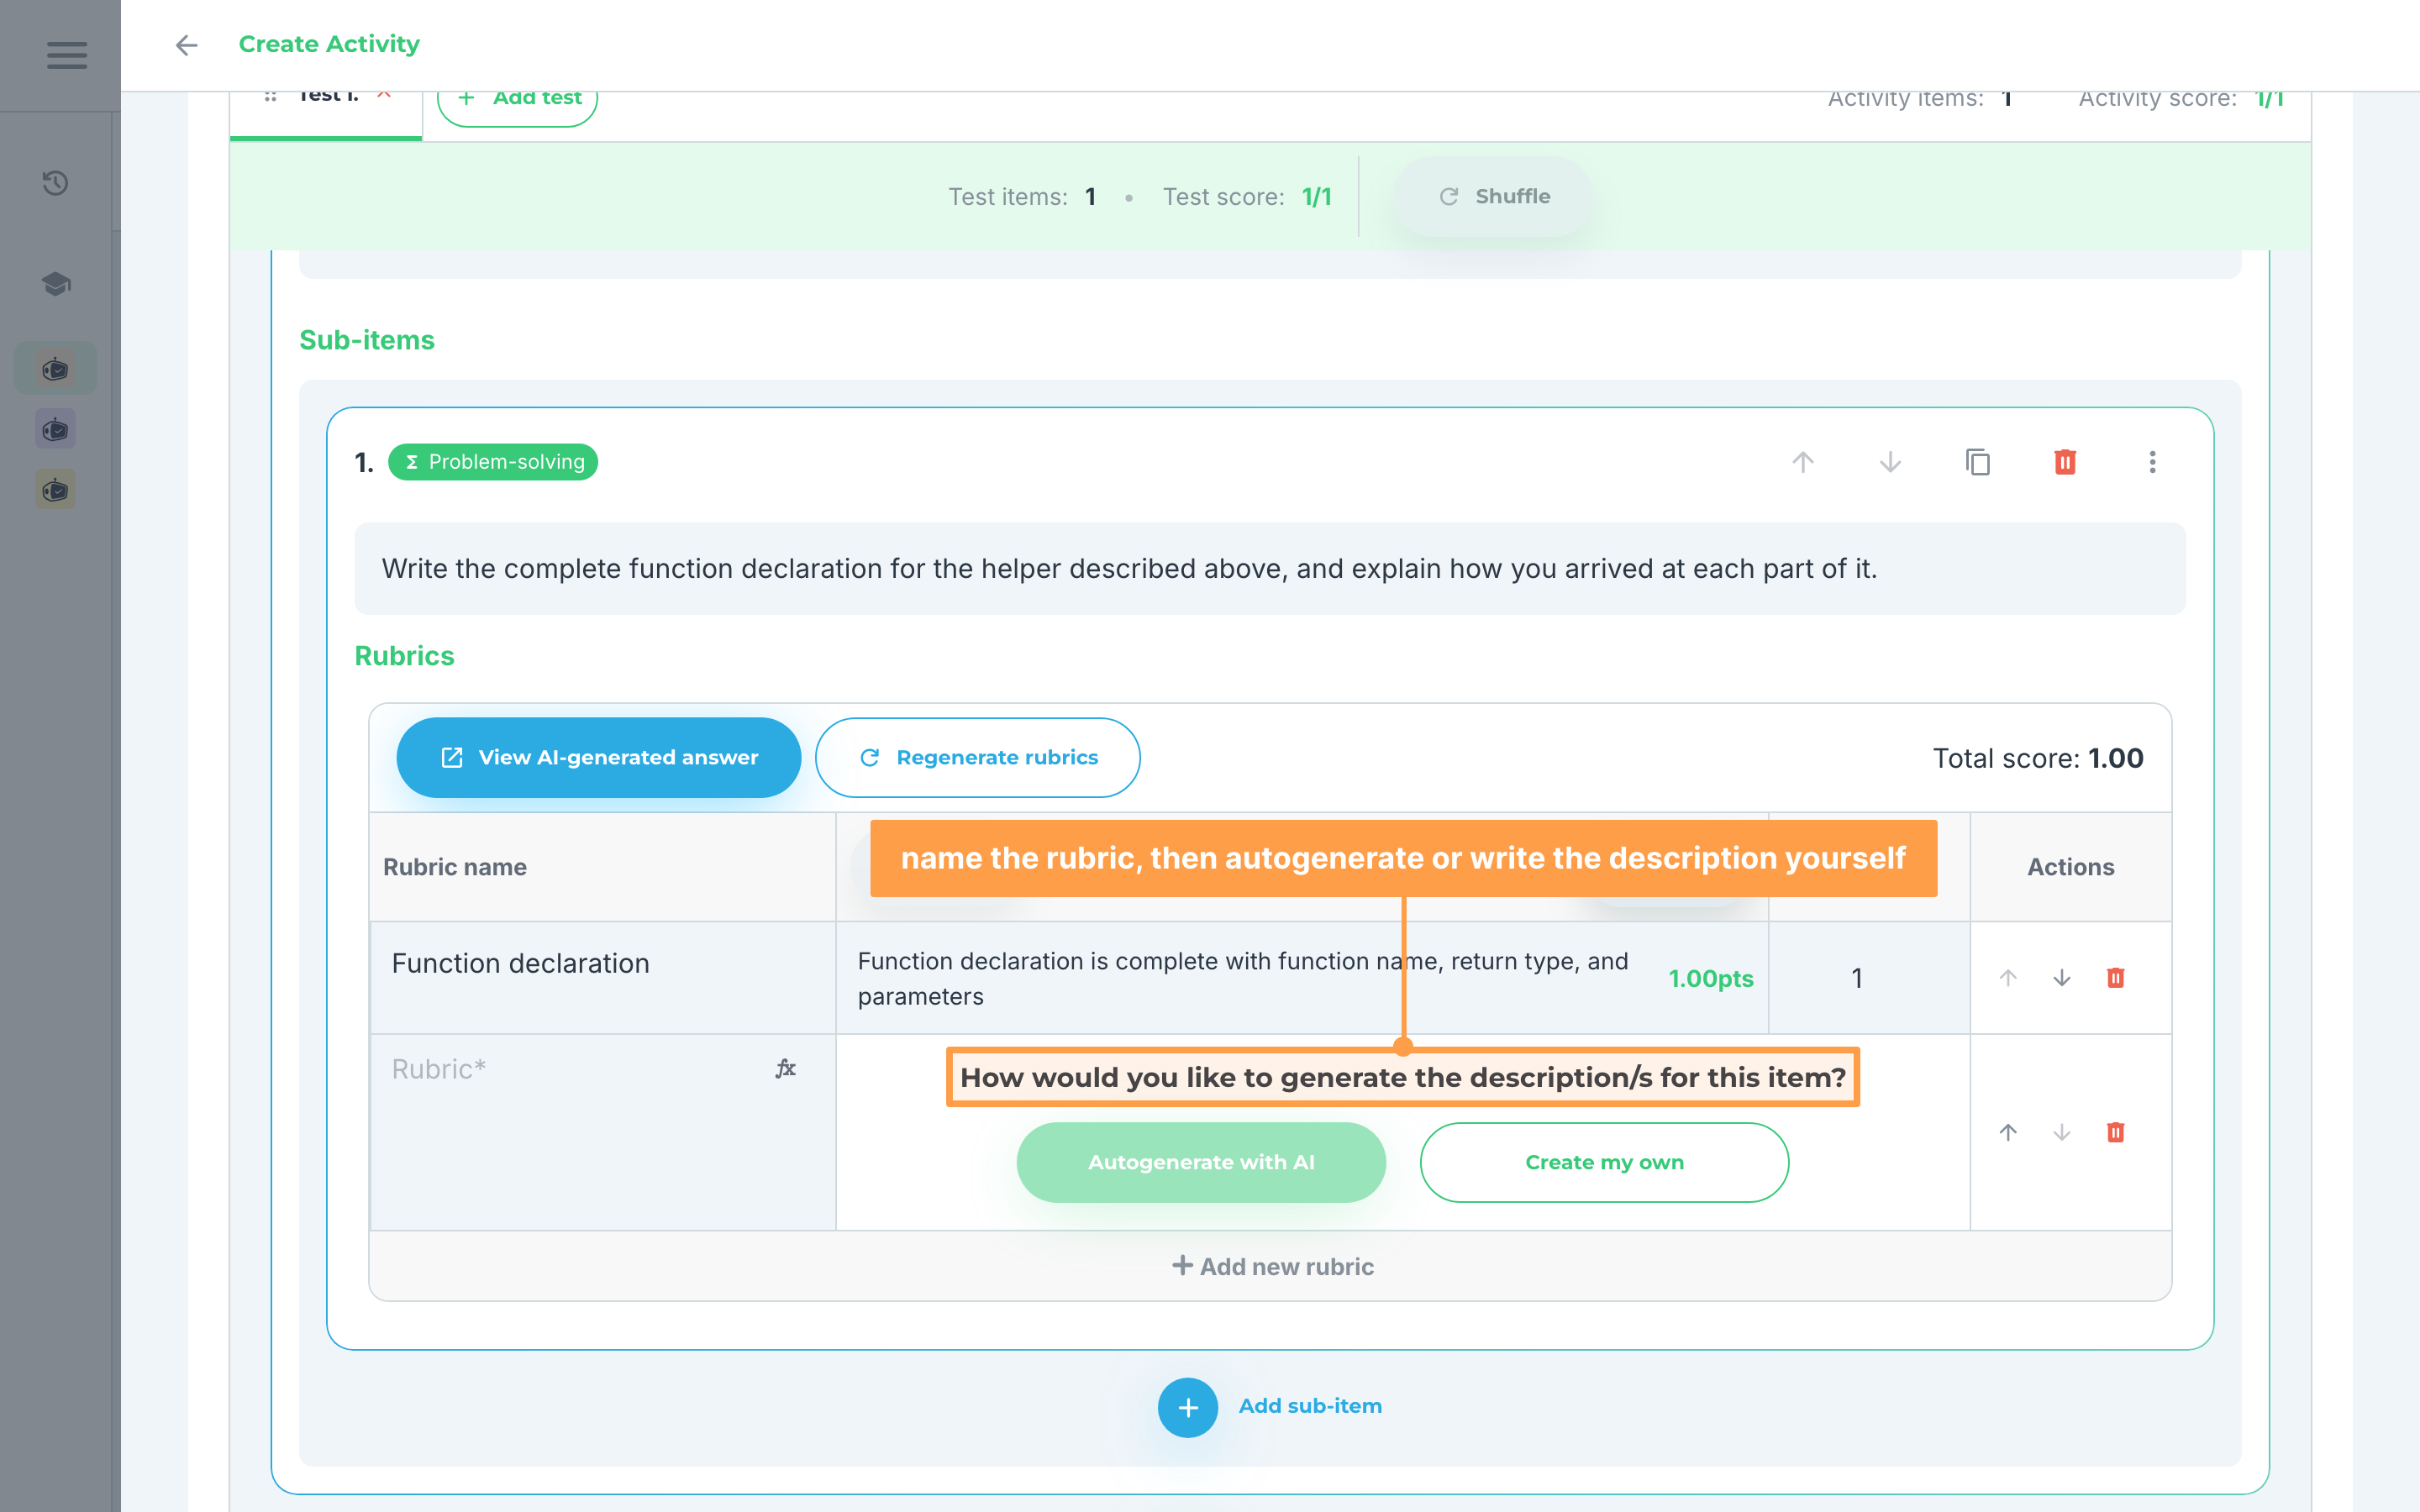
- Click on the View AI-generated answer button at the top of the rubrics table to view the answer key your rubrics were based upon.
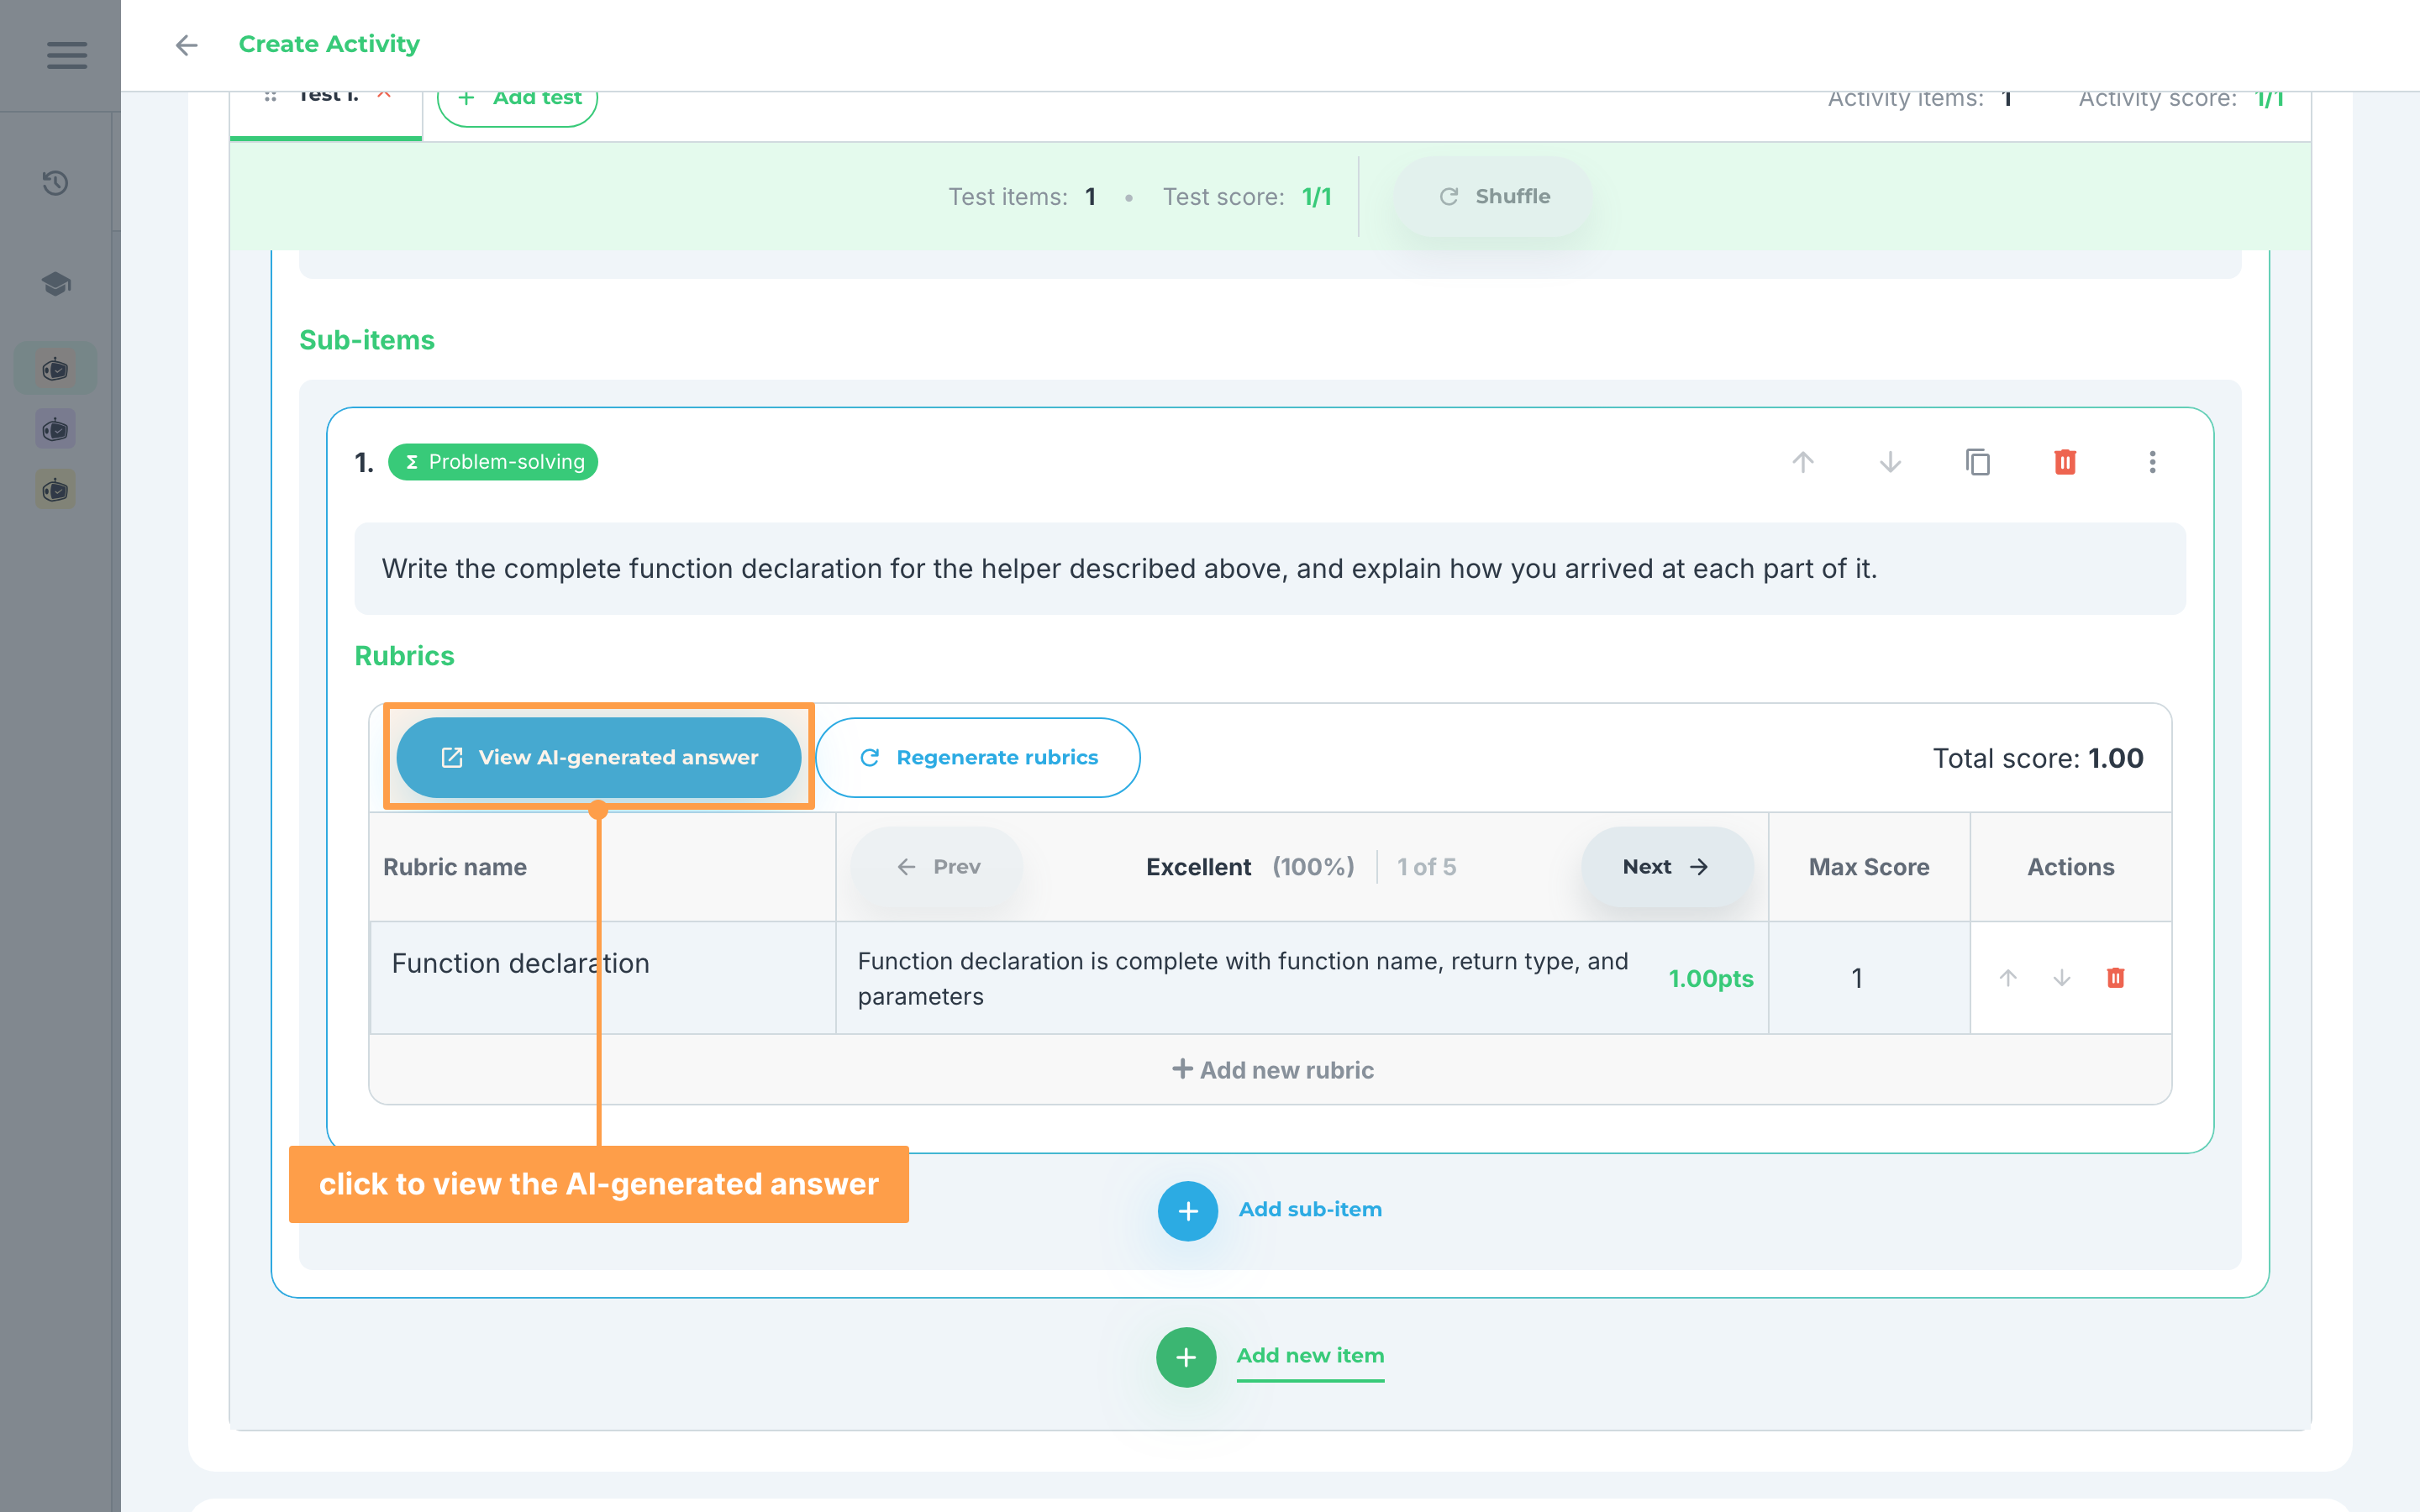
- You may also edit the answer if you wish and the rubrics will be updated based on your edited answer.
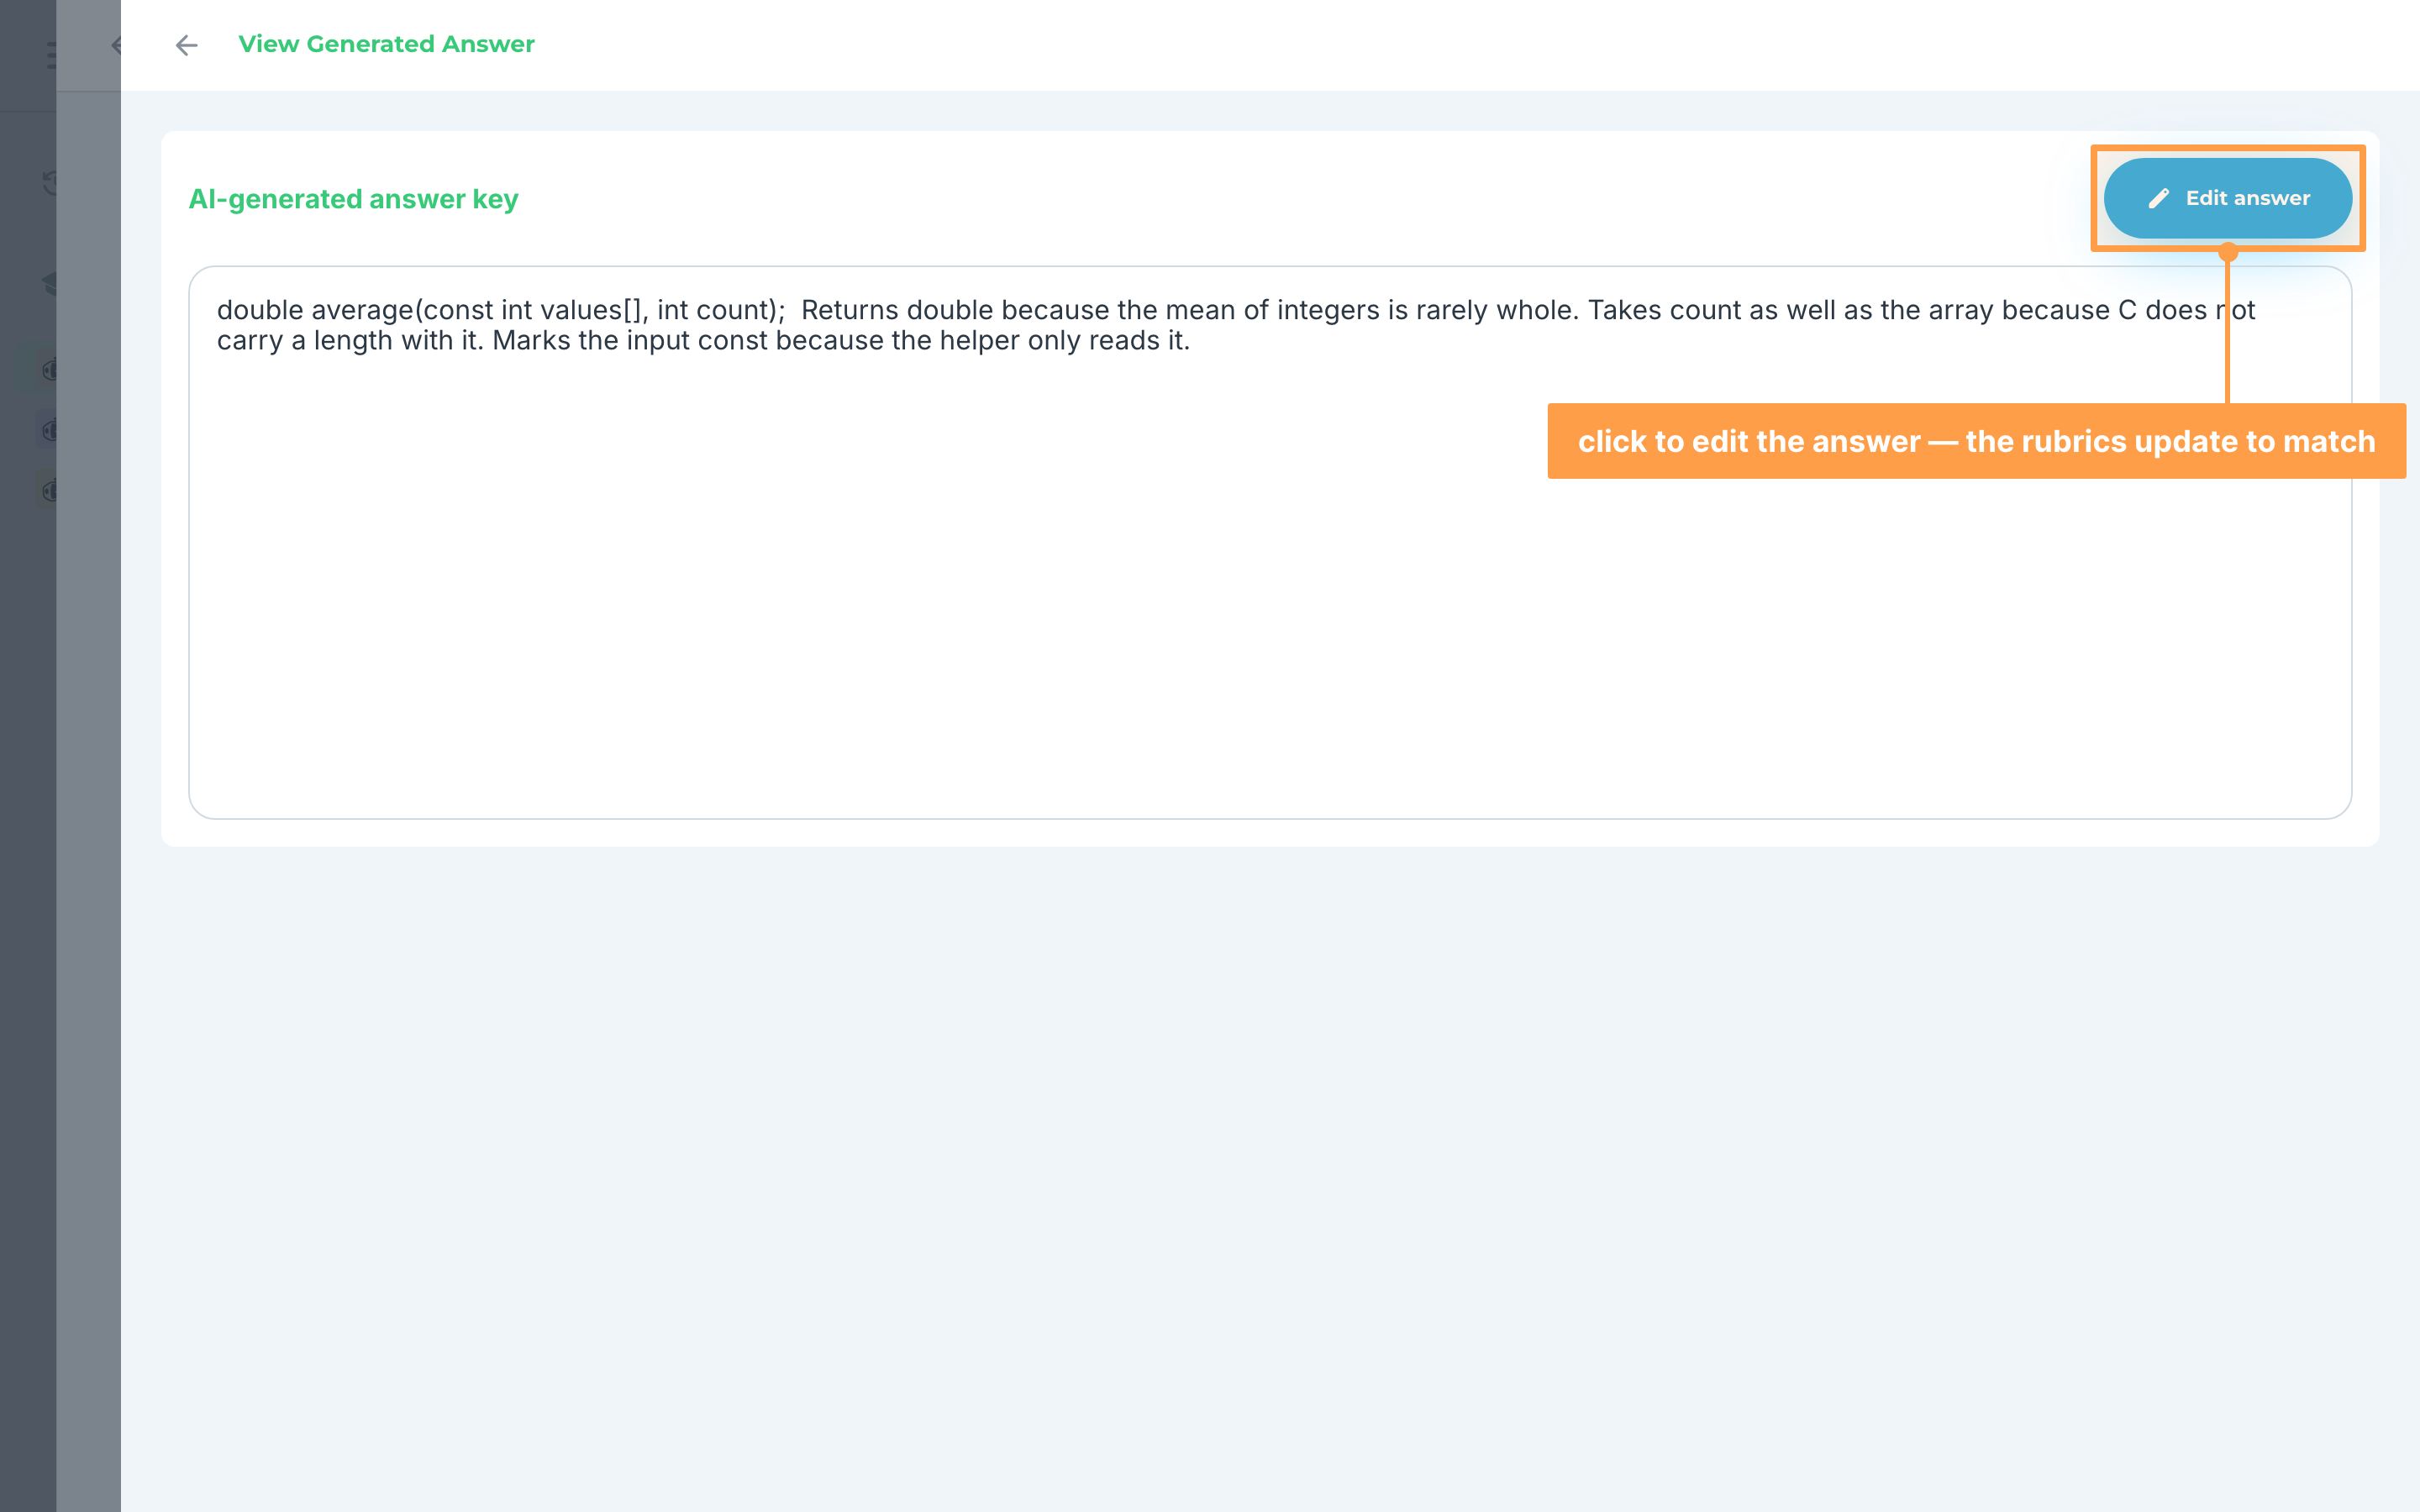
- Below that, select a Grading level:. The grading level sets the score bands each rubric will be scored against, and by default it is set to Detailed (5 levels). You can also pick one of your own saved levels, or click Add custom to build a new set.
f. Code on paper
For items with Code on paper (BETA) as the item type:
Code on paper is available on Handwritten activities only. If you switch the activity to Online in Step 2, its Code on paper and Visuals items are removed.
- Fill out the question for this item.
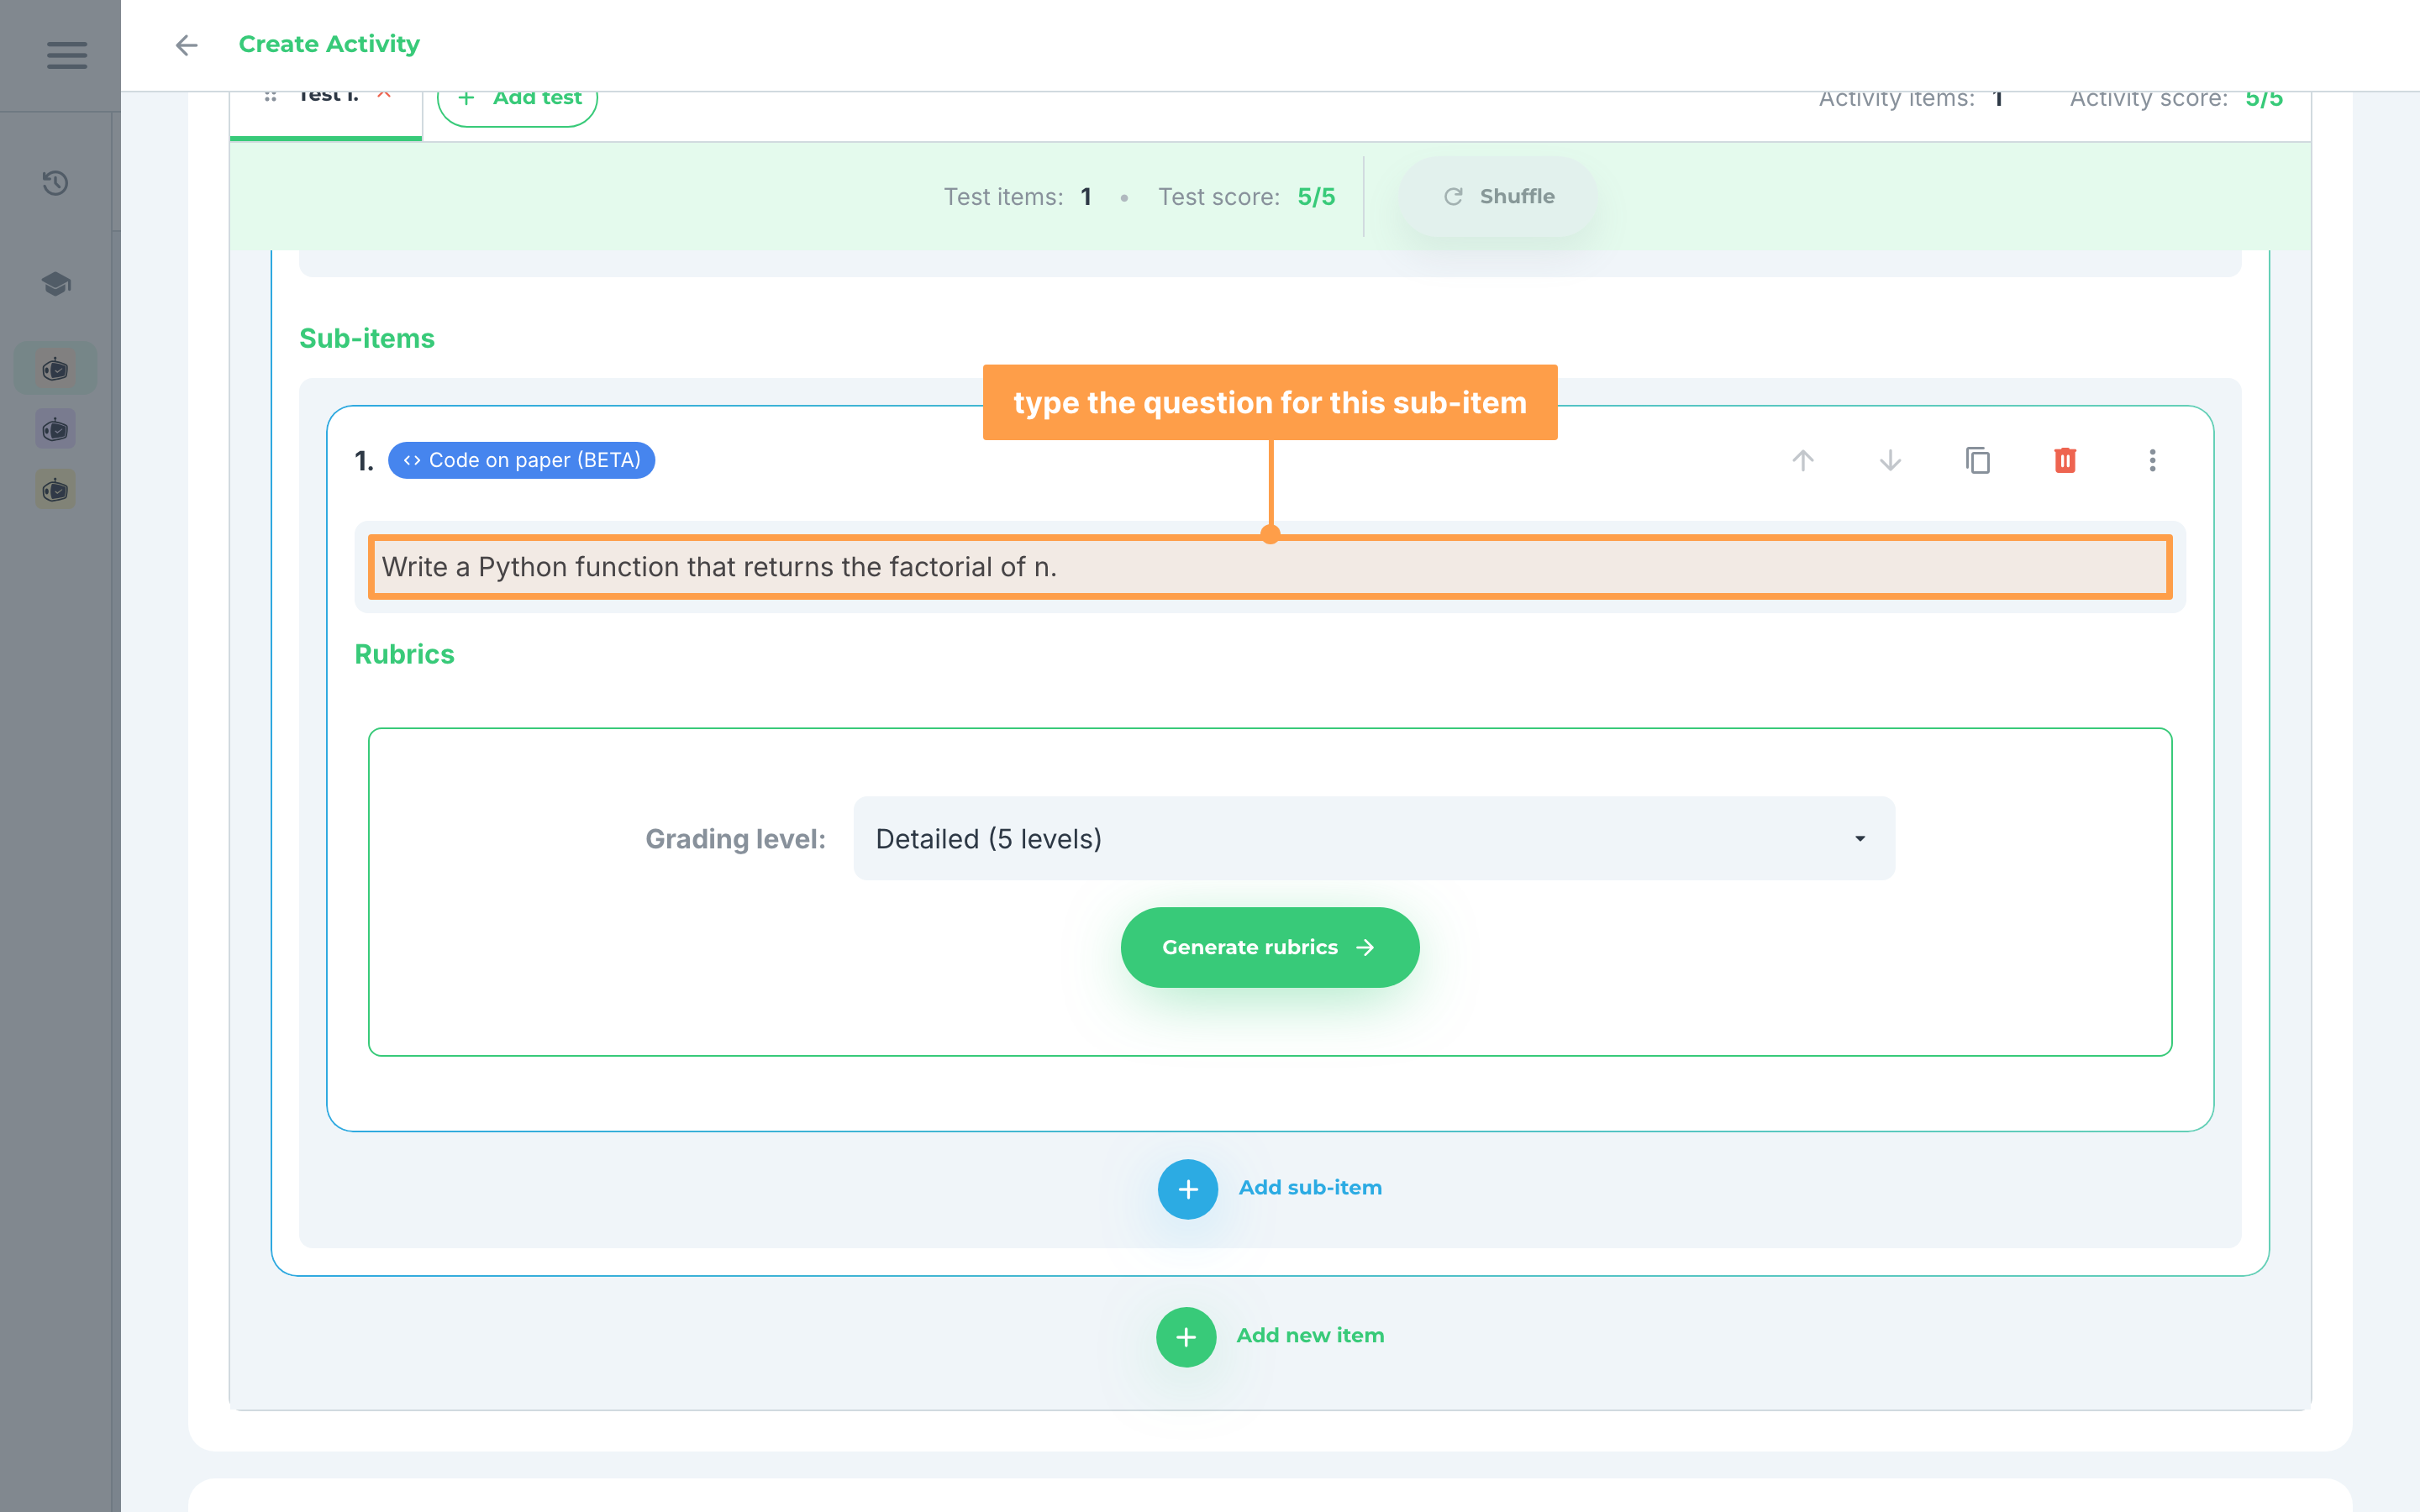
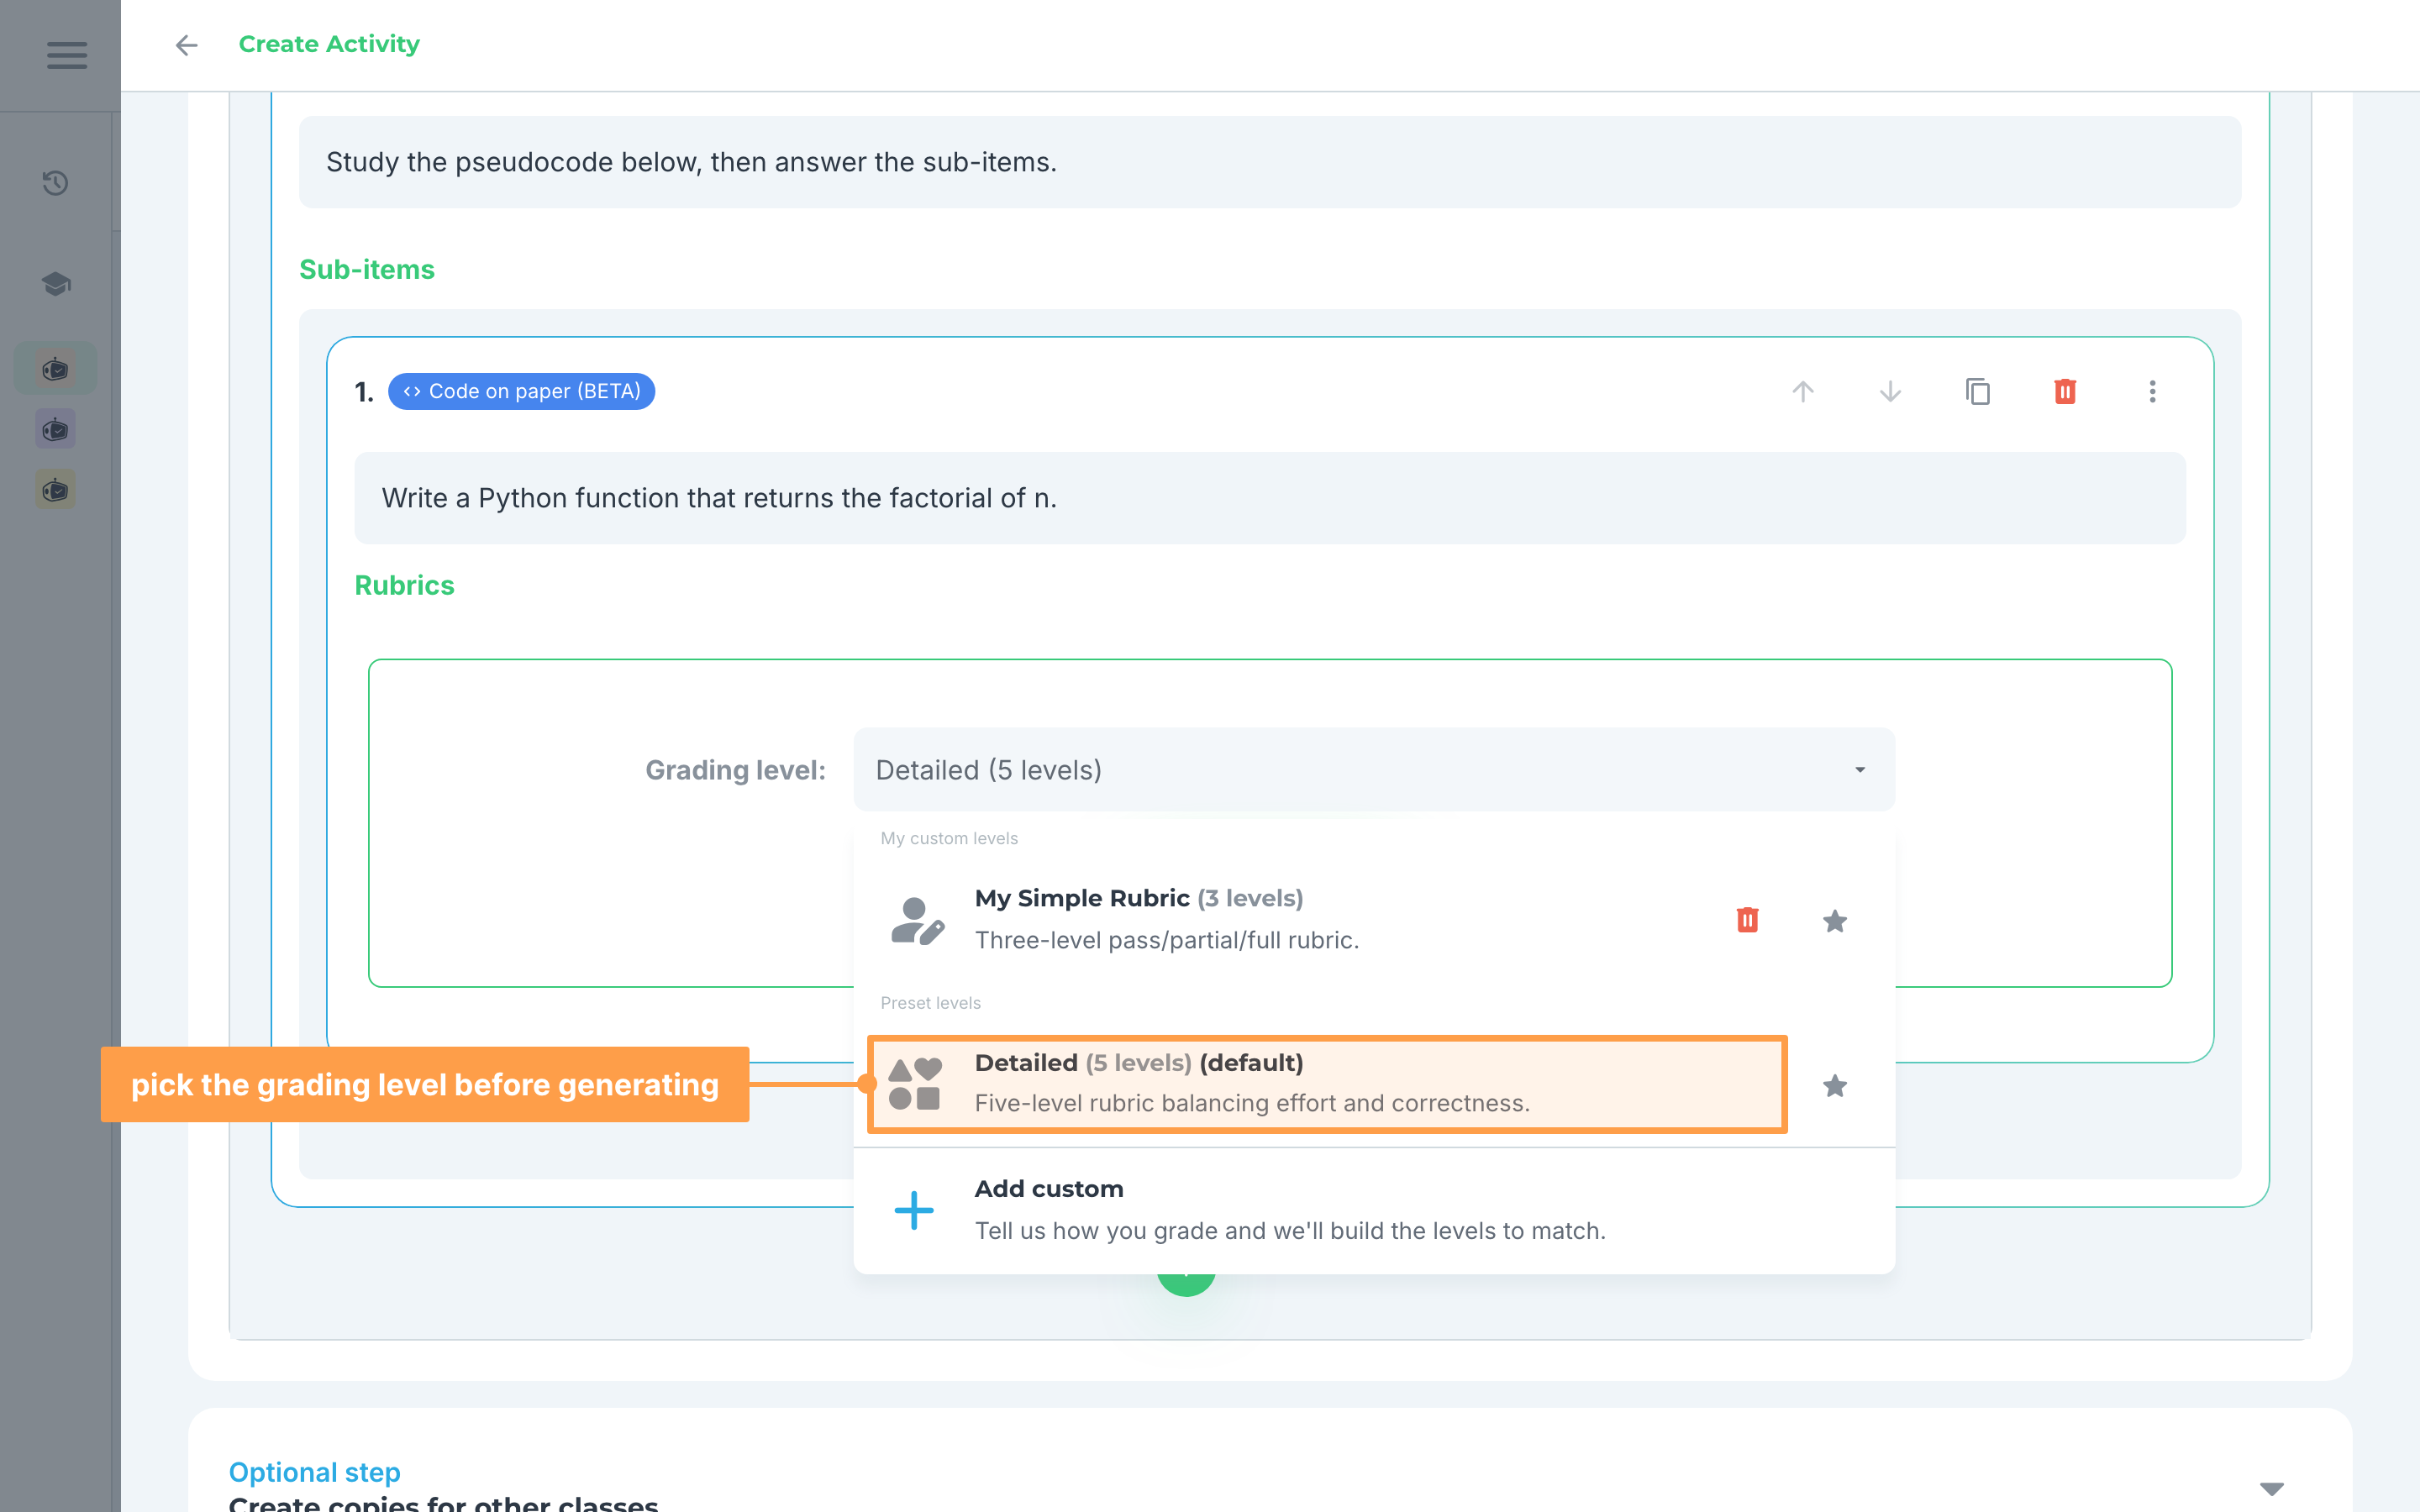
- Then, choose the Grading level for this item, which is the set of scoring levels each rubric will be written for, and click Generate rubrics and wait for our system to finish creating your rubrics.
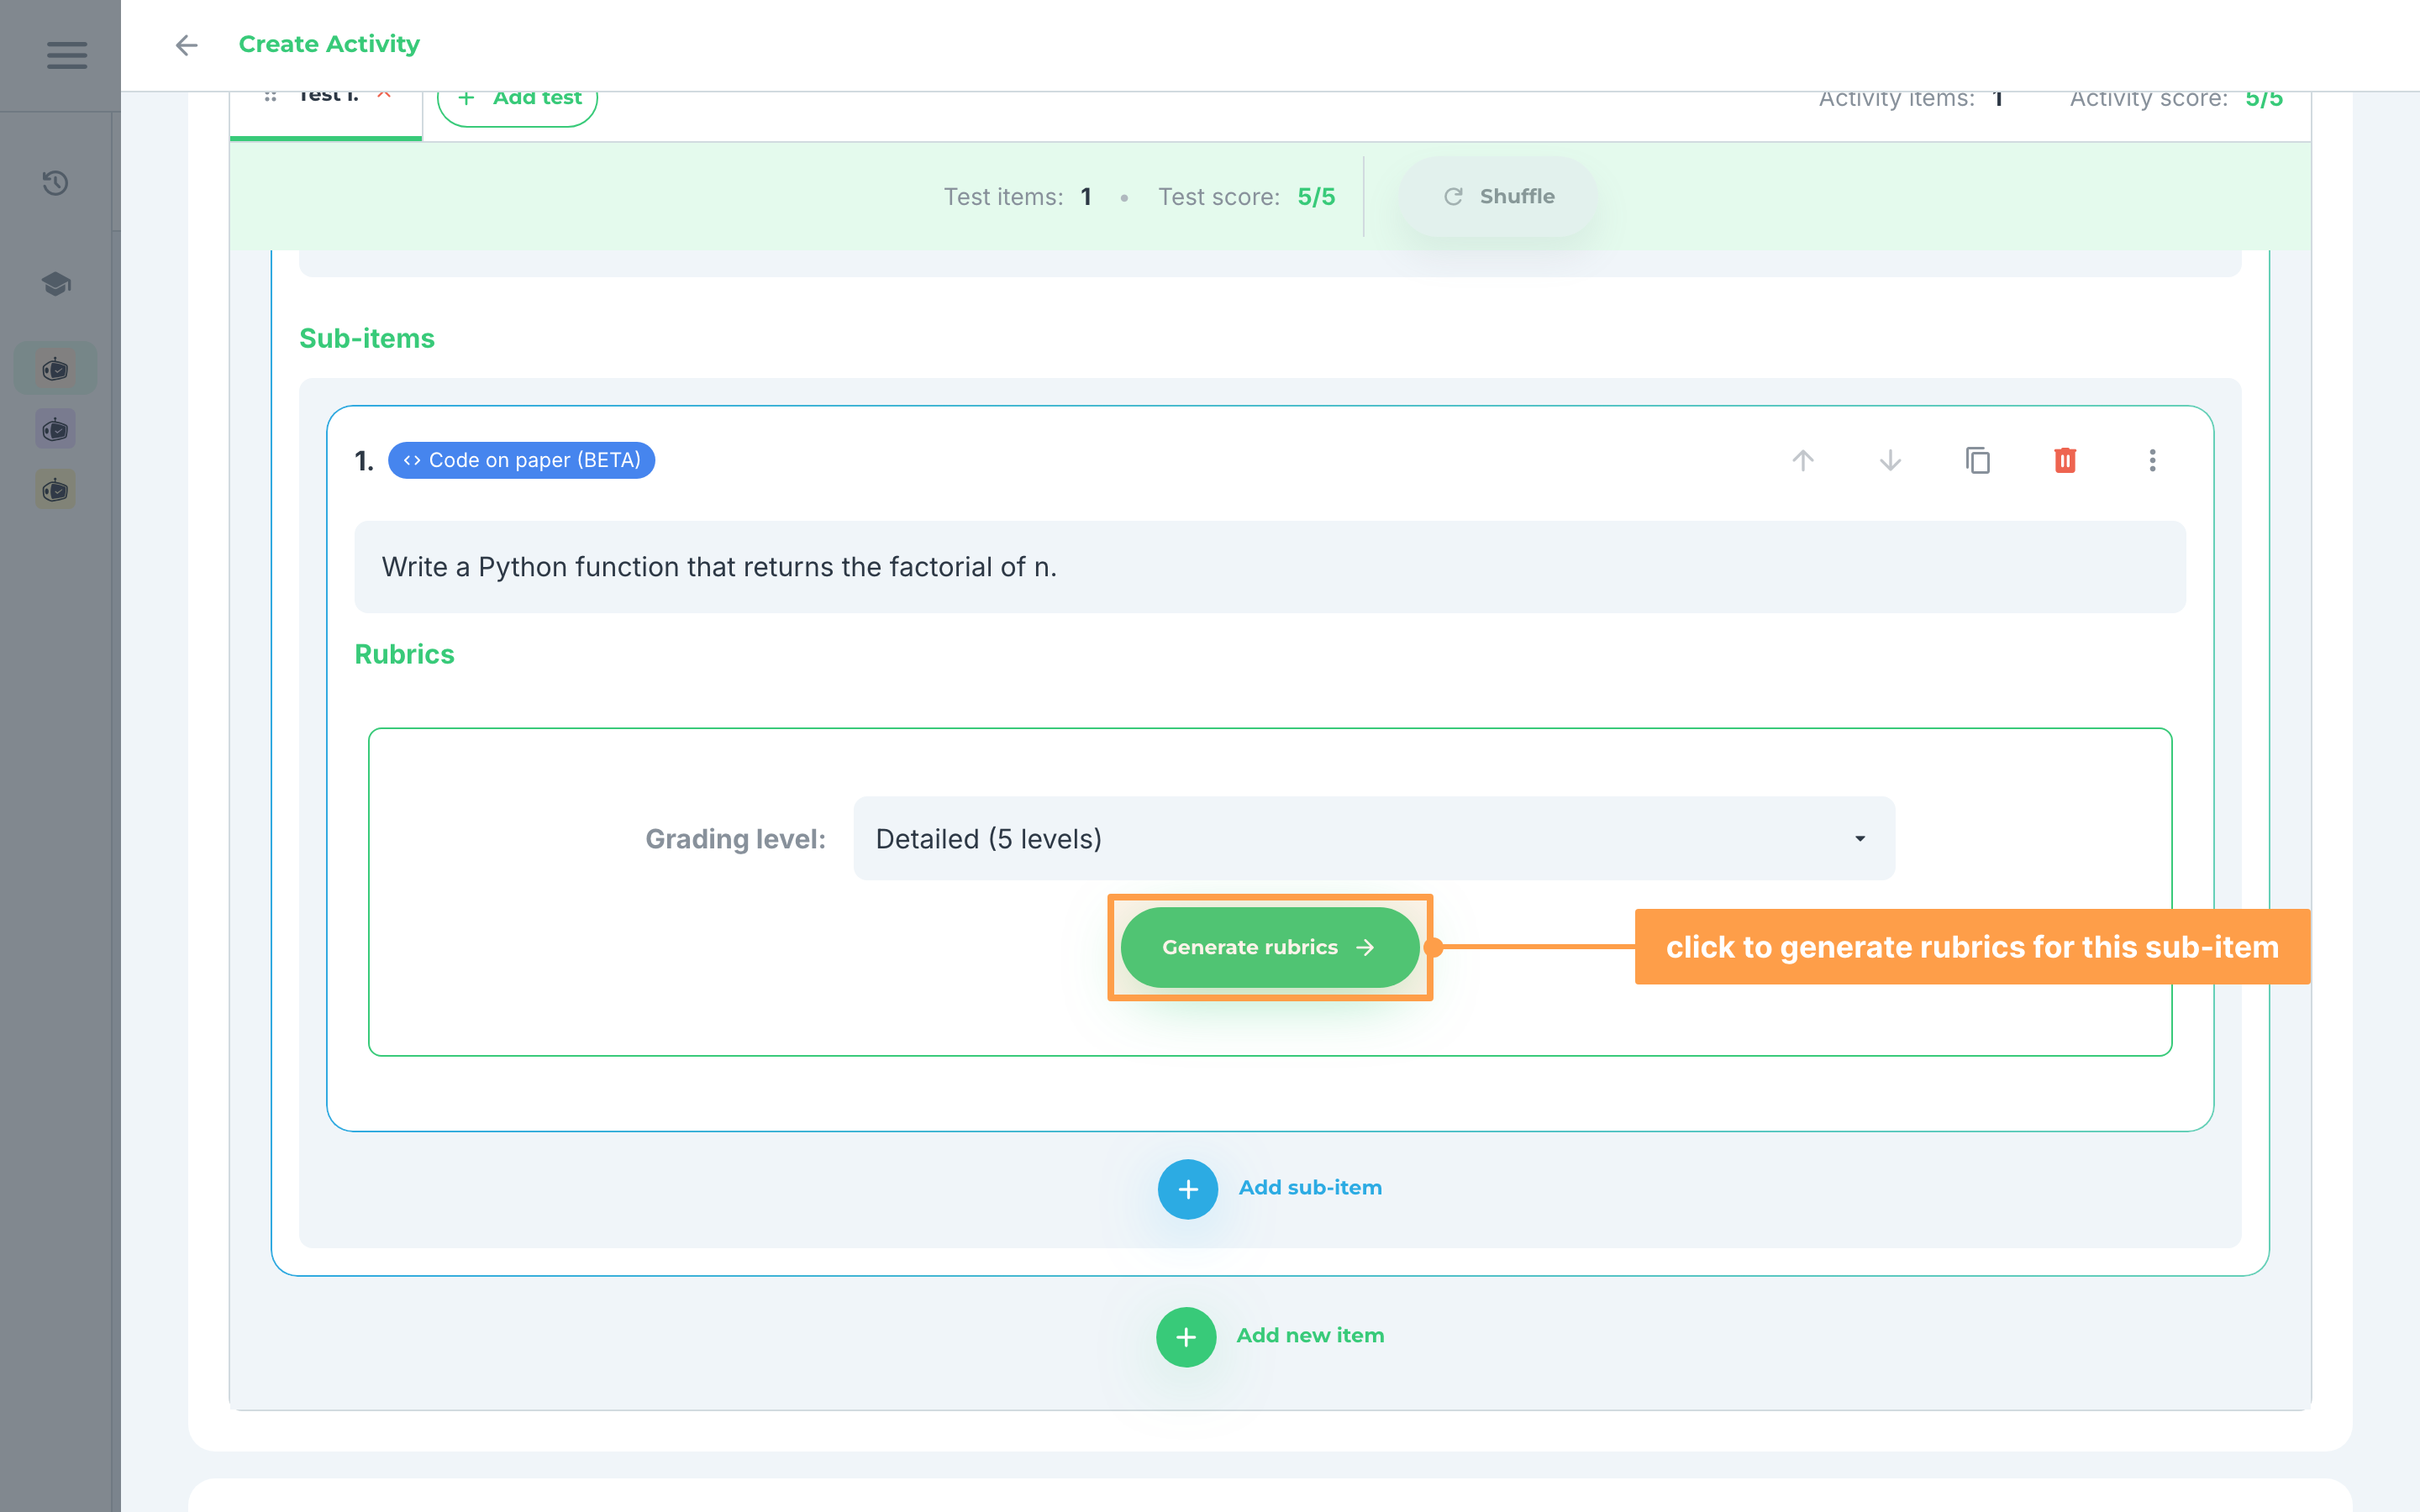
- Review the rubrics to see if it is to your liking, especially the description and score for each rubric.
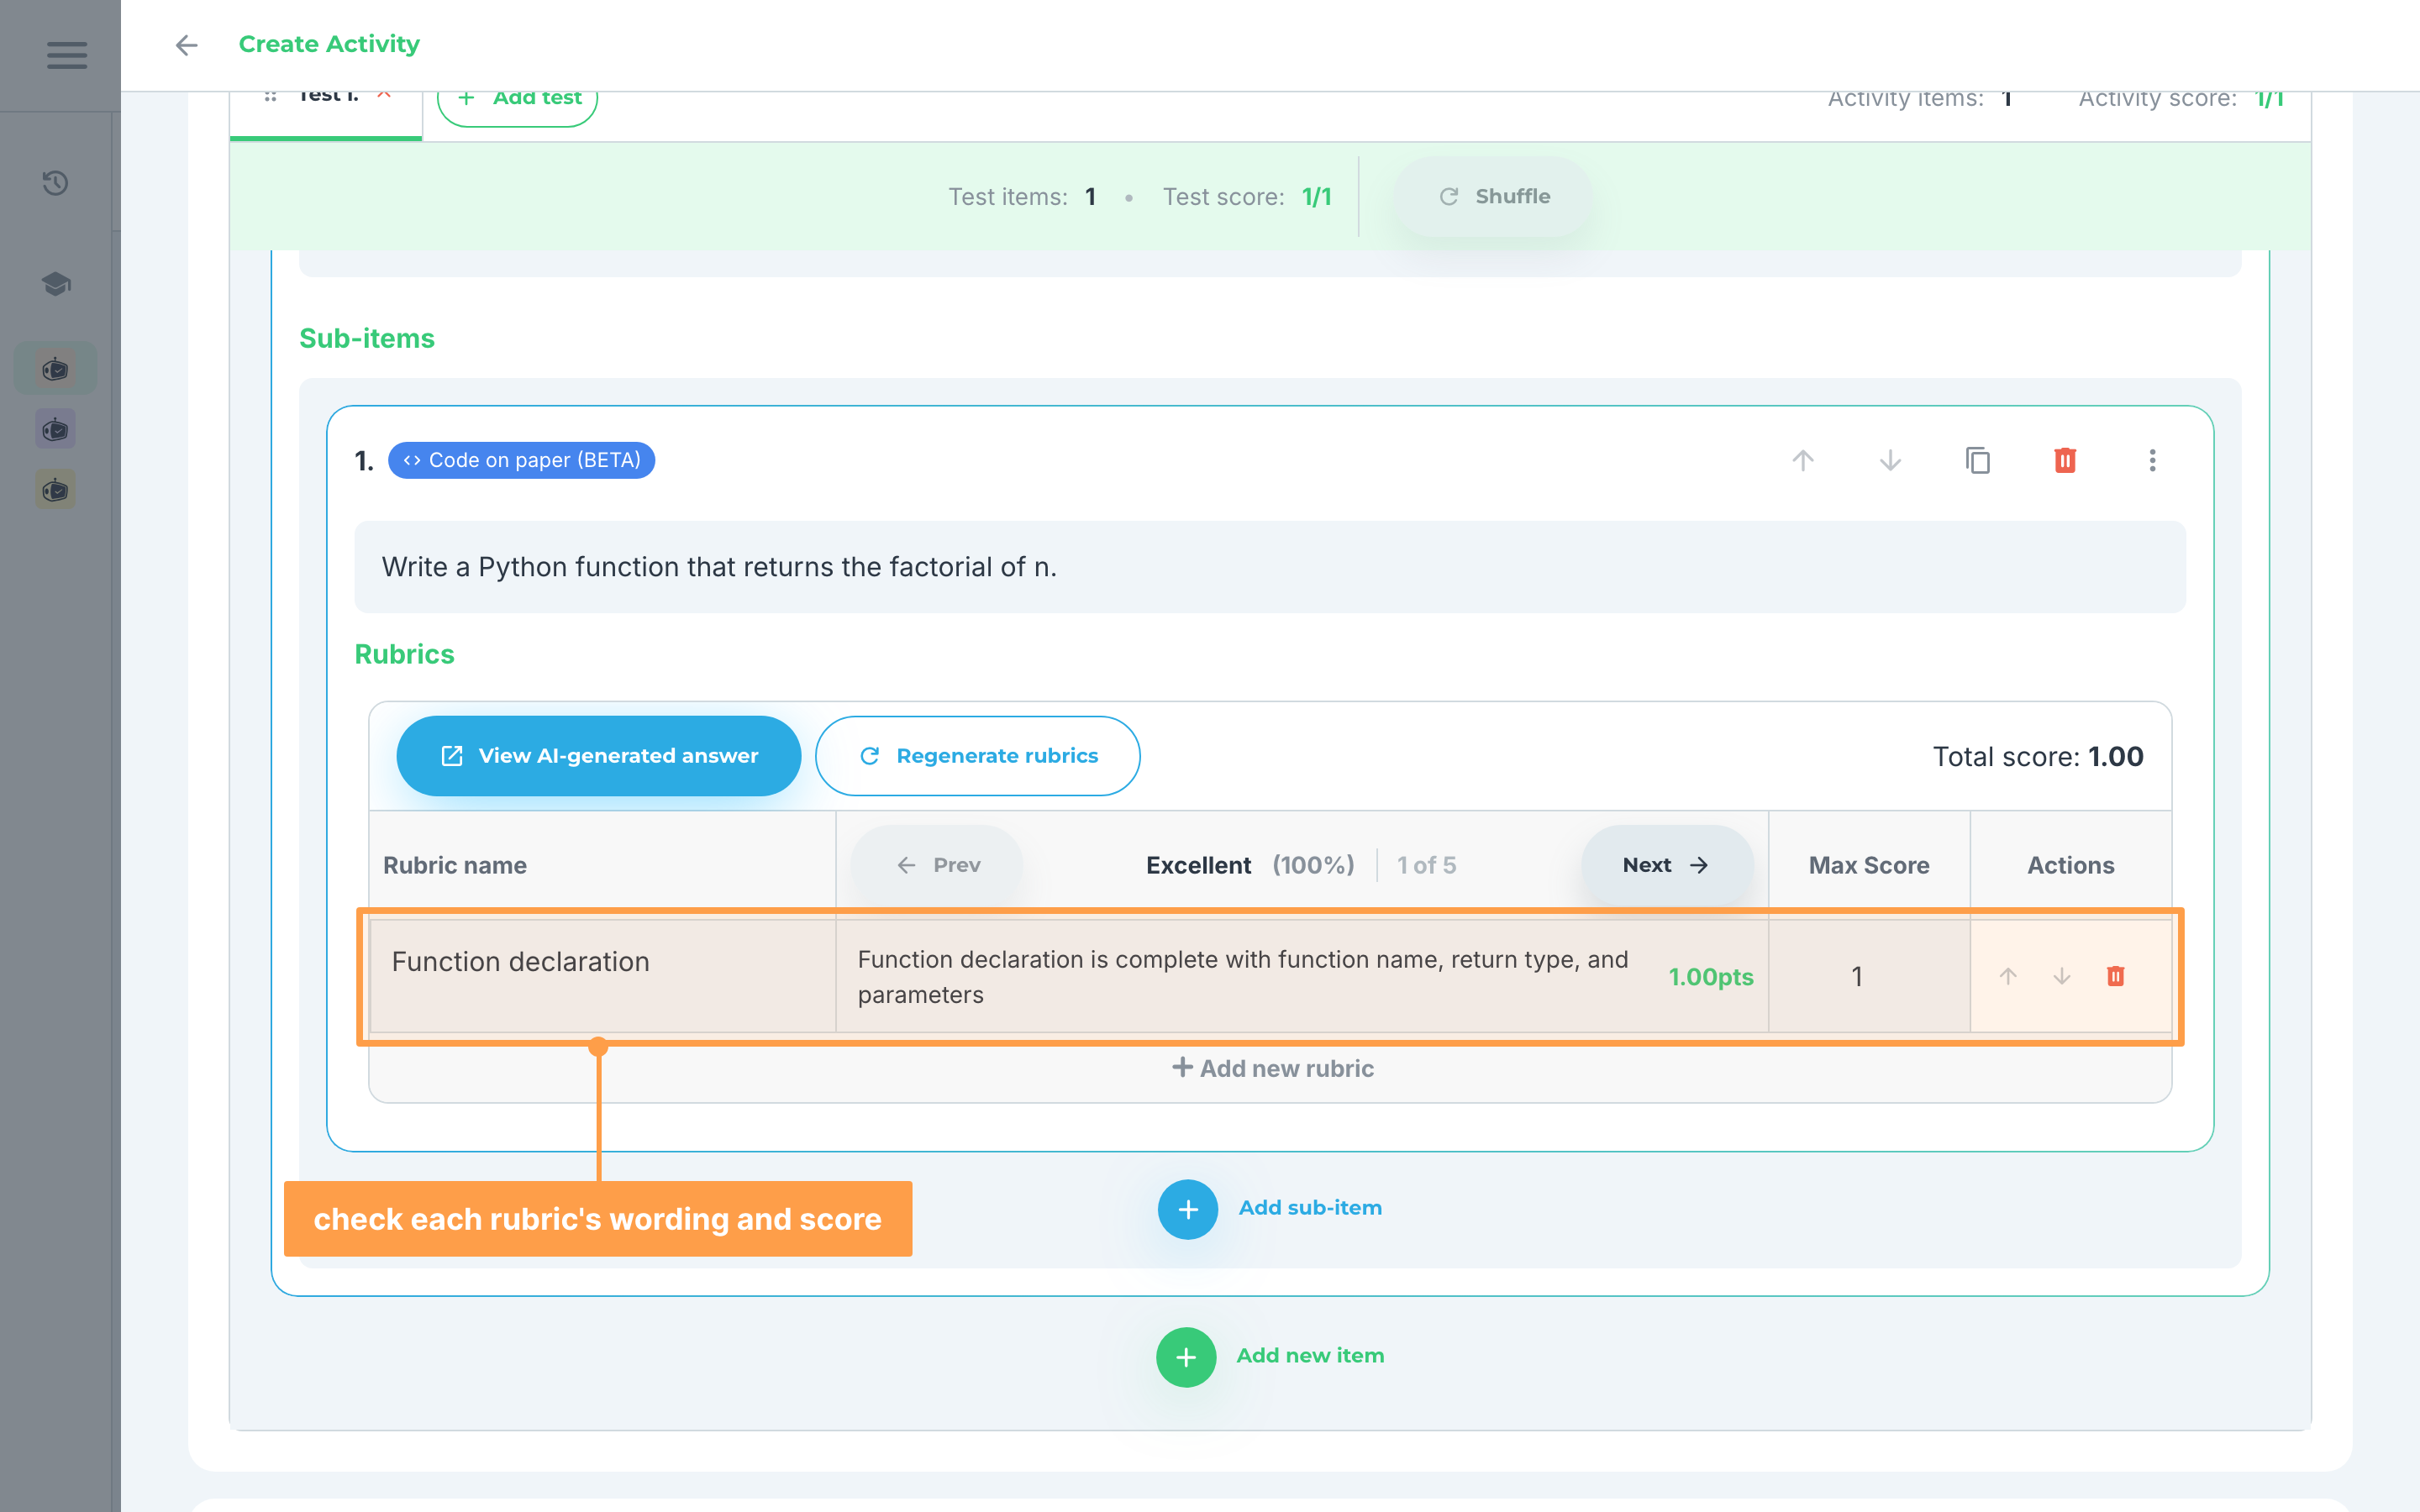
- If you wish to edit any detail to the rubrics, you can make your changes in the table by clicking the boxes and adding your modification. Each rubric carries one scoring guide per grading level, so use Prev and Next above the table to move between levels before you edit. You can also add another rubric by clicking + Add new rubric after the last rubric, or use the Actions column to move a rubric up or down or delete it.
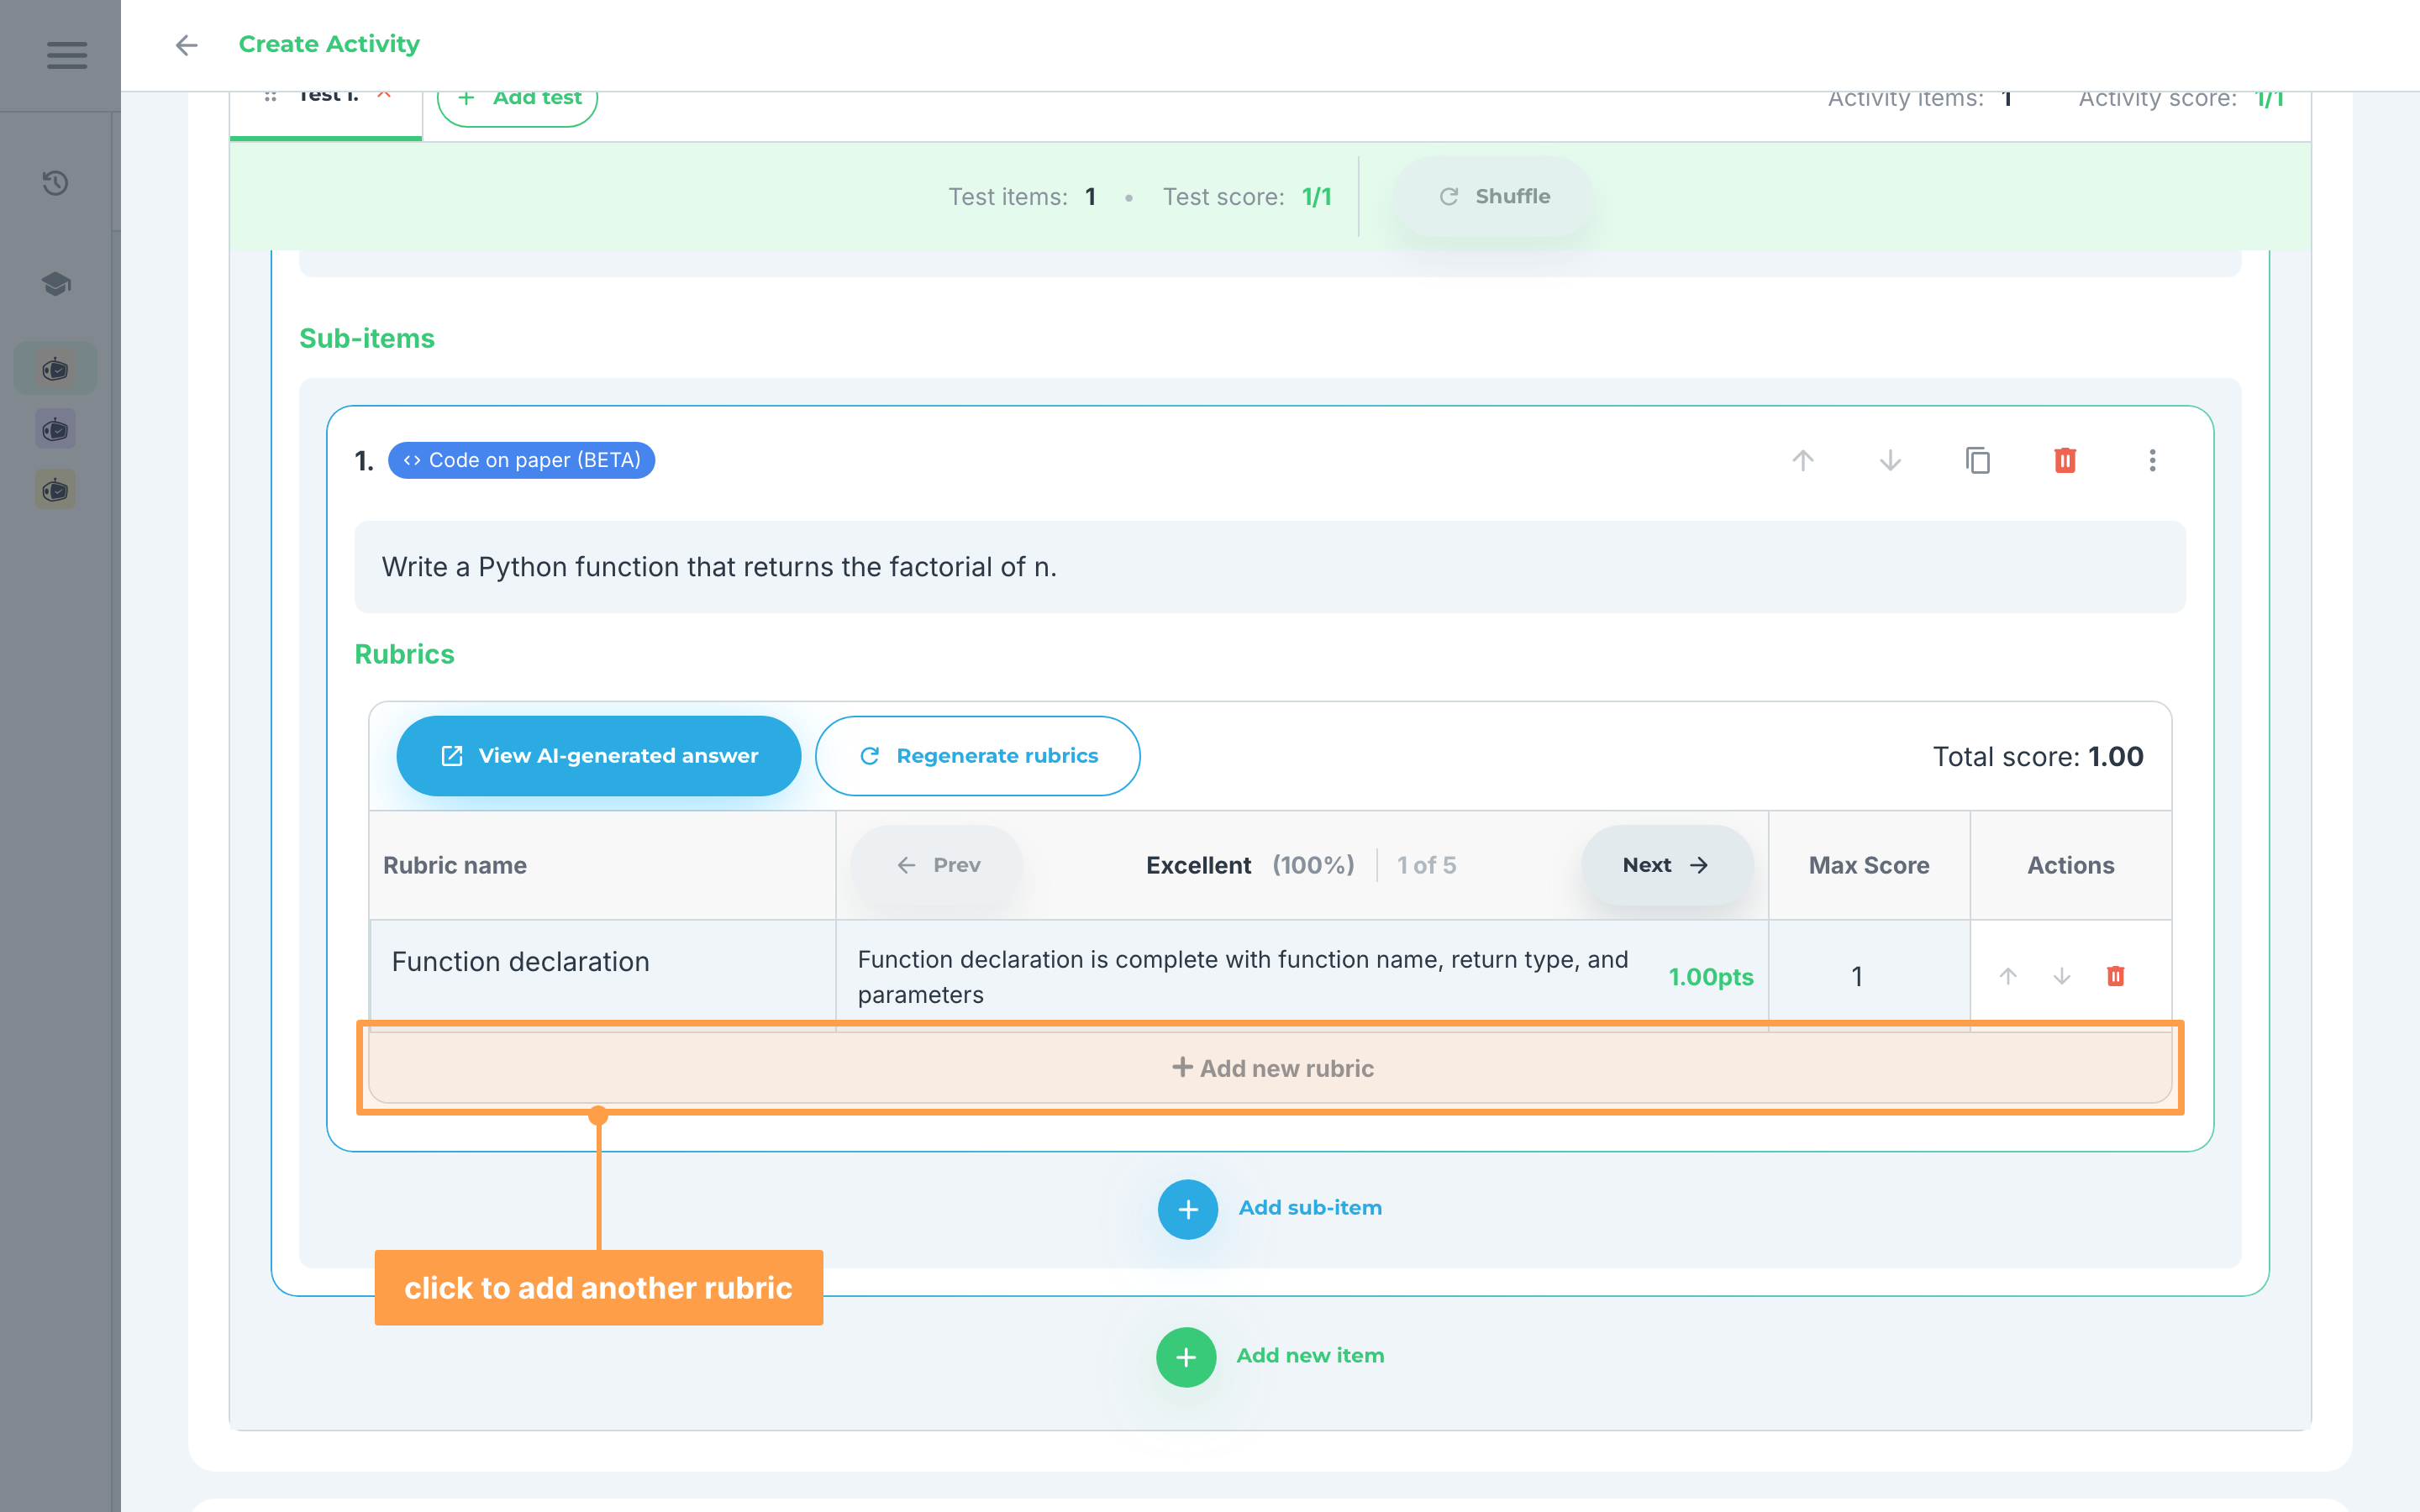
- Provide a rubric name then you can opt to Autogenerate with AI or Create my own the description/s of the rubric then set the score.
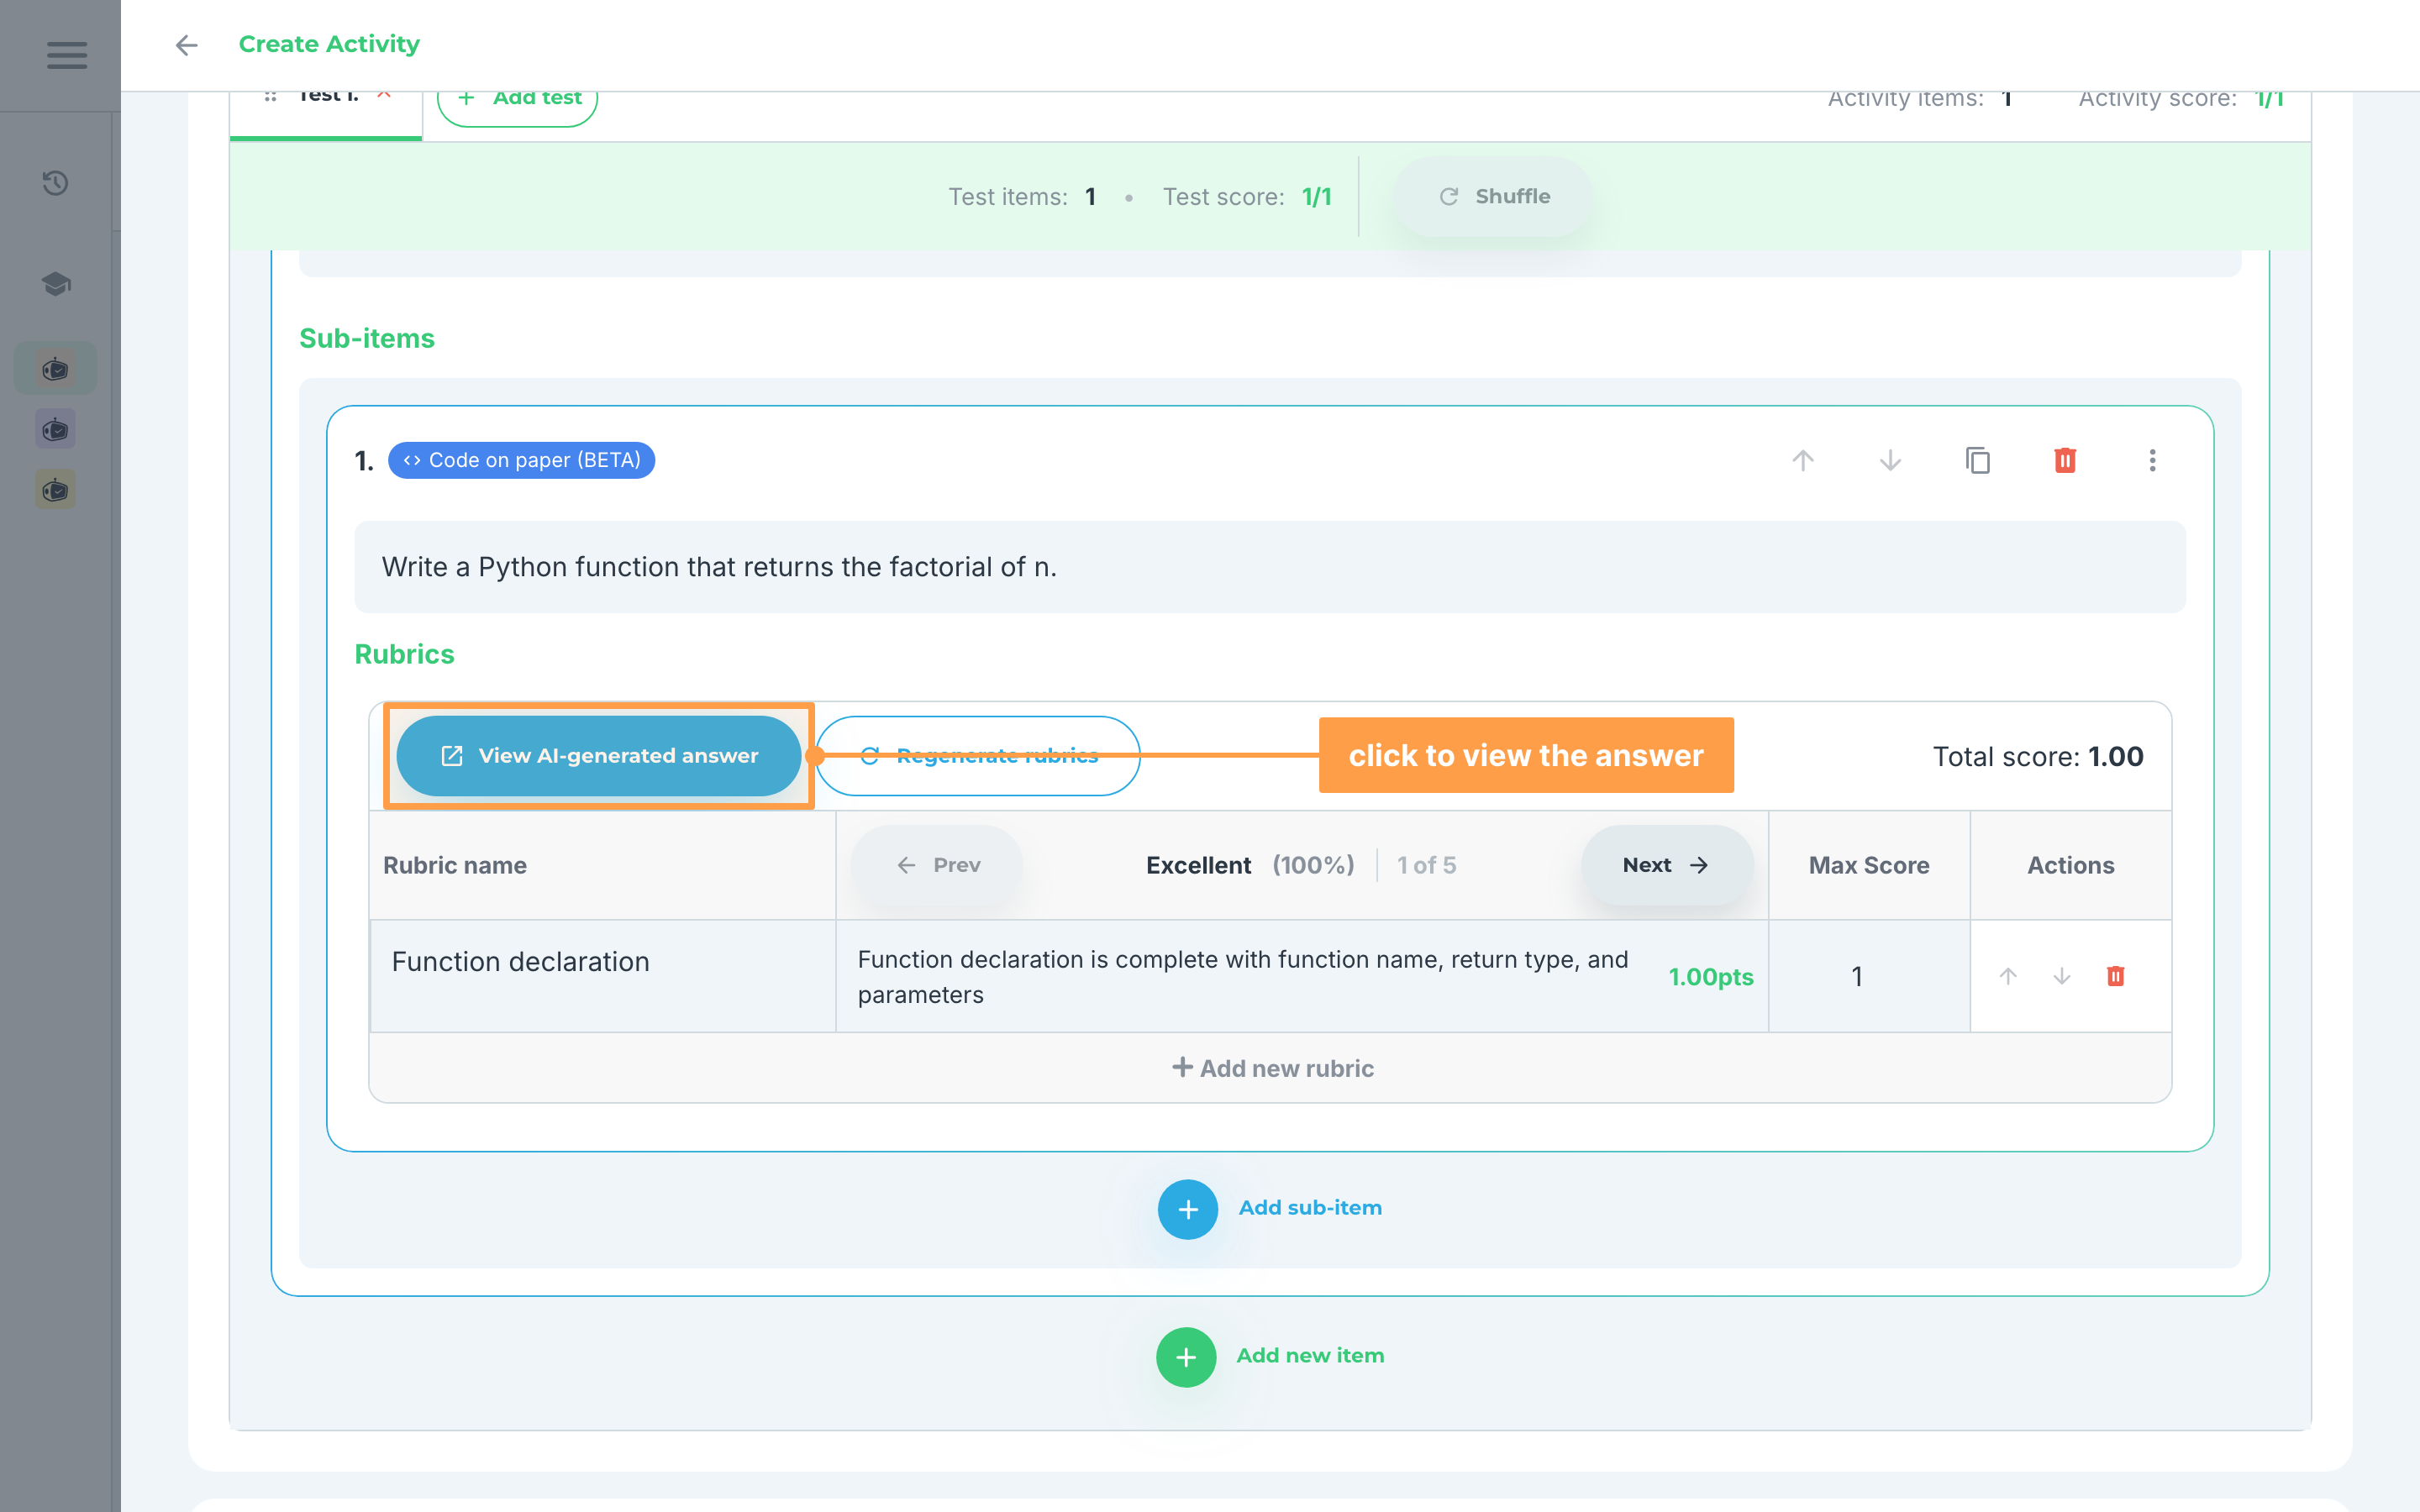
- Click on the View AI-generated answer button at the top of the Rubrics box to view the answer your rubrics were based upon.
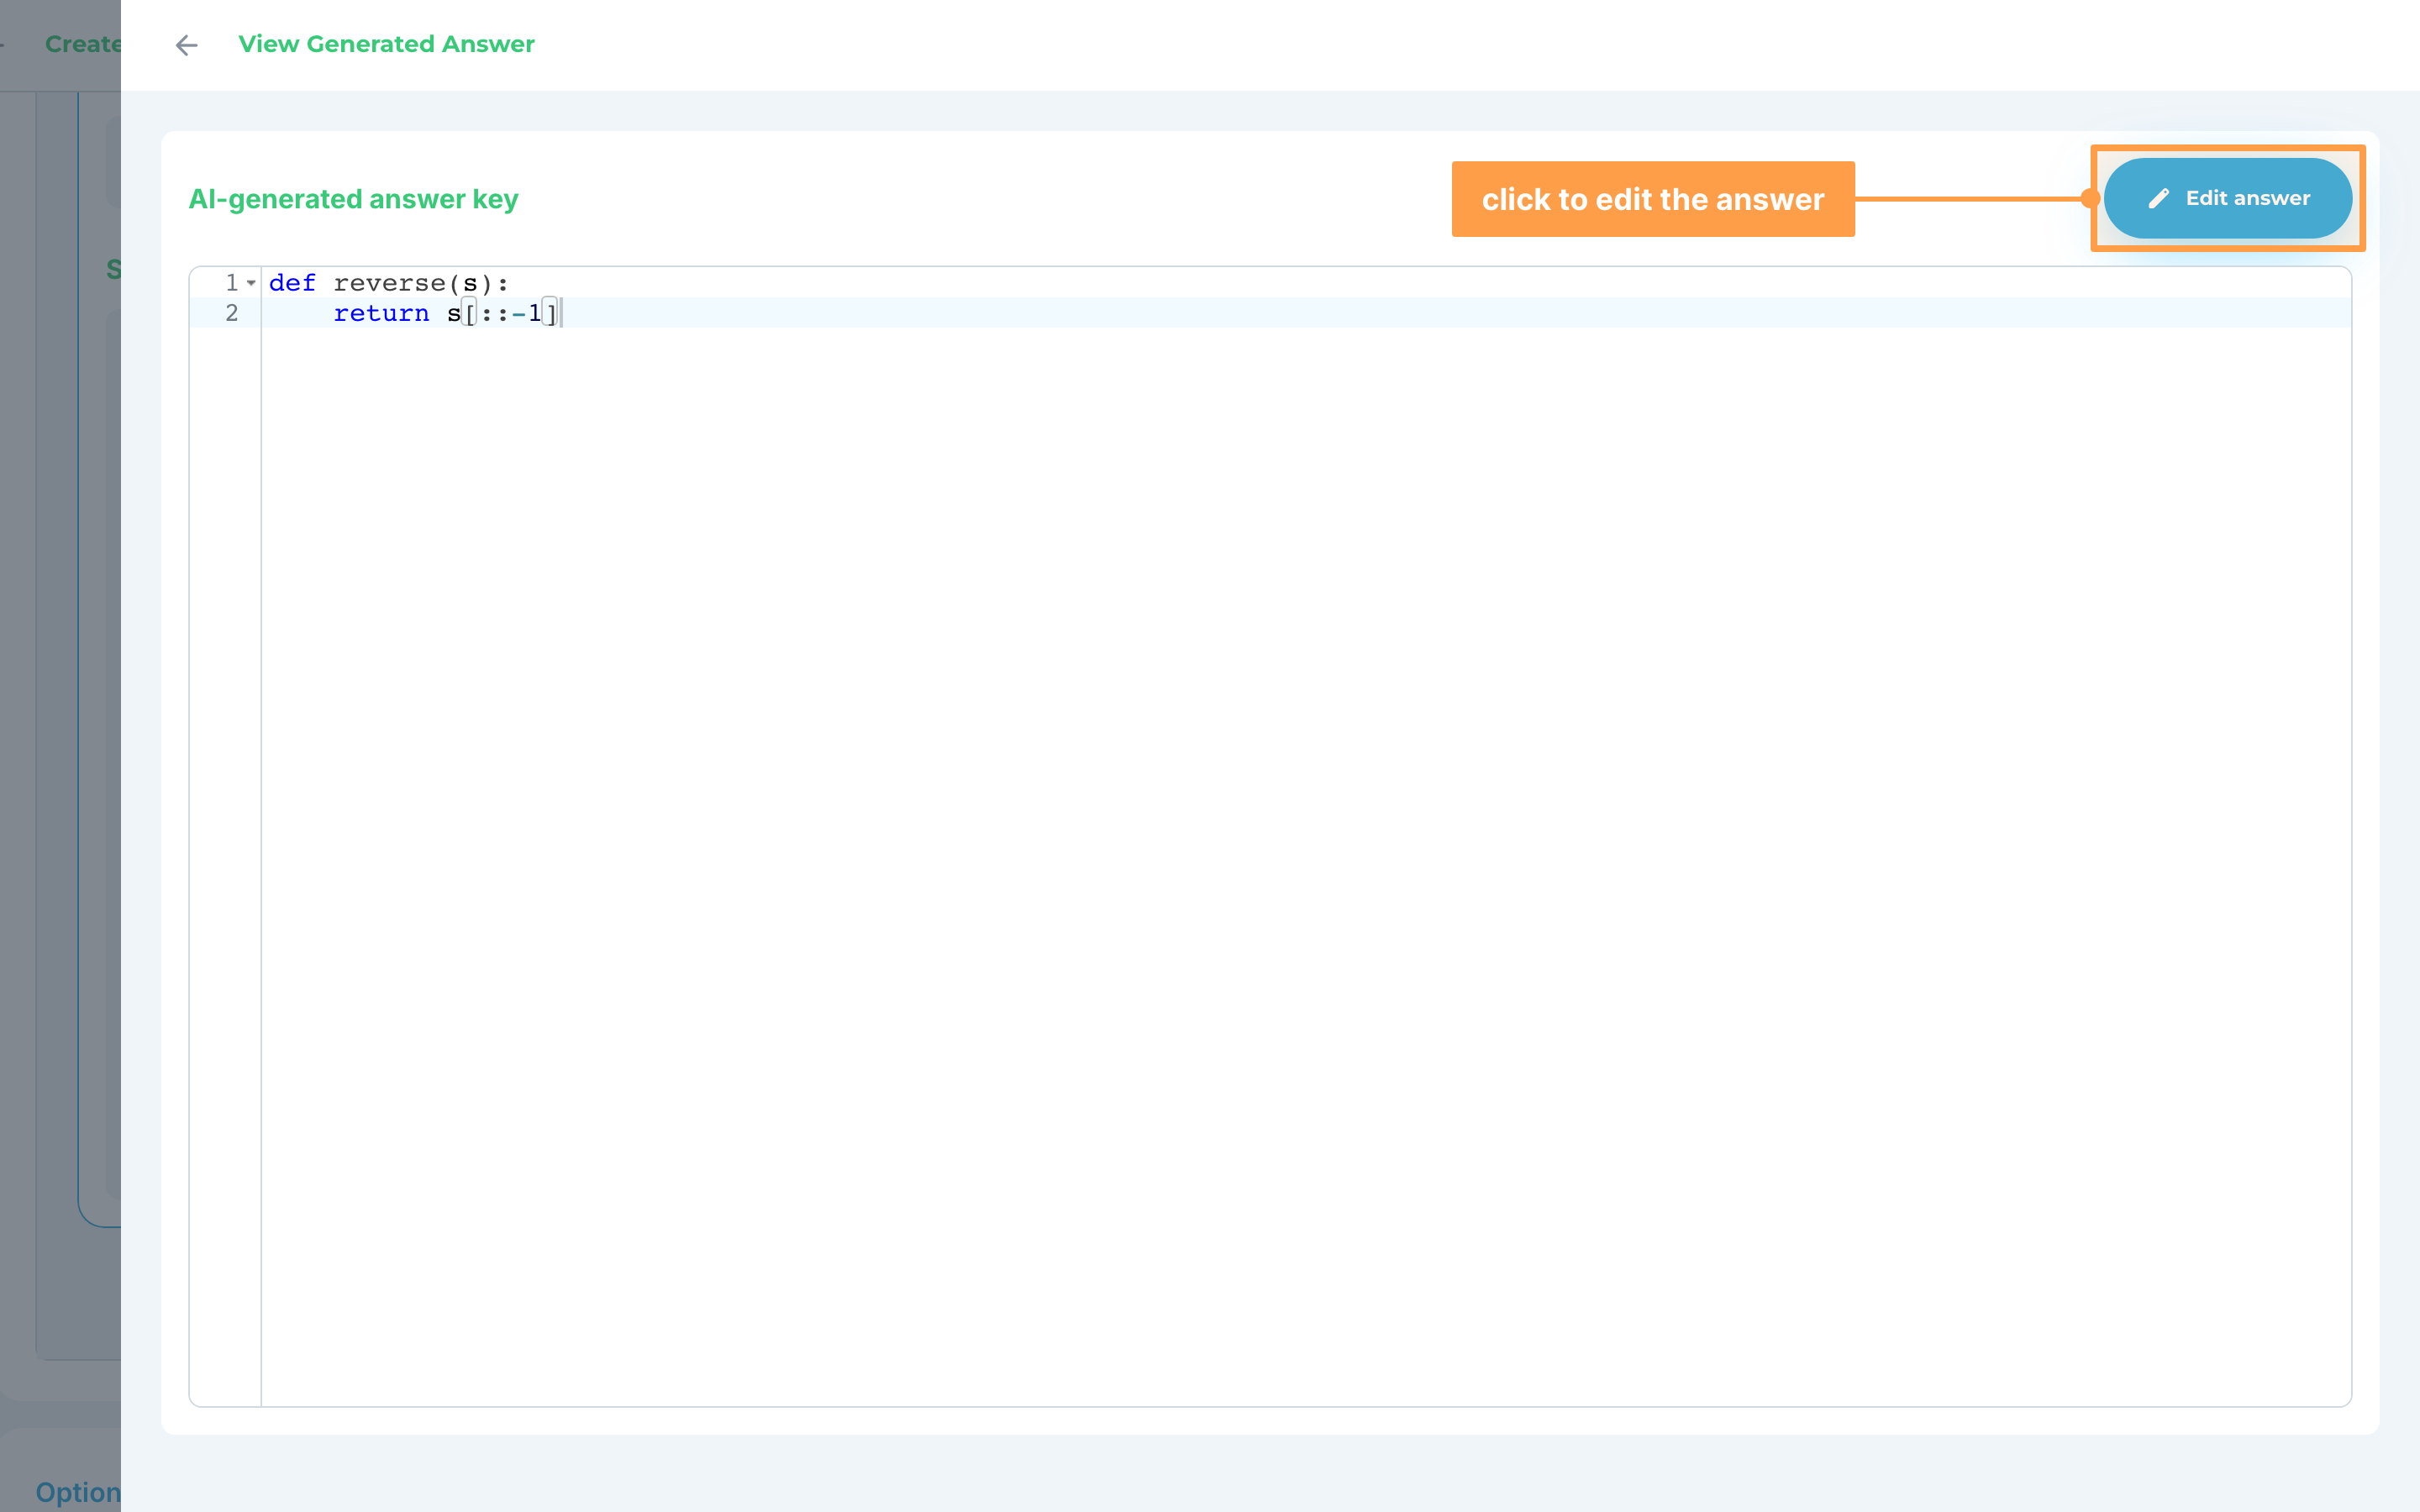
- You may also edit the answer if you wish by clicking Edit answer. When you save it GradeChum asks Generate again? and warns that you will lose your current rubrics and generate a new set based on your new answer.
- The Grading level you chose in step 2 is what decides how many scoring guides each rubric carries. To change it once the rubrics exist, click Regenerate rubrics above the table, pick a different level and generate again.
g. Visuals
For items with Visuals as the item type (currently in beta, and available for handwritten activities only):
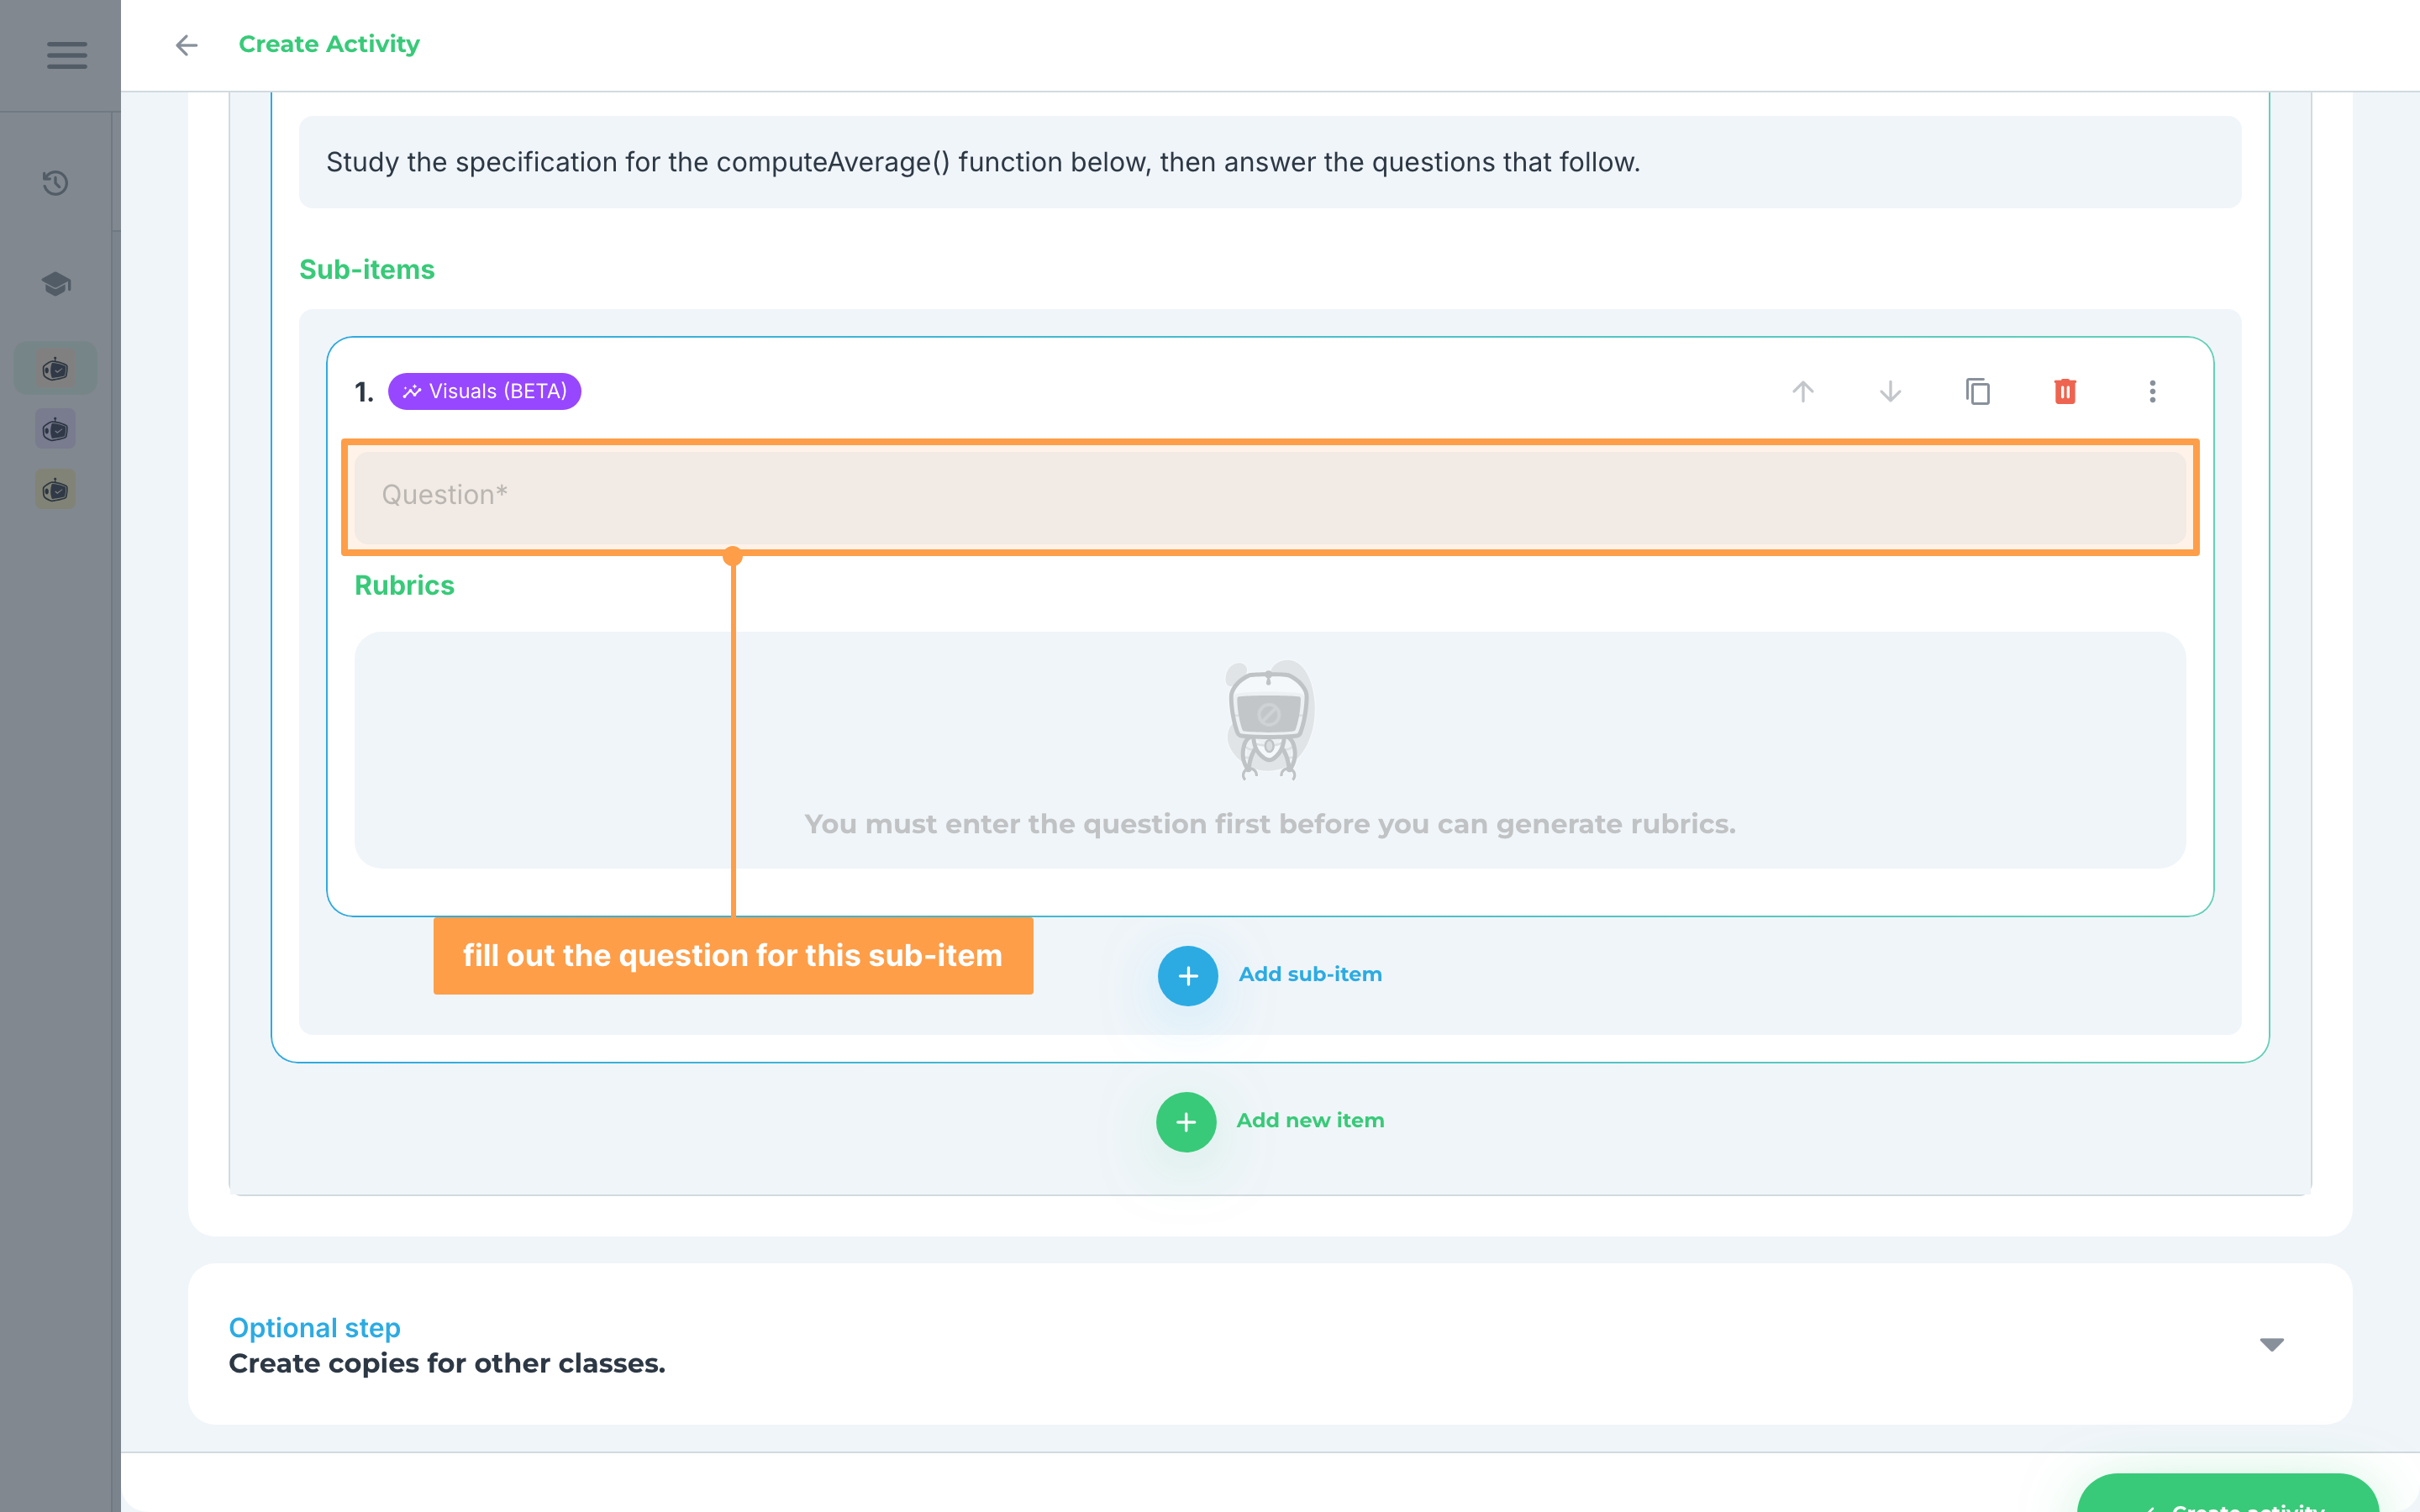
- Fill out the question for this sub-item.
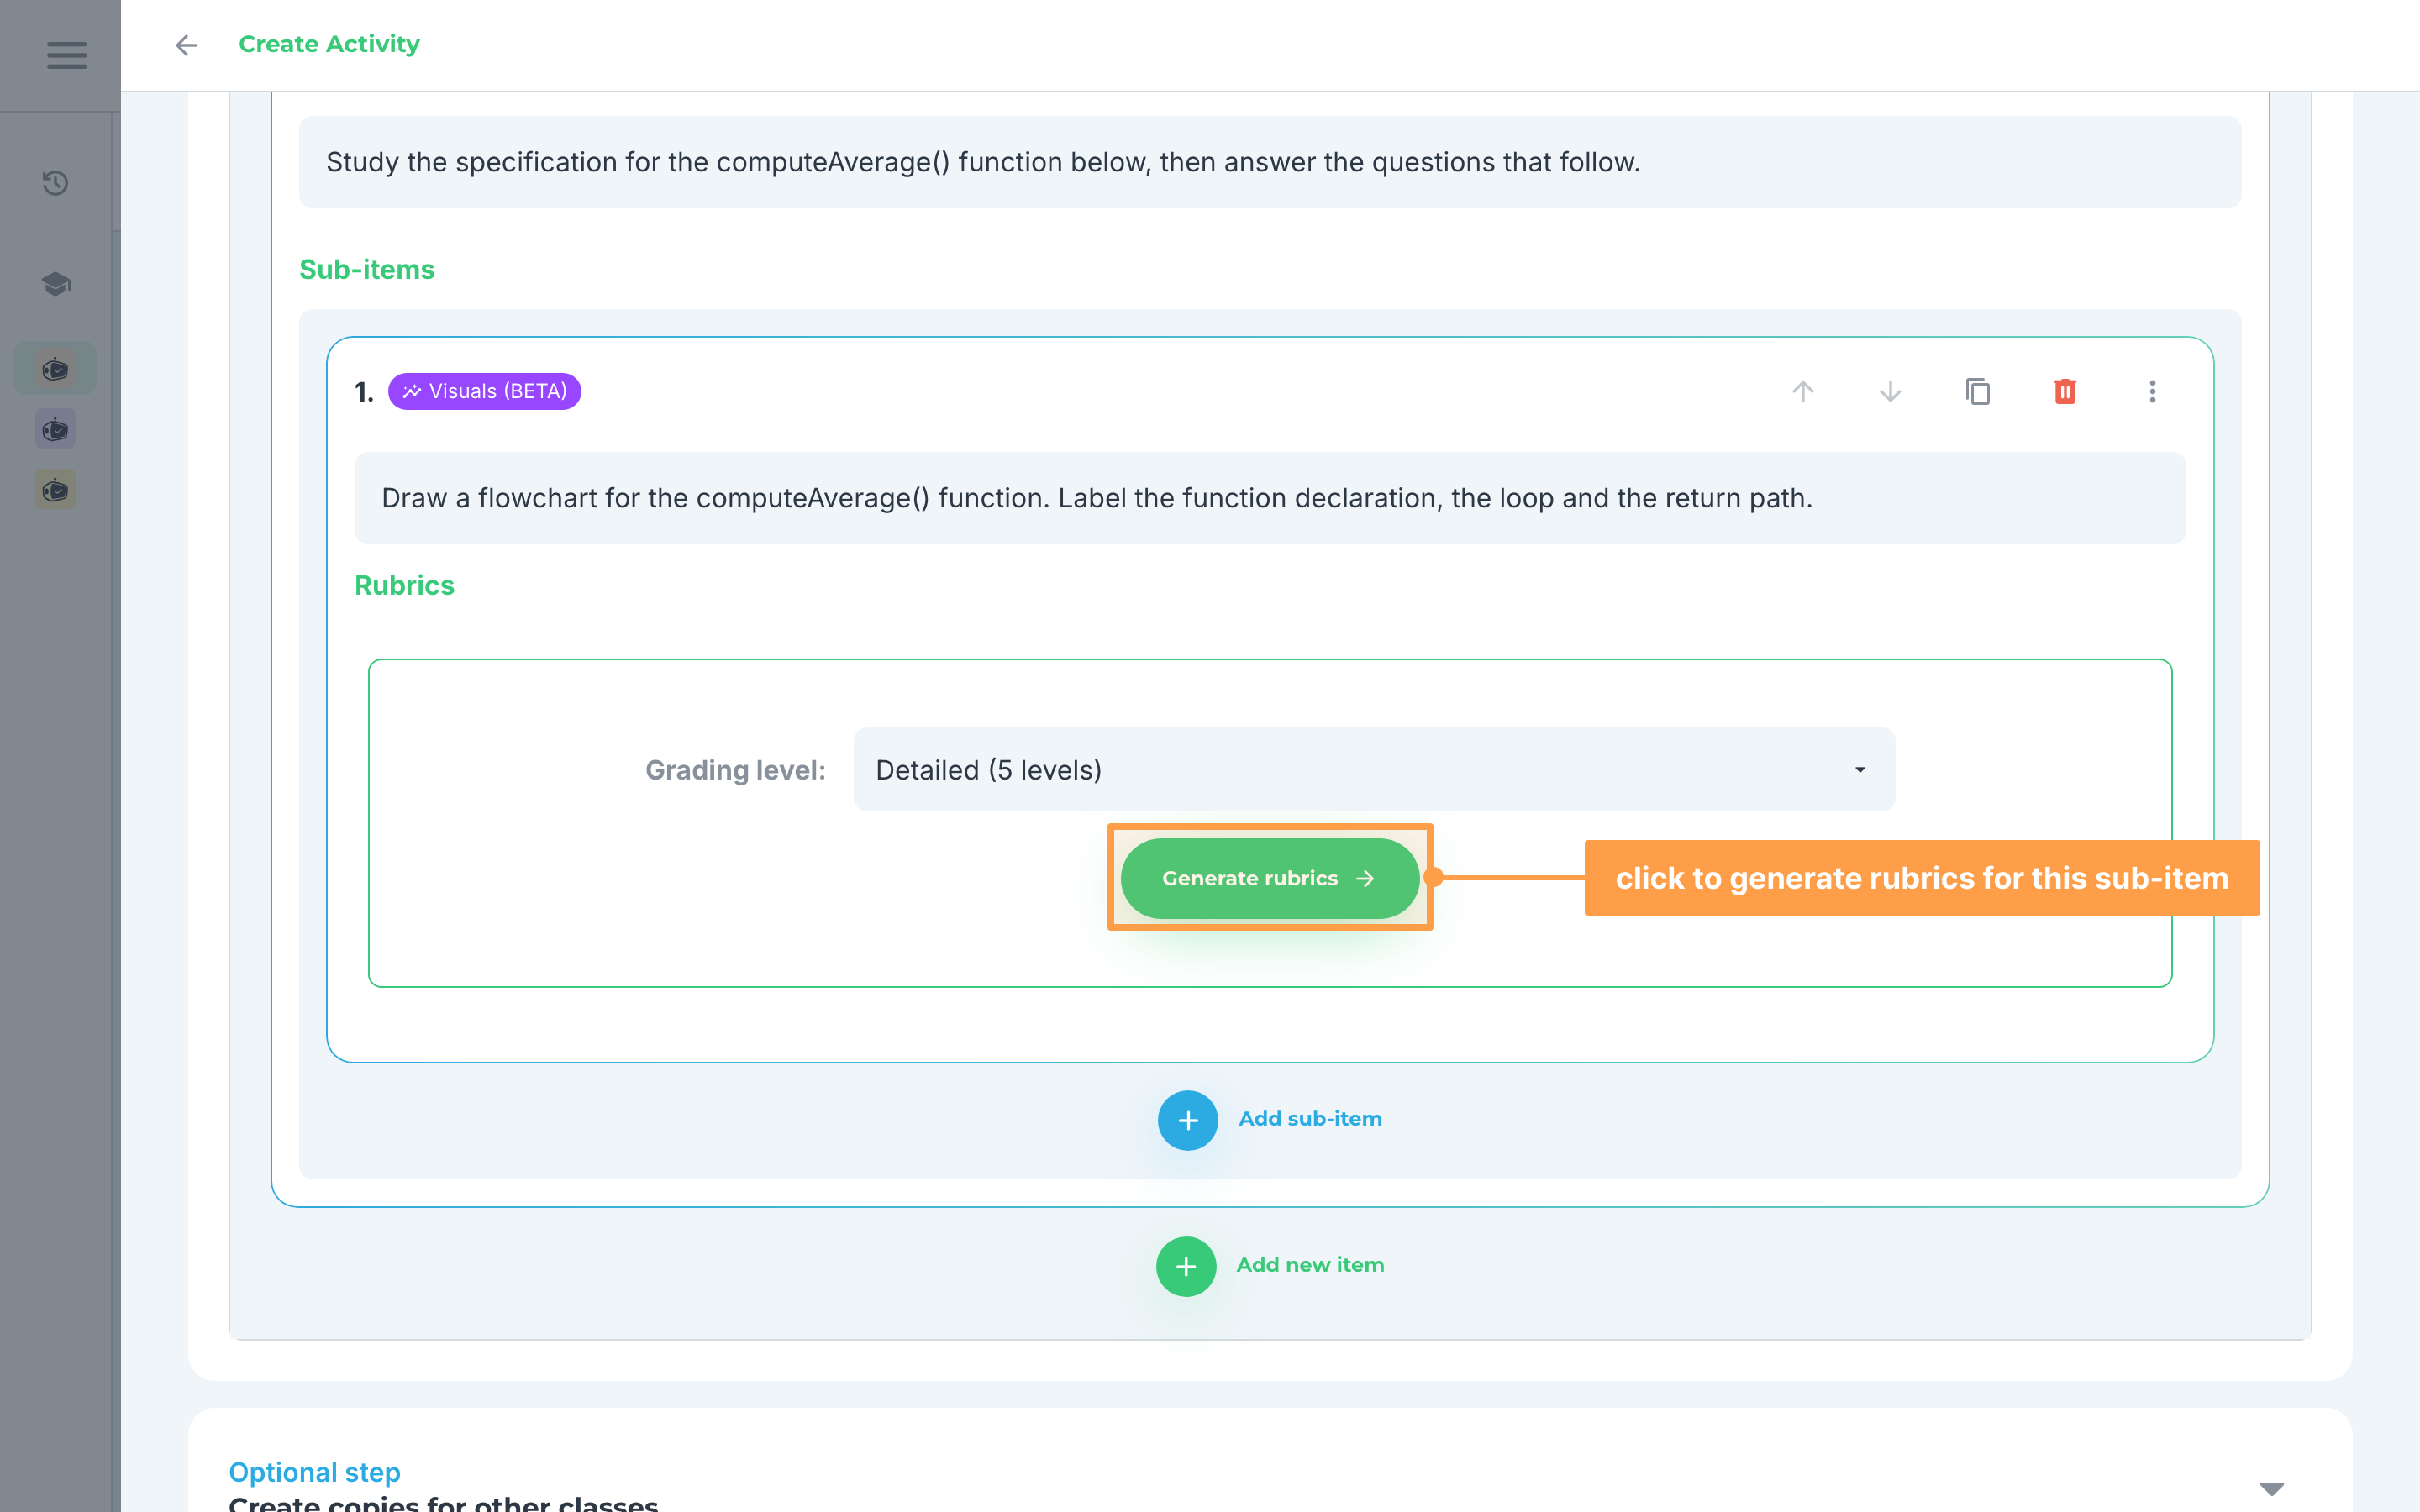
- Pick a Grading level for this sub-item (this decides how many performance levels your rubrics are written against) then click Generate rubrics and wait for our system to finish creating your rubrics.
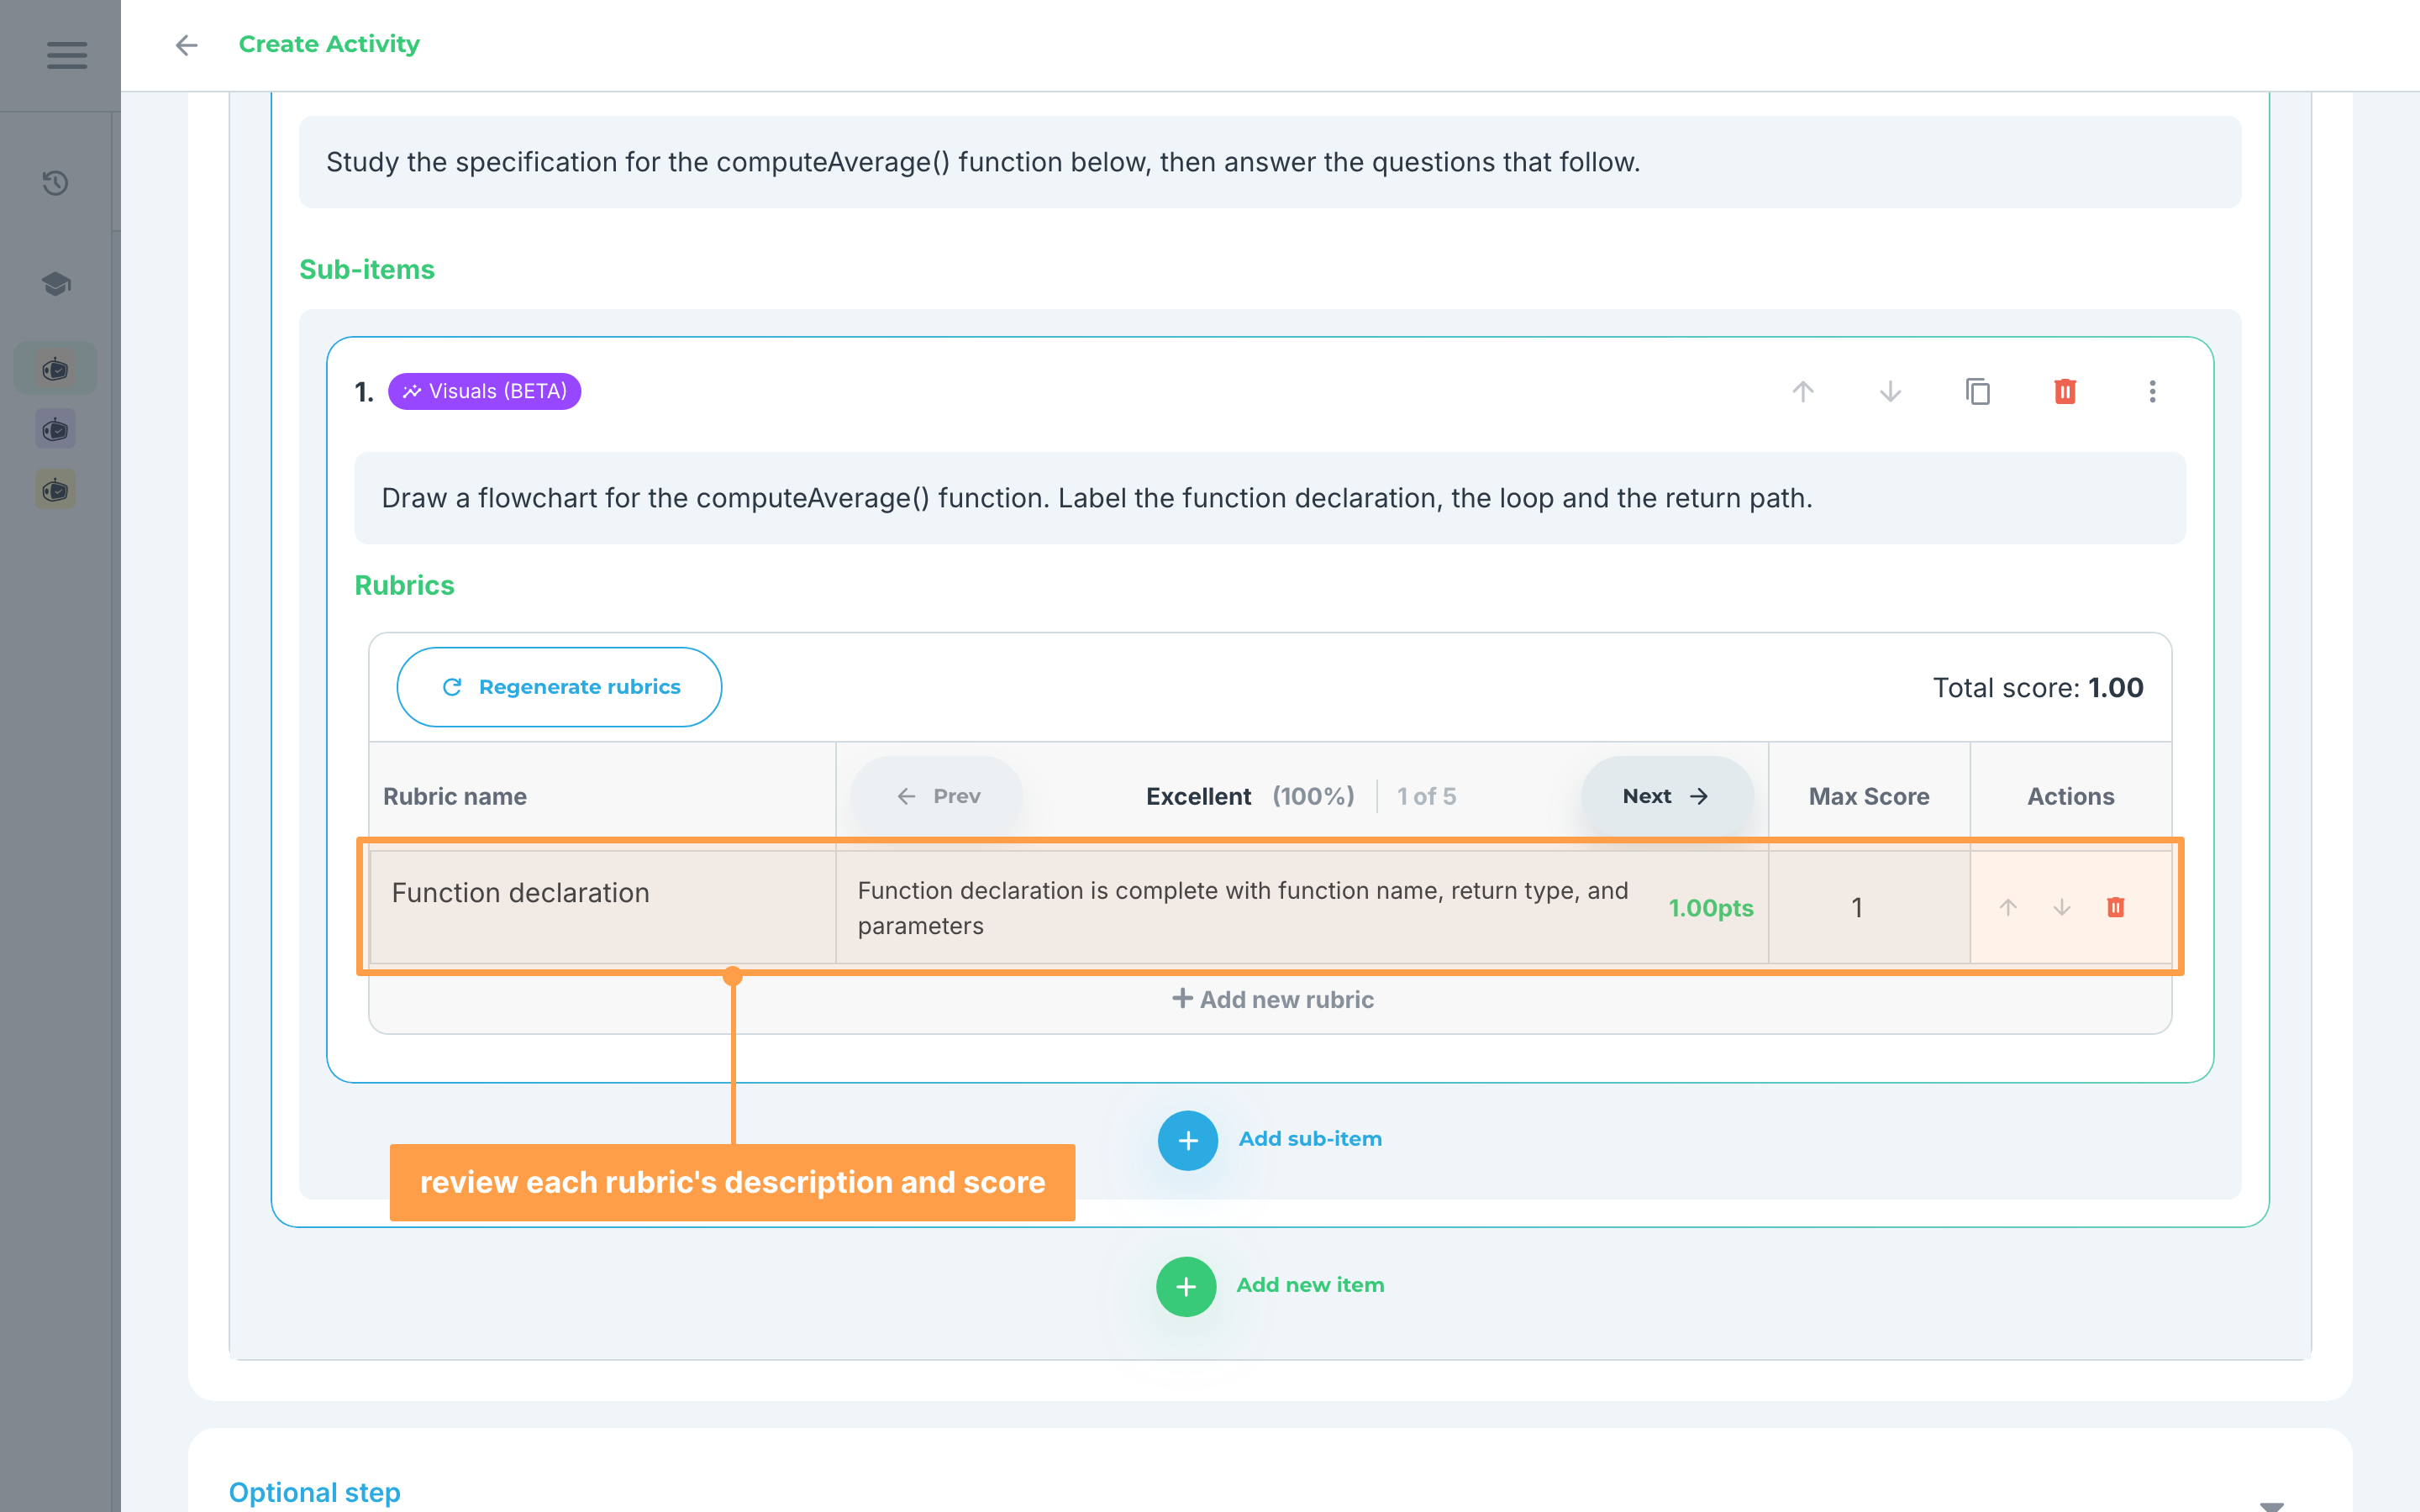
- Review the rubrics to see if they are to your liking. Each rubric has one description per performance level (use Prev and Next in the table header to page through them) plus a Max Score. The running Total score for the sub-item is shown above the table, next to Regenerate rubrics.
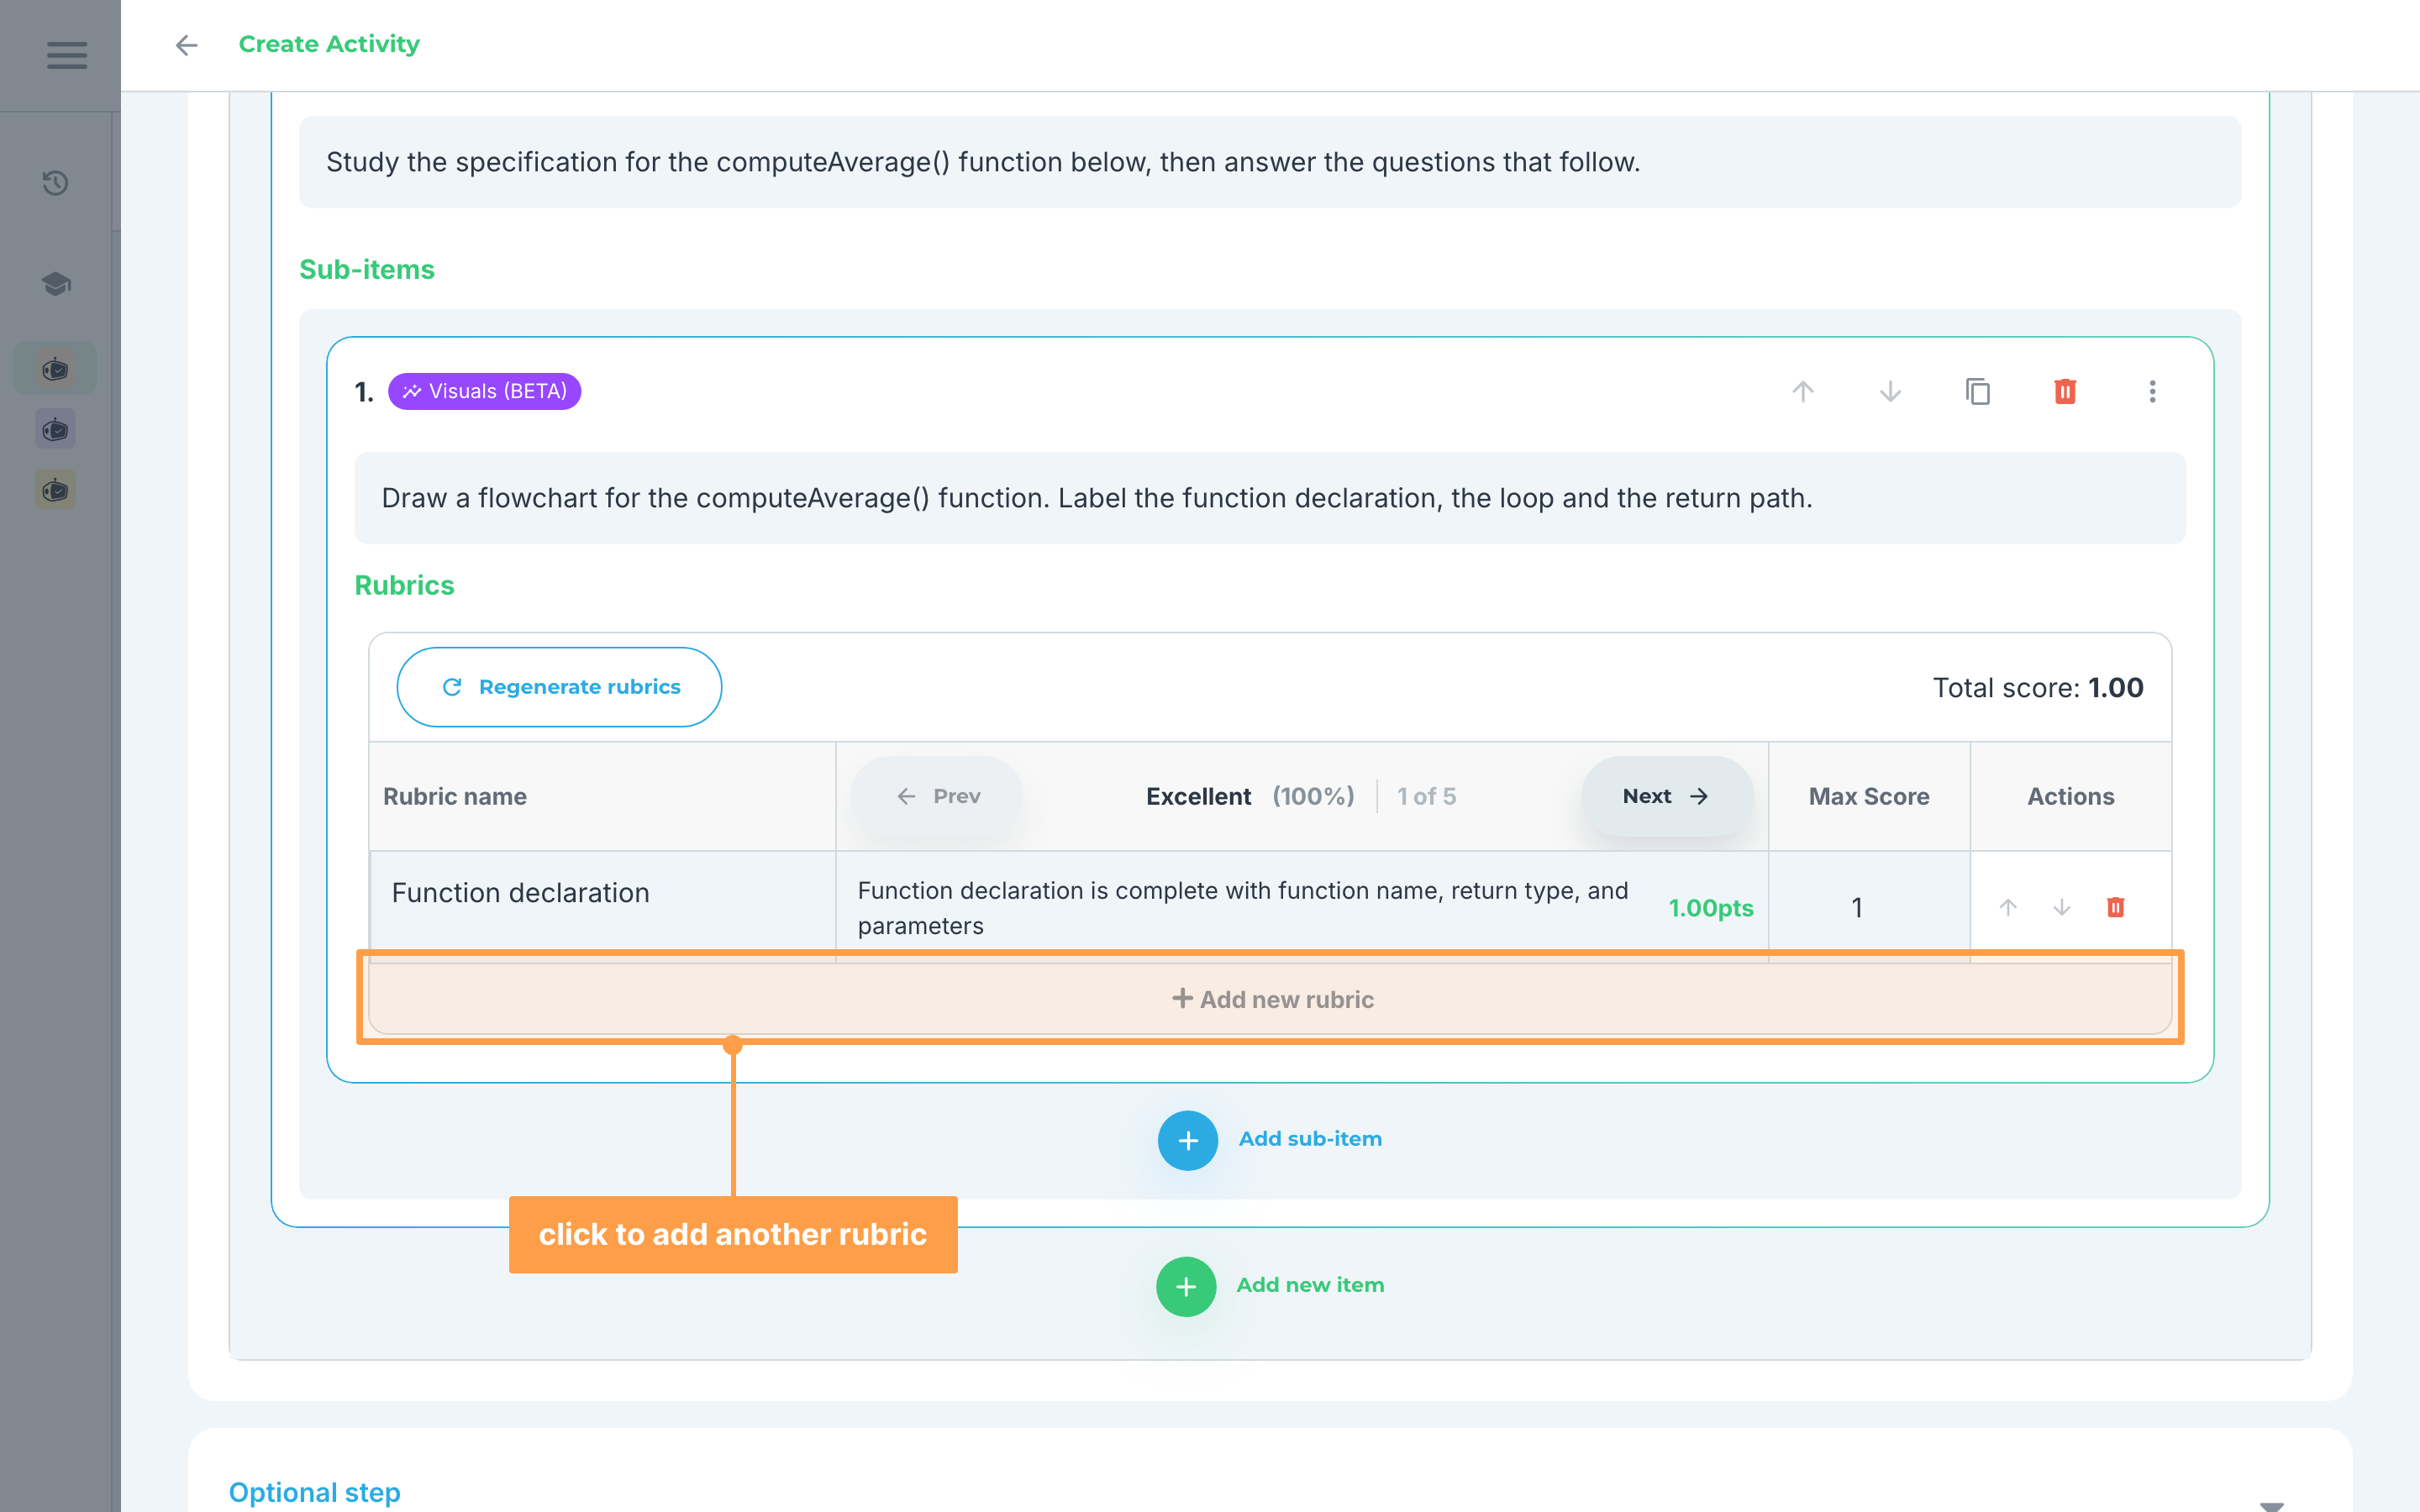
- If you wish to edit any detail to the rubrics, you can make your changes in the table by clicking the boxes and adding your modification. Remember to page through every performance level with Prev and Next: you are only editing the one on screen. Each row's Actions column lets you move a rubric up or down or delete it, and you can add another rubric by clicking + Add new rubric after the last one.
- Provide a rubric name then you can opt to Autogenerate with AI or Create my own the description of the rubric then set the score.
(delete this step and its figure; the grading-level choice moves into step 2 above, and the remaining steps renumber 1-5)
- Add as many sub-items as you need by clicking the + Add new sub-item button.
- To add another Item Group, repeat steps 4-7.
- Once done, review the activity you created. Then, click the "Create Activity" button. You will be shown an overlay that asks you to create sets for this activity.
Note: You may also opt to create a copy of your activity to other classes. Keep in mind that what changes you make in one section for a linked activity will be done as well to the activities in other classes.
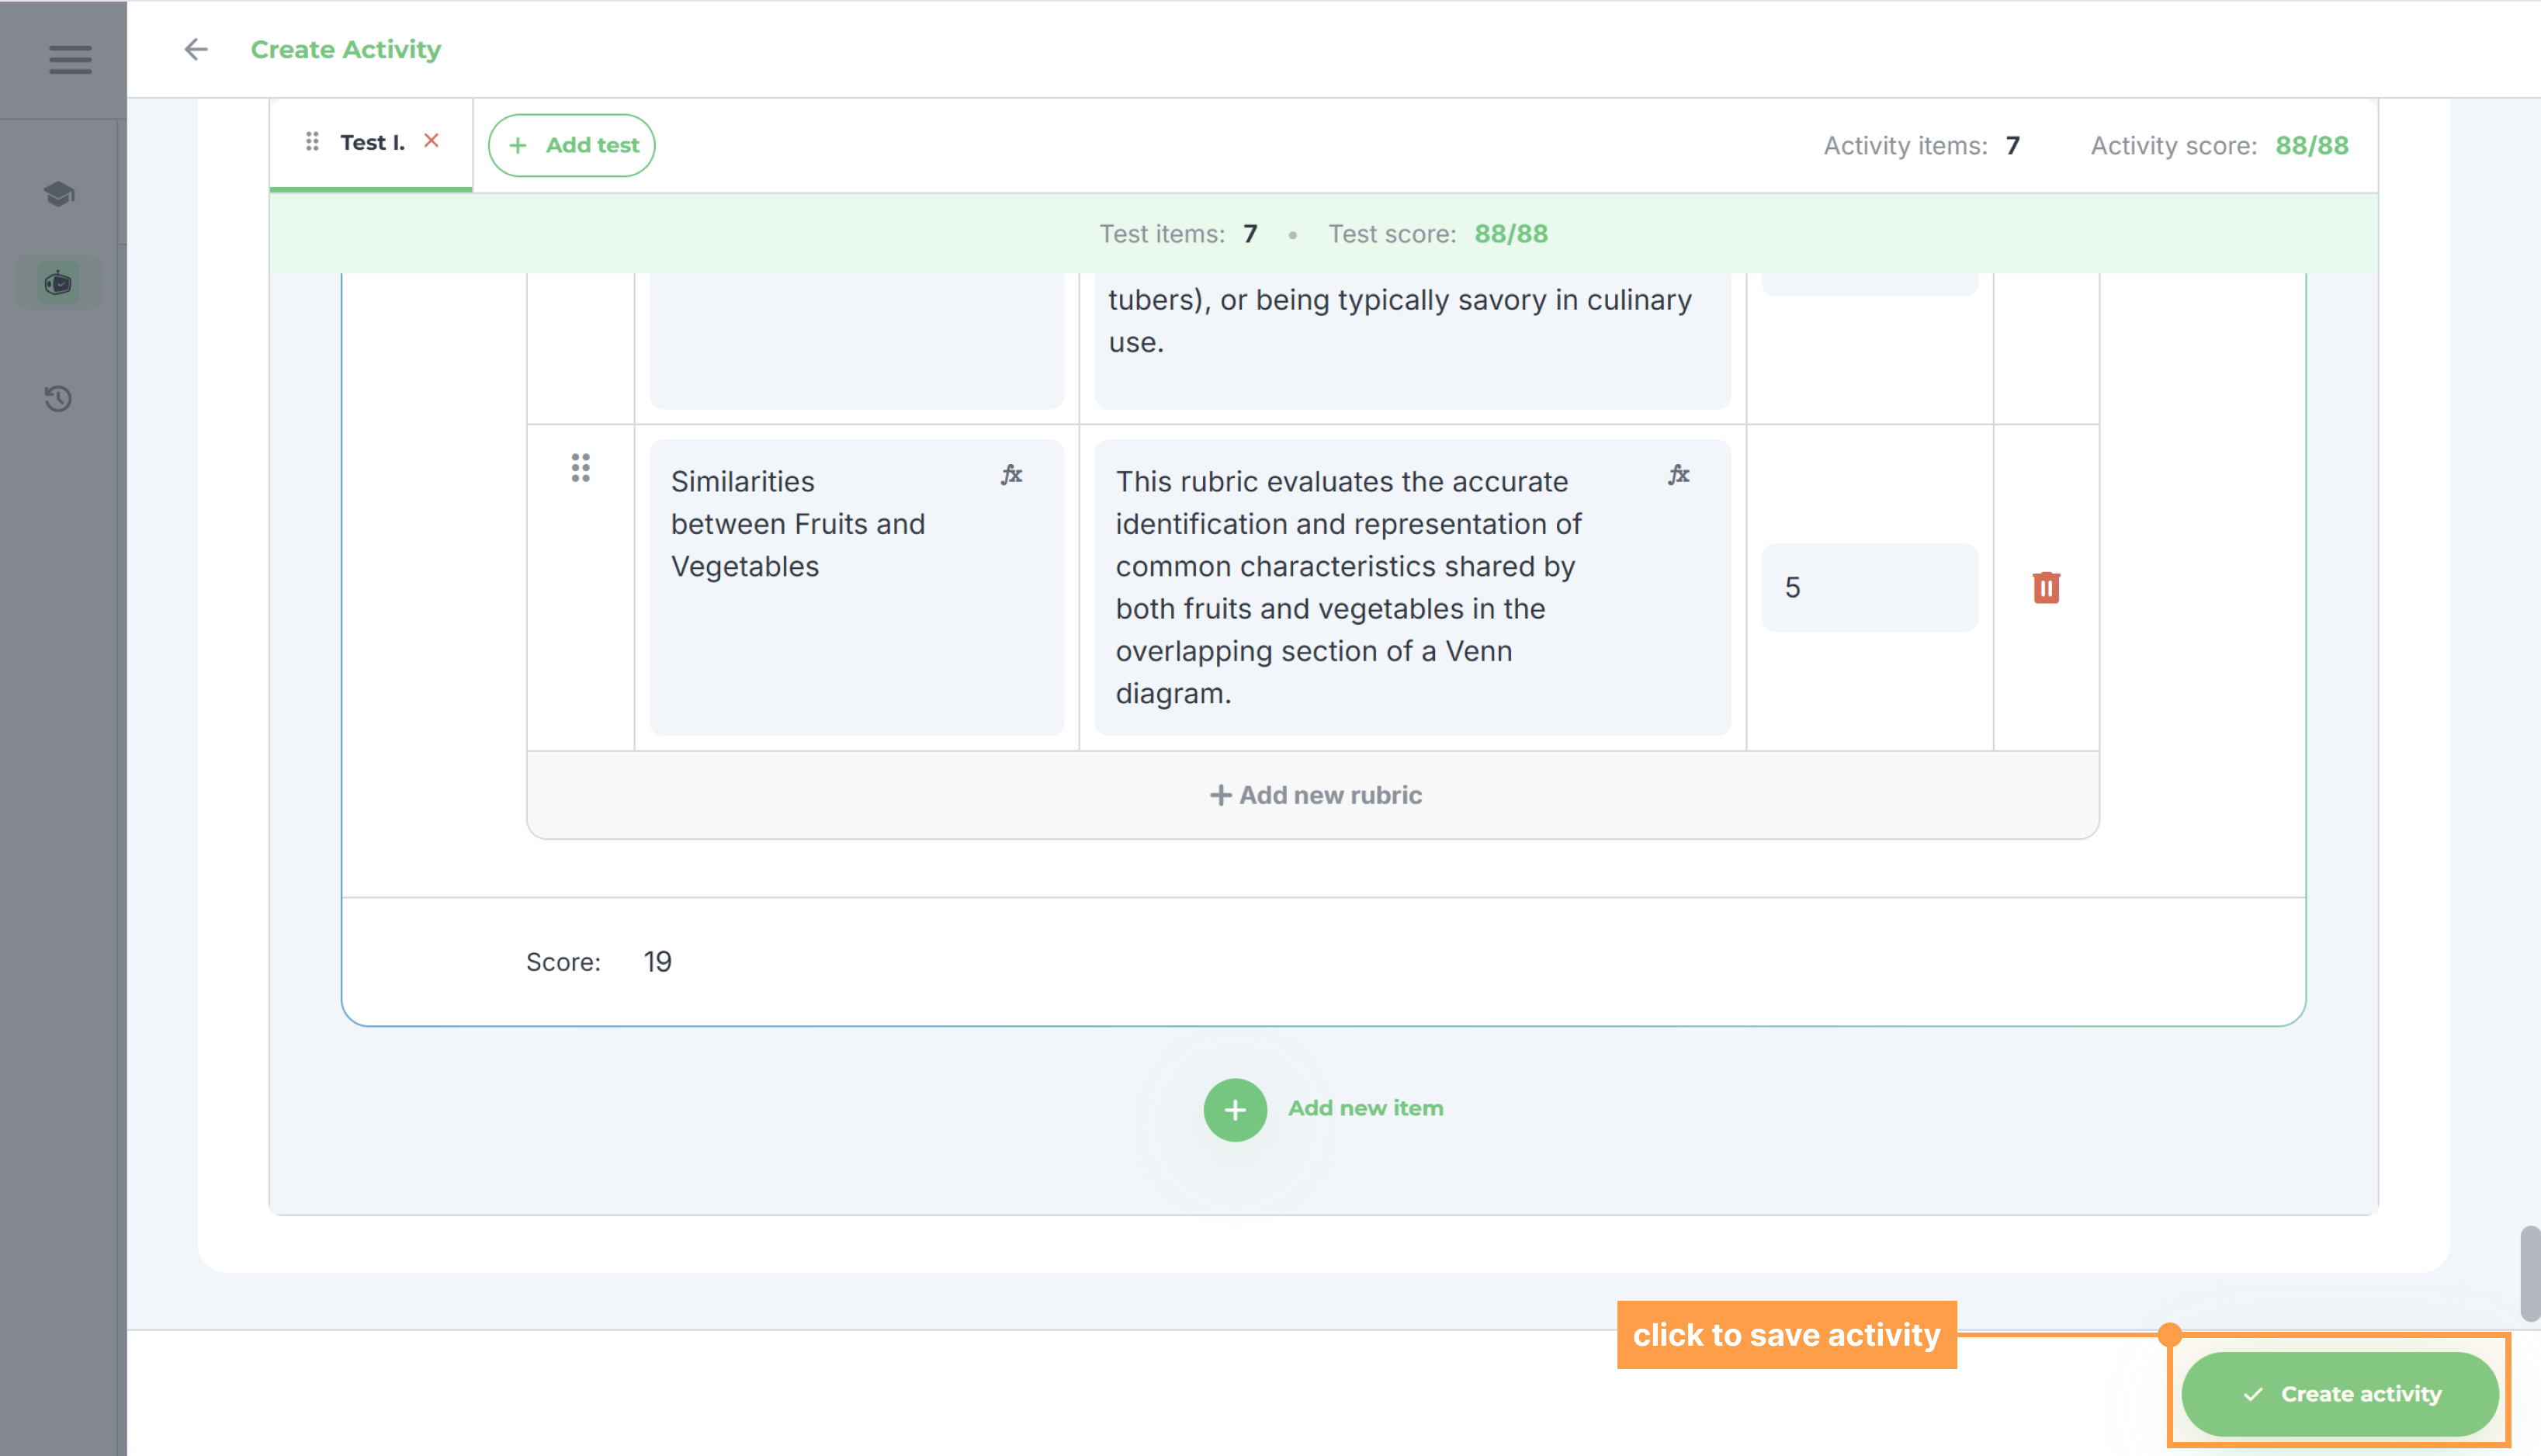
- If you wish to create sets, follow this documentation. Else, click "No thanks".
- Finally, you will be redirected to view the activity you just created.
And that's how you create an activity from scratch! Next, let's explore other options to create activities in GradeChum.